【前言】
2016年10月18日VMware官方正式宣佈推出VMware vSphere 6.5.0虛擬化平台產品,
官方網站於2016年11月16日正式開放最新版本VMware vSphere 6.5.0軟體下載。
(1)詳細新版技術資訊請參考VMware vSphere 6.5.0官方文件說明
(2)官方網站產品註冊試用下載連結VMware vSphere 6.5.0 ISO
新版VMware vSphere Hypervisor (ESXi) 6.5 安裝過程跟以往版本並沒有什麼不同,
主要 vSphere 6.5 不再支援下列CPU處理器平台進行升級和安裝:
Intel Xeon 51xx 系列
Intel Xeon 30xx 系列
Intel Core 2 Duo 6xxx 系列
Intel Xeon 32xx 系列
Intel Core 2 Quad 6xxx 系列
Intel Xeon 53xx 系列
Intel Xeon 72xx/73xx 系列
VMware vSphere Hypervisor (ESXi) 6.5 支援的最低硬體安裝規格:
實作 VMware ESXi 6.5.0 Step-By-Step Installation 安裝說明
系統安裝和設定流程說明:
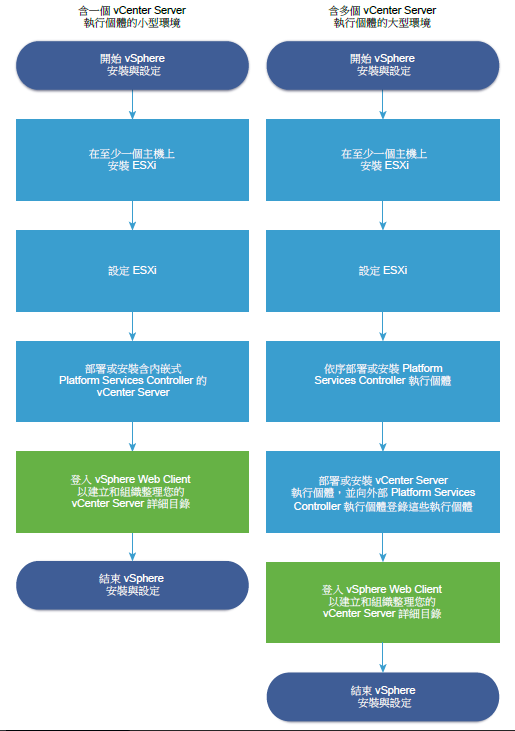
圖片來源VMware:vSphere-ESXi-vCenter-Server-65-Installation-Setup-Guide PDF
請先下載 VMware-VMvisor-Installer-6.5.0-4564106.x86_64.iso 檔案。
開機後請選擇 ESXi-6.5.0-4564106-standard Installer 按下Enter開始正式安裝。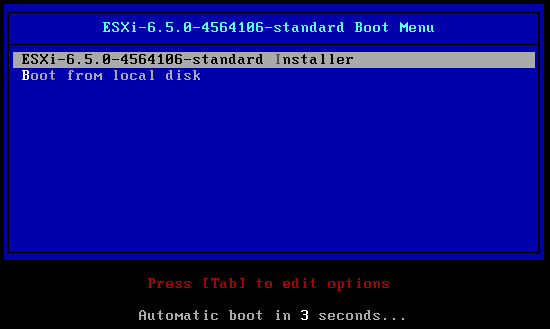
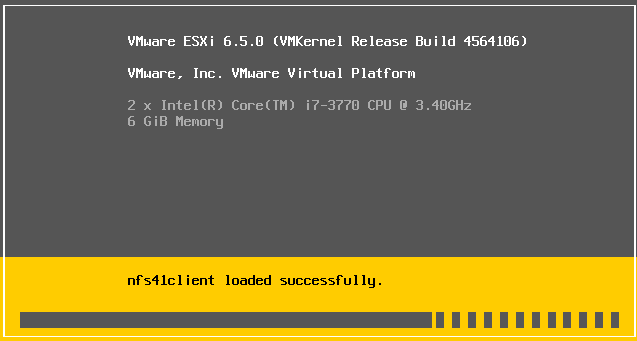
Loading ESXi Installer. 系統載入ESXi 6.5.0安裝程式中,請稍後。
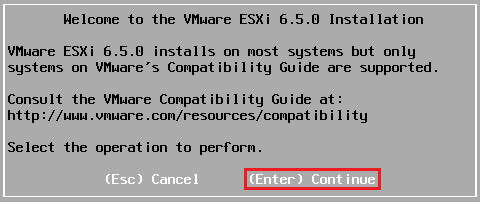
Welcome to the VMware ESXi 6.5.0 Installation
系統安裝歡迎畫面請按下Enter繼續下一步安裝。
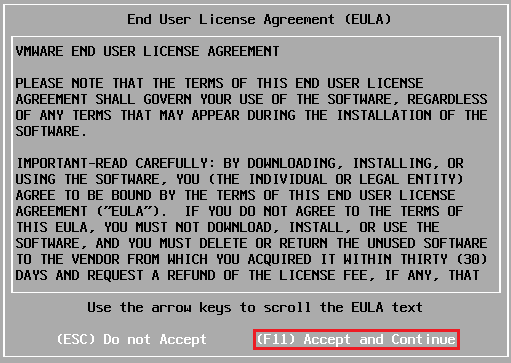
End User License Agreement (EULA)-F11 Accept and Continue.
請按下鍵盤F11按鍵接受使用者授權合約。
Scanning...偵測系統裝置中,請稍後。

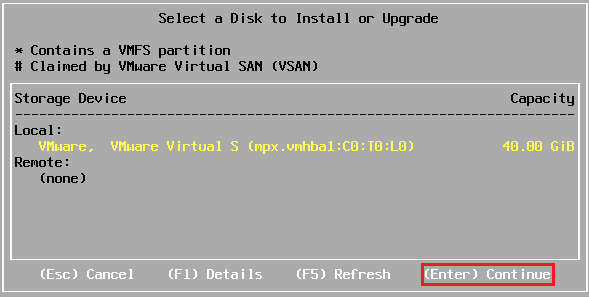
Select a Disk to Install or Upgrade-(Enter) Continue.
請選擇安裝ESXi 6.5.0系統的磁碟機,按下Enter繼續安裝。
Please select a keyboard layout.
選擇鍵盤輸入語言,選擇預設 US Default 按下Enter繼續安裝。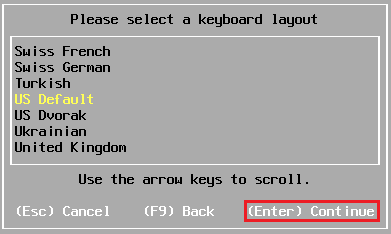
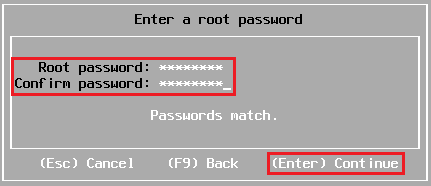
Enter a root password.
請輸入兩次 root 帳號開機登入密碼,輸入確認完成後按下Enter繼續安裝。
Scanning system. 偵測系統相關資訊中,請稍後。

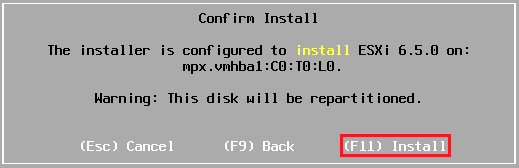
Confirm Install. (F11)Install.
請按下鍵盤F11按鍵,確認開始進行 ESXi 6.5.0的系統安裝。
Installing ESXi 6.5.0 系統正式開始安裝中,請稍後。

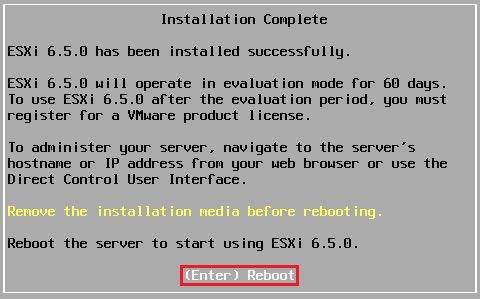
Installation Complete-Enter Reboot
系統安裝完成,請移除ESXi6.5.0安裝光碟或USB媒體裝置,請按下Enter重新開機。
Rebooting Server. 系統重新開機。

VMware ESXi 6.5.0 系統安裝完成登入畫面。
請按 F2 Customize System
開始設定系統IP, Gateway, Subnet and DNS Information.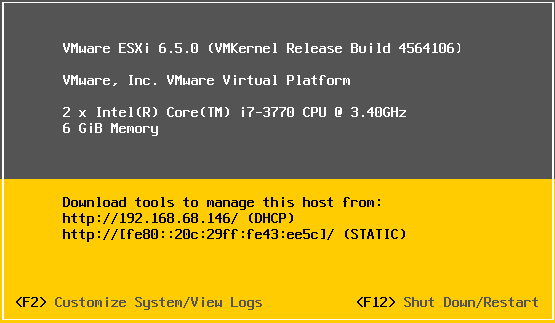
稍後再來介紹基本的系統IP, Gateway, Subnet and DNS設定操作說明。
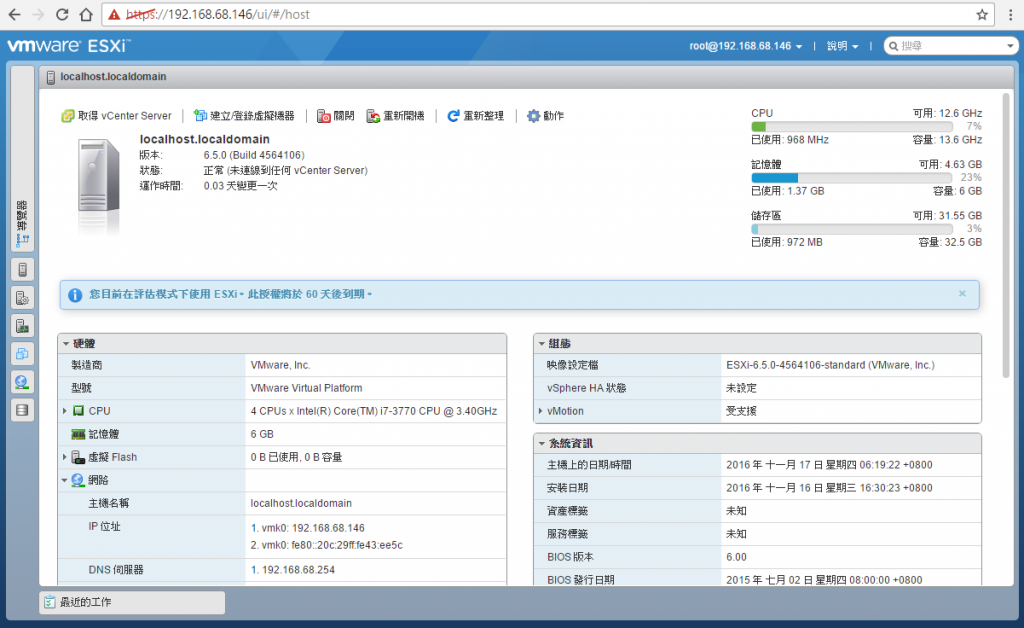
當安裝 ESXi 6.5.0後,可以使用Host Client和vCenter Server來管理主機,
開啟瀏覽器後輸入 http:// ESXi Server IP or FQDN /ui 如下圖所示:
例如:http:// 192.168.1.1/ui
登入帳號:root
登入密碼:系統安裝時,所設定輸入密碼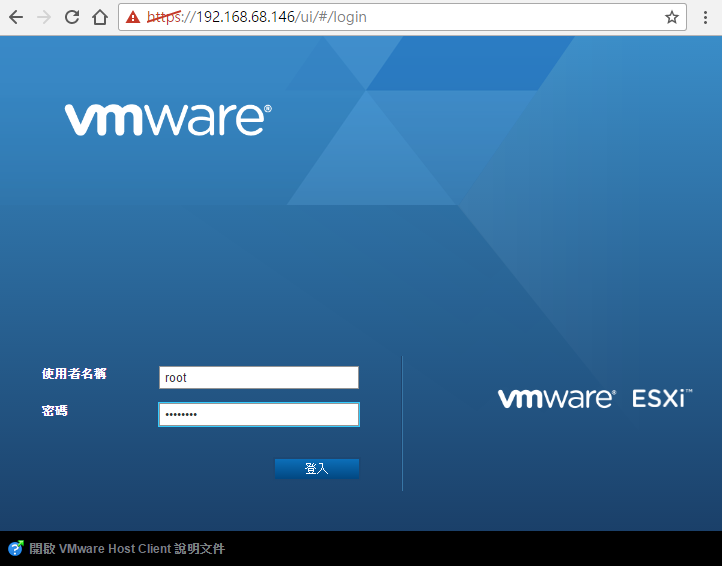
單機ESXi 6.5.0 Host Client 登入操作畫面。
第二章連結:VMware ESXi 6.5.0 安裝說明(二)-F2 Customize System
本文完整章節發布於:Lab-VM Testing Blog
[esxi 6.5] 安裝問題
請問一下,我在安裝esxi 6.5的時候,
執行到某個步驟時會跑出這個畫面,
不曉得要怎麼解決 ="=,
謝謝~
[主機板型號]
GA-AX370-GamingK7
[CPU型號]
AMD R7 1700
[問題畫面]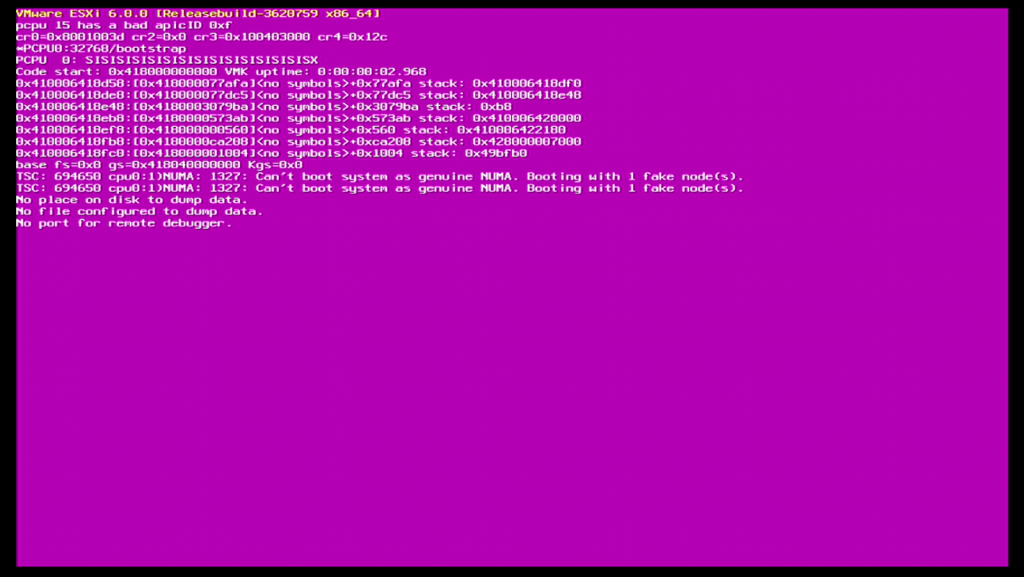
[實作畫面]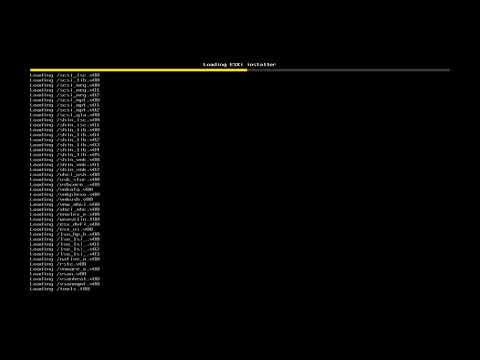
如果是個人測試研究虛擬化技術產品,在有限預算下,建議CPU與主機板不要採用最太過新產品,會有硬體相容性問題,此問題主要原因為安裝ESXi 6.5版本較舊,尚未支援AMD新產品架構,建議試試看:
1.安裝版本請使用最新 ESXi 6.5 Update 1
2.檢查BIOS→Chipset→IOMMU→Enable 是否有開啟
AMD虛擬化的IO記憶體管理單元:IOMMU,AMD input/output memory management unit.
※如果是伺服器硬體建議先檢查VMware產品相容性清單:https://www.vmware.com/resources/compatibility/search.php
恩恩,
經實驗過後,打開bios的IOMMU選項為Enabled後,就可以正常安裝了,
謝謝~

[bios IOMMU設定畫面]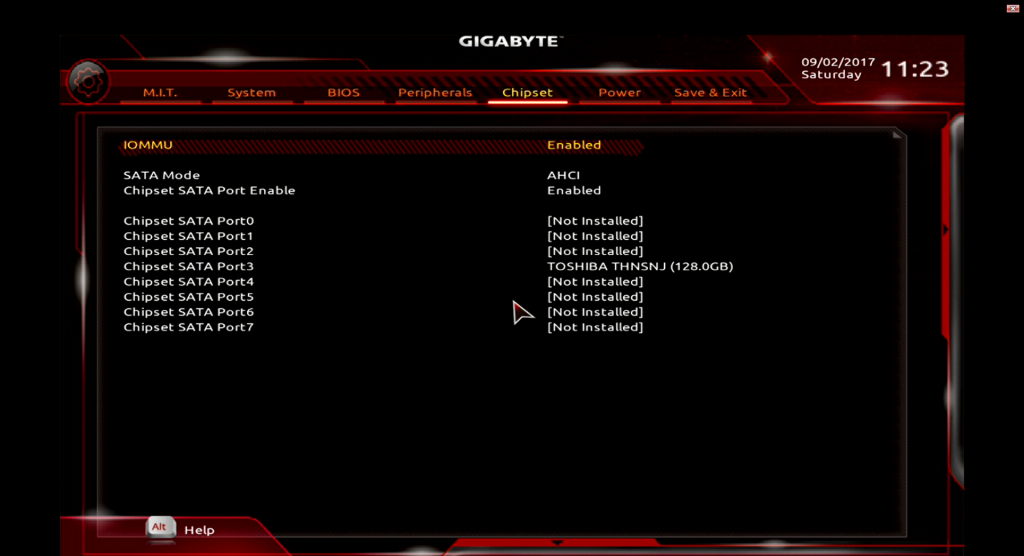
[實作畫面]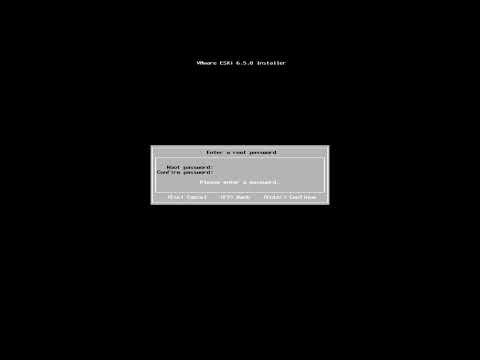
非常好的開始,看到AMD Ryzen 7 1700 3GHz L3 Cache:16MB 具備8個處理器核心、16個執行緒,以及令人驚豔的65W TDP;可以正式安裝完成VMware ESXi 6.5 U1,真的非常棒。
 max6886
