【前言】
當安裝完成 VMware ESXi 6.5.0 並啟動系統後,首先會看到如下圖ESXi6.5.0登入畫面。
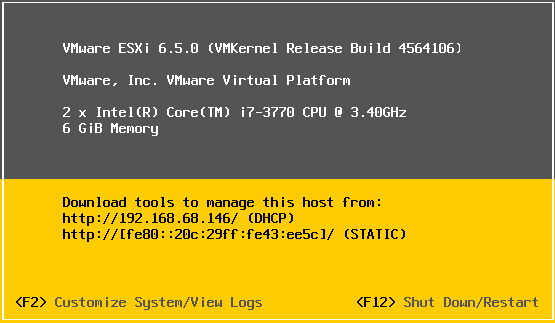
系統登入操作顯示畫面,當中會包含伺服器的基本軟硬體規格資訊:
【學習主題】
正式運作VMware ESXi 6.5.0系統環境之前,為了往後更便利管理維護系統,
建議先設定好管理系統基本參數:
【實作說明】
以下直接來介紹系統參數設定步驟:
VMware ESXi 6.5.0-F2 Customize / View Logs
請於ESXi 6.5.0 登入畫面按下鍵盤 F2按鍵,進入系統設定。
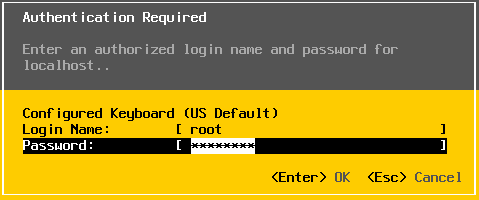
Authentication Reqired-Login Name and Password
請輸入系統預設登入驗證帳號:root 與安裝時設定的登入密碼
輸入完成後按下Enter
System Customization-Configure Password
顯示畫面為ESXi 6.5.0設定操作畫面,第一個選項是變更系統帳號登入密碼
請按下Enter。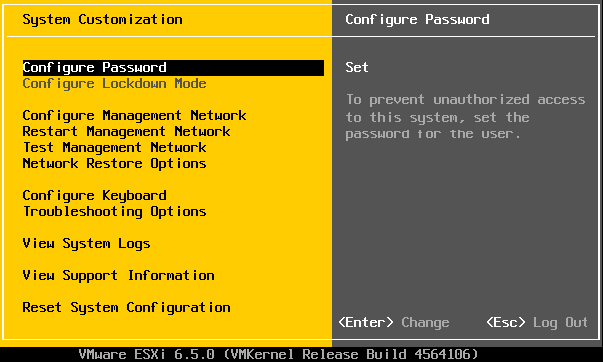
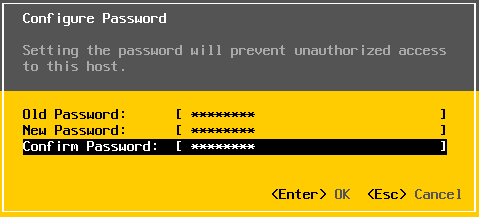
Confirm Password
Setting the password will prevent unauthorized access to this host
如需變更密碼,請先輸入原先舊密碼,在輸入兩次新密碼後,
按下Enter進行密碼變更。
依預設,ESXi 6.5.0 變更密碼時須包含以下四類字元的組合:
新密碼長度建議是八位數以上,
(1)英文大寫字元 (A 到 Z)
(2)英文小寫字元 (a 到 z)
(3)數字 (0 到 9)
(4)特殊字元 (例如: !、$、#、% 底線或破折號)
注意: 密碼開頭的大寫字元不計入使用的字元類別數。
密碼結尾的數字不計入使用的字元類別數。
依預設,五次密碼嘗試登入失敗後,系統 root帳戶即會自動鎖定無法再登入系統,
Web Client、VMware vSphere Client操作介面會在15分鐘(900秒)後解除鎖定。
詳細請參考原廠手冊說明:ESXi 密碼及帳戶鎖定
Configure Password-Warning
密碼變更確認,請確認是否變更系統登入密碼,
確認請按下Enter 取消變更請按ESC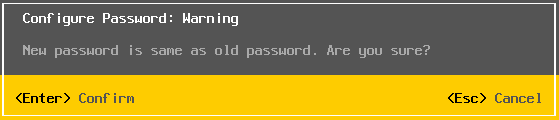
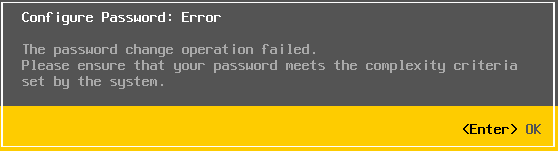
Configure Password-Error
下圖範例:輸入變更的密碼太簡單,不符合上述系統密碼複雜性標準原則。
Configure Management Network
回到系統操作畫面第三個選項,可以修改設定系統IP Addrss,
Subnet(子網路遮罩), Gateway(預設閘道)
確認需要進行變更系統IP位置,請按下Enter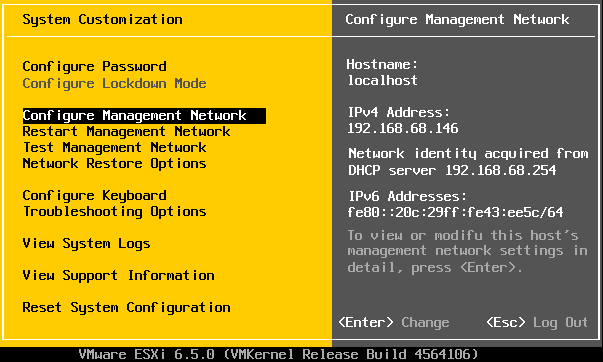
Configure Management Network-IPv4 Configuration
再選擇進入IPv4 Configuration選項,請按下Enter。
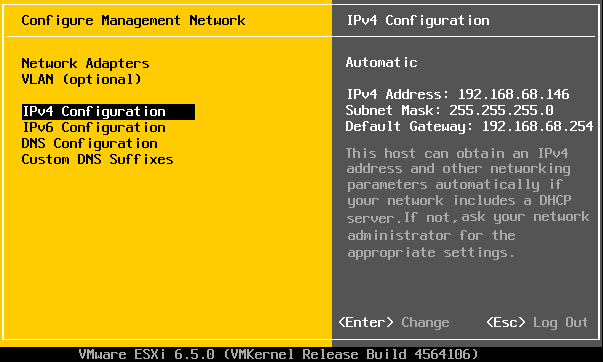
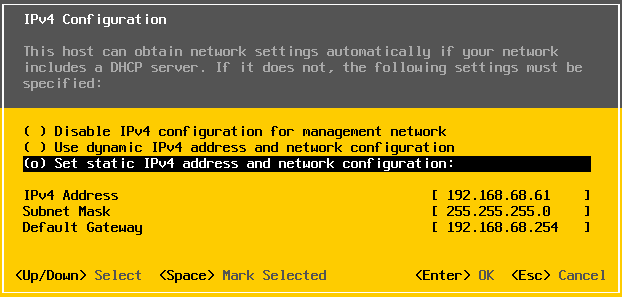
IPv4 Configuration
請按鍵盤向下鍵,空白鍵選擇 Set static IPv4 address and network configuration
設定系統IP Addrss, Subnet(子網路遮罩), Gateway(預設閘道),
建議使用靜態固定IP位置設定,方便日後系統維運管理
輸入完成後,請按下Enter 進行IP變更。
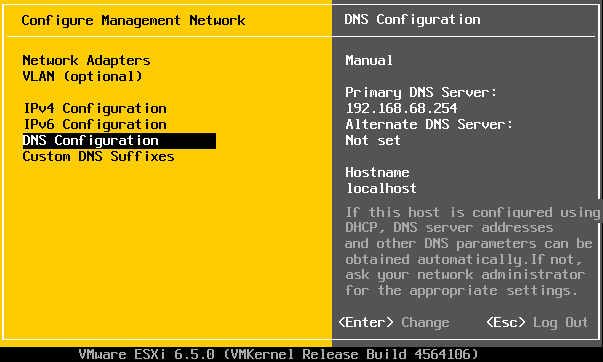
DNS Configuration-Manual Primary DNS Server
回到前一個畫面,再進入 DNS Configuration 選項,請按下Enter。
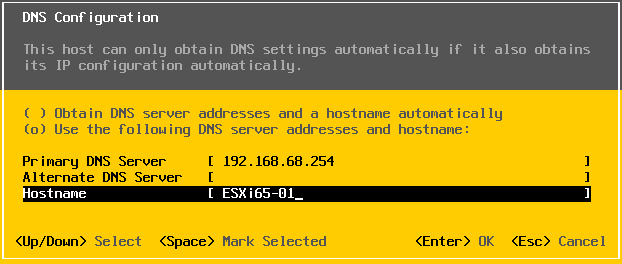
DNS Configuration-Hostname
請按鍵盤向下鍵,
空白鍵選擇 Use the following DNS setrver address and hostname
設定使用DNS伺服器位址和ESXi 6.5.0主機名稱,輸入完成後,
請按下Enter 進行變更。
Configure Management Network-Confirm
請按鍵盤 Y 確認設定完成網路參數變更設定。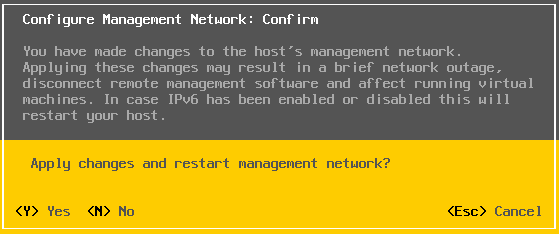
Configure Management Network-IPv6 Configuration
回到前一個畫面,再進入 IPv6 Configuration 選項,請按下Enter。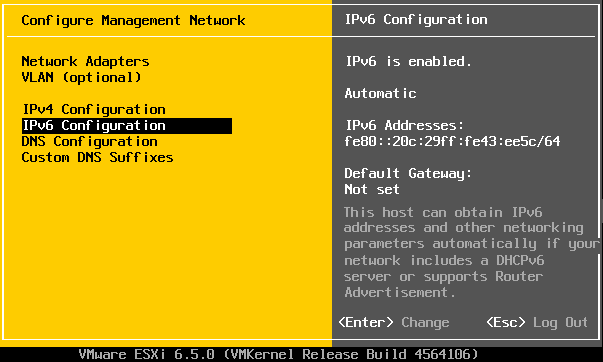
Disable IPv6 restart required-Space Mark Selected
請按鍵盤 空白鍵 選擇 Disable IPv6 (restart required)選項,請按下Enter。
如系統管理尚未使用到 IPv6建議關閉此服務。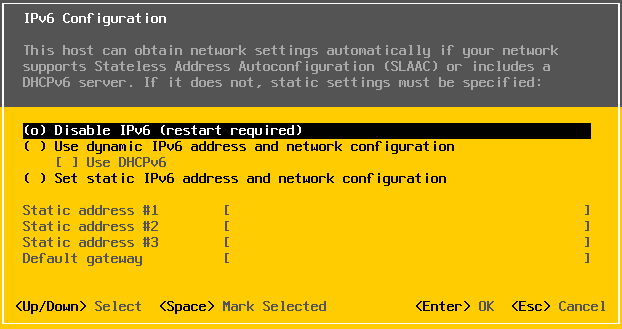
Configure Management Network-IPv6 Confirm
請按鍵盤 Y 確認設定完成關閉IPv6網路服務設定
注意:系統將自動重新開機進行變更。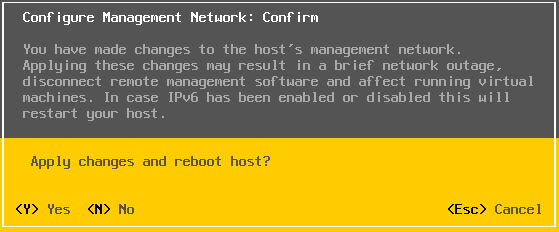
Restart Host-Restart in progress
ESXi 6.5.0 系統正在重新啟動中。

VMware ESXi 6.5.0-Static IP Address
開機之後,基本運作VMware vSphere Hypervisor (ESXi) 6.5系統環境設定完成。

VMware ESXi 6.5.0-https login
下一章節將來介紹新版VMware ESXi 6.5.0 Host Client操作介面。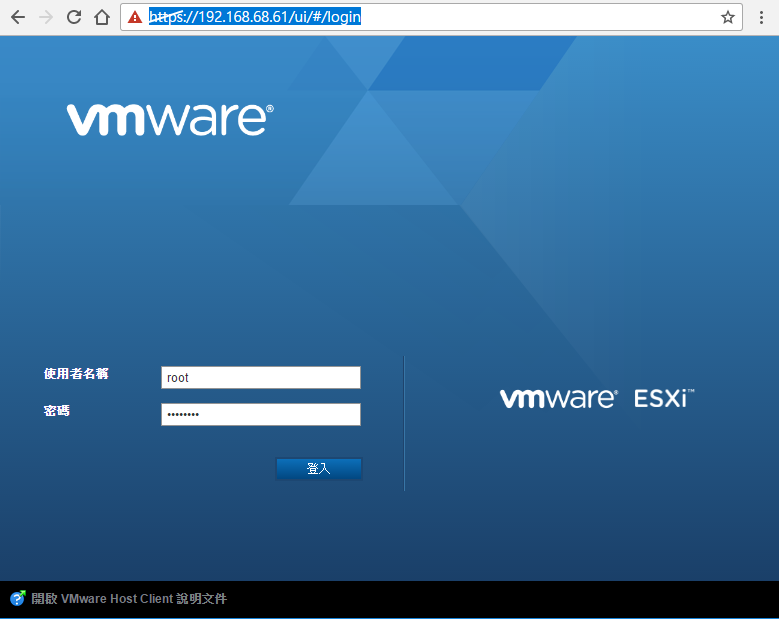
本文完整章節發佈於:Lab-VM Testing Blogger http://maxlabvm.blogspot.tw/
第三章連結:VMware ESXi 6.5.0-Host Client 操作使用說明(一)
 max6886

 iThome鐵人賽