訂閱需求: Azure AD basic 或 Premium 以上
Tenant 帳號需求: Tenant Admin
Windows Server - Application Proxy 安裝需準備 Windows Server 2012 R2 以上版本, 若考慮高可用性, 需安裝兩台以上的 Application Proxy 主機
Windows Server 加入網域需求: 若需啟用 Windows 認證單一簽入(SSO), Application Proxy Server 需要加入網域
AD domain admin 帳號需求: 使用 Windows 整合式驗證方式, 須設定 Kerberos Constrained Delegation (KCD), 需具有 AD 管理權限的帳號
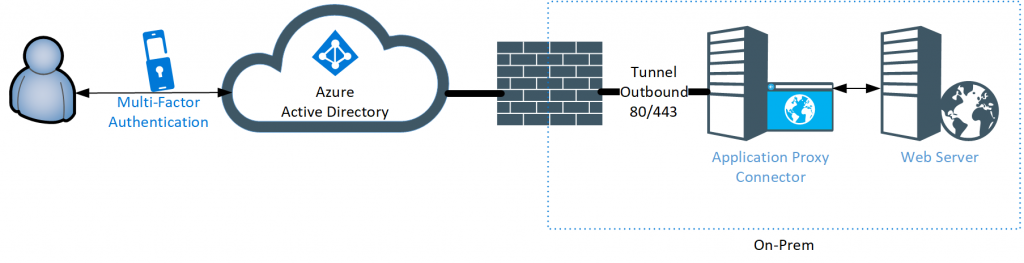
網路防火牆需求: 須開放 Outbound TCP 443 與 80 port
若需設置白名單請參考以下的 URL 設置:
| URL | How it's used |
|---|---|
| *.msappproxy.net *.servicebus.windows.net | Communication between the connector and the Application Proxy cloud service |
| mscrl.microsoft.com:80 crl.microsoft.com:80 ocsp.msocsp.com:80 www.microsoft.com:80 | Azure uses these URLs to verify certificates |
| login.windows.net login.microsoftonline.com | The connector uses these URLs during the registration process. |
若需設定 IP 白名單, 請參考 Azure DataCenter IP ranges.
Application Proxy Connector 安裝前需將 Windows Server 啟用 TLS 1.2, 請在註冊機碼中加入以下的機碼, 新增完成後需要重新開機.
Windows Registry Editor Version 5.00

[HKEY_LOCAL_MACHINE\SYSTEM\CurrentControlSet\Control\SecurityProviders\SCHANNEL\Protocols\TLS 1.2]
[HKEY_LOCAL_MACHINE\SYSTEM\CurrentControlSet\Control\SecurityProviders\SCHANNEL\Protocols\TLS 1.2\Client]
"DisabledByDefault"=dword:00000000
"Enabled"=dword:00000001
[HKEY_LOCAL_MACHINE\SYSTEM\CurrentControlSet\Control\SecurityProviders\SCHANNEL\Protocols\TLS 1.2\Server]
"DisabledByDefault"=dword:00000000
"Enabled"=dword:00000001
[HKEY_LOCAL_MACHINE\SOFTWARE\Microsoft\.NETFramework\v4.0.30319] "SchUseStrongCrypto"=dword:00000001
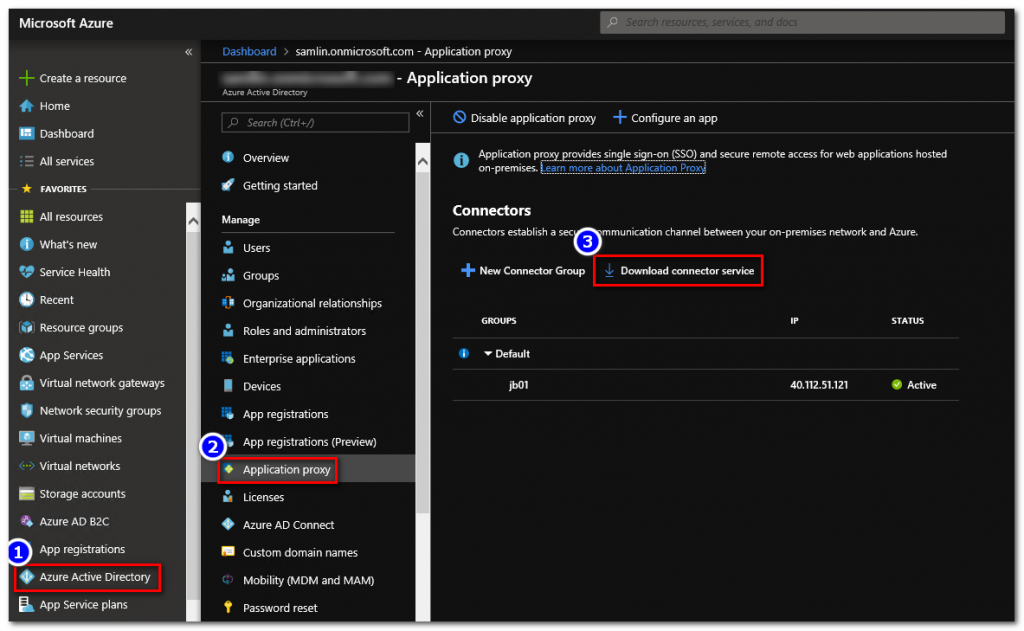
(1) 使用 Azure Tenant Admin 登入 Azure Portal
(2) 選取 Azure Active Directory >> Application Proxy >> Download connector service 下載最新版本 Application Proxy Connector (AADApplicationProxyConnectorInstaller.exe)
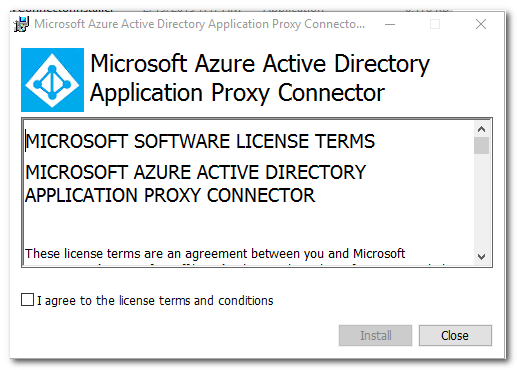
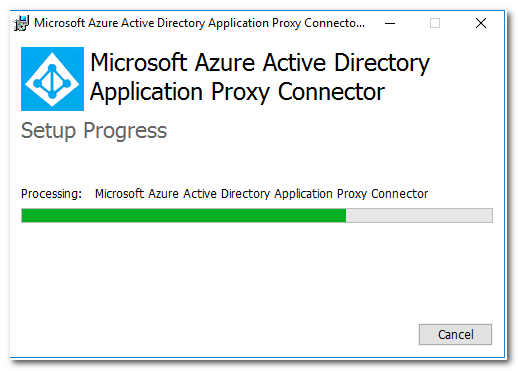
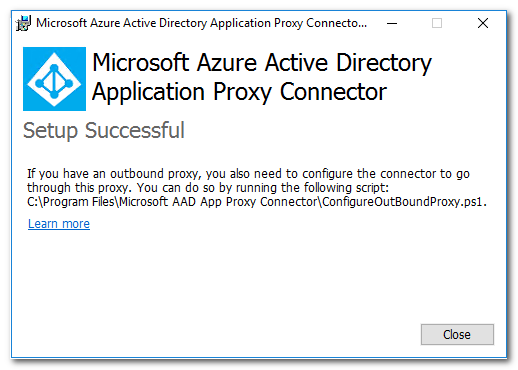
(3) 執行 AADApplicationProxyConnectorInstaller.exe 根據安裝精靈步驟進行安裝
A. 執行安裝精靈
B. 安裝過程中需使用 Tenant Admin 登入進行 Application Proxy Connector 註冊安裝
C. 安裝完成後若有對外連線需透過 Web Proxy, 需另外執行 ConfigureOutBoundProxy.ps1 進行修改 config 設定
(4) 設定 Web Proxy, 請使用 RunAs Administrator 開啟 C:\Program Files\Microsoft AAD App Proxy Connector\ConfigureOutBoundProxy.ps1
A. 執行 ConfigureOutBoundProxy.ps1
B. 輸入 Proxy Server Url (例如: http://proxy.contoso.com:8888)

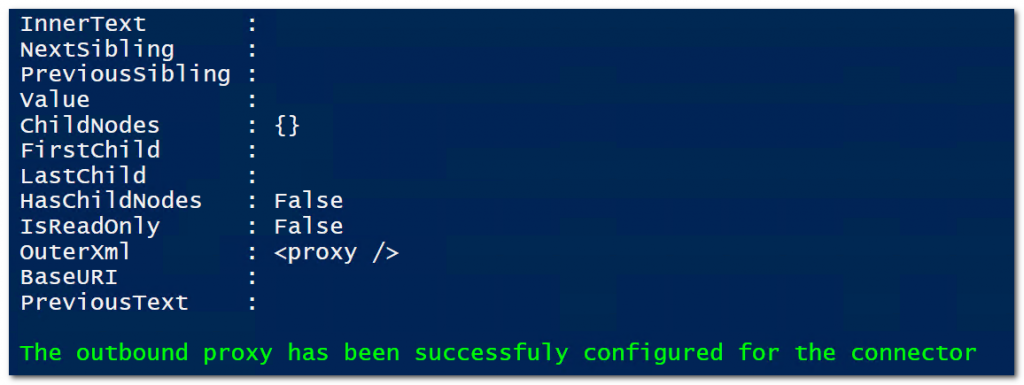
C. 執行完成後, 重新啟動 Microsoft AAD Application Proxy Connector 服務

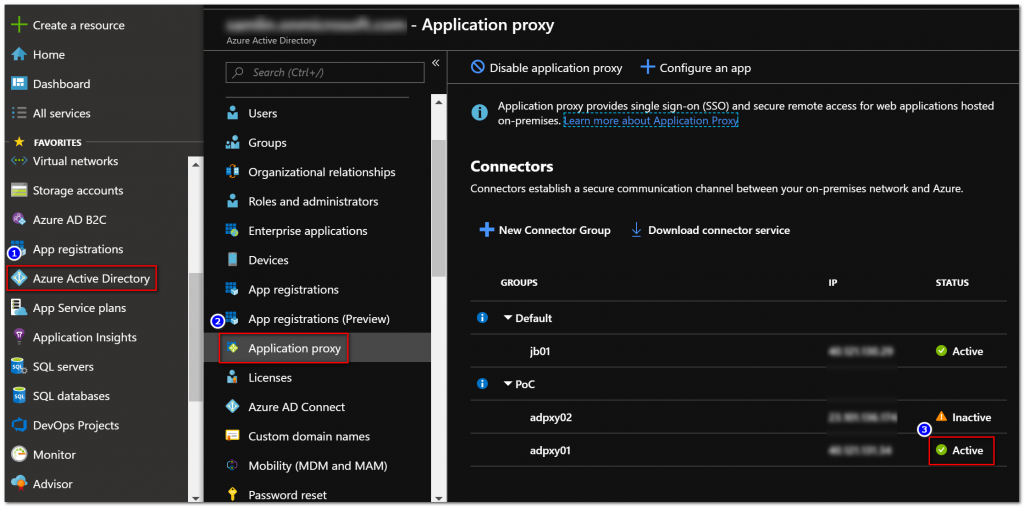
(5) 從 Azure Portal > Azure Active Directory > Application Proxy 檢查 Connector 是否為 Active 狀態
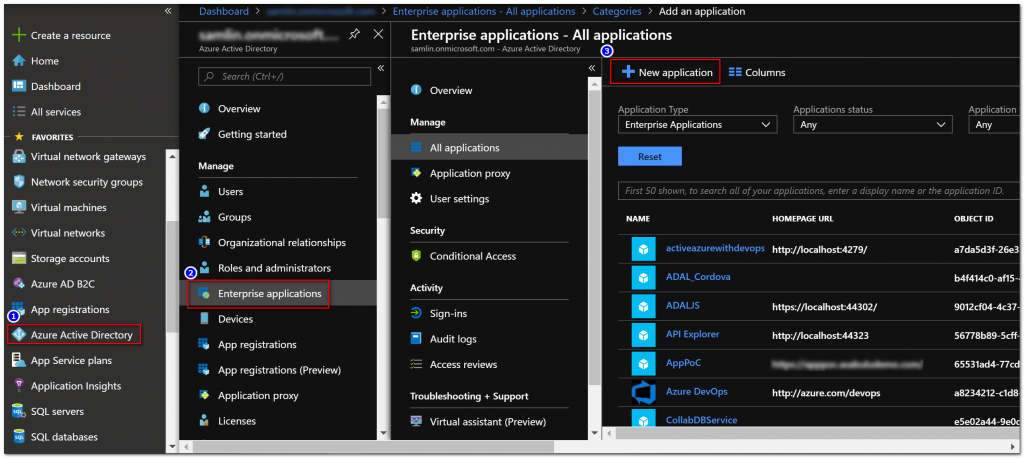
(1) Azure Active Directory > Enterprise application > New application 新增應用程式
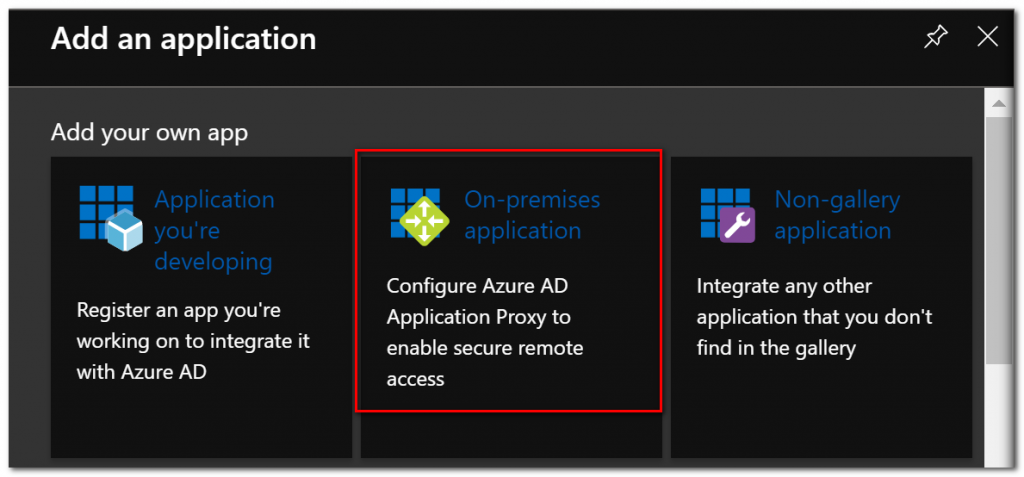
(2) 選取 On-Premises application
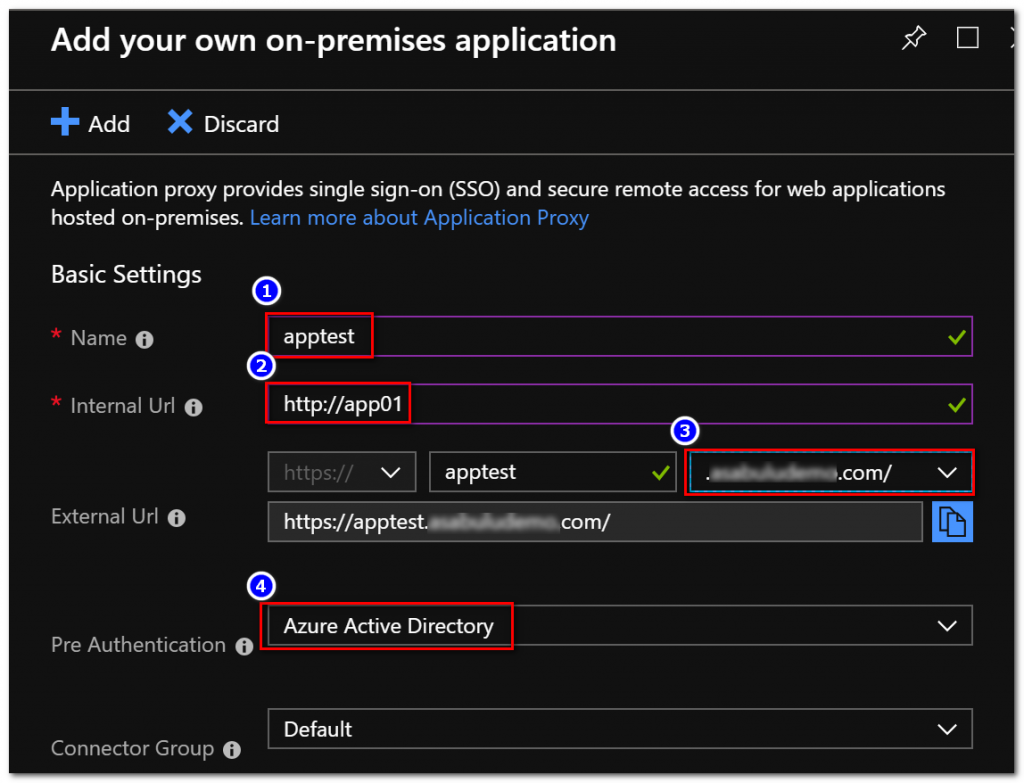
(3) 設定 App 名稱, 對應的內部 Url (例如: http://app01), 如果需要設定為自定義網域名稱, 請選擇對應的網域 (選取自定義網域後續需要在 DNS Server 上加入對應的 CNAME 紀錄, 並需要匯入含私鑰的 pfx 格式公開憑證), Pre Authentication 部分如果要使用 Azure Active Directory 登入時使用 MFA 以及 Conditional Access 功能, 請選擇為 Azure Active Directory 方式
(4) 如果使用自定義網域設定完成後, 需要匯入憑證
(5) 如果使用自定義網域設定完成後, 需要在 DNS Server 中加入一筆 CNAME 對應 (apptest-yourtenantname.msappproxy.net)

應用程式使用 Windows 整合式驗證需要做單一簽入 (SSO) 時, 需要進行 KCD 設置
(1) 在 On-Prem 環境中的任一台網域成員主機, 使用 Domain 管理者帳號進行設置:
說明: 內部應用程式 internal url 為 **http://app.contoso.com**, 主機名稱為 app01
setspn -A HTTP/app.contoso.com app01

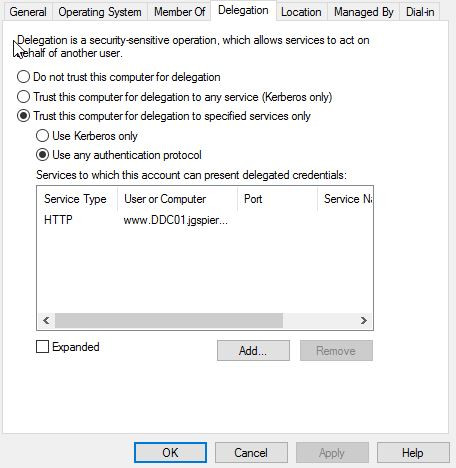
(2) 在 On-Prem 環境中的 DC 中 Search Application Proxy Connector 主機, 選取 Delegation 後, 選取 Trust this computer for delegation to specified services only, 選取 Add, 找到前一步驟的 AP Server (app01), 並選取 HTTP/app.contoso.com service type 加入
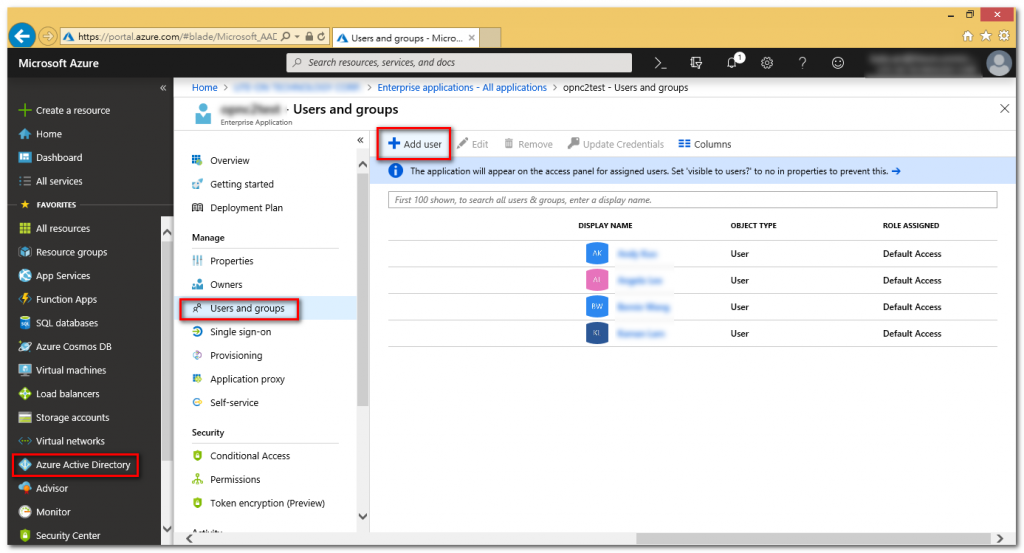
(1) 使用 Azure Active Directory 為 Pre-Authentication 模式時, 需要指派使用者給 Application, 選取 Application 後, 選取 Add User, 加入使用者後, 選取 Assign
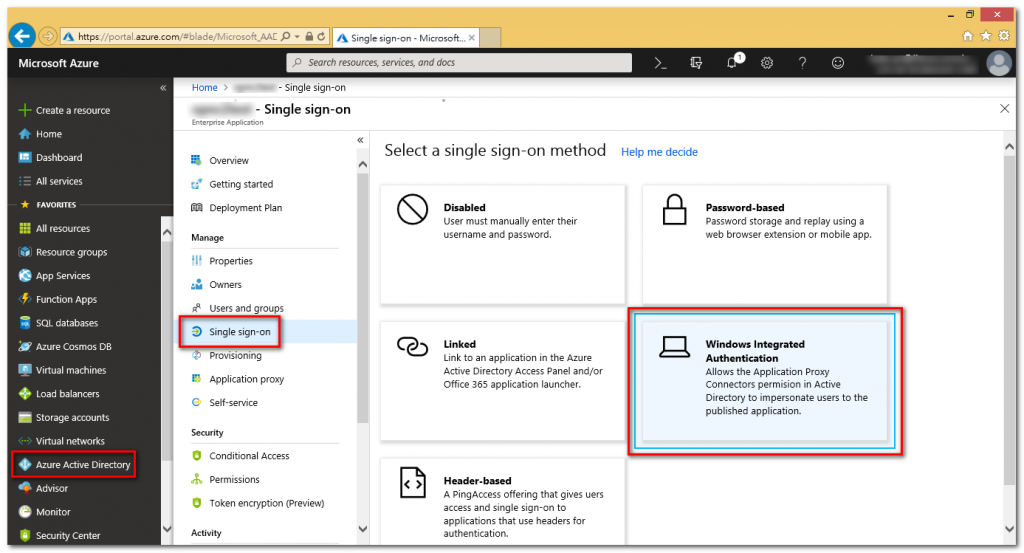
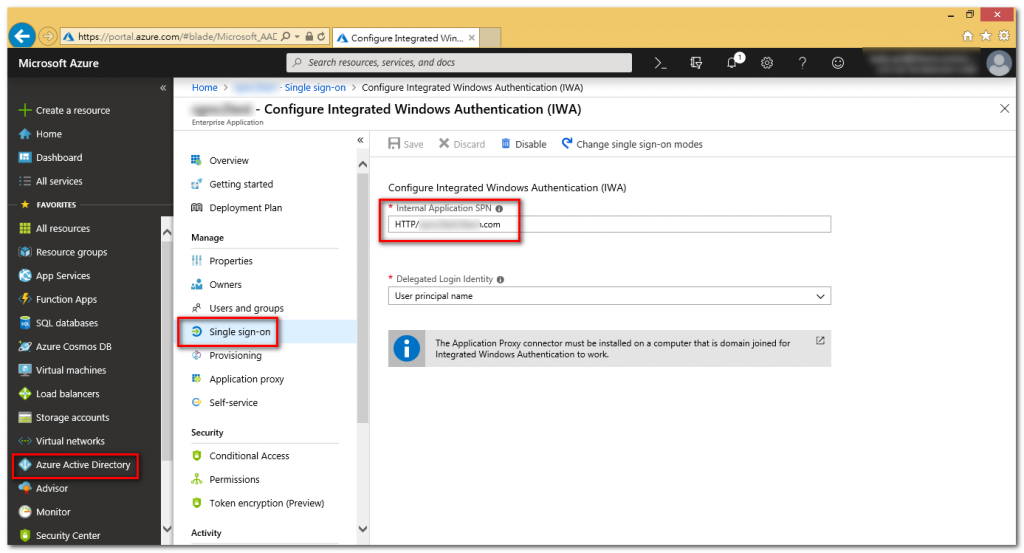
(1) 從 Azure Active Directory 選取 Application 後, 選取 Single sign-on 設定, 設定為 Windows Integrated Authentication 模式
(2) 其中 Internal Application SPN 為步驟 3.2 中所設定的 SPN 名稱 (HTTP/app.contoso.com)
 山姆大叔
山姆大叔
