今天想用Nest.js這個後端框架設計做一個像是google keep的筆記軟體超級陽春版 簡稱superkeep
Nest.js是node.js平台上的服務器框架,跟Express最大的不同就是,他是用Typescript寫出來的,而且還向前端框架Angular借鑒了依賴注入、provider、service、module....之類的概念,所以寫起來會有Angular的既視感!很酷!
npm install -g typescriptnpm i -g @nest/cli
nest new superkeepcd superkeepcode .
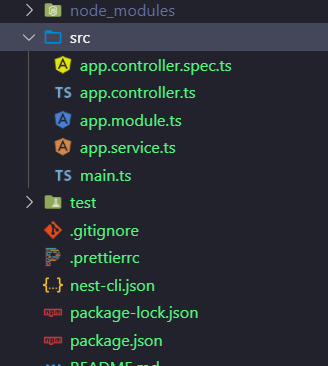
一開始的目錄會長這樣: (100% Angular的風格)
src目錄裡比官方網站介紹得還多了一個app.service.ts檔案
First steps
In this set of articles, you'll learn the core fundamentals of Nest. To get familiar with the essential building blocks of Nest applications, we'll build a basic CRUD application with features that cover a lot of ground at an introductory level.
Language#
We're in love with TypeScript, but above all - we love Node.js. That's why Nest is compatible with both TypeScript and pure JavaScript. Nest takes advantage of the latest language features, so to use it with vanilla JavaScript we need a Babel compiler.
We'll mostly use TypeScript in the examples we provide, but you can always switch the code snippets to vanilla JavaScript syntax (simply click to toggle the language button in the upper right hand corner of each snippet).
Prerequisites#
Please make sure that Node.js (>= 8.9.0) is installed on your operating system.
Setup#
Setting up a new project is quite simple with the Nest CLI. With npm installed, you can create a new Nest project with the following commands in your OS terminal:
$ npm i -g @nestjs/cli
$ nest new project-name
The project directory will be created, node modules and a few other boilerplate files will be installed, and a src/ directory will be created and populated with several core files.
src
app.controller.ts
app.module.ts
main.ts
Here's a brief overview of those core files:
app.controller.ts Basic controller sample with a single route.
app.module.ts The root module of the application.
main.ts The entry file of the application which uses the core function NestFactory to create a Nest application instance.
The main.ts includes an async function, which will bootstrap our application:
main.ts
JS
import { NestFactory } from '@nestjs/core';
import { AppModule } from './app.module';
async function bootstrap() {
const app = await NestFactory.create(AppModule);
await app.listen(3000);
}
bootstrap();
To create a Nest application instance, we use the core NestFactory class. NestFactory exposes a few static methods that allow creating an application instance. The create() method returns an application object, which fulfills the INestApplication interface. This object provides a set of methods which are described in the coming chapters. In the main.ts example above, we simply start up our HTTP listener, which lets the application await inbound HTTP requests.
Note that a project scaffolded with the Nest CLI creates an initial project structure that encourages developers to follow the convention of keeping each module in its own dedicated directory.
Platform#
Nest aims to be a platform-agnostic framework. Platform independence makes it possible to create reusable logical parts that developers can take advantage of across several different types of applications. Technically, Nest is able to work with any Node HTTP framework once an adapter is created. There are two HTTP platforms supported out-of-the-box: express and fastify. You can choose the one that best suits your needs.
platform-express Express is a well-known minimalist web framework for node. It's a battle tested, production-ready library with lots of resources implemented by the community. The @nestjs/platform-express package is used by default. Many users are well served with Express, and need take no action to enable it.
platform-fastify Fastify is a high performance and low overhead framework highly focused on providing maximum efficiency and speed. Read how to use it here.
Whichever platform is used, it exposes its own application interface. These are seen respectively as NestExpressApplication and NestFastifyApplication.
When you pass a type to the NestFactory.create() method, as in the example below, the app object will have methods available exclusively for that specific platform. Note, however, you don't need to specify a type unless you actually want to access the underlying platform API.
const app = await NestFactory.create(AppModule);
Running the application#
Once the installation process is complete, you can run the following command at your OS command prompt to start the application listening for inbound HTTP requests:
$ npm run start
This command starts the app with the HTTP server listening on the port defined in the src/main.ts file. Once the application is running, open your browser and navigate to http://localhost:3000/. You should see the Hello World! message.