再看一次文件
現在應該有點概念了,直接來實作一個ResponseBean
public class ResponseBean {
    private int statusCode;
    private Map<String, String> headers;
    private Object body;

    public ResponseBean() {
        headers = new HashMap<String, String>();
    }
}
補完get/set後(對,我都懶得打get/set給你看 )
那這樣是不是就可以將自己的bean塞進body後回傳就好了?
ResponseBean response = new ResponseBean();
response.setBody(person);
return response;
於是很偷懶的直接將昨天request取得的person塞進去試試,還真的可以有結果!
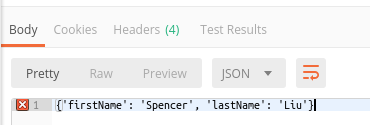
而且即使我沒有將statusCode、headers塞值,預設都幫我傳回http 200以及application/json了,good
等等.. Postman還是跟我說不美麗...
還是自己來吧serialize吧,畢竟就像之前說過的,Lambda Proxy integration只有當作POJO來處理,如果需要其他功能最好自己來。
所以我們把預設的getBody改寫
public Object getBody() {
    if (body == null) return null;
    try {
        ObjectMapper mapper = new ObjectMapper();
        if (view != null)
            mapper.setConfig(mapper.getSerializationConfig().withView(view));
        return mapper.writeValueAsString(body);
    } catch (JsonProcessingException e) {
        // TODO Auto-generated catch block
        e.printStackTrace();
        return null;
    }
}
除此之外,還有增加view與有參數的建構子方便使用
private Class<?> view;

public ResponseBean(Object body) {
    this();
    this.body = body;
}

public ResponseBean(Object body, Class<?> view) {
    this(body);
    this.view = view;
}
一樣是保留以後會用到的view參數
接下來只要這樣就可以使用
return new ResponseBean(person);
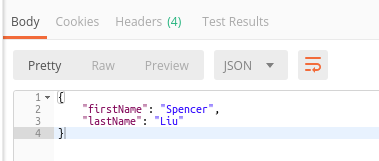
再測試一次,於是得到了美麗 的json
恭喜,我們的handler可以正式改寫為POJO方法來承接
public class LambdaFunctionHandler implements RequestHandler<RequestBean, ResponseBean> {

    @Override
    public ResponseBean handleRequest(RequestBean input, Context context) {
        Person person = input.getBody(Person.class);
        // do something?
        return new ResponseBean(person);
    }
}
因為request/response不管哪個body我們都改成自己以Jackson處理,所以如果你熟悉Json處理的話,應該就懂得接下來的玩法了。你可以增加config參數當作global設定,也可以在bean當中使用各種annotation註釋語法設定,那麼接下來幾天的內容你可以跳過了 。
