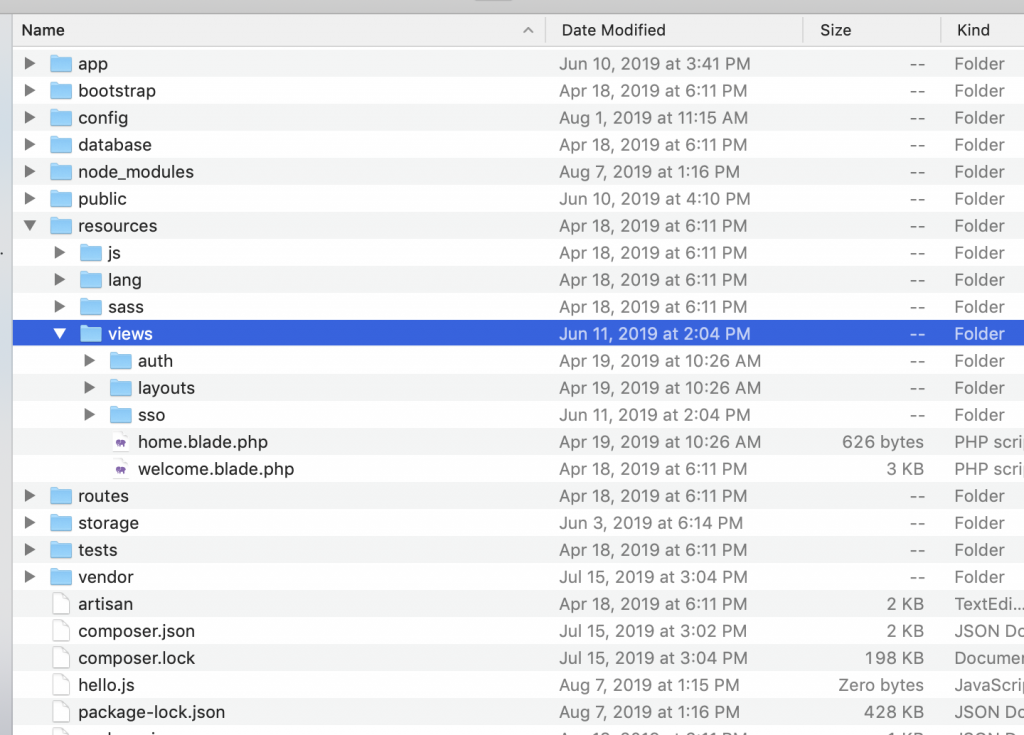
接下來讓我們介紹MVC裡的V,也就是Larvel理resources/views這個資料夾的部分。作為一個先進的框架,總不可能只是傳送文字這麼簡單,也需要有美美的網頁才可以撐得上一個合格的框架,
當然更不可以像Jquery 一樣用「組字串」的方式那麼辛苦的把html內容捕進來(懂Jquery的人應該懂我在說什麼)
所以Laravel 自帶使用所謂的blade,可以讓你用很方便的模板模式撰寫你要呈現的內容,我們用Laravel 附帶預設的Welcome.blade.php作為簡單的解說
<!DOCTYPE html>
<html lang="{{ str_replace('_', '-', app()->getLocale()) }}">
    <head>
        <meta charset="utf-8">
        <meta name="viewport" content="width=device-width, initial-scale=1">

        <title>Laravel</title>

        <!-- Fonts -->
        <link href="https://fonts.googleapis.com/css?family=Nunito:200,600" rel="stylesheet">

        <!-- Styles -->
        <style>
            html, body {
                background-color: #fff;
                color: #636b6f;
                font-family: 'Nunito', sans-serif;
                font-weight: 200;
                height: 100vh;
                margin: 0;
            }

            .full-height {
                height: 100vh;
            }

            .flex-center {
                align-items: center;
                display: flex;
                justify-content: center;
            }

            .position-ref {
                position: relative;
            }

            .top-right {
                position: absolute;
                right: 10px;
                top: 18px;
            }

            .content {
                text-align: center;
            }

            .title {
                font-size: 84px;
            }

            .links > a {
                color: #636b6f;
                padding: 0 25px;
                font-size: 13px;
                font-weight: 600;
                letter-spacing: .1rem;
                text-decoration: none;
                text-transform: uppercase;
            }

            .m-b-md {
                margin-bottom: 30px;
            }
        </style>
    </head>
    <body>
        <div class="flex-center position-ref full-height">
            @if (Route::has('login'))
                <div class="top-right links">
                    @auth
                        <a href="{{ url('/home') }}">Home</a>
                    @else
                        <a href="{{ route('login') }}">Login</a>

                        @if (Route::has('register'))
                            <a href="{{ route('register') }}">Register</a>
                        @endif
                    @endauth
                </div>
            @endif

            <div class="content">
                <div class="title m-b-md">
                    Laravel
                </div>

                <div class="links">
                    <a href="https://laravel.com/docs">Docs</a>
                    <a href="https://laracasts.com">Laracasts</a>
                    <a href="https://laravel-news.com">News</a>
                    <a href="https://blog.laravel.com">Blog</a>
                    <a href="https://nova.laravel.com">Nova</a>
                    <a href="https://forge.laravel.com">Forge</a>
                    <a href="https://vapor.laravel.com">Vapor</a>
                    <a href="https://github.com/laravel/laravel">GitHub</a>
                </div>
            </div>
        </div>
    </body>
</html>
你感覺到了嗎? 其實就像我們在寫HTML一樣。
而Laravel使用Blade 更厲害的地方是說我們可以將頁面組成像現代前端使用Component(元件)的效果一樣。例如我們使用
@extends('layouts.master')
這個extends 就會找Laravel resources/Views資料夾裡面的Layouts子資料夾裡面的master.blade.php。
注:其實我們在使用View()這個函式以及內部blade再引用其他的模板時,我們檔案名稱是需要使用.blade.php,但我們使用上不用加.blade.php,而且我們如果有子資料夾也不需要子資料夾/檔案名稱,就用.作為代替就好
在master.blade.php我們更可以把內容做「挖空」,請使用
@yield('content')
之後在其他檔案就可以這樣使用,讓我們以結合前面使用layouts.master作為例子
<html>
    <head>
        <title>@yield('title')</title>
    </head>
    <body>
        <div class="container">
            @yield('content')
        </div>
    </body>
</html>
@extends('layouts.master')

@section('title', '頁面標題')

@section('content')
    <p>這是我的主要內容。</p>
@endsection
這樣是不是page上會比較簡潔乾淨多了呢?
另外,Blade也允許我們使用運算式、條件式等,舉例來說
@if、@elseif、@else、@endif:就是關於條件的部分@for、@endfor、@foreach、@endforeach、@while、@endwhile:就是有關於迴圈的部分最後再附上如果要在blade加入參數怎麼辦,使用{{}}就好拉,例如
{{ $name }}
其實還有很多不同的使用,這裏我附上參考資料,可以自行參考使用囉
之後我們要開始一系列簡單的實作,如果覺得目前的概念簡介很模糊不清的話沒有關係,讓我們藉由實作當中直接面對面,學習怎麼將前面的東西一起用,希望到時可以讓你們更加清楚~~(這樣你大概就能算會使用Laravel的一半了呢)
