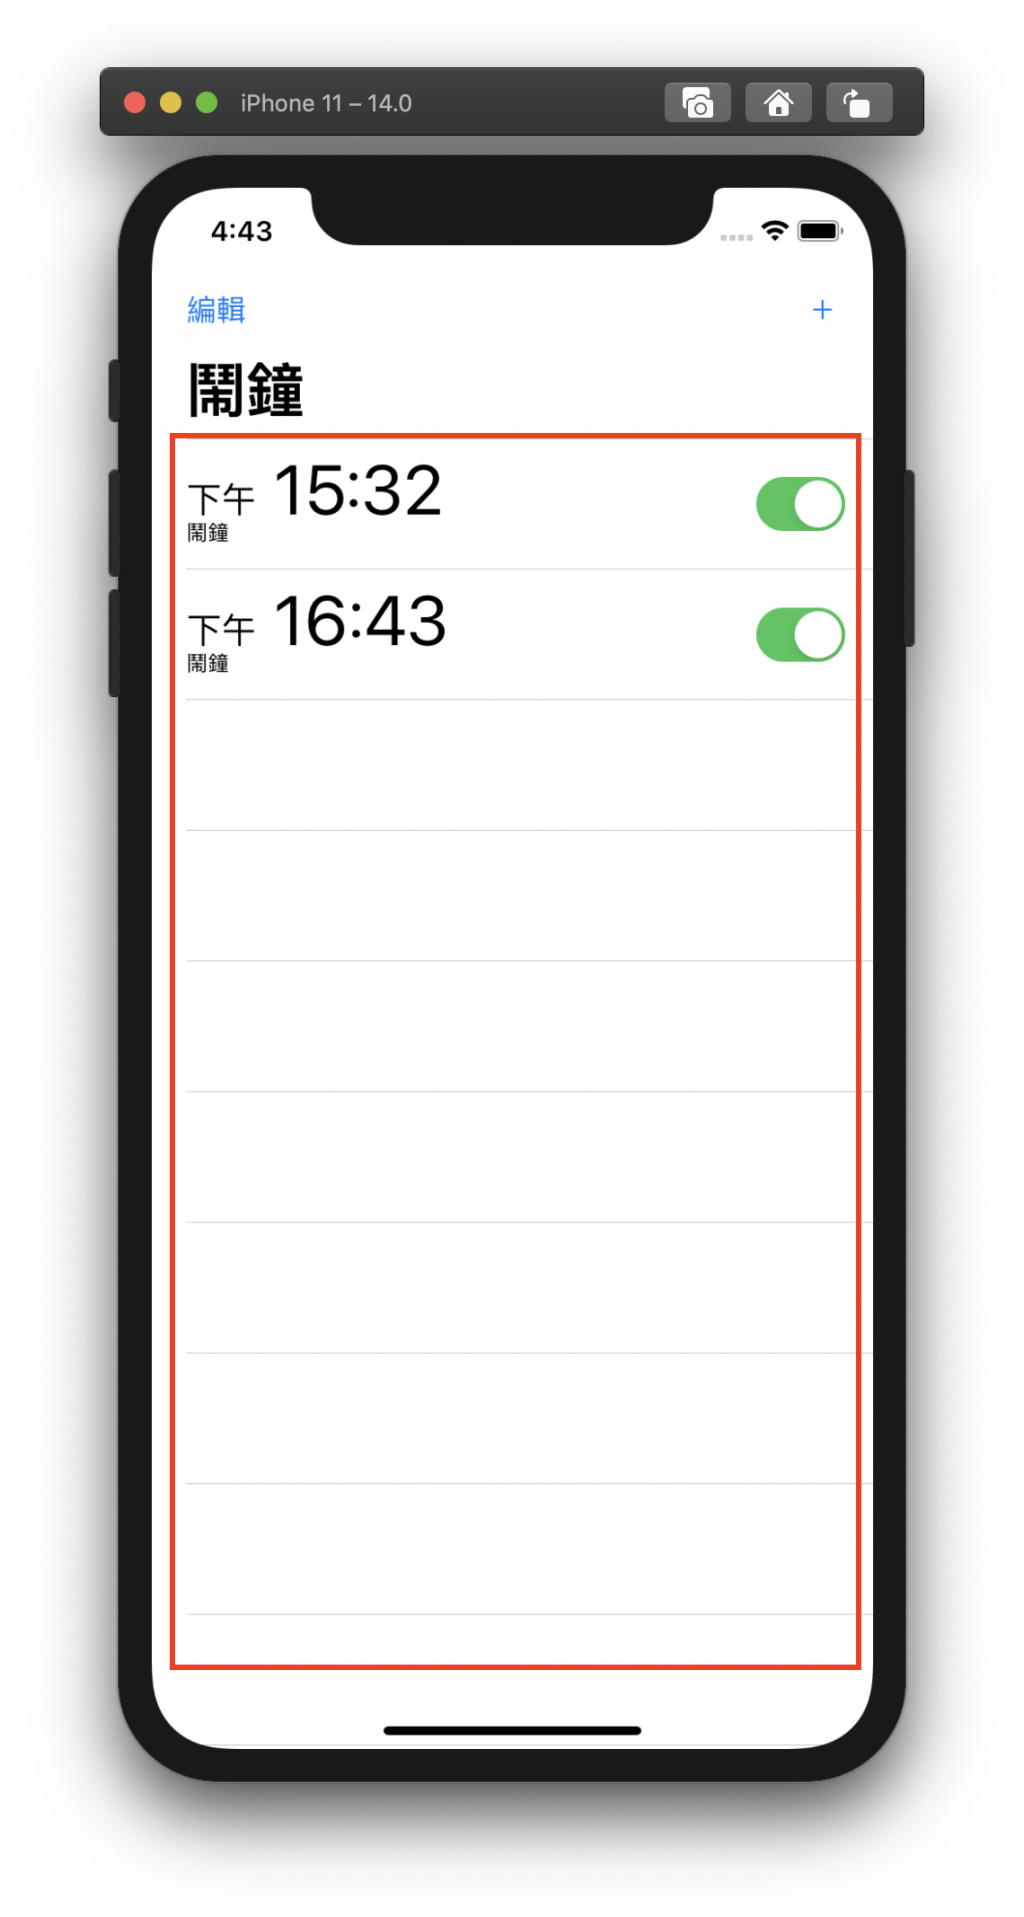
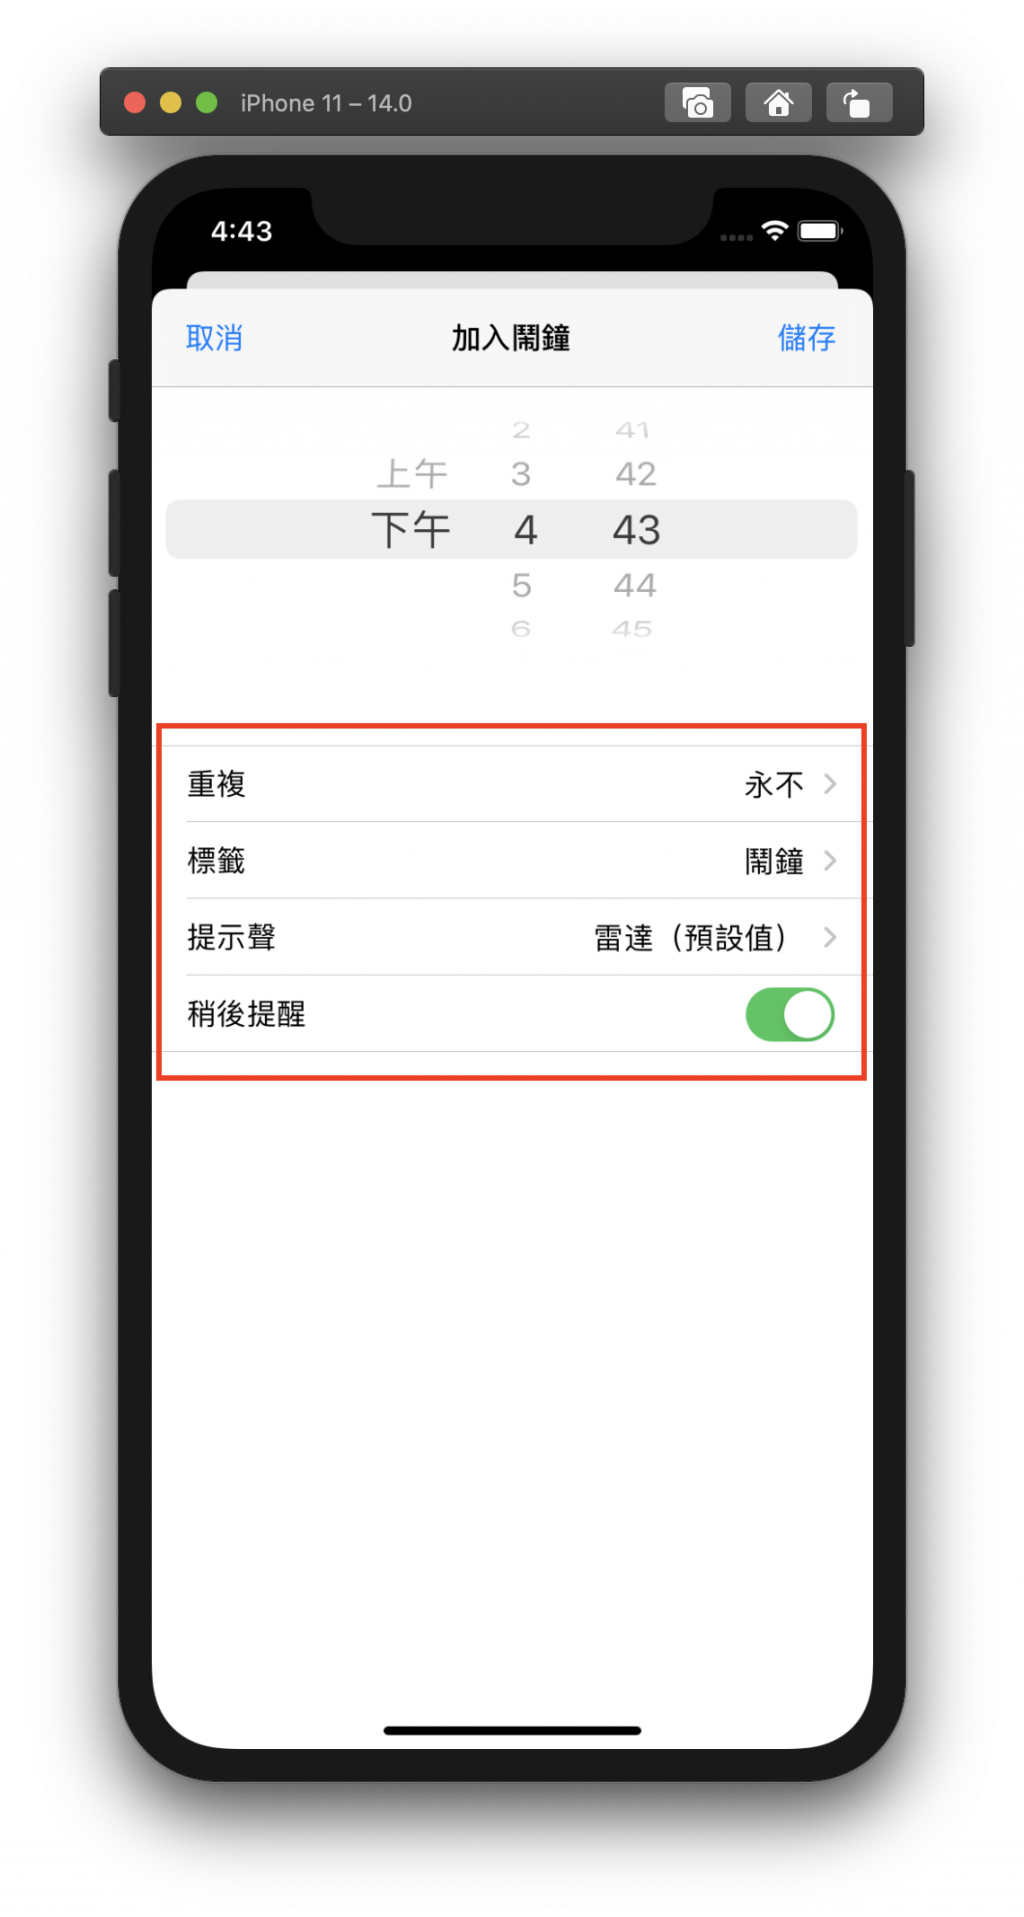
前言:
上一篇的 UI元件 都拉好設定好後,接下來是如何使用
正文:
中間的程式碼大部分是改其 Cell 的狀態
Bundle.main.loadNibNamed 這個方法可以改其對應的 Cell
func tableView(_ tableView: UITableView, cellForRowAt indexPath: IndexPath) -> UITableViewCell {
    let cell = Bundle.main.loadNibNamed("AlarmclockCell", owner: self, options: nil)?.first as! AlarmclockCell

    let order = orders[indexPath.row]

    cell.timeLabel.text = order.TimeOrder
    let subString = (order.TimeOrder as NSString).substring(with: NSMakeRange(0,2))
    var ampm = ""

    if Int(subString)! >= 12{
        ampm = "下午"
    }
    else{
        ampm = "上午"
    }
    cell.ampmLabel.text = ampm
    //是否有重複日期
    if "\(order.RepeatOrder)" == ""{
        cell.alarmnameLabel.text = "\(order.AlarmnameOrder)" + "\(order.RepeatOrder)"
    }
    else{
        cell.alarmnameLabel.text = "\(order.AlarmnameOrder)" + ",\(order.RepeatOrder)"
    }

    if order.SwitchOrder == false {
        cell.alarmSwitch.isOn = false
        cell.timeLabel.textColor = #colorLiteral(red: 0.8039215803, green: 0.8039215803, blue: 0.8039215803, alpha: 1)
        cell.ampmLabel.textColor = #colorLiteral(red: 0.8039215803, green: 0.8039215803, blue: 0.8039215803, alpha: 1)
        cell.alarmnameLabel.textColor = #colorLiteral(red: 0.8039215803, green: 0.8039215803, blue: 0.8039215803, alpha: 1)
    }
    else{
        cell.alarmSwitch.isOn = true
        cell.timeLabel.textColor = #colorLiteral(red: 0, green: 0, blue: 0, alpha: 1)
        cell.ampmLabel.textColor = #colorLiteral(red: 0, green: 0, blue: 0, alpha: 1)
        cell.alarmnameLabel.textColor = #colorLiteral(red: 0, green: 0, blue: 0, alpha: 1)
    }

    cell.alarmSwitch.tag = indexPath.row
    try! realm.write {
        order.savetagOrder = indexPath.row
    }
    // 印出資料庫的位址
    print("fileURL: \(realm.configuration.fileURL!)")
    return cell
}

或是同個頁面有兩種以上的Cell時
可以使用 Switch
func tableView(_ tableView: UITableView, cellForRowAt indexPath: IndexPath) -> UITableViewCell {
    switch indexPath.row {
    case 3:
        let cell:AddAlarmSwitchCell = tableView.dequeueReusableCell(withIdentifier: "addalarmswitchcell")
        as! AddAlarmSwitchCell
        let Alarmitem = info[indexPath.row]
        cell.textLabel?.text = Alarmitem
        return cell
    default:
        let cell:AddAlarmclockCell = tableView.dequeueReusableCell(withIdentifier: "addalarmclockcell")
        as! AddAlarmclockCell
        if indexPath.section == 0 {
            if indexPath.row == 0 {
                cell.labelname.text = "永不"
                cell.accessoryType = .disclosureIndicator
                if repeatDetail != ""{
                    cell.labelname.text = "\(repeatDetail)"
                }

            } else if indexPath.row == 1 {
                cell.labelname.text = "鬧鐘"
                cell.accessoryType = .disclosureIndicator
                if labelnameDetail != "鬧鐘"{
                    cell.labelname.text = "\(labelnameDetail)"
                }
            } else if indexPath.row == 2 {
                cell.labelname.text = "雷達(預設值)"
                cell.accessoryType = .disclosureIndicator
                if beeplabelDetail != "雷達(預設值)"{
                    cell.labelname.text = "\(beeplabelDetail)"
                }
            }
        }

        let Alarmitem = info[indexPath.row]
        cell.textLabel?.text = Alarmitem
//            configalarmtableview.reloadRows(at: [indexPath], with: .fade)
        return cell
    }

