今天要來使用laravel+Vue的台灣縣市選擇器
在開始前請先安裝bootstrap、bootstrap-sass,這兩個套件
npm install --save-dev bootstrap@4.0.0
npm install --save-dev bootstrap-sass@3.4.1
config在config資料夾,建立country.php,參閱縣市資料(這是待會,會用到的縣市資料結構)
Controller在專案的目錄下,輸入指令新增CountryController.php
php artisan make:controller CountryController
country.php在CountryController使用Config的country.php,拿到縣市選單資料
<?php

namespace App\Http\Controllers;

use Illuminate\Http\Request;
use Config;

class CountryController extends Controller
{
    public function getCountryData()
    {
        $country = Config::get('country');
        $countryData = [
            'city' => $country['city'],
            'districts' => $country['districts']
        ];

        return view('country', $countryData);
    }
}
Routes在routes/web.php路徑底下,新增/country,執行CountryController的getCountryData
Route::get('/country', 'CountryController@getCountryData');
JS檔案接下來在resources/js資料夾裡新增js檔,檔名為country.js,這裡要引入bootstrap,以及另外兩個components
import 'bootstrap/dist/css/bootstrap.css'
import countryCity from './components/country/City.vue';
import countryDistricts from './components/country/Districts.vue';

let app = new Vue({
    el: '#app',
    data: {
        message: 'Vue練習:',
        showText: '顯示郵遞區號!',
        citySelected: null,
        districtsSelected: null,
        citySelectedText: '',
        districtsSelectedText: '',
        btnStyle: 'btn btn-primary'
    },
    components: {
        'country-city': countryCity,
        'country-districts': countryDistricts
    },
    methods: {
        updateCity(CitySelectedText, CitySelected) {
            this.citySelectedText = CitySelectedText
            this.citySelected = CitySelected
            this.districtsSelected = null
        },
        updateDistricts(DistrictsSelectedText, DistrictsSelected) {
            this.districtsSelectedText = DistrictsSelectedText
            this.districtsSelected = DistrictsSelected
        },
        showPostalCode() {
            let show_text = '請選擇縣市和市區'
            if (this.citySelectedText != '' && this.districtsSelectedText != '' && this.districtsSelected != null) {
                show_text = this.citySelectedText + " " + this.districtsSelectedText + " 郵遞區號為:" + this.districtsSelected
            }
            alert(show_text)
        }
    }
})
以上範例,updateCity()是從country-city傳進來,更新citySelectedText 、citySelected 這兩個變數值,另一個updateDistricts()是從country-districts傳進來,更新districtsSelectedText 、districtsSelected另外兩個變數值,showPostalCode()則是將citySelectedText 、districtsSelectedText 、districtsSelected 組成字串,用提示訊息的方式顯示在頁面上。
components在resources/js/components/country路徑底下,新增兩個component檔案,City.vue、Districts.vue
<!-- City.vue -->
<template>
	<select v-model="cityValue" id="us_city" name="us_city" @change="changeCity()">
		<option value=null disabled selected>--請選擇--</option>
		<option v-for="(city, index) in cityArray" :key="index"
			:value="city.value">{{ city.text }}</option>
	</select>
</template>

<script>
export default {
	props: {
		cityData: {
			type:Array
		},
		citySelected: {
			type:Number
		}
	},
	data() {
		return {
			cityArray: this.cityData,
			cityValue: this.citySelected,
		}
	},
	methods:{
		changeCity() {
			if (this.cityValue != null) {
				this.$emit('change-city', this.cityArray[this.cityValue]['text'], this.cityValue)
			}
		}
	}
}
</script>
City.vue的範例中,props傳進來的cityArray當作縣市選單的資料,以及citySelected當作選單的預設值,當選擇縣市資料時,去觸發changeCity(),使用emit傳遞,function名稱為change-city,將文字與value資料傳到country.js的updateCity()。
<!-- Districts.vue -->
<template>
	<select v-model="districtsValue" id="us_districts" name="us_districts" >
		<option value=null disabled selected>--請選擇--</option>
		<option v-for="(districts, index) in districtsArray" :key="index" :value="districts.value">{{ districts.text }}</option>
	</select>
</template>

<script>
export default {
	props: {
		citySelected: {
			type:Number
		},
		districtsData: {
			type:Array
		},
		districtsSelected: {
			type:Number
		}
	},
	computed: {
		districtsArray() {
			if (this.citySelected != null ) {
				this.districtsValue = this.districtsSelected
				return this.districtsData[this.citySelected];
			}
		}
	},
	data() {
		return {
			districts: [],
			districtsValue: this.districtsSelected,
		}
	},
	watch:{
		districtsValue(newVal) {
			let districtsText = ''
			_.findKey (this.districtsArray, (e, key) => {
				 if (e.value === newVal) {
					 districtsText = e.text
				 }
			})

			if (districtsText != '') {
				this.$emit('change-districts', districtsText, newVal)
			}
		}
	}
}
</script>
Districts.vue的範例中,props傳進來的citySelected是目前縣市資料,districtsData是一整包市區資料,districtsSelected為選單的預設值。而districtsArray是縣市資料有更新時,會重新計算市區選單的資料,當選擇市區資料時,因為我們監聽districtsValue變數,當變數值改變時,會使用emit傳遞,function名稱為change-districts,將文字與value資料傳到country.js的updateDistricts()。
模板頁面做完之後在resources/views資料夾裡,新增頁面country.blade.php
<html>
	<head>
		<meta name="csrf-token" content="{{ csrf_token() }}">
	</head>

	<body>
		<div id="app">
			@{{ message }}
			<country-city
				@change-city="updateCity"
				:city-selected="citySelected"
				:city-data="{{ json_encode($city) }}"
			>
			</country-city>
			<country-districts
				@change-districts="updateDistricts"
				:city-selected="citySelected"
				:districts-selected="districtsSelected"
				:districts-data="{{ json_encode($districts) }}"
			/>
			</country-districts>
			<input
				type="button"
				id="show"
				:class="btnStyle"
				:value="showText"
				@click="showPostalCode"
			/>
		</div>
		<script src="{{mix('js/app.js')}}"></script>
		<script src="{{mix('js/country.js')}}"></script>
	</body>
</html>
從CountryController傳過來的city、districts資料,以及country.js的值,會傳到另外兩個component。
JS檔案完成之後,我們要進行編譯,請在webpack.mix.js檔案,新增country.js檔案
mix.js('resources/js/app.js', 'public/js')
   .js('resources/js/country.js', 'public/js')
   .sass('resources/sass/app.scss', 'public/css');
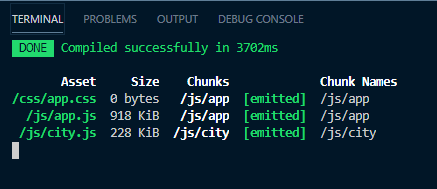
新增完成,執行編譯指令,執行完後會顯示下方的畫面
npm run watch
$ php artisan serve
Starting Laravel development server: http://127.0.0.1:8000
啟動之後,輸入網址為http://127.0.0.1:8000/country
在頁面上選擇縣市與市區後,點擊按鈕後就會顯示郵遞區號!
基隆市 中山區 郵遞區號為:203