首先介紹什麼是如何附加自己的分類在別人的情緒之上,
對別人已經訓練好的情緒 model,我們對這個 model 的某一次輸入及輸出,打上一個標籤,
但因為我們不可能幫所有的輸入及輸出打上標籤,我們可以透過 ml5 的 KNNClassifier,
就可以很簡單地,自動地將他的情緒及其他造成他這樣情緒的文字,打上一個最相近的標籤。
接著備料,
將上一章的 sketch_sentiment.js,改寫成如下所示。
let sentiment;

let statusEl;
let inputBox;
let submitBtn;
let sentimentResult;

let addshow;
let labelBox;
let buttonAddLabel;
let buttonShowLabel;
let predictResult;

let saveload;
let buttonSetData;
let buttonGetData;

function setup() {
    // initialize sentiment
    sentiment = ml5.sentiment('movieReviews', modelReady);

    noCanvas();


    statusEl = createP('loading model...');

    inputBox = createInput();
    inputBox.attribute('size', '75');

    submitBtn = createButton('submit');
    submitBtn.mousePressed(getSentiment);

    sentimentResult = createP('sentiment score:');


    addshow = createP();

    labelBox = createInput();
    labelBox.attribute('size', '15');
    labelBox.parent(addshow);

    buttonAddLabel = createButton('add label');
    buttonAddLabel.mousePressed(addExample);
    buttonAddLabel.parent(addshow);

    buttonShowLabel = createButton('show label');
    buttonShowLabel.mousePressed(classify);
    buttonShowLabel.parent(addshow);
    buttonShowLabel.hide();

    predictResult = createP('addExample count:');
    predictResult.parent(addshow);


    saveload = createP();

    buttonSetData = createButton('Save Dataset');
    buttonSetData.mousePressed(saveMyKNN);
    buttonSetData.parent(saveload);

    buttonGetData = createButton('Load Dataset');
    buttonGetData.mousePressed(loadMyKNN);
    buttonGetData.parent(saveload);
}


function modelReady() {
    // model is ready
    statusEl.html('model loaded!');
}


let text;
let prediction;
function getSentiment() {
    // get the values from the input
    text = inputBox.value();

    // make the prediction
    prediction = sentiment.predict(text);
    statusEl.html('get new sentiment score!');

    // display sentiment result on html page
    sentimentResult.html('sentiment score: ' + prediction.score);
}


const knnClassifier = ml5.KNNClassifier();

let count = 0;
function addExample() {
    const inputLabel = labelBox.value();

    if (inputLabel) {
        knnClassifier.addExample(getTensor(), inputLabel);

        predictResult.html('addExample count: ' + ++count);
        prediction = null;
        statusEl.html('addExample OK');

        labelBox.value('');
    }
}
function getTensor() {
    if (!prediction) {
        getSentiment();
    }

    const _text = text.padEnd(256).substr(0, 256);

    return _text.split('').map(p => [prediction.score, p.charCodeAt(0) / 100]);
}

function classify() {
    // Get the total number of labels from knnClassifier
    if (knnClassifier.getNumLabels() == 0) {
        statusEl.html('no example in any label.');
        return;
    }

    // Use knnClassifier to classify which label do these features belong to
    knnClassifier.classify(getTensor(), gotResults);
}
function gotResults(err, result) {
    if (err) {
        console.log(err);
    }
    console.log(result);

    if (result.confidencesByLabel) {
        predictResult.html(JSON.stringify(result.confidencesByLabel));
        prediction = null;
        statusEl.html('classify OK');
    }
}


// Save dataset as myKNNDataset.json
function saveMyKNN() {
    knnClassifier.save('myKNNDataset');
}

// Load dataset to the classifier
function loadMyKNN() {
    knnClassifier.load('./myKNNDataset.json', updateCounts);
}
function updateCounts() {
    predictResult.html('labels number: ' + knnClassifier.getNumLabels());
    console.log(knnClassifier.getCount());
    console.log(knnClassifier.getCountByLabel());
    labelBox.hide();
    buttonAddLabel.hide();
    buttonShowLabel.show();
}
備料完成後,就可啟動 Live Server,
在 VS Code 裡的 sentiment.html 程式碼按右鍵,在顯示的內容選單裡,點選 Open with Live Server,
就可顯示如下畫面。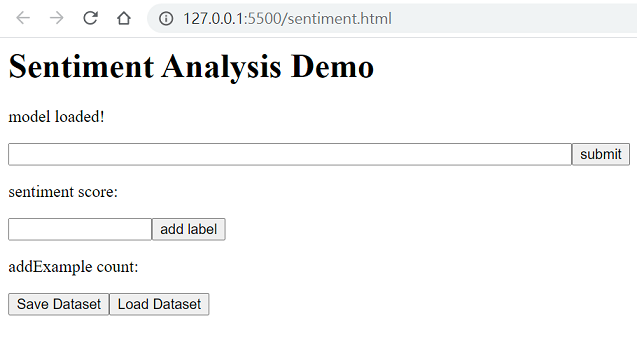
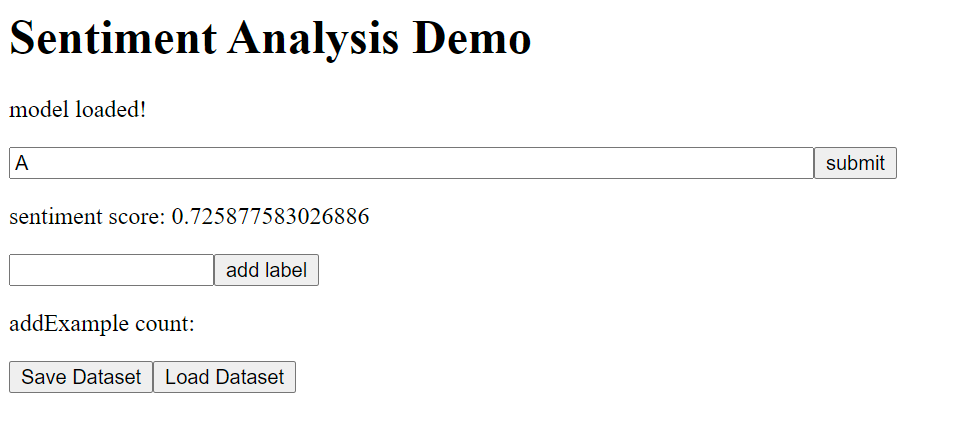

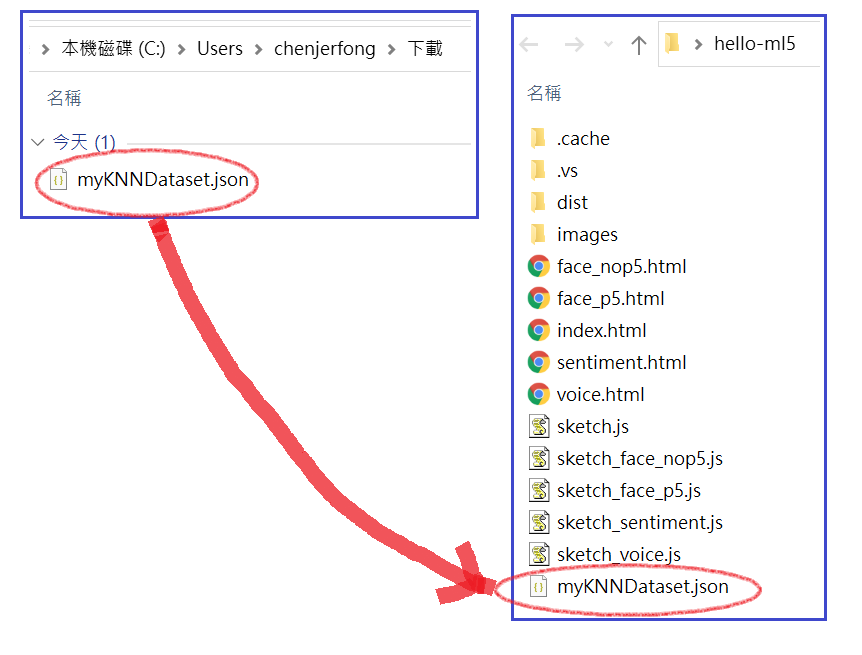
備料完成後,就可重新載入此網頁,按下 Load Dataset 按鈕,畫面就會如下所示。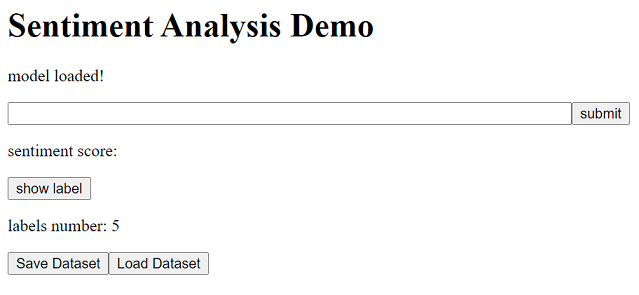
在輸入框內輸入 love,記得先按下右邊的 submit 按鈕,再按下 show label 按鈕,結果如下圖所示。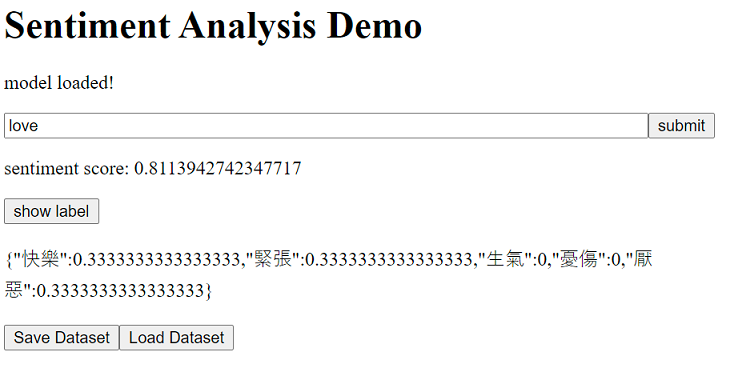
所以,已被紀錄之別人的情緒,對 love 這個字而言,會介於我所分類的【快樂、緊張、厭惡】這些標籤之間。
此外,如果覺得哪個分類很奇怪,可以將 sketch_sentiment.js 裡的程式碼,
    labelBox.hide();
    buttonAddLabel.hide();
註解掉,重新載入網頁,並重新載入 myKNNDataset.json 之後,就可以對某個已取得情緒分數之有問題的文字,加入自己所認知的標籤,
對相同的文字加入相同的標籤越多次,則此標籤對此文字的權重越高,這是 KNN 的特性,權重變更之後,就可以再按下 show label 按鈕,確認結果是否正確,
確認後,按下 Save Dataset 按鈕,下載新的 myKNNDataset.json 取代放在 hello-ml5 裡舊的 myKNNDataset.json,這樣重新載入 sentiment.html 時才可以使用新的權重。
https://www.youtube.com/watch?v=KTNqXwkLuM4
https://www.youtube.com/watch?v=Mwo5_bUVhlA
https://www.youtube.com/watch?v=JWsKay58Z2g
