What should you do if the partition on your external hard disk, SD card or USB flash drive turns into RAW? Once a partition turns to RAW, all files in the partition will be inaccessible. In this article, you can find out how to recover RAW partition and how to convert RAW to NTFS file system without losing data. DiskGenius provides effective methods to help you safely recover files from RAW partition as well as change RAW partition to NTFS/FAT32/exFAT/Ext2/Ext3/Ext4 file system easily and quickly
"Hey guys! Do you know any free RAW to NTFS converter that can change RAW partition to NTFS without data loss? My external hard drive is displaying as RAW drive in Disk Management and cannot be opened! I started to get this problem after the external hard drive was not properly disconnected. Windows keeps asking to format the drive before I can use it. I don't want to do that. So I submit question here and need your help to change RAW partition to normal as before."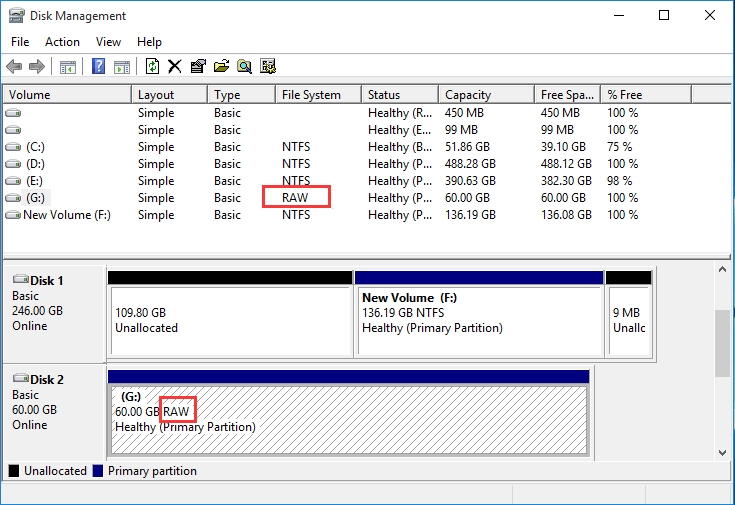
NTFS, FAT12, FAT16, FAT32 and exFAT are frequently used file system types under Windows, and storage device with any of these file systems can be recognized and accessed by system. RAW drive can be caused by many factors such as corrupted file system, damaged partition table, virus, bad sectors, etc. If file system gets damaged, the partition might be shown as RAW file system and it cannot be opened by system. You are likely to get following error messages when attempting to open a RAW partition:
Many of us may encounter such issue, and there is no need to be panic. It is easy to fix this error via two phases: recover RAW partition and then convert RAW to NTFS. Let's take a look at how to make the conversion happen without losing data.
To avoid further data damage, you should recover files from RAW partition from your external hard drive, SD card, USB flash drive, etc. before trying any methods to change RAW to NTFS. What's more, do not format RAW partition even though Windows suggests formatting before you can use it. Recovering RAW partition needs a professional data recovery program which can get a satisfied recovery
DiskGenius is recommended here to perform RAW drive recovery. With this software, you can quickly retrieve lost files and folders with original names and directories from RAW, corrupted or unformatted partitions on internal hard drive, external hard drive, memory card, virtual disk, USB flash drive, pen stick, thumb drive and more. Furthermore, with DiskGenius you can also recover deleted files, recover formatted partition, restore lost/deleted partition, recover deleted photos, recover corrupted hard drive, etc.
Connect the RAW drive to computer and you can follow the step-by-step guide below to perform RAW partition recovery .
Step 1: Free download and install DiskGenius on your computer.
If this is the first time you work with DiskGenius, you can start with the free trial version which can be free downloaded by clicking the DOWNLOAD button from its official site; then double click the downloaded program and follow the onscreen installer to install DiskGenius.
Step 2: Launch DiskGenius after installation and check the RAW drive in the software to see if files can be displayed directly.
In some cases, files and folders in the RAW drive will be listed once DiskGenius is launched. DiskGenius examines all connected disks and partition during launching and its powerful fault-tolerant capability takes effect to corrupted drive so that files can be displayed in the software without any scanning as long as the drive is not damaged to a very bad extent.
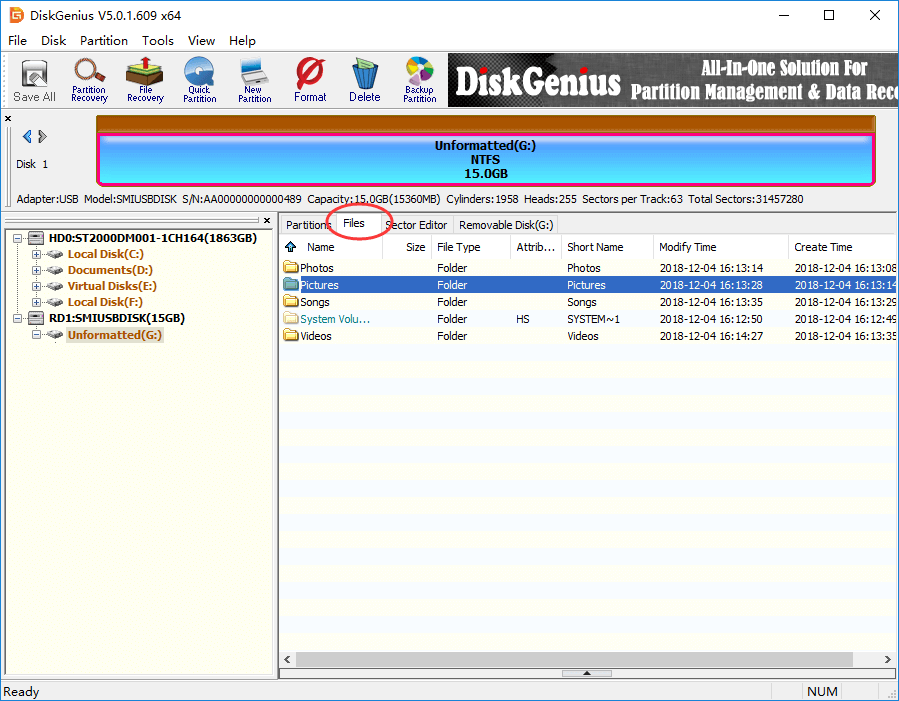
Besides, Load Current Partition Intelligently is another function you can try to recover RAW drive. This function works on corrupted NTFS drives and it aims to load lost files with original names from RAW drive quickly. If this function cannot load your data, them move to next step.
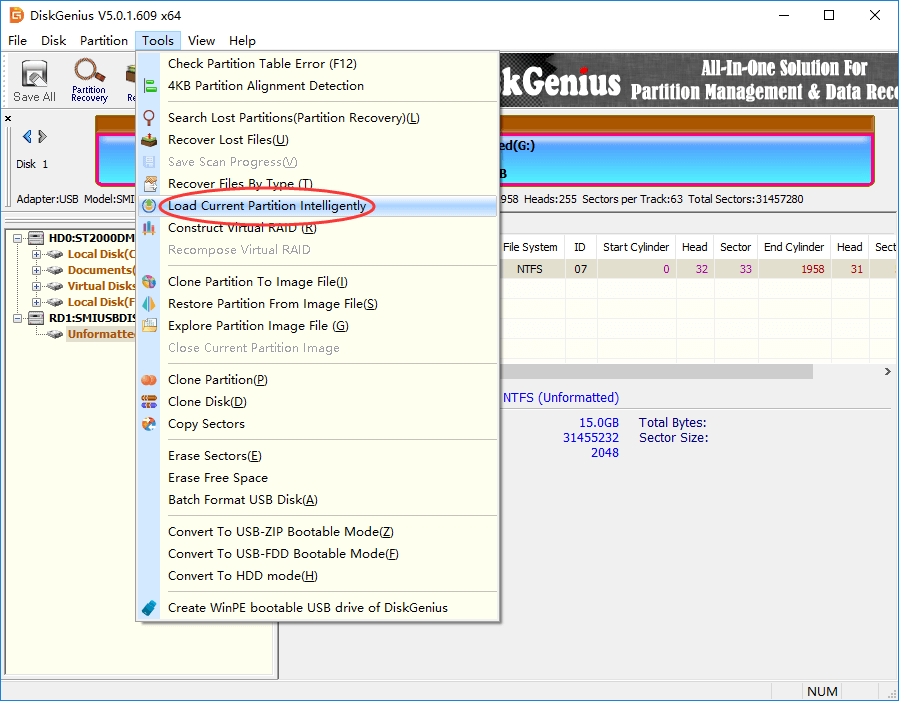
Step 3: Scan the RAW drive to recover lost files..
Select the RAW drive in DiskGenius and click File Recovery button from toolbar area. This opens the Recover Files window, as below.
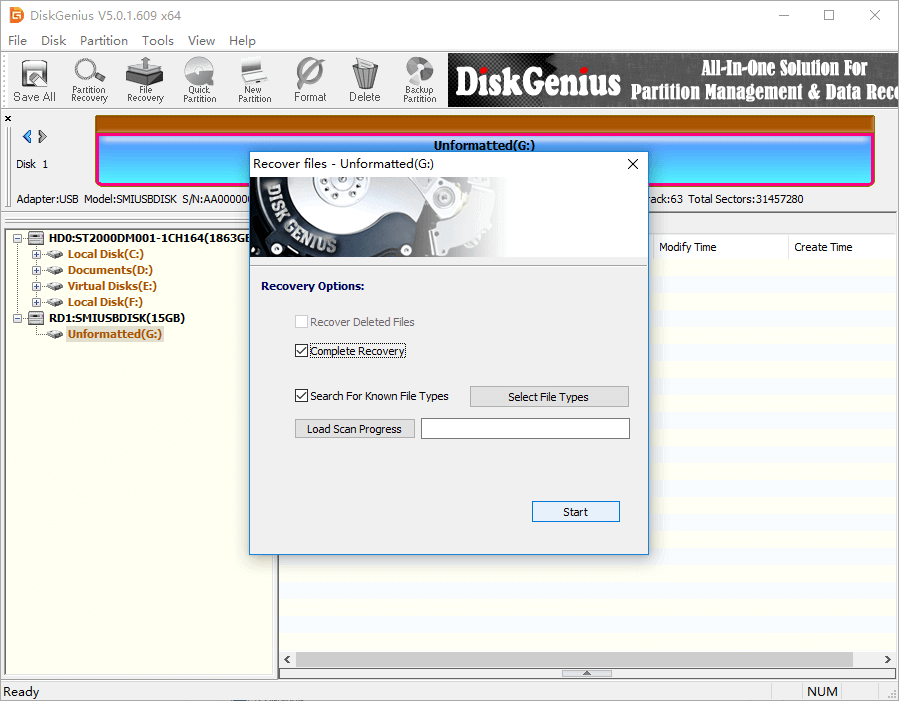
This recovery software supports to search for files by file names and file types and it allows to specify file types by clicking Select File Types. The pop-up window shows file types you can select, including documents, photos, music, video, graphic files, etc. If the file type you need is not listed here, you can also recover files via file names and paths, which does not have limit on file types.
Click Start button to start the scanning. Scanning speed mainly depends on the disk speed, and generally the deep scanning of 1TB drive needs around 4 hours. Whereas, most times scanning won't have to complete, for you can pause or stop it as long as needed files are found.
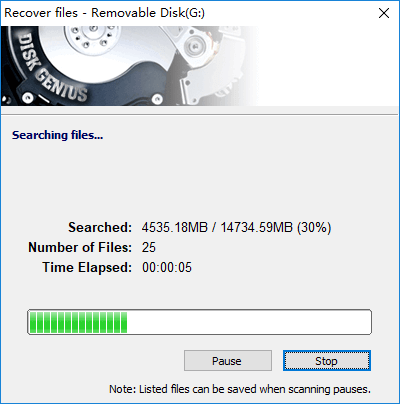
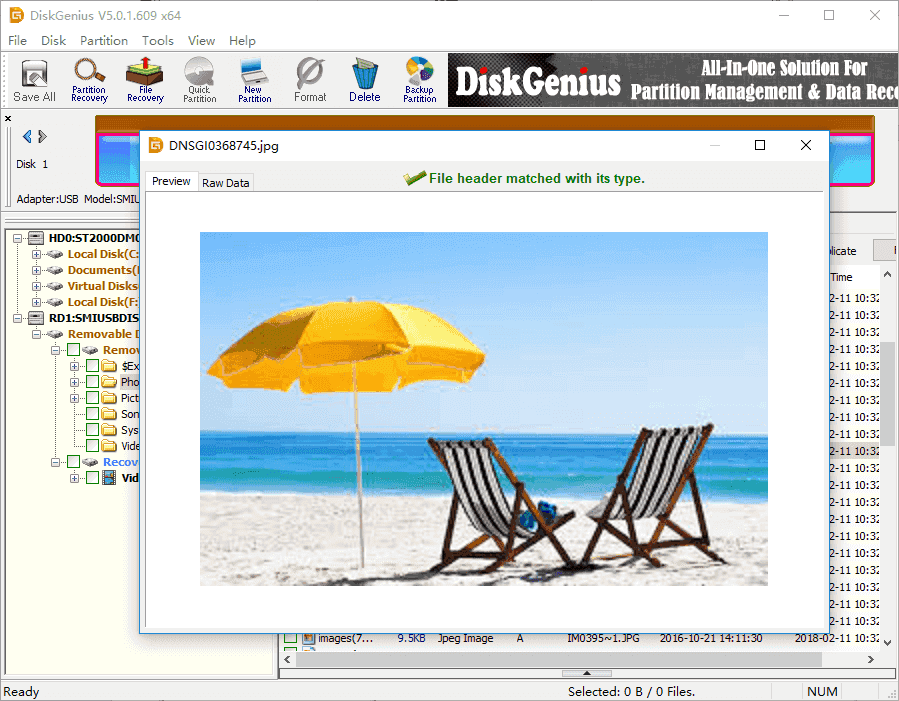
Step 4: Preview recoverable files and check recovery quality.
File preview allows users to view original content from a pop-up window, which helps to make sure if lost files are corrupted or damaged. Moreover, you can filter found files by type, name, time, size, etc. so as to quickly locate needed data.
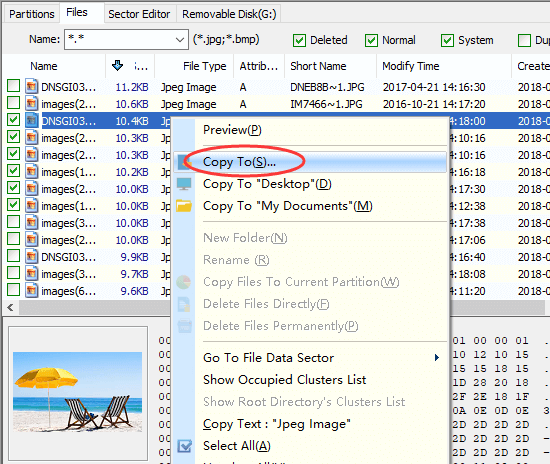
Step 5: Copy files to a different drive.
The data recovery process is read-only and the software does not write data to the drive being scanned, thus you need to copy and save found files to a different drive to complete the recovery.
Since RAW drive is the result of partition corruption, there is possibility that the partition can be repaired, which means files can be recovered to the drive without copying to a different drive. However, not all RAW drive can be recovered in this way and such recovery method requires a very skilled technician who can recover data by way of analyzing hexadecimal data. If you are skilled in this, you can make use of the Sector Editor built-in DiskGenius to repair RAW drive and recover data in-place.
We can provide such data recovery service if you need. How does the data recovery service works? The principle is No Data, No Charge. When you need further help for complicated data loss issues such as RAW drive, partition loss, RAID recovery, repartition disk, etc., you can contact DiskGenius data recovery experts who will give a free diagnosis first and then come up with recovery solutions.
After all files in the RAW drive get backed up or recovered safely, you can try converting it to NTFS or other file system. In this part, you can find 3 methods to do the conversion: format RAW drive to NTFS with DiskGenius Free edition, change RAW to NTFSin Disk Management and convert RAW to NTFS file system with cmd.
Step 1: Start DiskGenius Free edition again, and you can see the inaccessible drive. Right-click on it and choose Format Current Partition option.
Step 2: Select file system and click Format button.
DiskGenius supports to format partition into NTFS, FAT32, exFAT, EXT2, EXT3 and EXT4 file systems, and you can select one from the dropdown list according to your requirements.
Step 3: Click Yes button to initial the formatting process.
Formatting process removes all files in the partition and you should make sure important files have been backed up or recovered before clicking Yes button.
Disk Management is a Windows built-in function which can help users to manage disks and partition, such as create partition, format partition, shrink partition, extend partition, initialize disk and so on. It provides an easy way to format RAW drive to NTFS file system.
Step 1: In Windows 10, right-click Start menu and choose Disk Management to open system Disk Management.
If you are using other Windows versions, you can open it in this way: right-click on This PC / My Computer icon from desktop > select Manage option > click Disk Management under Storage on the left pane.
Step 2: Find and right-click the RAW partition to choose Format option.
Step 3: Choose NTFS from file system dropdown list and click Start button.
In some situations, you cannot format RAW partition in Disk Management and get error message "The format did not complete successfully" or "Windows was unable to complete the format"; If you run chkdsk you may get "The type of the file system is RAW. CHKDSK is not available for RAW drives" error. When encountered with these errors, you can try convert RAW to NTFS with cmd.
Step 1: Launch Command Prompt.
Input cmd in search box and you can find Command Prompt in searching result, then run it as administrator.
Click Yes when User Account Control ask if you want to allow this app to make changes to your device.
Step 2: Type diskpart and hit Enter button.
Step 3: Type following commands and press Enter after each command.
list disk
select disk # (replace # with the disk number of your RAW drive)
clean create partition primary
format fs=ntfs quick (type format fs=fat32 quick if you want to format RAW drive to FAT32 file system)
After going through this article, you should be able to convert RAW partition to NTFS file system without losing data for your external HDD, SD card, USB flash drive and so on. The process is divided into two phases: recover files from RAW partition and convert with DiskGenius / Disk Management / diskpart commands. In the end, we strongly recommend you to create backups for important files so that you can avoid many data loss issue such as RAW drive, deletion, formatting, etc. Should you have any suggestions, questions or doubts regarding this topic, please feel free to email us.
