
將三天的工給做最後整理
花了幾天在講自訂動作與頁面這個東西,也該有個結束了!
我們現在將DemoUse.Installer的專案加入昨天的DemoUse.CustomAction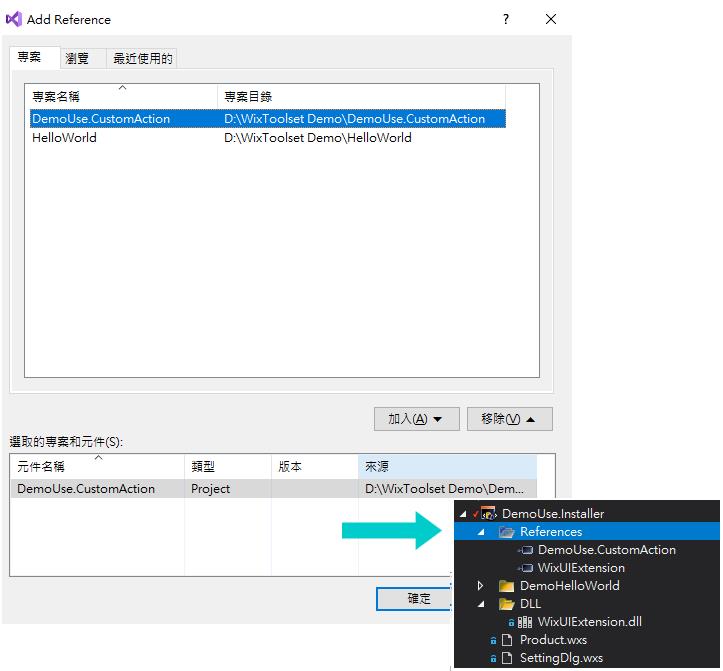
然後引用的部分要使用 DemoUse.CustomAction.CA.dll的dll檔,
程式碼如下
<Binary Id='SettingCADLL' SourceFile='$(var.DemoUse.CustomAction.TargetDir)/DemoUse.CustomAction.CA.dll' />
<CustomAction Id="SetURL" BinaryKey="SettingCADLL" DllEntry="SetCustomAction" Execute="immediate" Return="check" />
<InstallExecuteSequence>
  <Custom Action="SetURL" After="InstallFinalize" Overridable="yes">NOT Installed</Custom>
</InstallExecuteSequence>
Binary : DemoUse.CustomAction引用CA.dll 專用檔
CustomAction : BinaryKey-上面的Id ,
DllEntry : 要進入的Action
InstallExecuteSequence : 安裝完成後的動作順序,
可以參考InstallExecuteSequence 的執行順序,
https://docs.microsoft.com/zh-tw/windows/win32/msi/suggested-installexecutesequence
我們寫After = "InstallFinalize",
也可以用數字順序表達6601。
<InstallExecuteSequence>
  <Custom Action="SetURL" Sequence="6601" Overridable="yes">NOT Installed</Custom>
</InstallExecuteSequence>
而假設有兩個自訂動作以上,我們額外一個customaction Id 為 xxx,程式表達
<Binary Id='SettingCADLL' SourceFile='$(var.DemoUse.CustomAction.TargetDir)/DemoUse.CustomAction.CA.dll' />
<CustomAction Id="SetURL" BinaryKey="SettingCADLL" DllEntry="SetCustomAction" Execute="immediate" Return="check" />
<CustomAction Id="xxx" BinaryKey="SettingCADLL" DllEntry="SetCustomAction" Execute="immediate" Return="check" />
<InstallExecuteSequence>
   <Custom Action="SetURL" After="InstallFinalize" Overridable="yes">NOT Installed</Custom>
   <Custom Action="xxx" After="SetURL" Overridable="yes">NOT Installed</Custom>
</InstallExecuteSequence>
使用上 after 跟 squence 是同樣的,
但squence 數字如果重複則在建置時會出錯誤,
after 會自動推算。
建置安裝時如果有問題了話,
可以試試看加入資料夾權限
<Component Id="cmpB59C44B238E764B86C6DFC0A8045E3FA" Guid='BDAA4089-F7C0-42E8-928E-B81901938FCD' >
    <CreateFolder Directory="INSTALLFOLDER">
    <Permission User="SYSTEM" GenericAll="yes"/>
    <Permission User="EveryOne" GenericAll="yes"  GenericRead="yes" Read="yes" ReadAttributes="yes"  GenericExecute="yes" TakeOwnership ="yes"  GenericWrite ="yes"    WriteAttributes="yes" ReadPermission ="yes"   ChangePermission="yes" />
    <Permission User="Users" Domain="[LOCAL_MACHINE_NAME]"  GenericRead="yes" Read="yes" ReadAttributes="yes"  GenericExecute="yes" TakeOwnership ="yes"  GenericWrite ="yes"    WriteAttributes="yes" ReadPermission ="yes"   ChangePermission="yes"/>
     </CreateFolder>
</Component>
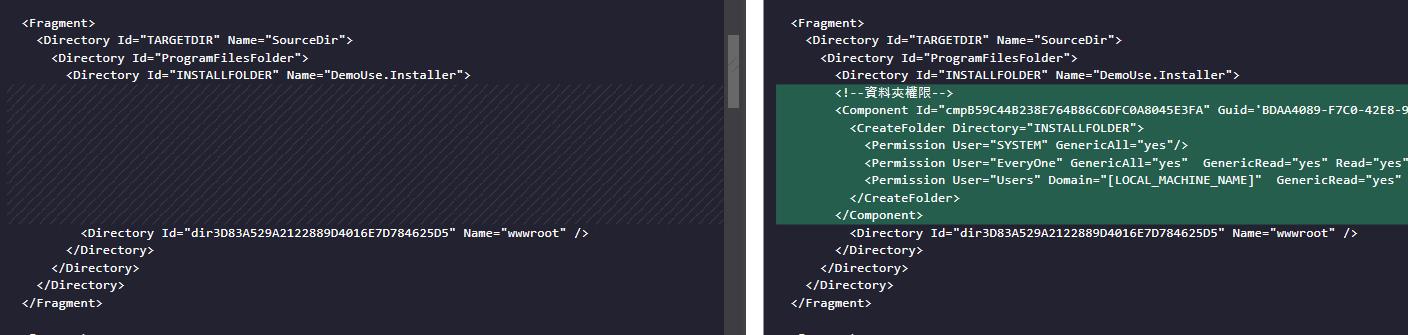
上面註冊Component
最後安裝完後,去資料夾看 appsettings.json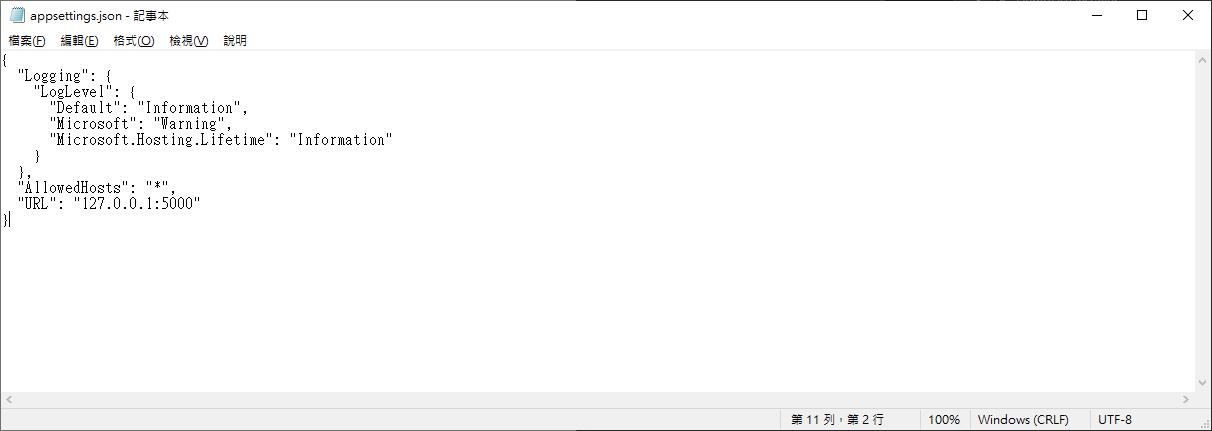

我在指定動作的部分,
After = "InstallFinalize",
這個我每一個都去嘗試過,
但只有安裝完成後再執行是可以成功的,其他都會有問題...
可能還要有其他設定之類der~沒多研究。
Day9程式碼
https://github.com/Aslan7826/defaultMVC/commits/Day09
