在開始介紹Spring Boot 以前,我們需要先建好作業系統,這裡選用了Windows 子系統Linux 版並採用XFCE 桌面環境。
Windows 子系統Linux 版可以讓開發人員執行GNU/Linux 環境,直接在Windows 上執行不需要進行修改,不會造成傳統虛擬機器或dualboot 設定的額外負荷。
但單靠WSL 來運行Linux 作業系統僅能夠安裝或執行Linux 相關的命令程式,若想要讓WSL 下的Ubuntu 系統的桌面視窗程式在Windows 桌面中執行則需要搭配Windows 版本的第三方開源X server 相容套件,目前常用的套件有VcXsrv 和Xming,本篇教學使用VcXsrc。
安裝步驟就依照Windows 安裝指南就可以了,因為我們不是Windows 測試人員,只要照著手動安裝的步驟進行安裝,這邊只列出步驟的視窗截圖或指令。
設定 > 應用程式 > 程式和功能 > 開啟或關閉Windows 功能 > Windows 子系統 Linux 版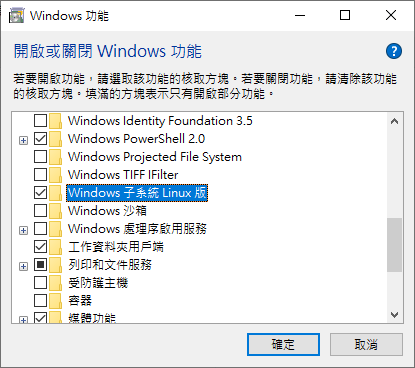
開啟Windows 子系統Linux 版功能後,以系統管理員身分開啟PowerShell 並執行
dism.exe /online /enable-feature /featurename:Microsoft-Windows-Subsystem-Linux /all /norestart
以系統管理員身分開啟PowerShell 並執行
dism.exe /online /enable-feature /featurename:VirtualMachinePlatform /all /norestart
開啟PowerShell 並執行
wsl --set-default-version 2
開啟Microsoft Store,然後選擇您最愛的 Linux 發行版本,這邊選擇版本為Ubuntu 20.04 LTS。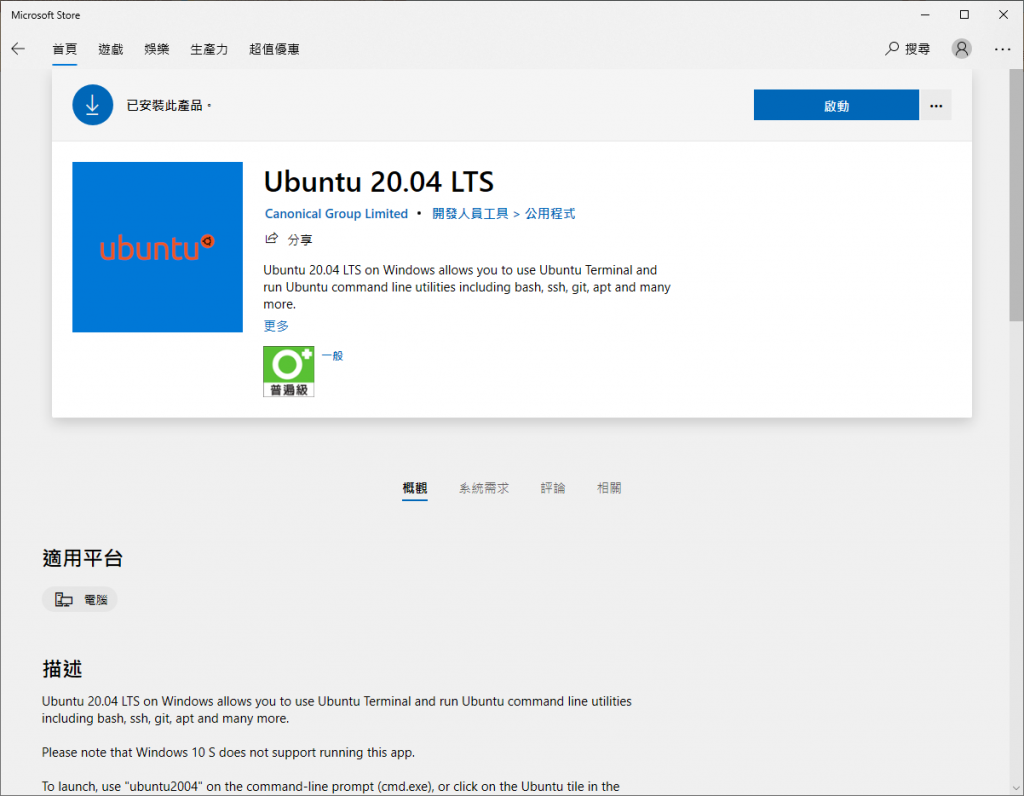
安裝完成後啟動Ubuntu 20.04 LTS,第一次啟動系統會將檔案解壓縮並儲存在電腦上,執行期間也會要求設定Linux 的使用者名稱和密碼。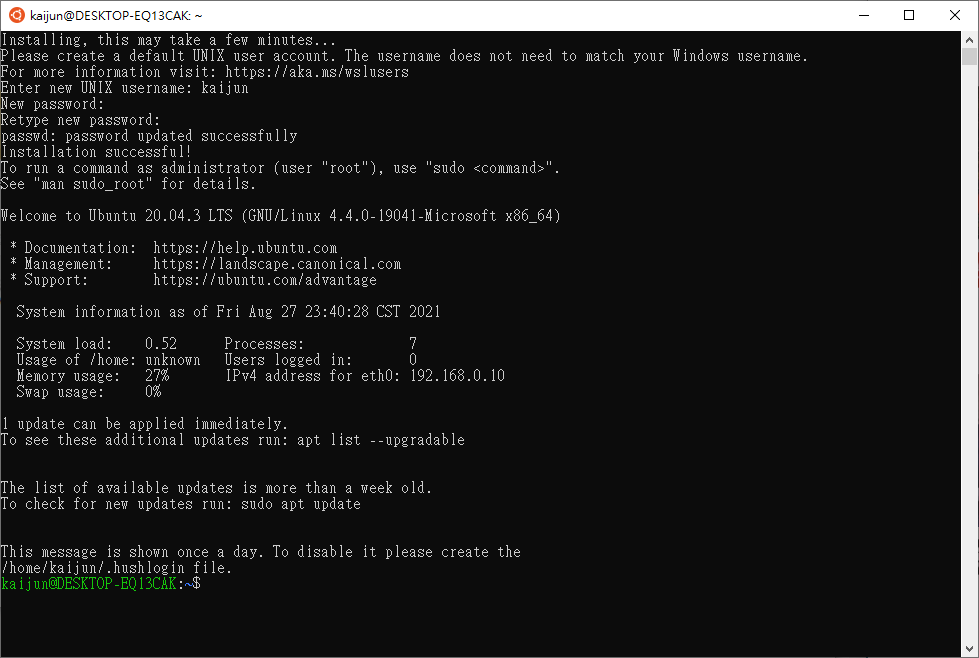
這邊依照個人習慣,可以選擇 Windows Terminal。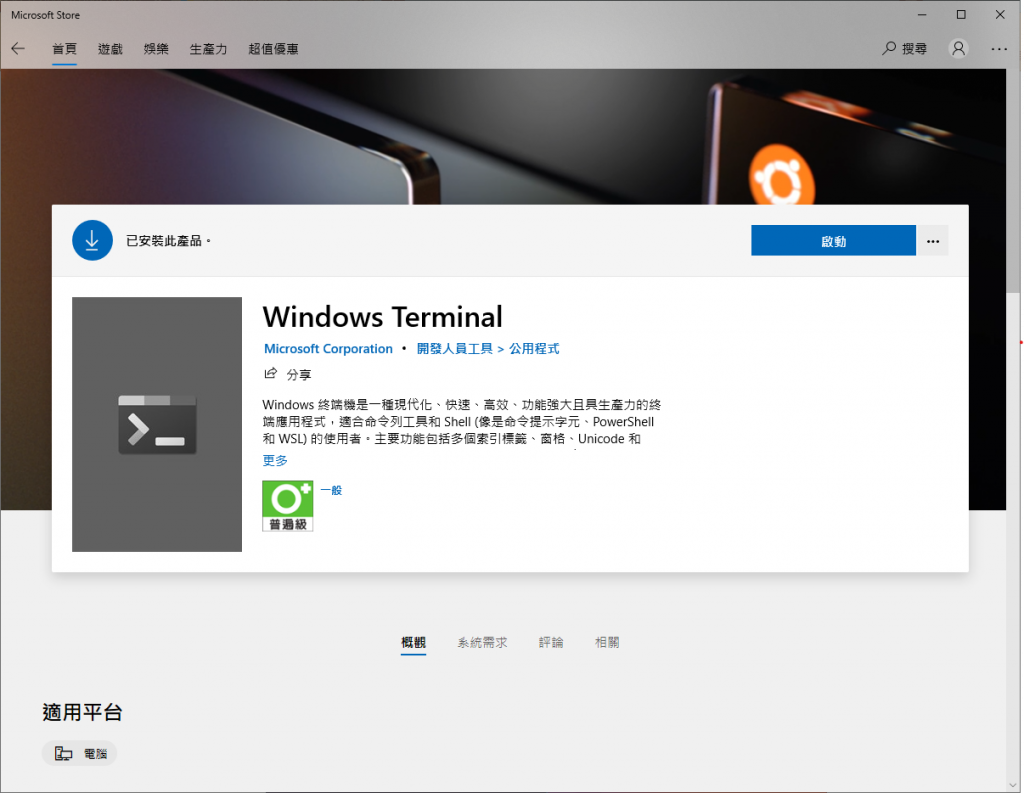
Ubuntu Linux 的GUI 介面就選用XFCE,安裝步驟也按照國外Youtuber SavvyNik 的教學安裝,XFCE 安裝步驟從7:39 開始,這邊就列出影片中的步驟、截圖以及相關連結。
下載並安裝最新VcXsrv Windows X Server。
於Ubuntu 中安裝xfce4 圖形介面環境,選擇xfce4 的原因就在於它設計輕巧、快速並且在運行後不會占用太多系統資源,非常適合與Windows 桌面環境融合使用。
sudo apt update
sudo apt upgrade
sudo apt install xfce4
安裝xfce4 時會詢問顯示管理器,這邊選擇gdm3。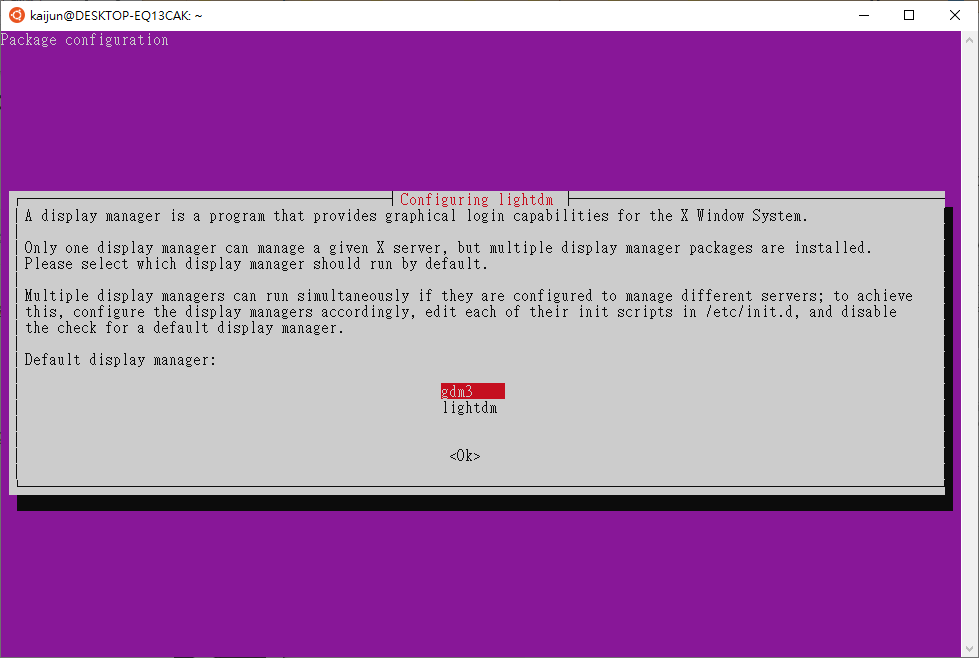
於.bashrc 檔案中新增設定DISPLAY 環境變數為:0.0。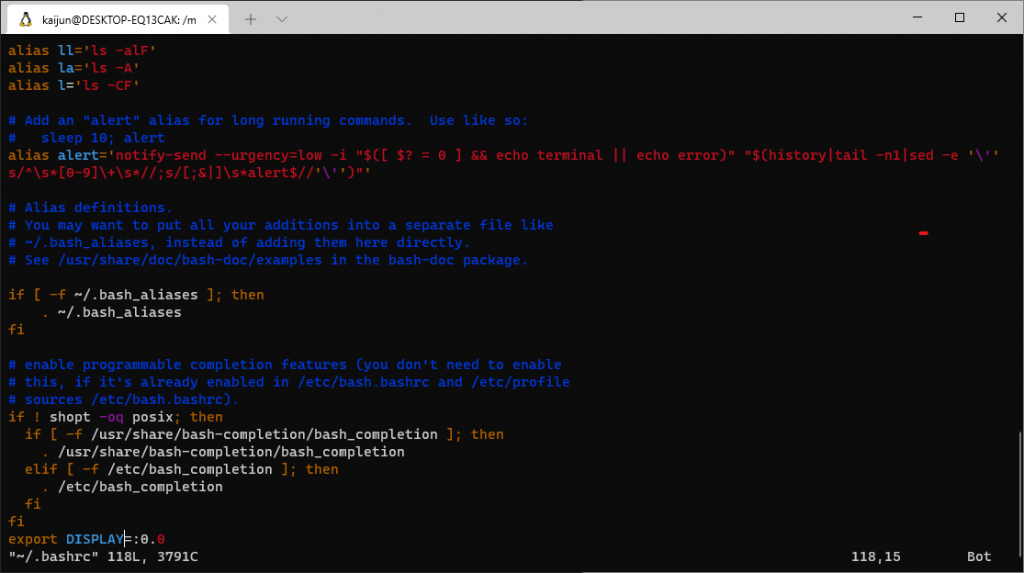
上述設定完成後執行XLaunch,均照預設值點擊下一步,記得在第三步驟輸入-ac。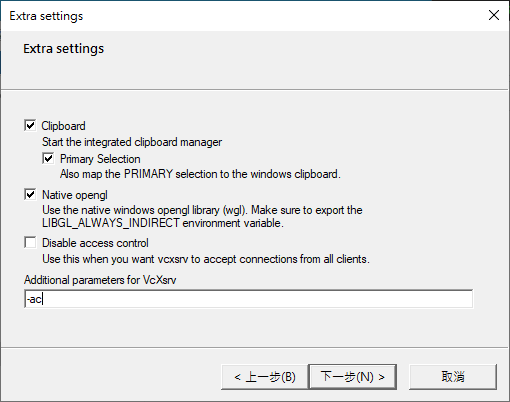
最後,於Ubuntu Terminal 執行startxfce4 即可開啟Ubuntu Linux GUI 介面。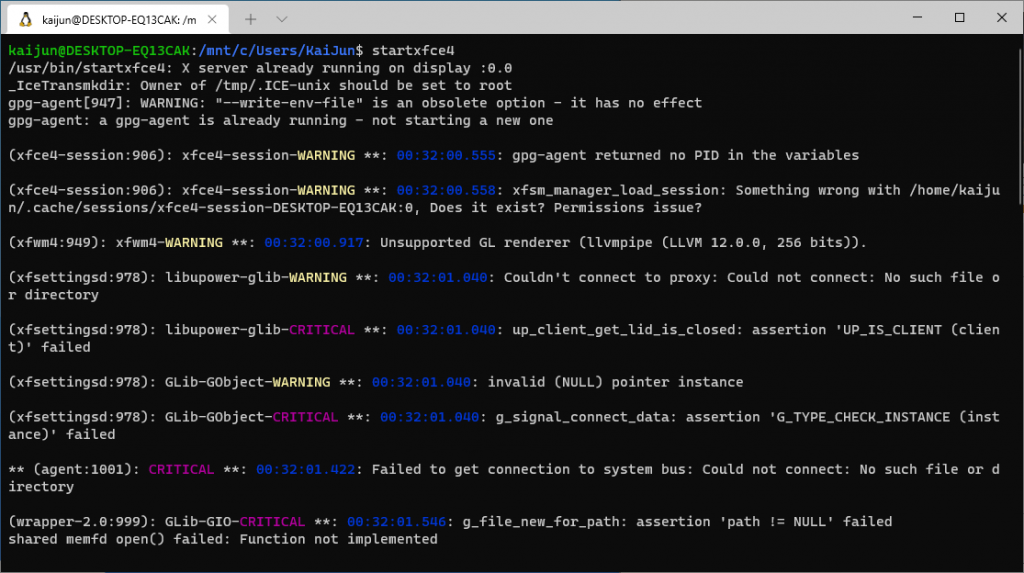
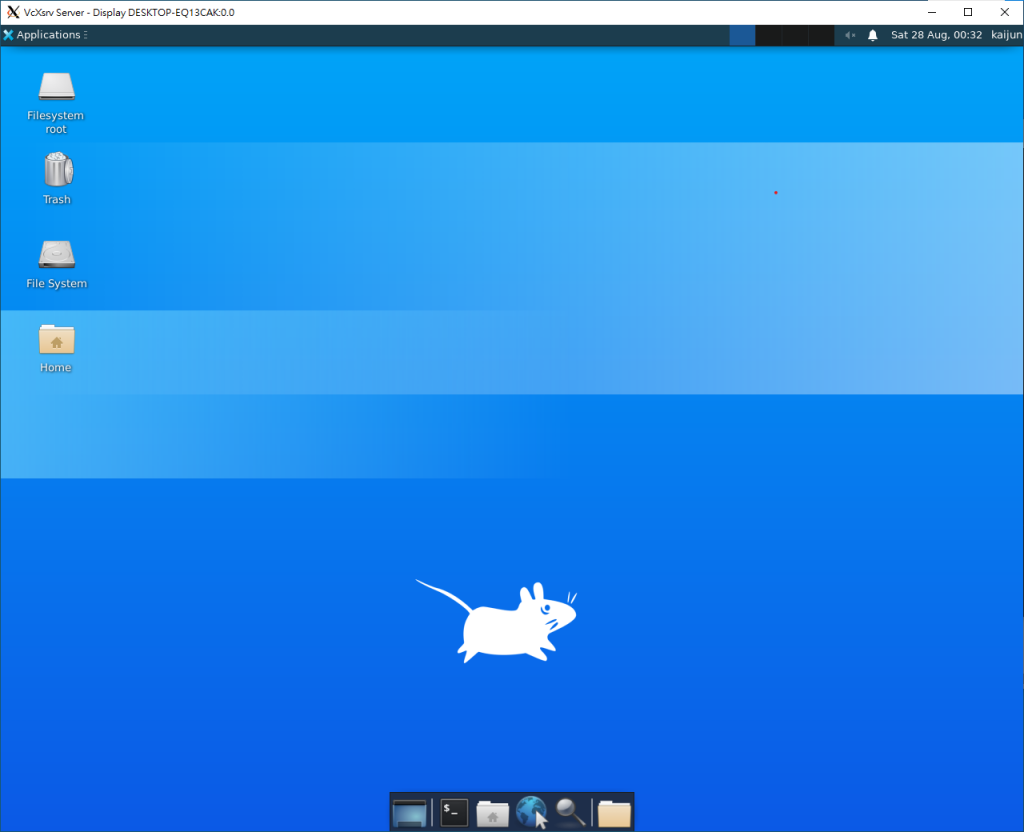

$ startxfce4
/usr/bin/startxfce4: X server already running on display 0:0
xrdb: Connection refused
xrdb: Can't open display '0:0'
dbus-update-activation-environment: error: unable to connect to D-Bus: Failed to connect to socket /run/user/1000/bus: No such file or directory
Segmentation fault
startxfce4
/usr/bin/startxfce4: X server already running on display 10.255.255.254:0
xrdb: Connection refused
xrdb: Can't open display '10.255.255.254:0'
gpg-agent: a gpg-agent is already running - not starting a new one
(xfwm4:1355): Gtk-WARNING **: 11:11:43.604: cannot open display: wayland-0
** (xiccd:1396): CRITICAL **: 11:11:43.955: Can't open display: wayland-0
Failure: Module initialization failed
(polkit-gnome-authentication-agent-1:1426): polkit-gnome-1-WARNING **: 11:11:44.130: Unable to determine the session we are in: No session for pid 1426