身為一介Rails工程師,我們必須懂一些Rails特化的寫法,可以讓我們寫code 更方便、優雅。
link_to 為Rails工程師必須會的helper之一,它的功用為製造超連結,並且搭配btn btn-primary等等的bootstrap class,就會像是按鈕一般,以下為按下按下重新動作的按鈕。
link_to '重新動作', update_invoice_status_manually_admin_return_order_path(return_order),
                   class: 'ml-4 btn btn-primary btn-sm', method: :post, style: 'height: 32px',
                   data: { confirm: "請注意!點擊「確定」後狀態將切換,無法復原!" }
該按鈕的身份為連結,按下去會觸發/admin/return_orders/102/update_invoice_status_manually,並且方法為post的路徑。
<a class="ml-4 btn btn-primary btn-sm" style="height: 32px" data-confirm="請注意!點擊「確定」後狀態將切換,無法復原!" rel="nofollow" data-method="post" href="/admin/return_orders/102/update_invoice_status_manually">
  重新折讓
</a>
當我們使用data-confirm,Rails 就會自動生成 確定/取消 的 Javascript 對話窗。
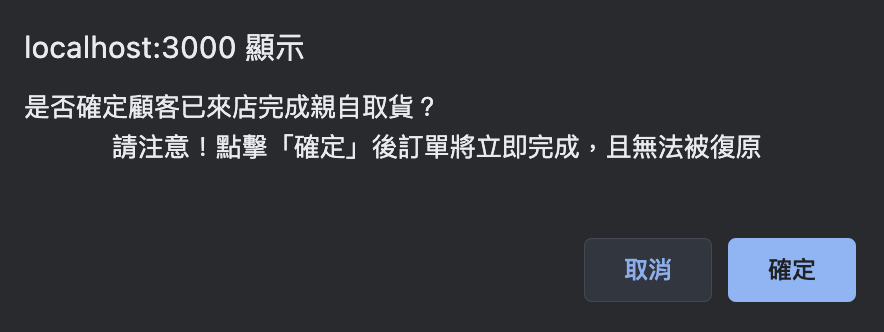
= link_to '顧客親取', "#", class: 'ml-4 btn btn-primary btn-sm', method: :post,
          data: { confirm: "是否確定顧客親自取貨\n..." }
當我們按下取消,就會自動不執行動作。這塊在Rails 就已經幫我們做好,毋需寫額外的程式碼處理
這也是Rails 附贈的方法。當我們將按鈕按下送出之後,在打到後端的等待時間,就會被轉為載入中。
button_tag "出貨", type: 'submit', class: 'btn btn-primary',
            data: { confirm: "是否確定要送出編輯?\n請注意!送出後無法復原!", disable_with: "載入中..." })

有了 data-remote=true 屬性,表單會透過 Ajax 提交,而不是瀏覽器平常的提交機制。這是在 Rails 附帶的一個對於打Ajax極為方便的工具。日後再介紹Stimulus的篇章會再提及
以下為checkbox與 label 組合再一起的寫法
<%= label_tag do %>
  <%= check_box_tag 'category[]', '1', false %>
  Community
<% end %>
= f.input :custom_field, :label => false do
  = check_box_tag :some_name
= label_tag nil, class: 'mb-0' do
  = check_box_tag 'return_order[:return_failed]', 'yes', false, class: 'mx-1'
  = tag.strong '全數不同意退貨', style: 'font-size: 14px;'
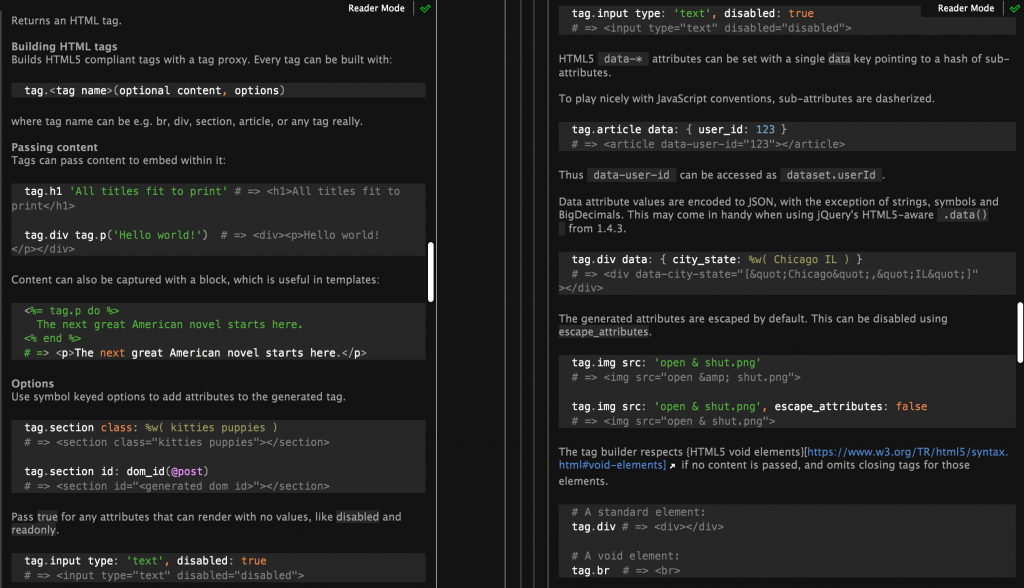
tag 是一個非常實用的 helper
# 用法
tag.<tag name>(optional content, options)
下列為底層的code
def tag(name = nil, options = nil, open = false, escape = true)
  if name.nil?
    tag_builder
  else
    "<#{name}#{tag_builder.tag_options(options, escape) if options}#{open ? ">" : " />"}".html_safe
  end
end
以下為 tag 的用法對應上方底層程式碼的if判斷是內的用法 ➡️ tag_builder
底層使用的else用法為Rails的舊寫法,會被未來的Rails版本所棄用deprecated
⭐️ tag helper可以用來寫table
table.table.table-hover.table-striped.table-sm
  thead.thead
    tr
      th(colspan="7" class="table-active" style="font-size:16px") 訂單列表
    tr
      th.col-2 訂單編號
      th.col-2 訂單品牌
      th.col-1 訂單狀態
      th.col-1 物流狀態
      th.col-1 商品數量
      th.col-2 出貨店櫃
      th.col-3
  = tag.tbody do
    - order.sub_orders.each do |sub_order|
      = tag.tr do
        = tag.td do
          = link_to sub_order.number, admin_sub_order_path(sub_order)
        = tag.td sub_order.brand.title
        = tag.td process_i18n(t("sub_orders.status.#{sub_order.status}"))
        = tag.td process_i18n(t("sub_orders.shipping_status.#{sub_order.shipping_status}"))
        = tag.td sub_order.order_items.count
        = tag.td [sub_order.brand.title, sub_order.store.title_zh].compact.join('-')
        = tag.td do
          - if related_brands(sub_order)
            - if sub_order.return_order
              = link_to '退貨明細', admin_return_order_path(sub_order.return_order),
                        class: 'btn btn-primary btn-sm mr-2', target: '_blank'
            = link_to '子訂單明細', admin_sub_order_path(sub_order),
                      class: 'btn btn-primary btn-sm', target: '_blank'
⭐️ 基本排版的時候也會用到tag helper
.container-xxl
  .row
    .col-12.col-lg-6
      = card do
        = card_header(title: "訂單狀態")
        = card_body do
          = grid_div do
            = tag.strong '訂單狀態'
            = tag.div process_i18n(t("orders.status.#{order.status}"))
            = tag.strong '訂單編號'
            = tag.div order.number
            = tag.strong '購買日期'
            = tag.div order.created_at.strftime('%F %T')
      = card do
        = card_header(title: "配送資訊")
        = card_body do
          = grid_div do
            = tag.strong '配送方式'
            = tag.div process_i18n t("orders.shipping_type.#{order.shipping_type}")
            = tag.strong '配送地址'
            = tag.div order.address_info
            = tag.strong '收件人姓名'
            = tag.div order.receiver_name
            = tag.strong '電話'
            = tag.div order.receiver_phone
tag.div可以搭配區塊使用
= grid_div do
  = tag.strong '訂單異動紀錄'
  = tag.div do
    = modified_log(order.versions, modified_order_genre, 'orders')
  = tag.strong '發票異動紀錄'
  = tag.div do
    = modified_log(order.invoice&.versions, modified_invoice_genre, 'invoices')
tag.div 可以搭配 data, style 使用。
= tag.div class: 'form_group', data: { 'admin--order_target': 'storeBlock' },
          style: "display: #{f.object.cvs? ? 'block' : 'none'};"
_tag,這種以tag作為後綴的helper也很好用,以下舉幾個例子帶讀者來認識
⭐️ button_tag 的用法即為按鈕,一共有reset, button, reset
button_tag '清除重填',
  type: 'reset', form: 'export-orders',
  class: 'btn btn-secondary btn-sm ml-2 mb-2',
  onchange: "handleChange(this)",
  data: { action: 'click->orders#reset', 'orders-target': 'resetBtn' }
⭐️ content_tag 的用法與上面所提到的 tag 用法相同。下列兩兩一組的意思一樣
# span
content_tag(:span, '新增')
tag.span '新增'

# strong
content_tag(:strong, '母訂單')
tag.strong '母訂單'

# div
content_tag(:div, class: 'modal-body') { yield if block_given? }
tag.div class: 'modal-body' { yield if block_given? }
⭐️ check_box_tag 為checkbox
label_tag nil, class: 'mb-0' do
  # check_box_tag <name 屬性>, <value>, [填滿/不填滿], class|data|style...
  check_box_tag('return_order[disapprove_all]', 'yes', false, class: 'mx-1',
     data: { action: "admin--return-order-apply-form#disapproveAll" }) +
  tag.strong('全數不同意退貨', style: 'font-size: 14px;')
end
<label class="mb-0">
  <input type="checkbox" name="return_failed" id="return_failed"
         value="yes" class="mx-1"
         data-action="admin--return-order-apply-form#disapproveAll">
  <strong style="font-size: 14px;">全數不同意退貨</strong>
</label>

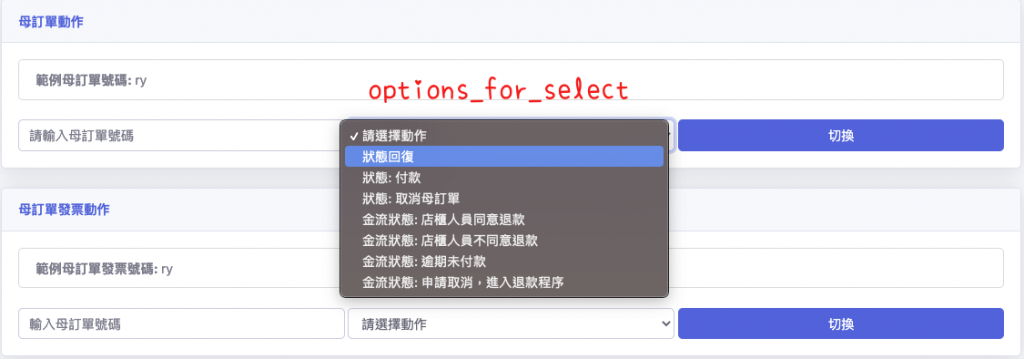
⭐️ select_tag 為下拉式選單
在我的專案裡面,當name 屬性空值,代表為為使用 Javascript 傳值用,因此不用name 屬性進行傳值
# select_tag(<name 屬性>, 選項, class|data|style...)
select_tag(nil, options_for_select(options, '請選擇動作'), class: 'form-control')
options_for_select 為自己包的方法
⭐️ file_field_tag 為上傳檔案的輸入框,若沒有特別調整樣式,預設長相如下。

⭐️ submit_tag 與 button_tag type: 'submit' 意思相同
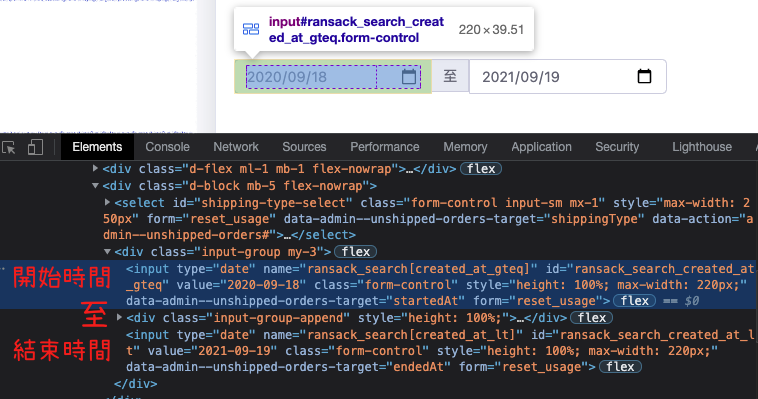
⭐️ date_field_tag
#===== 範例1
date_field_tag 'date', nil, class: 'special_input'
#=> <input class="special_input" id="date" name="date" type="date" />

#===== 範例2
date_field_tag(
  'ransack_search[created_at_gteq]', '2021-09-18',
   class: 'form-control', style: 'height: 100%; max-width: 220px;',
   disabled: options[:disabled] || false)
下列的開始時間至結束時間的樣式,可以參考前一天提到的input group,而date_field_tag 對應的表單內容 ➡️ <input type="date" name="..."></input>
我們在Rails填入的時間要是2021-09-18的形式,或者類別為Date。
Day7 提到了一些時間相關的用法,讀者們可以參考
# 可以用
Date.today - 1.year  # 開始時間 Fri, 18 Sep 2020
Date.today + 1.day   # 結束時間 Sun, 19 Sep 2021
(Date.today + 1.day).class  #=> Date

# 不能用
1.year.ago      # 去年
1.year.from_now # 明年
1.year.from_now.class #=> ActiveSupport::TimeWithZone

# 可以用
1.year.ago.strftime('%F') # 去年
Rails 的 helper 很多,以上為我常用的寫法。基本上上面的用法就已經很夠用了,所以也把我自己常用的基本helper跟大家分享,表單的部分會在 Day23, Day24 分享。
明天要介紹如何自定義 helper


 iThome鐵人賽