今天來實作身分驗證的部分,筆者此前是用 ASP.NET Core Web API 搭配 Blazor,使用者第一次成功登入時,在後端將 Role、Claim 等權限儲存在 JWT,將 JWT 存在瀏覽器的 LocalStorage 裡面,前端再自己覆寫 AuthenticationStateProvider,去檢查 LocalStorage 的 JWT,接著將 AuthenticationState 當作 CascadingParameter 層層傳遞到各 Component,這樣就不需要不停跟後端交換資料,這是個很寶貴的經驗,讓筆者對身分驗證有深入了解,這次筆者試試看 ASP.NET Core 自己的 Identity。
首先去 NeGet 下載 3 個套件,分別為Microsoft.AspNetCore.Identity.EntityFrameworkCore、Microsoft.AspNetCore.Identity.UI、Microsoft.VisualStudio.Web.CodeGeneration.Design,第 1 個是 Identity 必備套件,如果想自己實作 JWT 的話,只需要下載第一個套件,再下載 JWT 相關套件(Microsoft.AspNetCore.Authentication.JwtBearer)即可,後面 2 個都是讓 ASP.NET Core Identity幫我們產生預設 Identity 頁面的套件。
接著去BlazorServer.Models的AppDbContext,將繼承的DbContext改為IdentityDbContext,代表接下來用的 DB 跟 Identity有關係。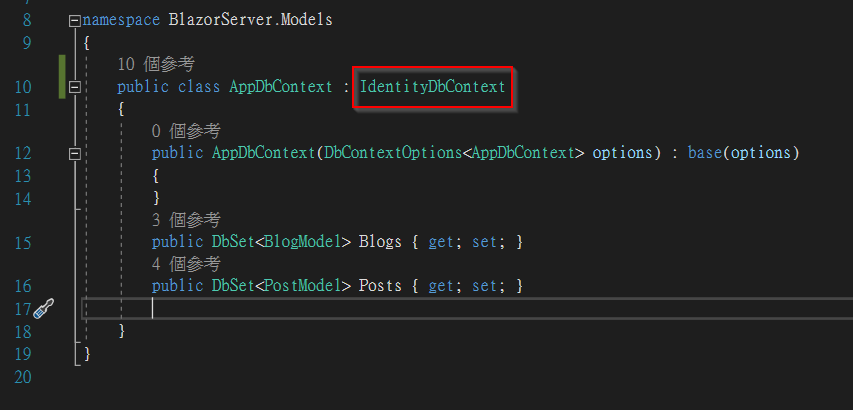
在 BlazorServer 專案按右鍵,選擇「加入」,選擇「新增 Scaffold 項目」,切換到「識別」頁籤,選擇識別。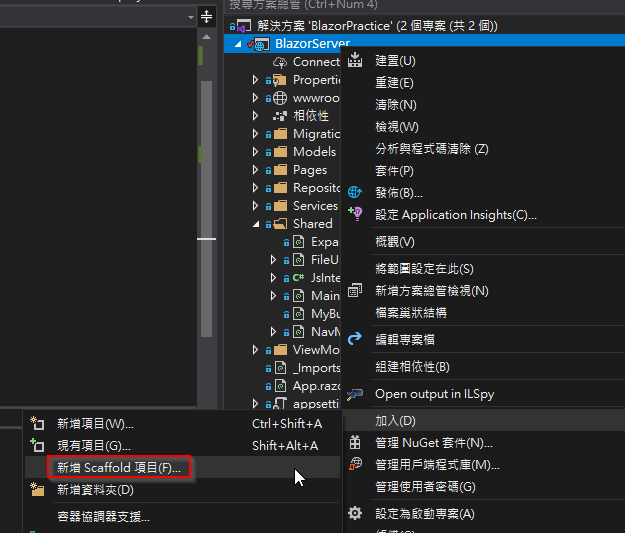
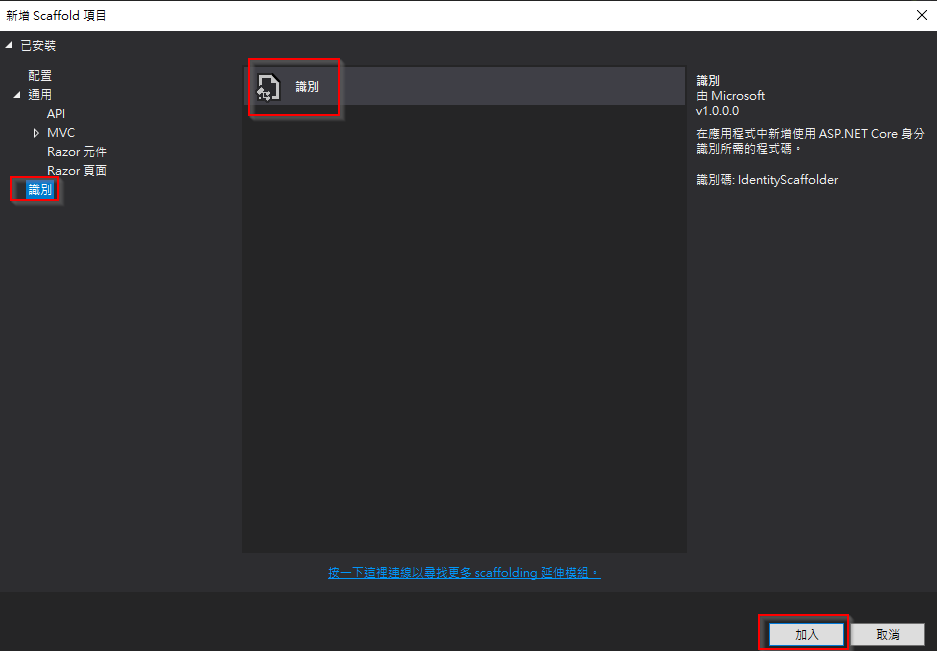
勾選「覆寫所有檔案」,資料內容類別選擇AppDbContext,要注意的是,如果剛才沒將繼承的類別改成IdentityDbContext,就不會有AppDbContext可以選,必須點右邊的「+」符號自己新增一個IdentityDbContext。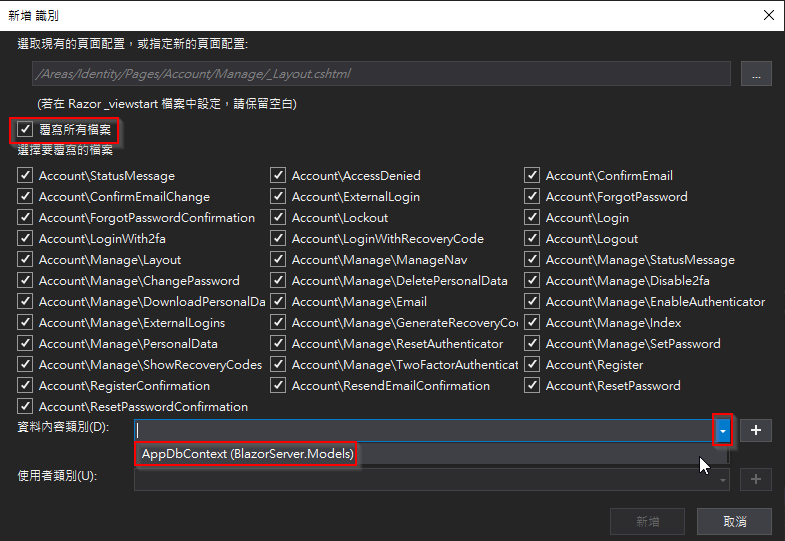
這時候有可能遇到這種「OnInitializedAsync(): 未找到任何合適的方法可覆寫」的錯誤訊息,這通常是 Visual Studio 的問題,先將這裡註解,重複一次上一段的作法就可以。

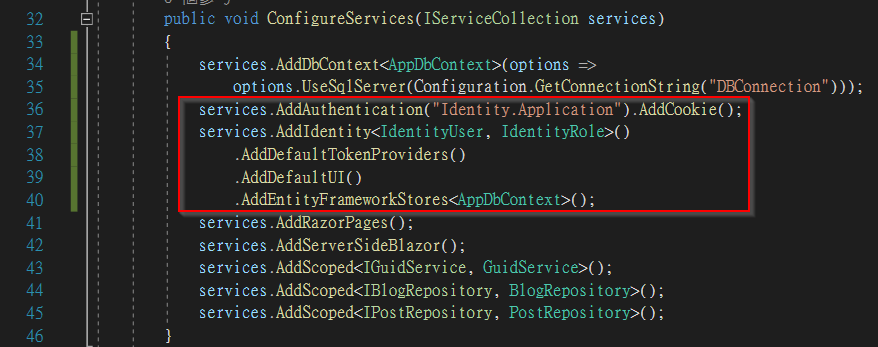
接著去Startup.cs的ConfigureServices()跟Configure()加上身分驗證的服務,Identity 預設將驗證資訊存在 Cookie。ConfigureServices()
            services.AddAuthentication("Identity.Application").AddCookie();
            services.AddIdentity<IdentityUser, IdentityRole>()
                .AddDefaultTokenProviders()
                .AddDefaultUI()
                .AddEntityFrameworkStores<AppDbContext>();
Configure()
            app.UseAuthentication();
            app.UseAuthorization();

接著在套件管理器主控台執行兩段指令,Add-Migration IdentitySupport新增Migration,Update-Database更新 DB,去看資料庫,可以看到多了 6 張表,其中最常用到的就是 AspNetUsers、AspNetRoles 及 AspNetUserRoles,如果以 Claim 處理權限的話,就會用到 AspNetUserClaims。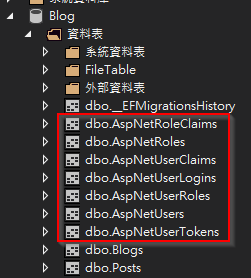
專案則多了一個 Areas 資料夾,裡面就是 ASP.NET Core Identity 的實作,包括了登入系統、帳號系統、管理系統。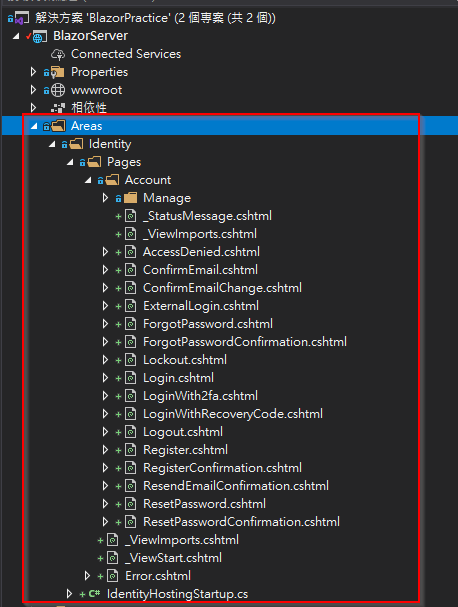
我們去NavMenu.razor加上通往 Login 的 NavLink,在相對路徑中 Areas 跟 Pages 可以省略。
        <li class="nav-item px-3">
            <NavLink class="nav-link" href="Identity/Account/Login" Match="NavLinkMatch.All">
                <span class="bi bi-file-earmark-lock2 h4 p-2 mb-0" aria-hidden="true"></span> Login
            </NavLink>
        </li>
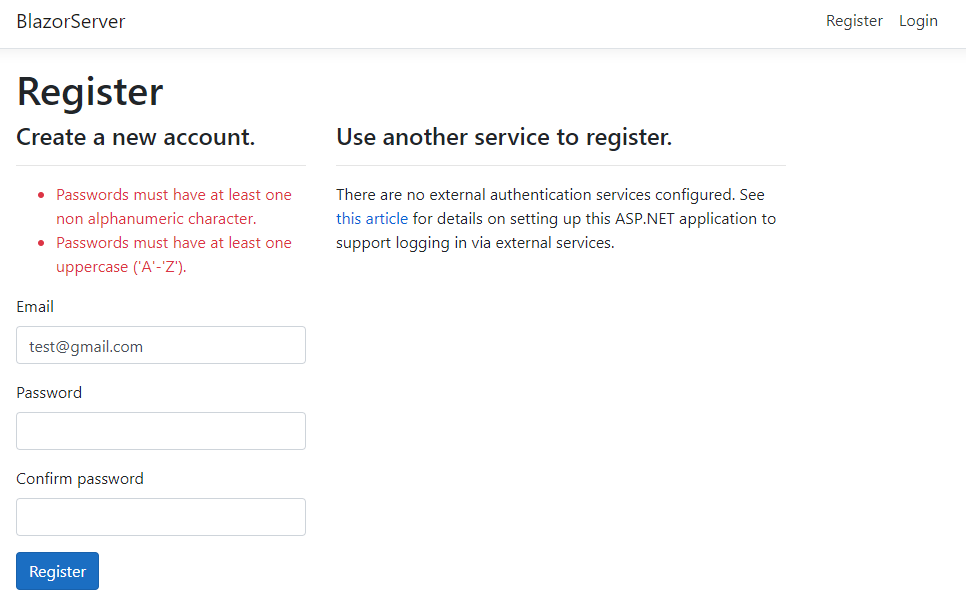
啟動網站後,從左邊 Nav 前往 Login頁面,可以看到已經有個完善的登入系統,包括註冊、登入、忘記密碼等等功能,就連註冊密碼的規則也有,我們照規則註冊一個帳號,資料庫也產生了剛剛註冊的帳號。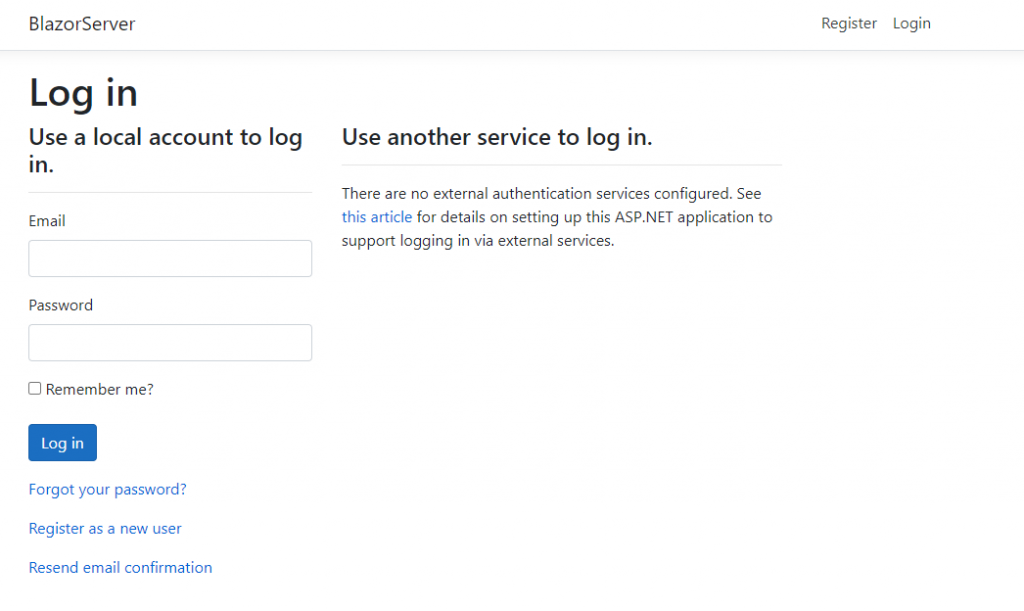

Ref:Claims-based authorization in ASP.NET Core
Ref:Claim type and claim value in claims policy based authorization in asp net core
Ref:ASP NET Core Identity tutorial from scratch
Ref:Unable to resolve service for type IEmailSender while attempting to activate RegisterModel
