鼬~~哩賀,我是寫程式的山姆老弟,昨天跟大家一起看了一點 ActionMailer 的使用方式,但只是像昨天那樣設定的話,對方是收不到信的,今天就來看一下 ActionMailer 怎麼跟第三方 Email Service 串接,夠夠~
我們使用 AWS 的 SES(Simple Email Service) 來幫我們寄信

可以選擇是「網域的擁有者」或是「Email Address 的擁有者」,如果你是選網域驗證的話,之後寄信就可以透過多個 email address 當作寄件者;如果選 Email address 驗證的話,那就只能用你驗證的那一個 Email address 來當作寄件者
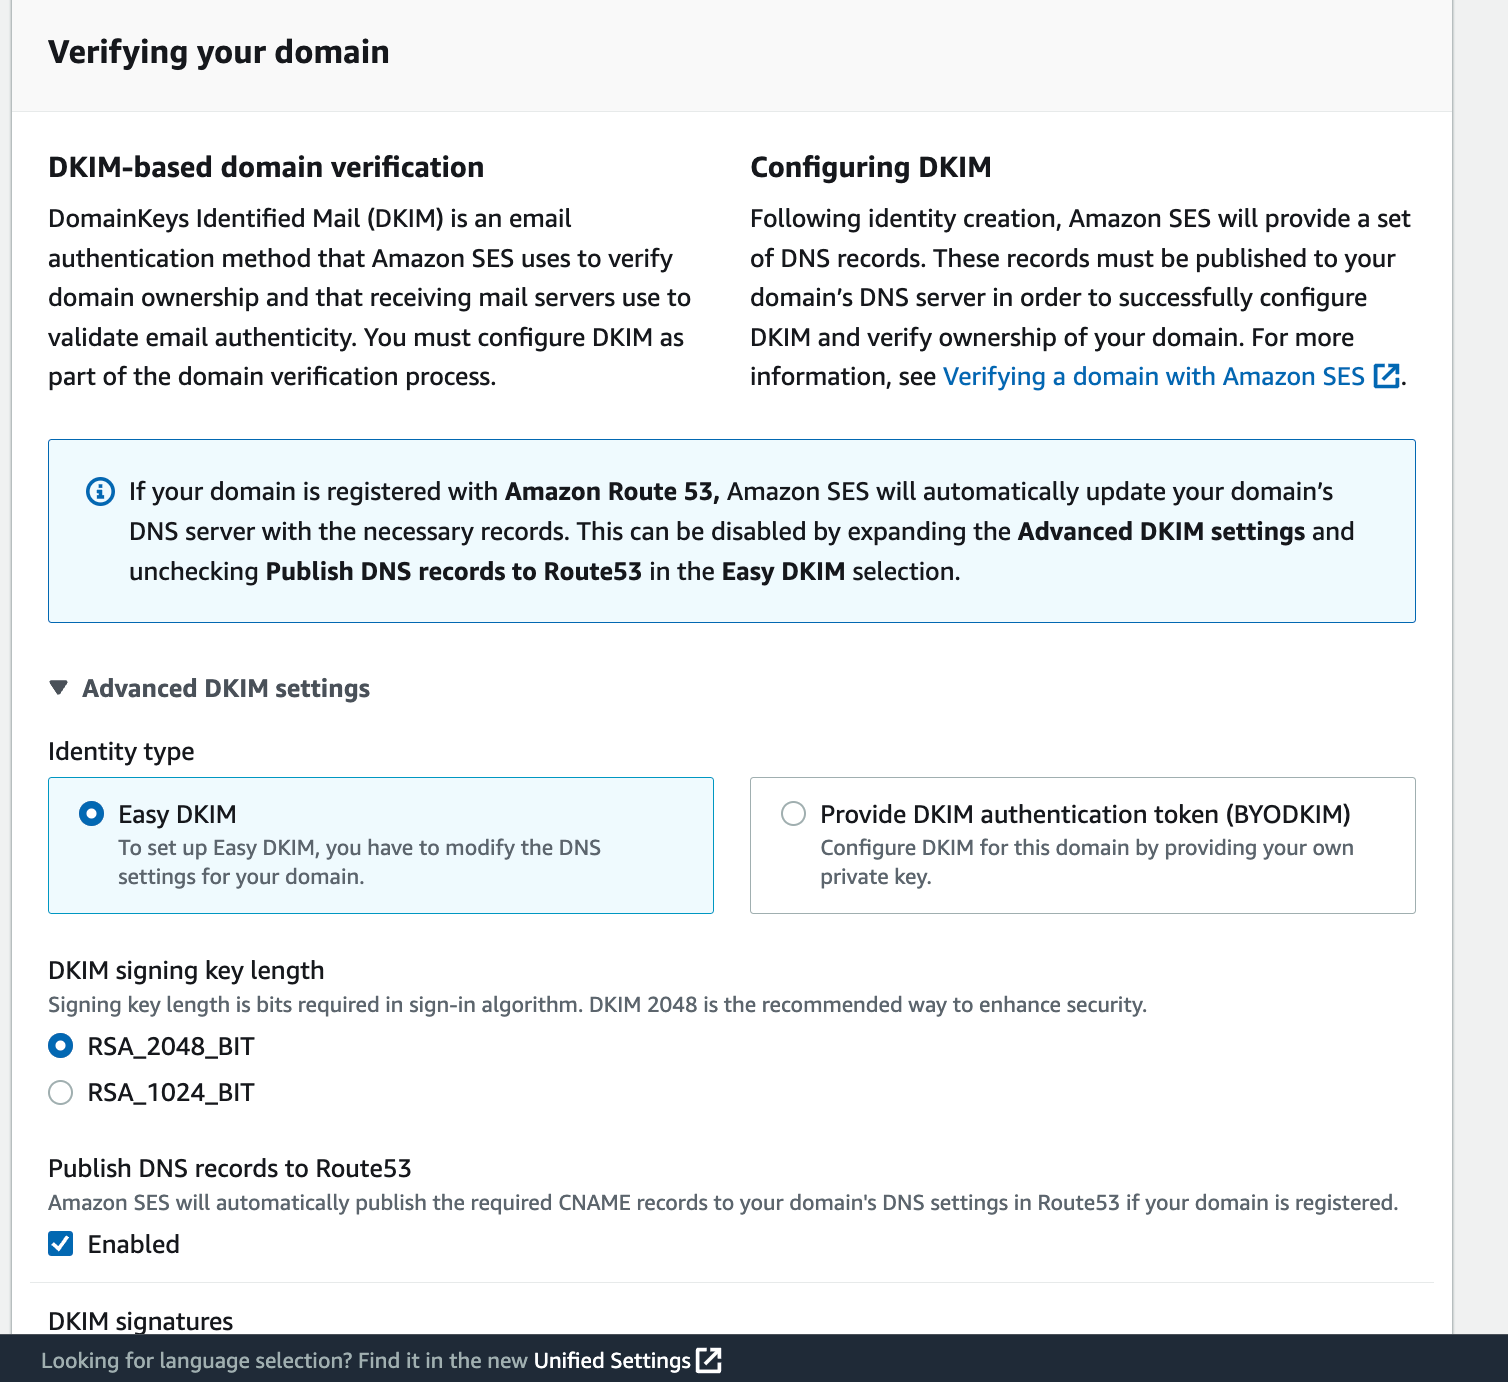
往下會看到進階的 DKIM 設定,我們選預設的 Easy DKIM,RSA_2048_BIT 就好,待會解釋這個 DKIM 是在做什麼的~
有兩種方式驗證網域擁有權,一種是在 DNS 加入 TXT record,另一種是 DKIM(DomainKeys Identified Mail) ,兩種都可以,AWS 建議我們使用 DKIM 來驗證,Google 有寫篇文章幫忙解釋為什麼要用 DKIM,簡單來說就是 DKIM 能確認 email 沒有被盜用者修改過,會提高 email 的可信度
使用 DKIM 的方法,是透過在 DNS 新增三個 CNAME records,展開 Publish DNS records 的部分,這三個 CNAME records 就是要給你在 DNS 新增的
等你新增完後,過幾分鐘,重新整理頁面就轉成 Sucessful,如果過幾分鐘都沒變 Successful,那有可能就是你設定錯了 XD
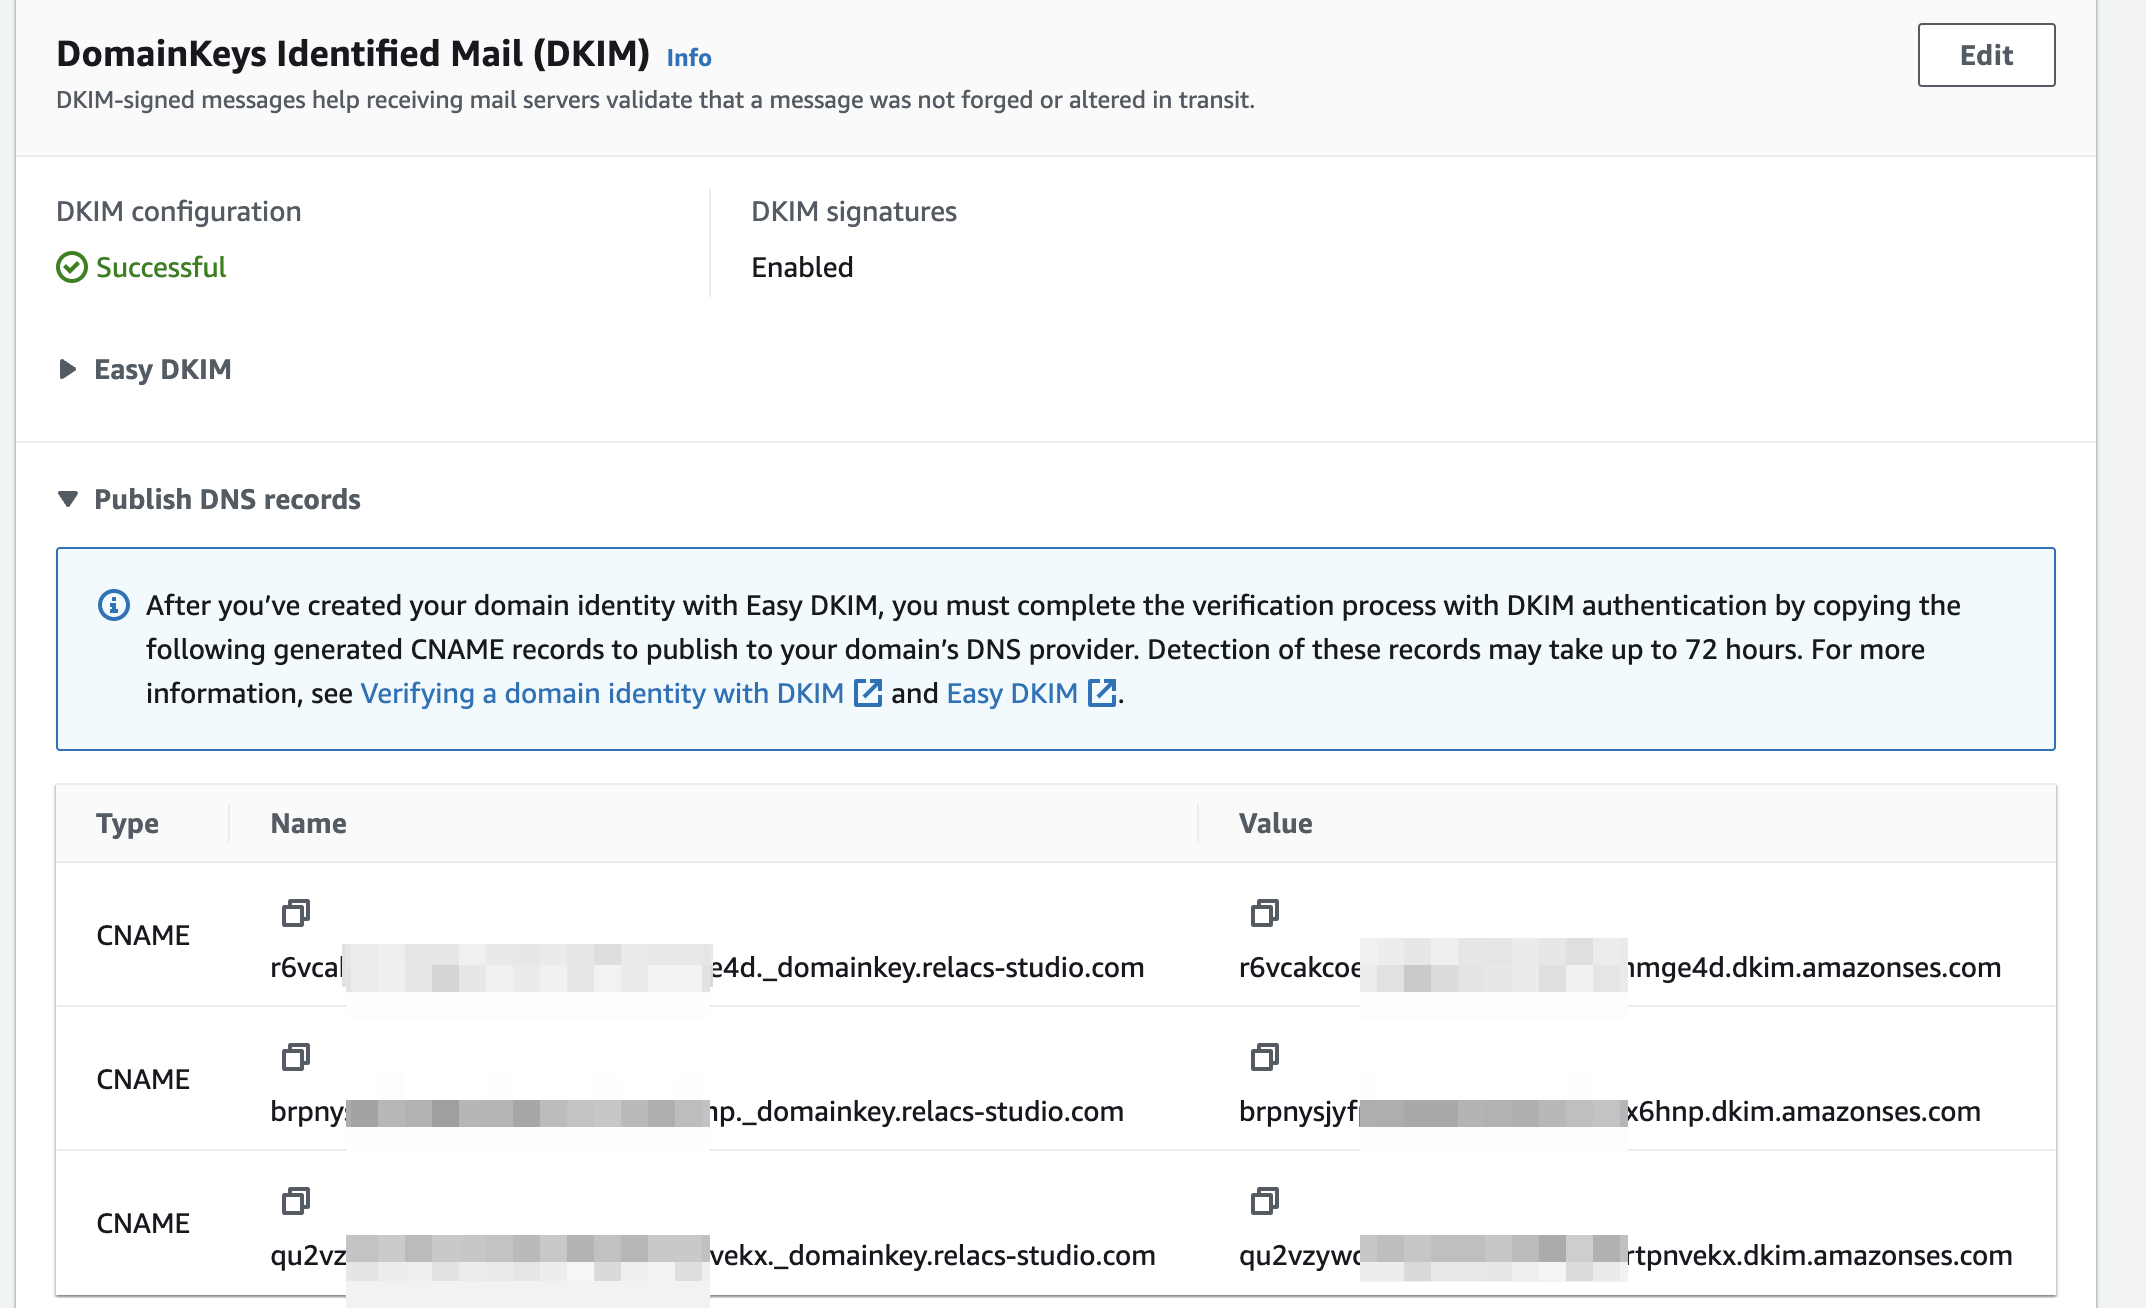
展開 Publish DNS records 之後,就可以看到要新增的 records 囉
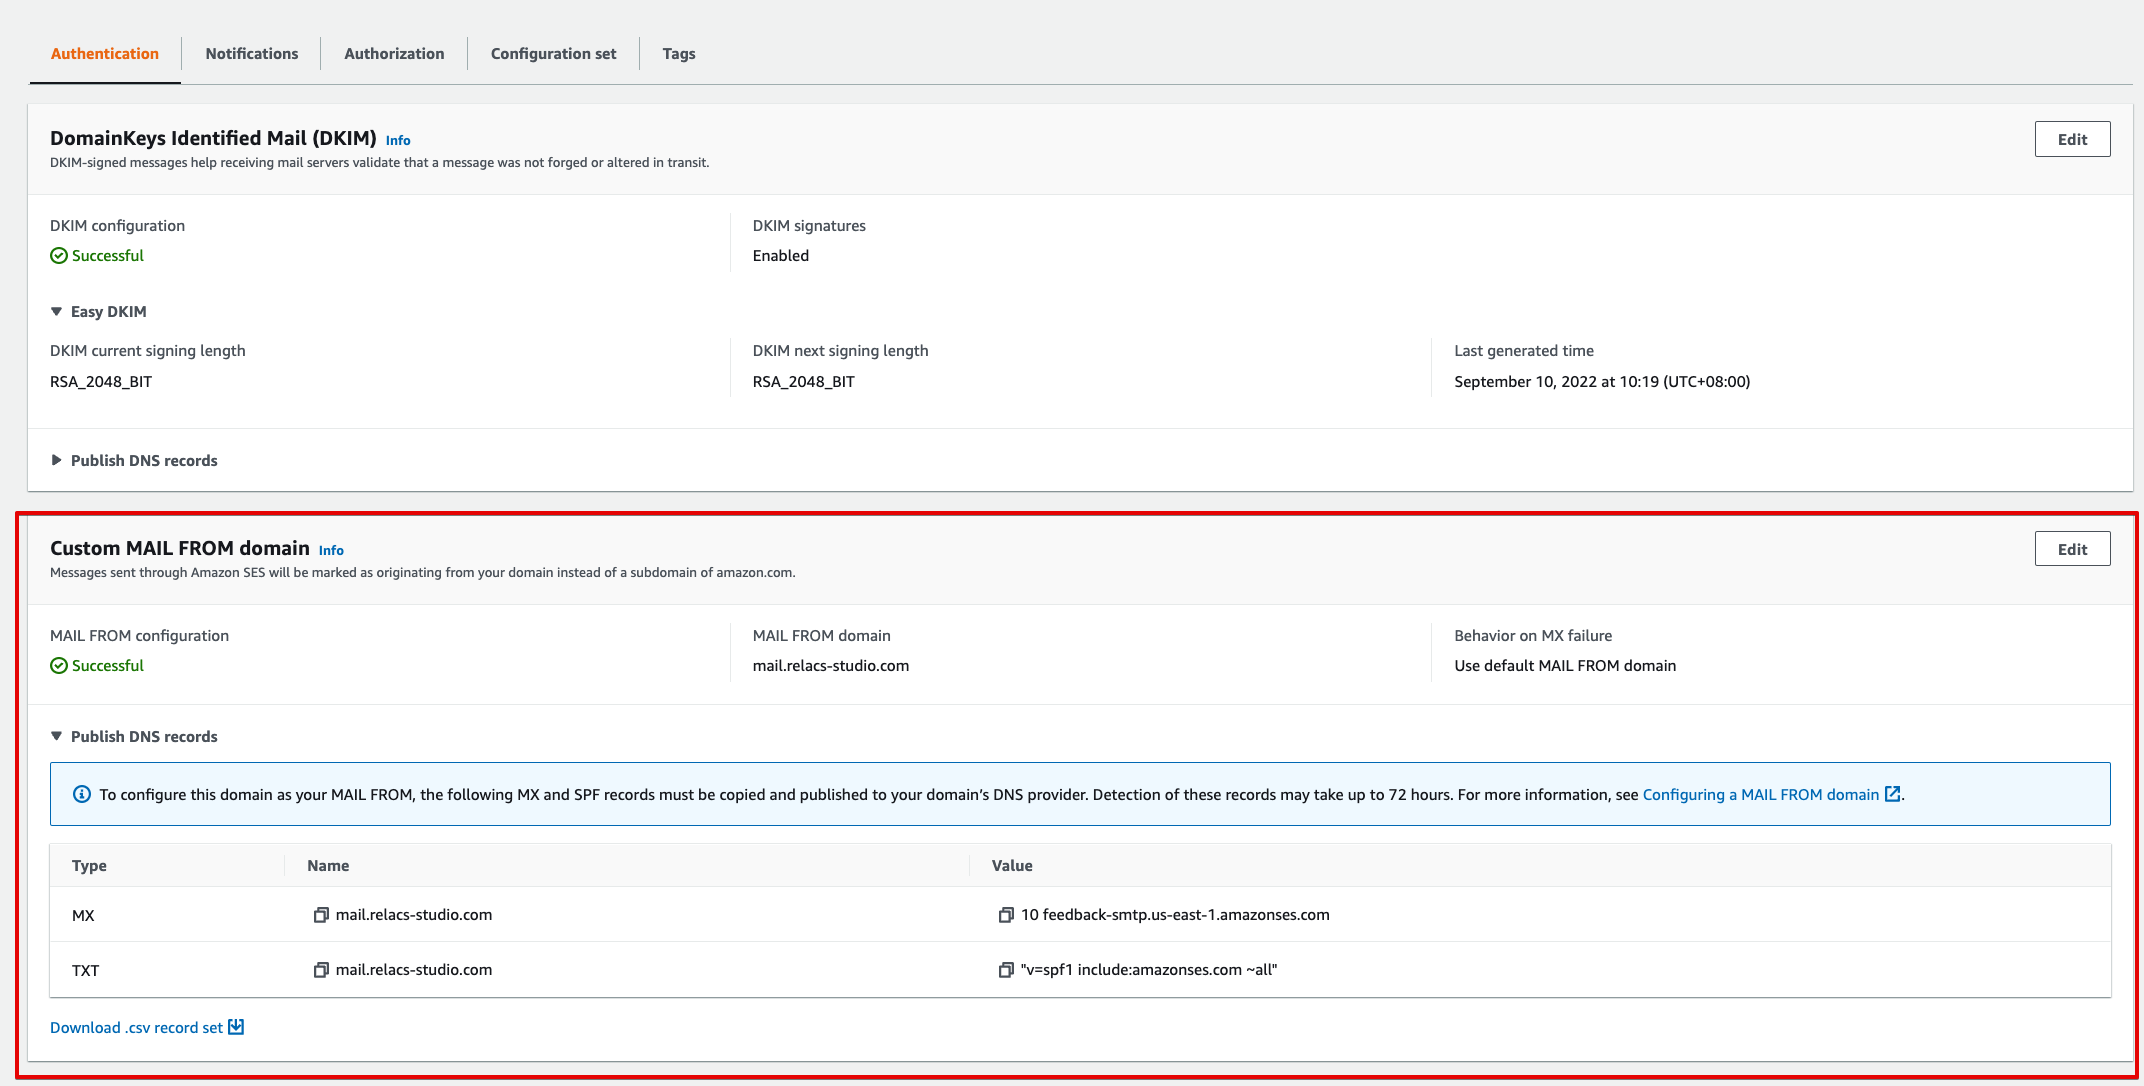
同時也可以新 MX 和 TXT 兩個 records,來開啟 custom MAIL FROM domain,就可以用 subdomain 來寄信,這個就看需求了,不一定要啟用
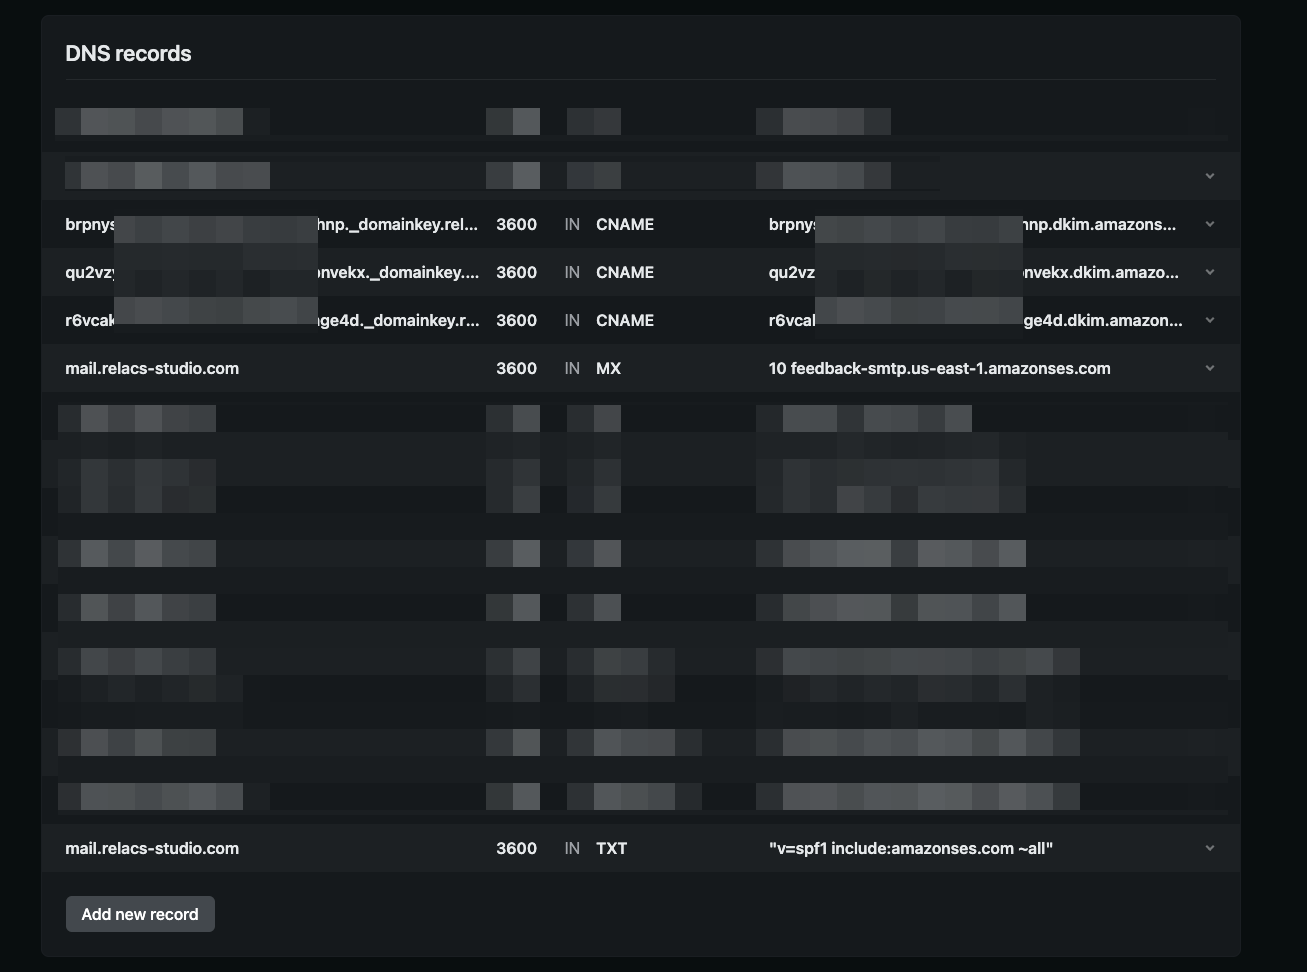
到 DNS 管理商那邊,新增 3 個 CNAME records 來完成 DKIM 驗證
點選左邊選單的 SMTP settings,再點右上角的 Create SMTP Credentials
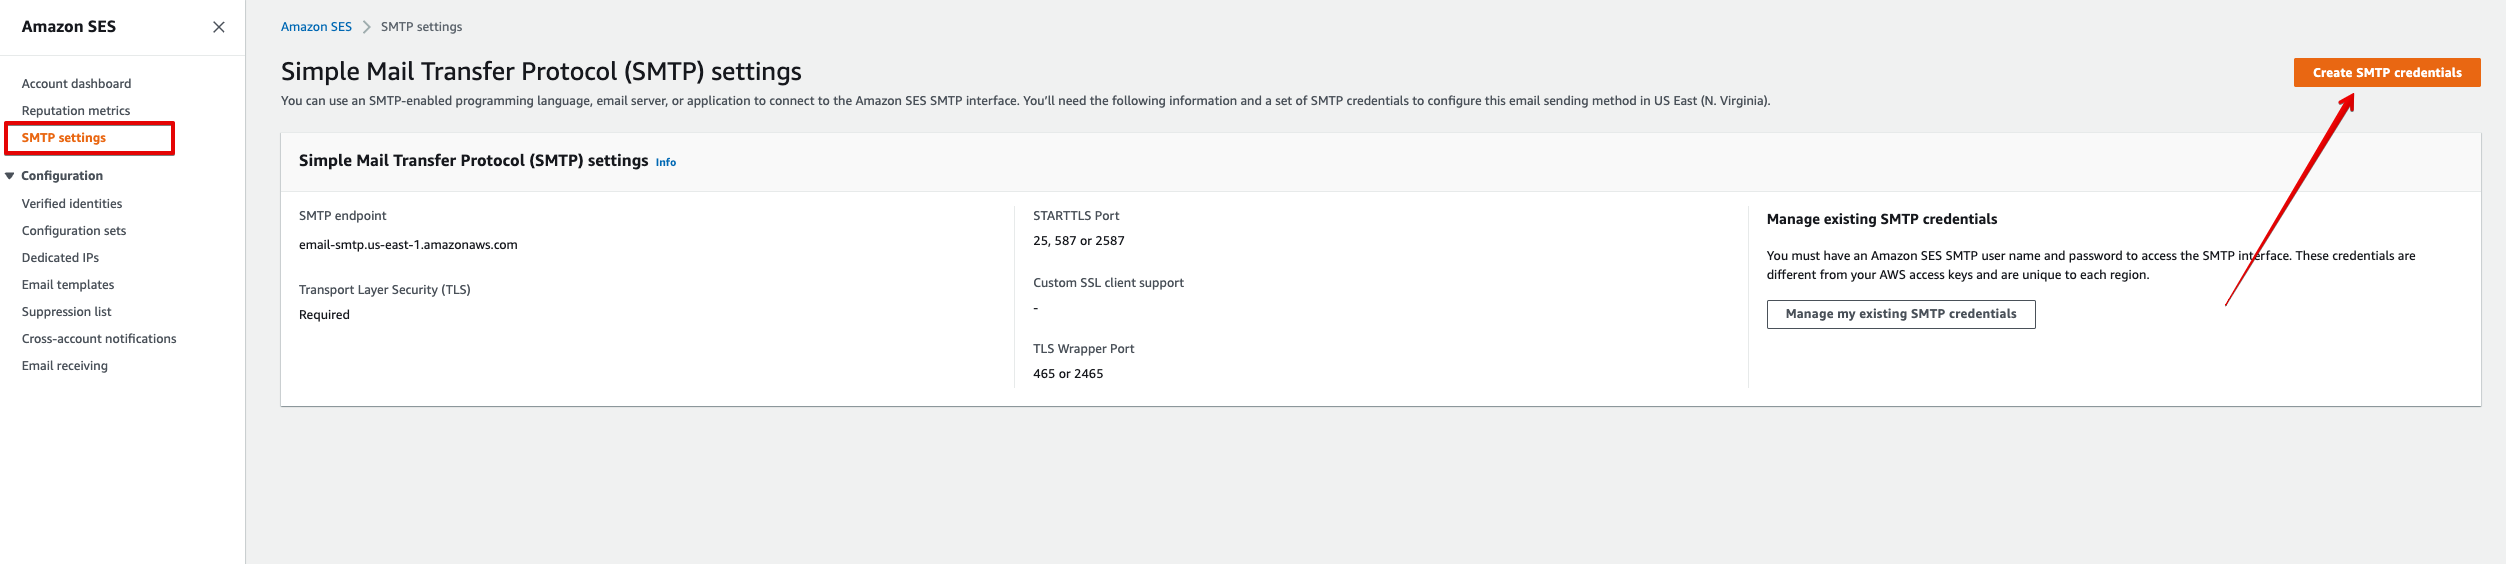
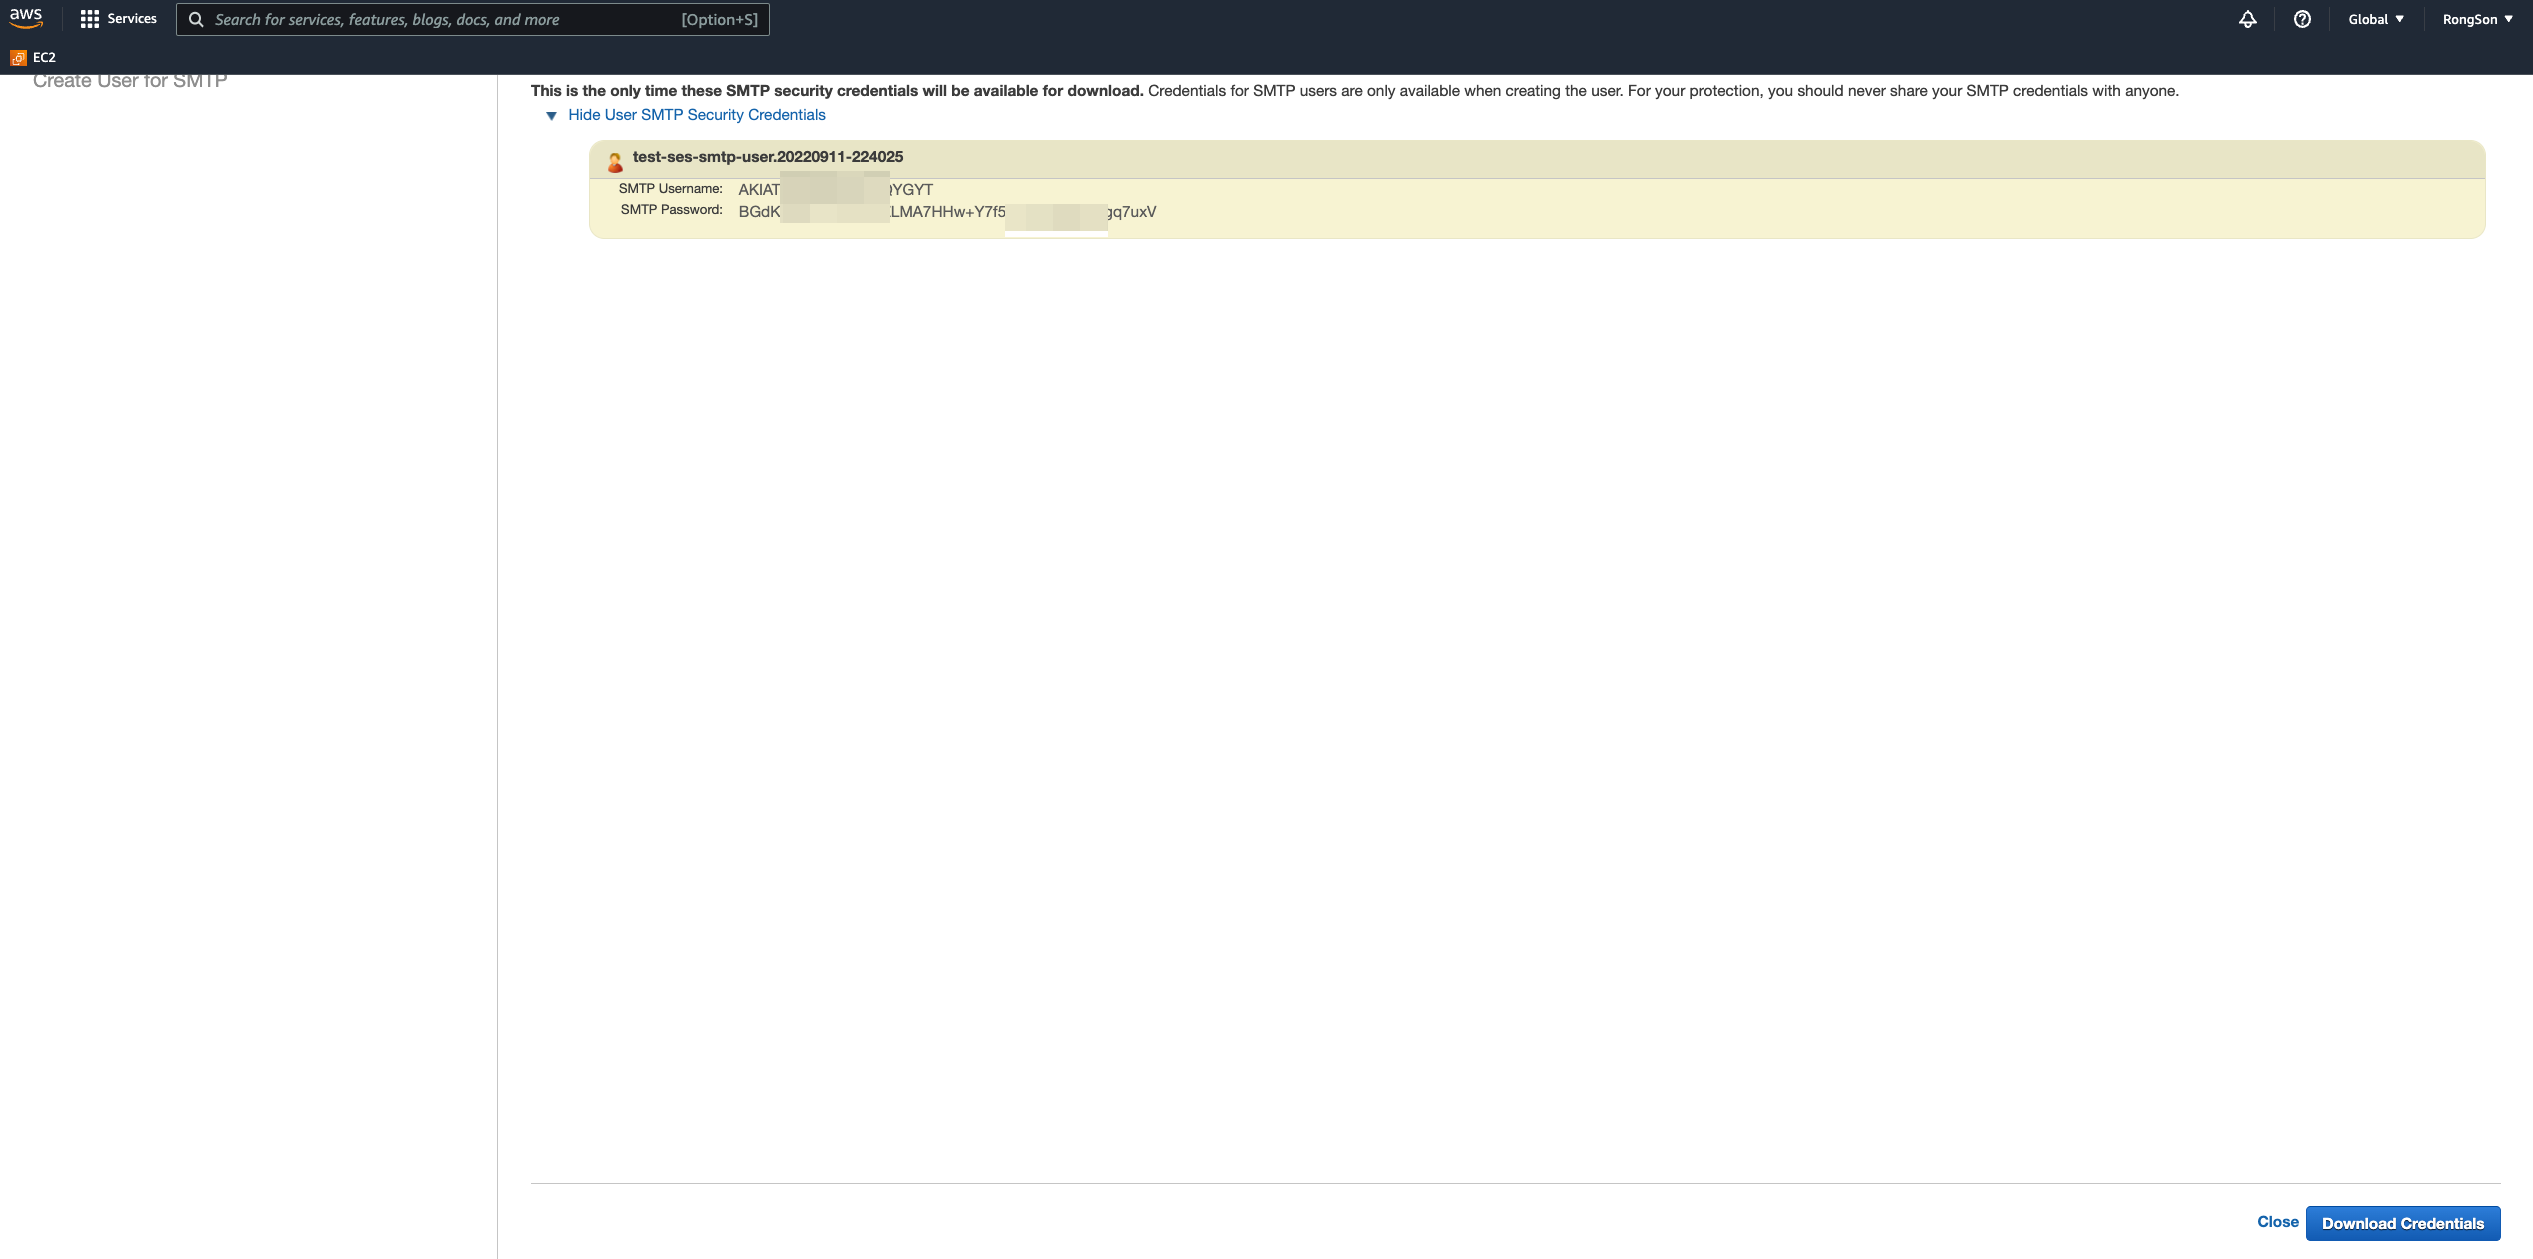
這邊的 CSS 跑掉拉,AWS 工程師在幹嘛!氣氣氣 XD,輸入一個名字之後,點右下角的 Create,就會自動在 IAM 產生一個 user 囉

然後就產生一組 SMTP Username 和 SMTP Password 囉,這個存下來,待會在 Rails 的設定中會用到
再來 Rails 中的 config/environments/development.rb 設定
# config/environments/development.rb
Rails.application.configure do
	config.action_mailer.raise_delivery_errors = true # 方便檢查錯誤
	config.action_mailer.delivery_method = :smtp
	config.action_mailer.smtp_settings = {
    :address => "email-smtp.us-east-1.amazonaws.com",
    :port => 587,
    :user_name => Rails.application.credentials.dig('aws', 'ses_username'), # Your SMTP user here.
    :password => Rails.application.credentials.dig('aws', 'ses_password'), # Your SMTP password here.
    :authentication => :login,
    :enable_starttls_auto => true
	}
	...
end
SMTP Username 和 SMTP Password 建議是使用 $ rails credentials:edit 把重要資訊帶進去,或是環境變數的方式帶入~
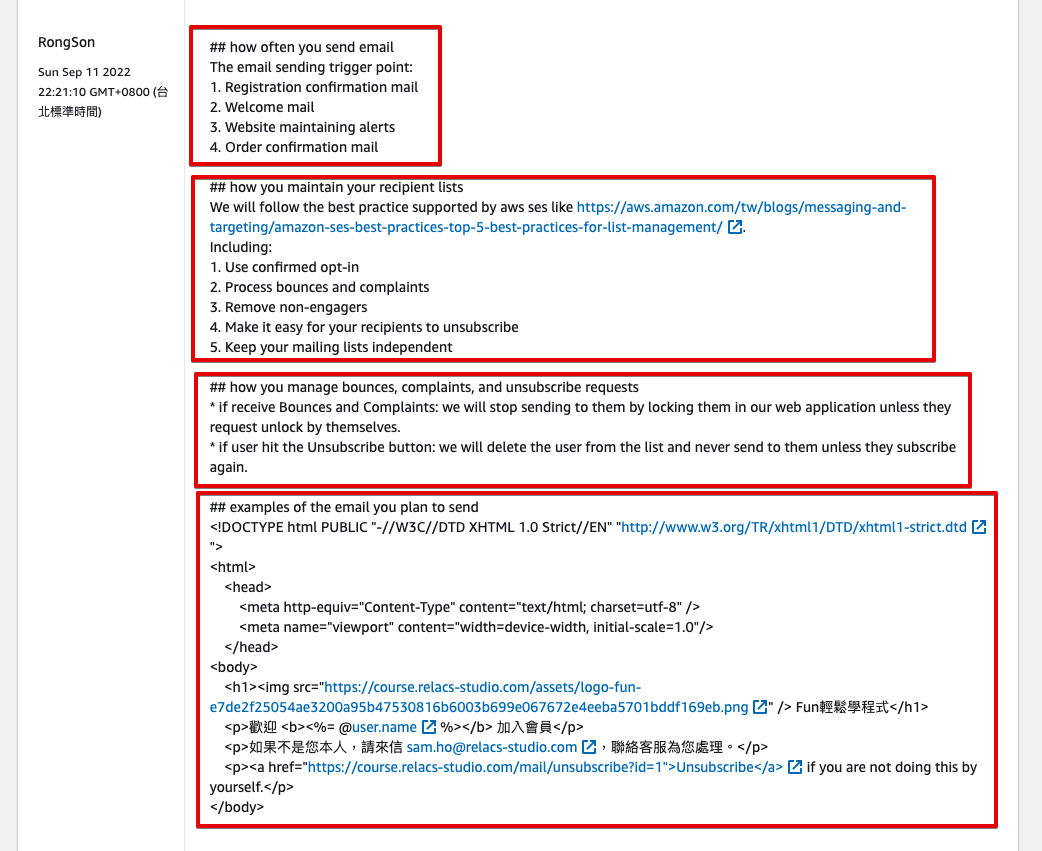
剛開始使用 SES 會是預設 sandbox 模式,在這個模式除了有寄信數量的限制之外(每24小時最多200封、每秒最多一封),最嚴重的是,你只能寄信給同一個網域的 email address,例如我申請的 relacs-studio.com 這網域,那我只能寄信 xxx@relacs-studio.com 的人,不能寄給 gmail、hotmail、yahoo,這一點比較麻煩,然後如果要從 sandbox 模式轉為 production 模式的話,需要填寫一些「關於你會怎麼使用 SES 」的問題,寫得不夠詳細,還真的會被客服擋下來,以下是我的範例 XD
總體來說,使用 SES 不會很麻煩,跟 ActionMailer 串接也只有幾行設定而已,而且 SES 每個月有 62000 封 mail 免費(如果是使用 EC2 來發才有的優惠),但還是要付流量的錢拉,如果信件的圖片、檔案都不大的話,那應該是幾乎不用錢,如果不是使用 AWS EC2 的話,那應該也還行,1000 封才 0.1 美金,可以去跟其他 Email Service Provider(ESP) 比價看看

