利用 Angular 框架所開發的是單一頁面應用程式,因而會利用路由來進行不同頁面的切換。這一篇就來說明要如何針對路由的作業撰寫單元測試程式。
這一篇會使用到 ProductPageComponent 與 ProductDetailPageComponent 這兩個頁面元件。前者用來說明如何撰寫「切換至產品明細頁面路由」測試情境。
onGoto(id: number): void {
  void this.router.navigate(['product', 'detail', id]);
}
而後者則用來撰寫「依路由網址參數取得產品明細資料」的測試情境。
ngOnInit(): void {
  this.product$ = this.route.paramMap.pipe(
    map((paramMap) => paramMap.get('id')!),
    switchMap((id) => this.productService.getProduct(+id))
  );
}
如一開始的程式,我們利用 router.navigte 來實作路由頁面的切換,因此可以建立 Router 的 Spy 物件,確認是否有呼叫 Router 物件的 navigate() 方法,且傳入預期的參數。
describe('ProductPageComponent', () => {
  let router: jasmine.SpyObj<Router>;

  beforeEach(async () => {
    router = jasmine.createSpyObj<Router>(['navigate']);

    await TestBed.configureTestingModule({
      imports: [ ... ],
      declarations: [ ... ],
      providers: [
        { provide: Router, useValue: router },
        ...
      ],
    }).compileComponents();
  });

  it('當點選 id 為 1 產品的明細按鈕, 應轉址到"product/detail/1"', () => {
    // Arrange
    var cards = fixture.debugElement.queryAll(
      By.directive(ProductCardComponent)
    );
    var detailButton = cards[0].query(By.css('button'));

    // Act
    detailButton.triggerEventHandler('click', null);

    // Assert
    expect(router.navigate).toHaveBeenCalledWith(['product', 'detail', 1]);
  });
});
在撰寫測試之前,由於 ProductDetailPageComponent 頁面元件會透過 ProductService 服務去取得特定產品編號的資料,因此需要先利用此服務的 Spy 物件來替代原本的服務。
describe('ProductDetailPageComponent', () => {
  let component: ProductDetailPageComponent;
  let fixture: ComponentFixture<ProductDetailPageComponent>;

  let productService: jasmine.SpyObj<ProductService>;

  beforeEach(async () => {
    productService = jasmine.createSpyObj<ProductService>(['getProduct']);

    await TestBed.configureTestingModule({
      imports: [MatButtonModule],
      declarations: [ProductDetailPageComponent],
      providers: [
        { provide: ProductService, useValue: productService },
      ],
    }).compileComponents();

    fixture = TestBed.createComponent(ProductDetailPageComponent);
    component = fixture.componentInstance;
    fixture.detectChanges();
  });
});
不同於利用 Jasmine 建立 Spy 物件來替代掉本來注入的服務實體,在實作上會透過 ActivatedRoute 內的 paramMap 屬性來取得路由所傳入的值,所以測試上需要利用 Angular 提供的 convertToParamMap() 方法來建立 ParamMap,因此這裡會在 src/testing 資料夾建立由 Angular 官網中所提供的 ActivateRouteSub 類別。
import { convertToParamMap, ParamMap, Params } from '@angular/router';
import { ReplaySubject } from 'rxjs';

export class ActivatedRouteStub {
  private subject = new ReplaySubject<ParamMap>();

  constructor(initialParams?: Params) {
    this.setParamMap(initialParams);
  }

  readonly paramMap = this.subject.asObservable();

  setParamMap(params: Params = {}) {
    this.subject.next(convertToParamMap(params));
  }
}
接著,就可以在測試案例中建立此 Stub 物件,且傳入產品編號,並取代掉 ActivateRoute 物件。
describe('ProductDetailPageComponent', () => {
  ...

  let activatedRoute: ActivatedRouteStub;

  beforeEach(async () => {
    activatedRoute = new ActivatedRouteStub({ id: '1' });
    ...

    await TestBed.configureTestingModule({
      imports: [MatButtonModule],
      declarations: [ProductDetailPageComponent],
      providers: [
        { provide: ActivatedRoute, useValue: activatedRoute },
        { provide: ProductService, useValue: productService },
      ],
    }).compileComponents();

    ...
  });
});
如此一來,就可以去驗證頁面載入時,是否有呼叫 ProductService 的 getProduct() 方法,並傳入的參數為 1。
it('頁面載入時, 應取得 id 為 1 的產品', () => {
  // Arrange

  // Act

  // Assert
  expect(productService.getProduct).toHaveBeenCalledWith(1);
});
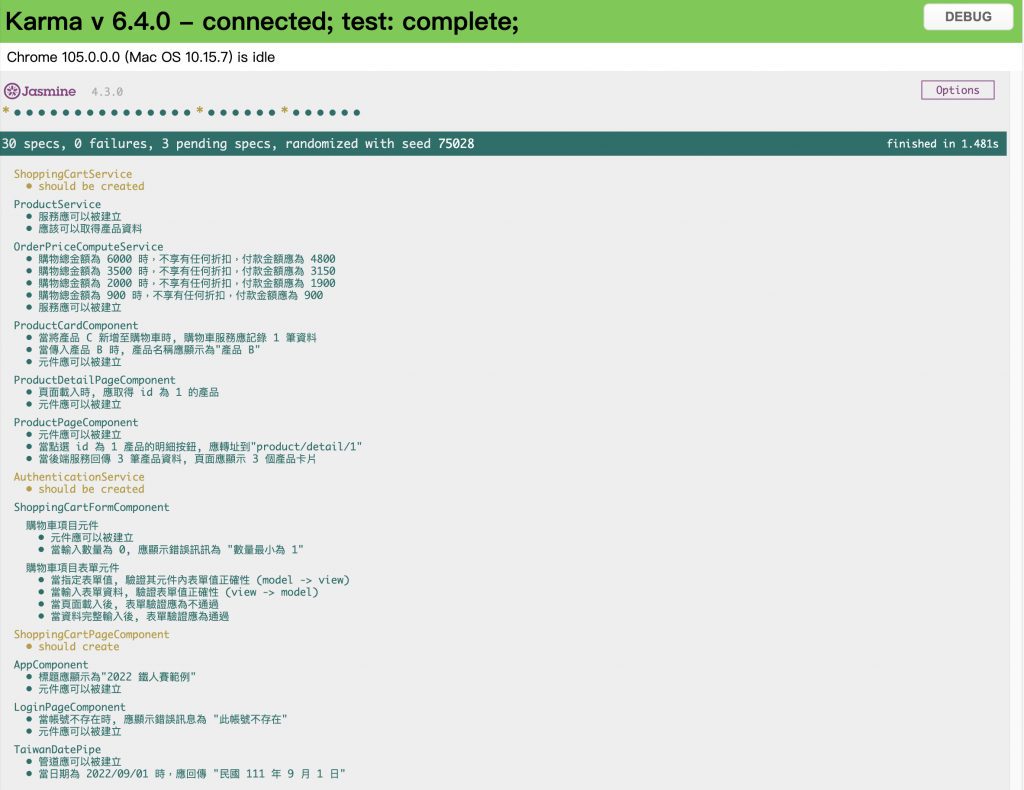
最後就執行 ng test 來確認測試執行的結果。

這一篇說明了如何撰寫路由相關的單元測試程式,完整的測試程式可以參考 GitHub。接下來,就是元件測試的最後一篇,來說明如何利用 Page 物件來封裝元件的頁面元素,以降低測試程式的複雜度。
