大家好,我是 Yubin
在網頁的應用上,常常會需要上傳的功能,上傳文件上傳圖片等。
本篇文章來介紹在 Fastify App 開發上,使用 Fastify-Multipart 來上傳檔案的方式。
我們知道 Fastify 核心中定義的 Content-Type Parser 只有 text 跟 JSON 兩種,其他 Parser 要使用 Plugin 的方式註冊使用。
@Fastify/multipart 這個 Plugin 可以增加 Fastify App 對於 multipart 的支援,由 Fastify 官方團隊所維護。
如果沒有擴充對於 multipart 的支援,直接對伺服器上傳檔案的話,在 Fastify 生命週期中,進到 route 前,就會被 Fastify 回傳 415 的錯誤。
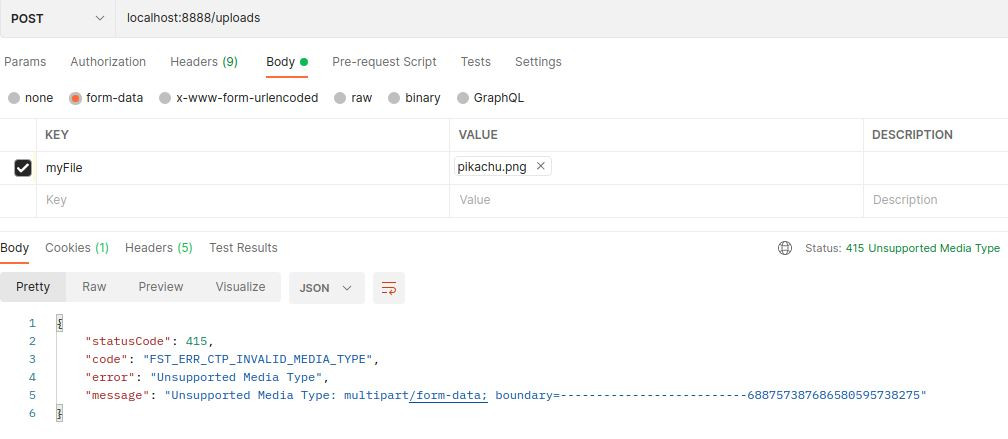
如圖,Fastify 回應了 415 Unsupported Media Type 的回應,因為沒有相應的 Parser。
透過 npm 就可以簡單安裝:
npm i @fastify/multipart
接著透過 server.register() 進行註冊:
import fastify, { FastifyInstance } from 'fastify'
import fastifyMultipart from '@fastify/multipart'

const server: FastifyInstance = fastify()

server.register(fastifyMultipart)
註冊完 plugin,我們的 app 就有處理 multipart 的能力了。
試著寫一個 POST /uploads 的 Endpoint 來測試上傳檔案的功能:
server.post('/uploads', async (request, reply) => {
    try {
      const data = await request.file()
      if (data) {
        const filename = data.filename
        // handle file
        return reply
          .status(201)
          .send({ message: `Successfully upload file: ${filename}` })
      } else {
        return reply.status(400).send({ message: `Failed to upload file` })
      }
    } catch (error) {
      return reply.status(500).send({ error })
    }
})
因為要帶 Payload,所以用 POST 而不是 GET。
透過 request.file() 拿到 MultipartFile 物件。
處理完沒錯誤就回應 201 (或 200,看 API 設計) 給 Client。
通常是前端網頁會透過 JavaScript 的方式把要上傳的檔案帶到後端,為了方便開發測試,這裡使用 Postman。
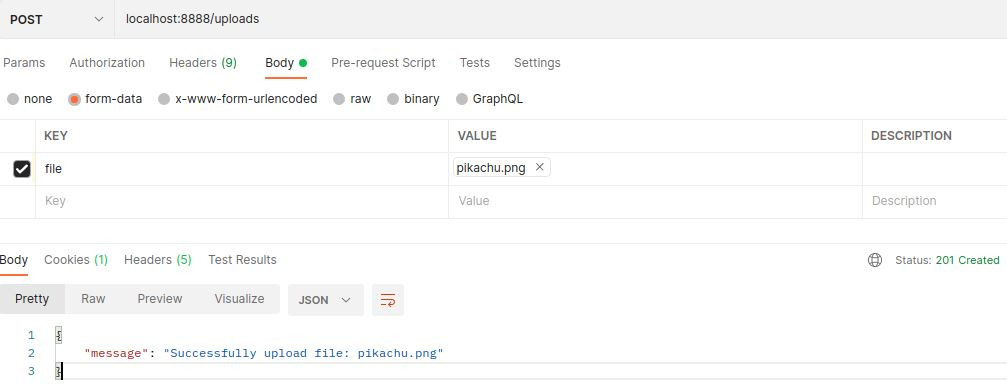
可以看到,不會再得到 415 的回應了,我們的 Request 順利進到 route 中,並回應正確的狀態瑪。
把上傳的檔案儲存到伺服器的某個位置是個常見的方式。(先不論好不好XD)
這邊示範的是,使用 fs 的 createWriteStream 方法,來把收到的檔案寫進特定目錄。
以下程式以上傳到專案的
uplodads/目錄為例,請先建立好該目錄。
import fs from 'fs'
import { pipeline } from 'stream'
import util from 'util'

const pump = util.promisify(pipeline)

server.post('/uploads', async (request, reply) => {
    try {
      const data = await request.file()
      if (data) {
        const filename = data.filename
        await pump(data.file, fs.createWriteStream(`uploads/${filename}`))

        return reply
          .status(201)
          .send({ message: `Successfully upload file: ${filename}` })
      } else {
        return reply.status(400).send({ message: `Failed to upload file` })
      }
    } catch (error) {
      return reply.status(500).send({ error })
    }
})
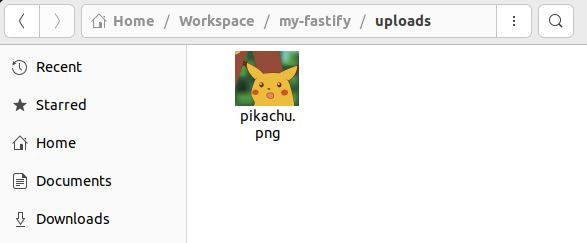
再次透過 Postman 發送 Request,可以在 uploads 目錄找到該檔案。
上傳檔案這個 Feature 雖然常見,但有許多要注意的地方。
比如說應該要對上傳的內容限制他的檔案大小,否則有人不小心或故意上傳了超大的東西給你,可能會造成伺服器的負擔 (硬碟或記憶體等)。
以下是 @fastify/multipart 文件中關於限制上傳的範例程式:
server.register(fastifyMultipart, {
  limits: {
    fieldNameSize: 100, // Max field name size in bytes
    fieldSize: 100,     // Max field value size in bytes
    fields: 10,         // Max number of non-file fields
    fileSize: 1000000,  // For multipart forms, the max file size in bytes
    files: 1,           // Max number of file fields
    headerPairs: 2000   // Max number of header key=>value pairs
  }
})
詳細資訊請參考官方文件。
另外有些使用情境是檔案收進來之後,會經過處理,處理完就不需要那個檔案。
在處理的過程中,有沒有要以檔案的形式落地,如果落地了要不要保存或刪除。
這些跟 IO 有關的操作成本都是很高的,必須謹慎面對。
=> 不要看個範例,程式有功能就開始亂搞。
雖然本文是以上傳到本地端的檔案系統為範例,但更常見的可能會是把檔案保存到 NFS 或 Object Storage 中,避免妨礙了 Scale Out 的機制。
以上介紹 @fastify/multipart 這個 Plugin 的使用及實際演示。
完整範例可以參考 GitHub。


 iThome鐵人賽