iT邦幫忙

2023 iThome 鐵人賽

DAY 3
0
Cloud Native

2023 年了,一起來學 CDN - 你也可以瞭解的 CloudFront 系列 第 3

Day 03 - 開始動手,以 CloudFront 作為自己的第一個 CDN 方案(Part I)

  • 分享至 

  • xImage
  •  

Day 03 - 開始動手,以 CloudFront 作為自己的第一個 CDN 方案

在瞭解 CDN 的基本概念 & CDN 的目標功能後,最好的驗證方法,就是捲起袖子來練習。

今日目標

實做I: 建立自己的第一個 CloudFront Distribution。

事前準備: 針對本日的練習,你會需要以下資源:
  • a. 具有足夠權限的 AWS 帳號 * 1
  • b. 可以透過 Internet 訪問的 HTTP Server * 1 + (optional) AWS Application Load Balancer(ALB) * 1[1]
  • c. 存放 CDN 日誌 & 作為資料來源的 S3 Bucket * 1 - 我使用的叫做 s3://kgg23-ironman2023[2]
  • d. 有瀏覽器的電腦 + (optional) 安裝 curl 程式的電腦。
  • e. (其它) 再設置這些服務時可能會使用的東西;

開 始 開 工

1. 載入你的網站網址,ex: 確認可以看到內容。比方說我的測試網址 http://ironman2023-alb-1744908637.ap-northeast-1.elb.amazonaws.com/ [1]
2. 登入 AWS CloudFront Console(控制台),選擇 Create Distribution,進入設置頁面。由上到下包含幾個區塊,以下數值是第一次作業的建議,如果還沒用過,可以先比照設定。
  • 2.1 Origin:
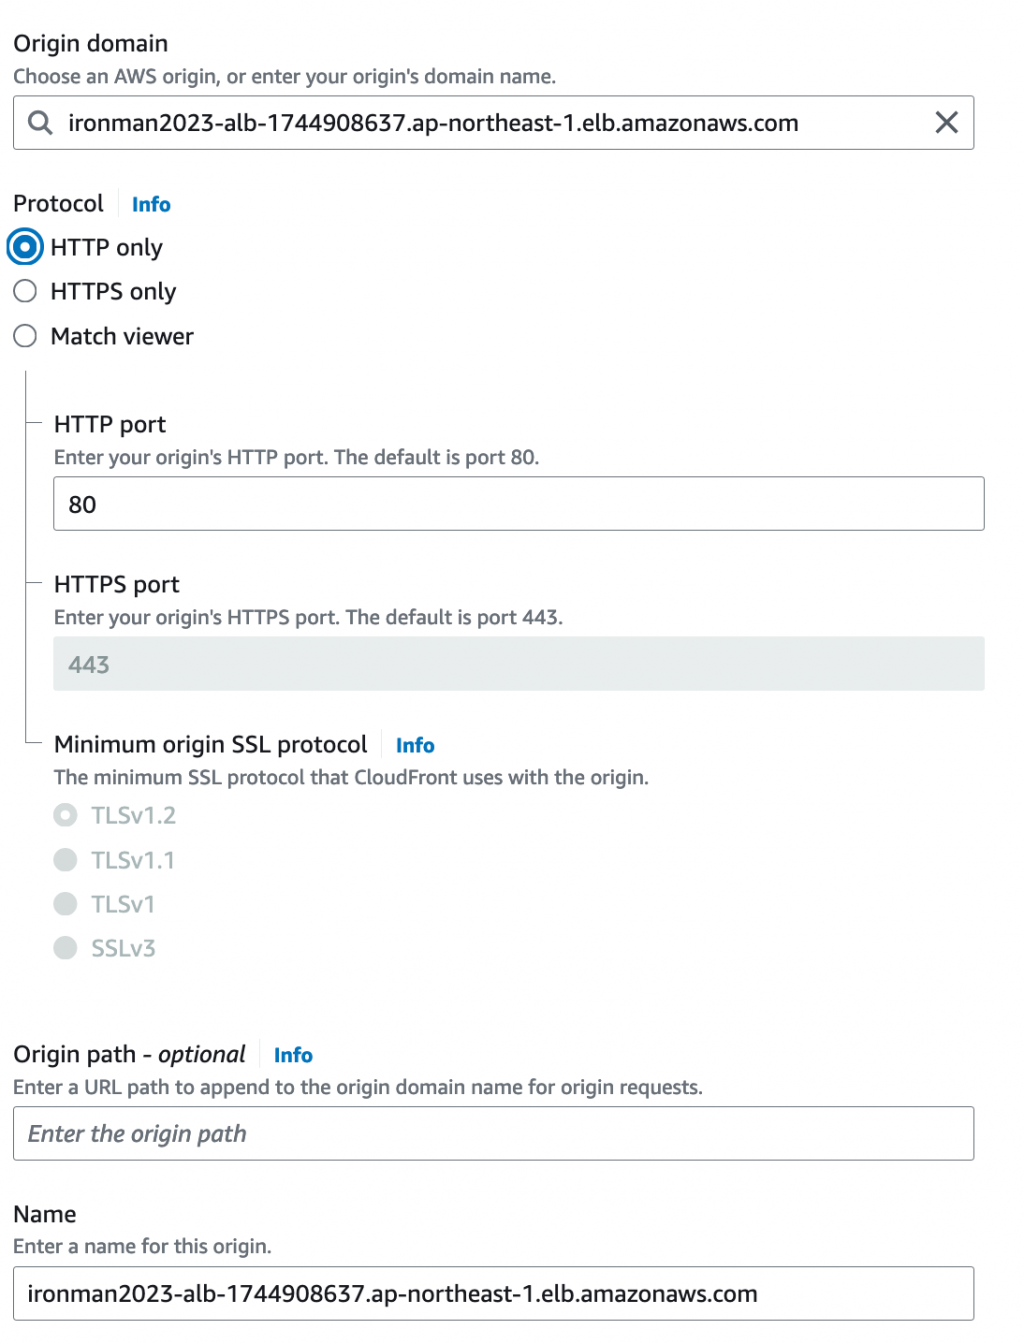
   - a. Origin Domain: 填寫你的網站域名(如上述,填寫後會看到下方 Name 的欄位自動補上了值; Protocol 選 HTTP Only; Port: 80
   - b. Origin Path: (留空)
   - c. Name: 維持不動
   - d. Add customer header: (留空)
   - e. Additional settings: (不動)
   - f. Enable Origin Shield: (不動)

https://ithelp.ithome.com.tw/upload/images/20230905/20162502Mujnfqiriv.png

  • 2.2 Default cache behavior
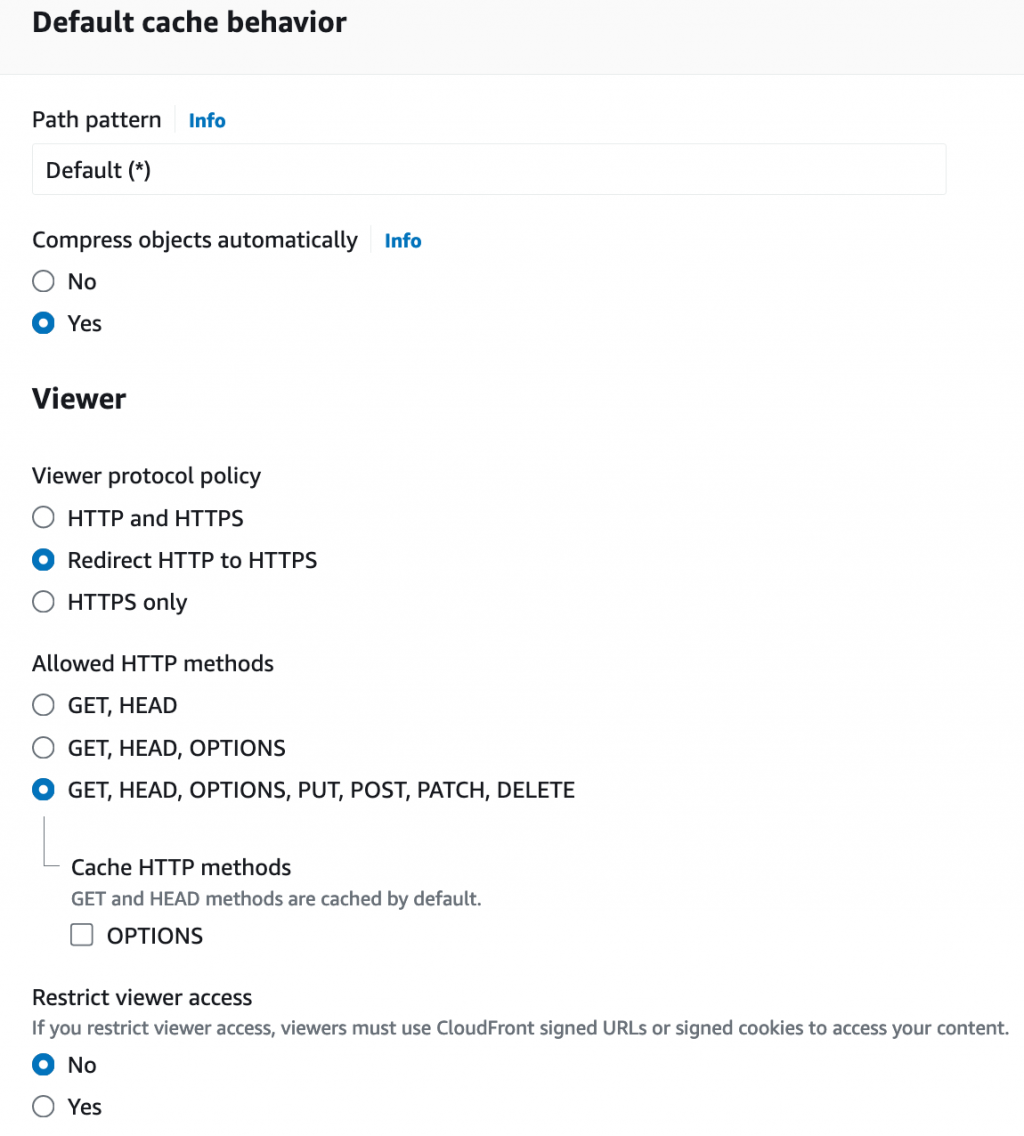
  - a. Path Pattern: (不能修改,因為目前正建立第一組 behavior)
  - b. Viewer protocol policy: Redirect HTTP to HTTPS
  - c. Allowed HTTP methods: GET, HEAD, OPTIONS, PUT, POST, PATCH, DELETE
  - d. Restrict viewer access: No

https://ithelp.ithome.com.tw/upload/images/20230905/2016250238ND2rAJnc.png

  • 2.3 Cache key and origin requests: 這邊使用 "Cache policy and origin request policy (recommended)"
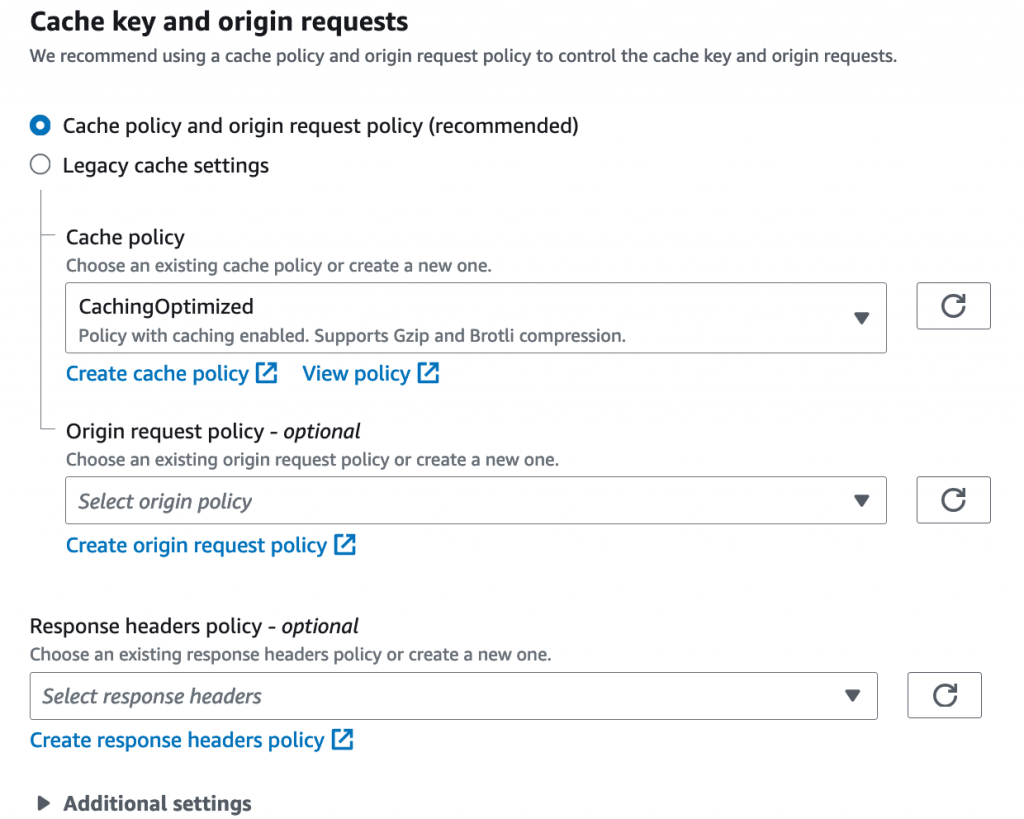
  - a. Cache policy: CachingOptimized
  - b. Query strings: Origin request policy - optional: (留空)
  - c. Response headers policy: (留空)
  - d. Additional settings: (留空)

https://ithelp.ithome.com.tw/upload/images/20230905/20162502N5VSrgNvh3.png

  • 2.4 Function associations - Optional - 全部不動
  • 2.5 Web Application Firewall (WAF) - Do not enable security protections (做實驗/練習,$$要花在刀口上,先不急著開)
    https://ithelp.ithome.com.tw/upload/images/20230905/20162502v3PEv0RjNp.png
  • 2.6 Settings
  - a. Price class: Use all edge locations (best performance)
  - b. Alternate domain name (CNAME): (留空)
  - c. Custom SSL certificate: (留空)
  - d. Supported HTTP versions: HTTP/2 & HTTP/3 都勾選
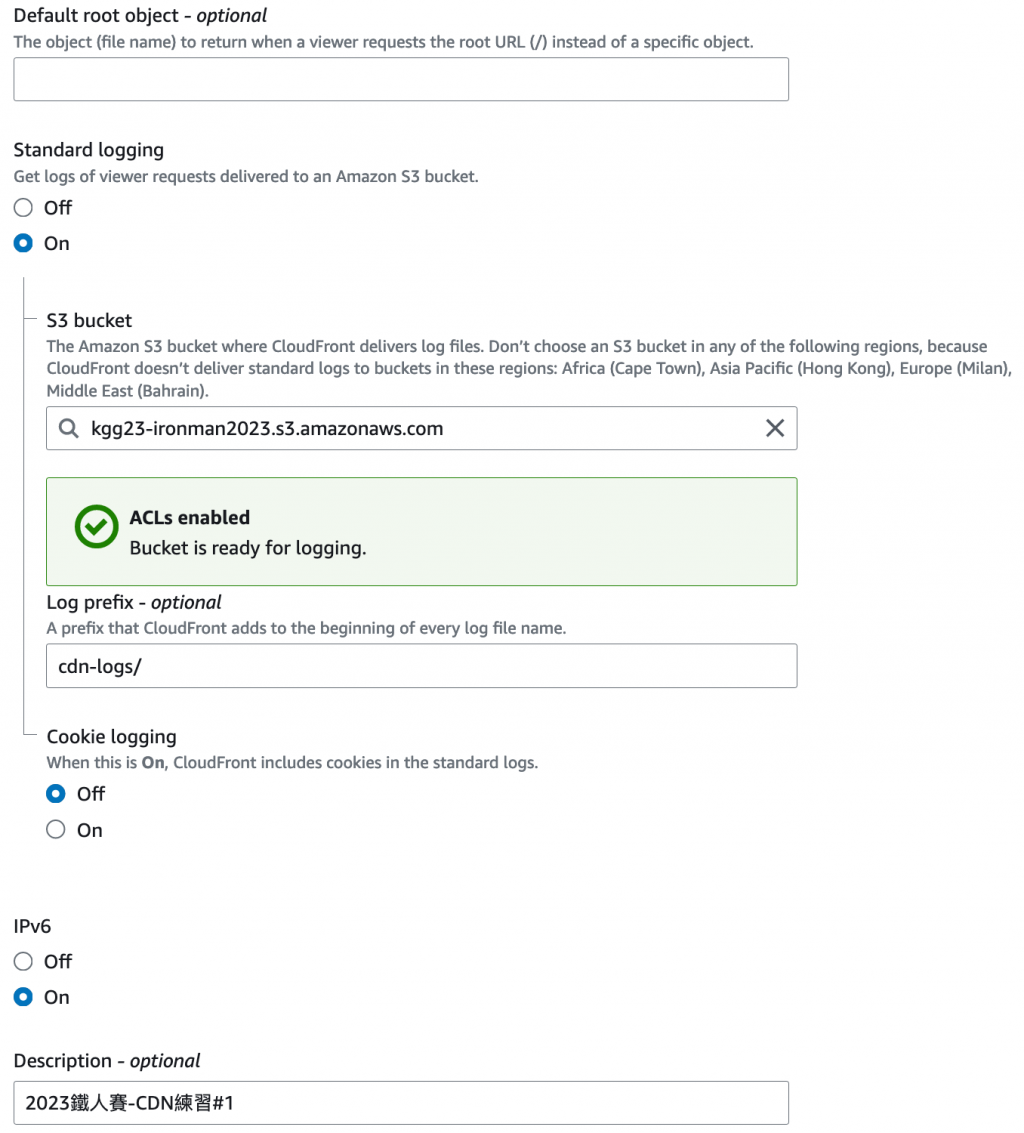
  - e. Default root object: (留空)
  - f. Standard logging: On - 選擇一開始準備的 S3 bucket - s3://kgg23-ironman2023; Console 頁面上會看到提示需要打開 ACL,就點選同意打開 
  - g. Cookie loggin: No
  - h. IPv6: Off 
  - i. Description: (請填寫你喜歡的說明)

https://ithelp.ithome.com.tw/upload/images/20230905/20162502UBXfOUIuqV.png

  • 2.7 按下 'Create Distribution' 創建屬於您的第一個 CloudFront Distribution.
    1. 此時會回到 Distribution 的詳細資訊頁面,在 Details 的部分會列出這個 Distribution 的域名、ARN、LastModified 資訊。
      https://ithelp.ithome.com.tw/upload/images/20230905/2016250215VOKdEkA6.png
      以我剛設定的 CloudFront Distribution 為例,對應的域名是 dwnhikcdqi4zf.cloudfront.net。試著將其貼到瀏覽器裡,就會看到網站的內容。(跟原本的網站看來完全一樣耶!)
      https://ithelp.ithome.com.tw/upload/images/20230905/20162502J5EYaGoJiE.png

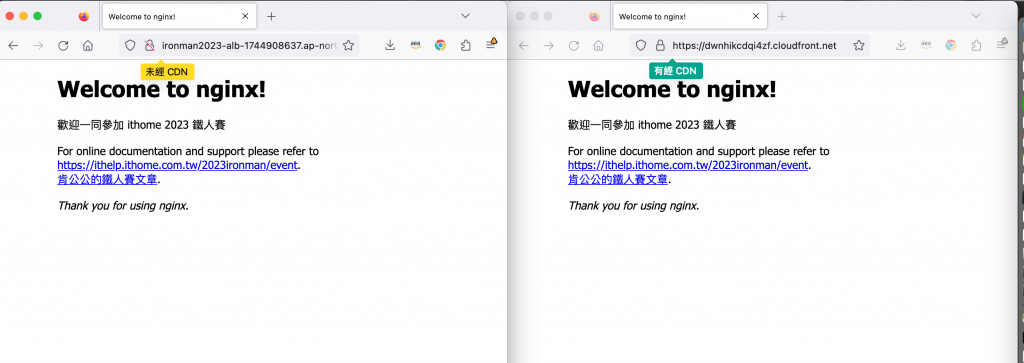
恭喜你,你也完成了第一組 CloudFront 的設置,讓 CloudFront 可以對外替你提供網站內容給客戶。
明天我們將針對目前的設定進一步說明並進一步的做實驗。
Day 04 - 開始動手,以 CloudFront 作為自己的第一個 CDN 方案(Part II) - 不同設置的差別 & 比較

[1] 考慮後續彈性,建議使用 ALB 對外的 DNS 域名,而不是直接以 EC2 的域名來提供服務。- http://ironman2023-alb-1744908637.ap-northeast-1.elb.amazonaws.com/
[2] 如果你有需要將 CDN 日誌存放到 S3,記得 Bucket 不能開在 HKG/Milan/Captown/Bahrain等區域,因為 CloudFront 無法將日誌寫到這些區域的 S3 Buckets


上一篇
Day 02 - CDN 是什麼,是怎麼提供服務的?
下一篇
Day 04 - 開始動手,以 CloudFront 作為自己的第一個 CDN 方案(Part II) - 如何量測
系列文
2023 年了,一起來學 CDN - 你也可以瞭解的 CloudFront 30
圖片
  直播研討會
圖片
{{ item.channelVendor }} {{ item.webinarstarted }} |
{{ formatDate(item.duration) }}
直播中

尚未有邦友留言

立即登入留言