TailwindCSS 與 Headless UI 就像用原型食物去做烹煮,而不是經過非常多製程的加工食品。當我們使用它們時,我們得到的是最基本、最純粹的成分,讓我們可以根據自己的需求進行調整。這不僅提供了更大的靈活性,還確保了我們的產品具有獨特和個性化的特色。本篇文章將與讀者們介紹 TailwindCSS 與 Headless UI 的優勢
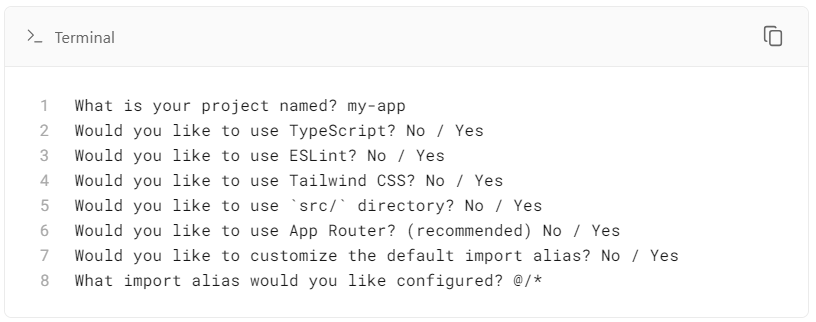
什麼是 Tailwind CSS,他就像在寫 pure 的 css 一樣,但可以不用在另外的 css 檔案中建立再引進需使用的檔案中,而是將它 class name 化,只要在 class / className 中設置 tailwind 規定的語法就可以進行樣式的調整。而且! 若是使用 Nextjs CLI 進行專案安裝,Tailwind CSS 就是作為預設的樣式套件

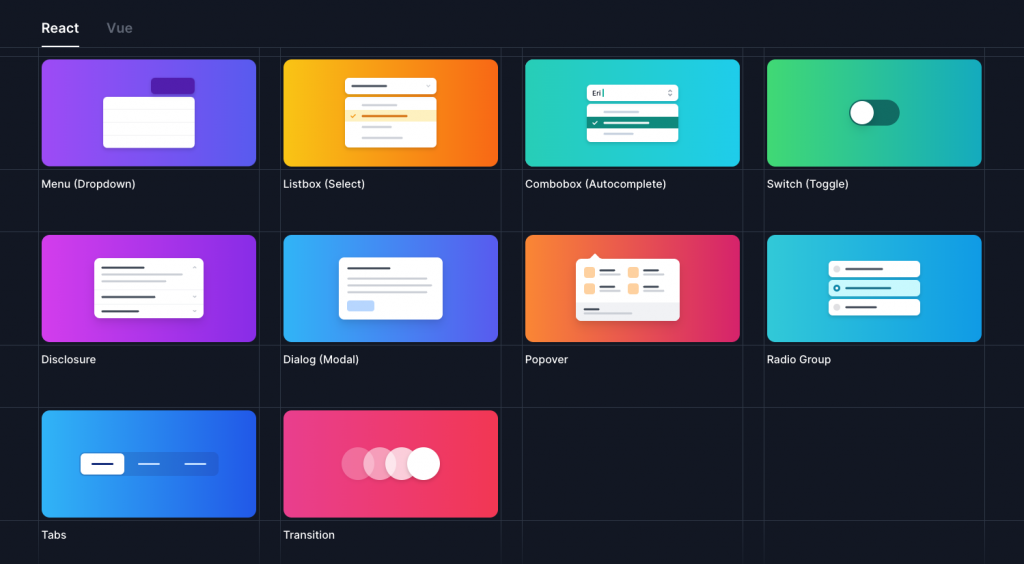
@apply 指令組合工具類別,確保開發者按照設計系統規範創建一致的界面。Headless UI 是 Tailwind CSS Lab 提供的完全無樣式,但具功能性的元件工具庫,主要幫助開發者建立高度無障礙性且完全可客製化的 Web 界面元件。由於是由 Tailwind CSS Lab 進行開發,所以可完全的使用 Tailwind CSS 的語法進行樣式設計,不需額外設置 CSS 檔案。支援 React 及 Vue 框架,且提供 10 種進階功能元件,每個元件皆有使用範例可以參考。

我自己個人使用過 Material UI 、Ant Design 元件庫進行開發,安裝後開箱即用他們提供的元件,真的又快又香,但同時也嘗過一些苦頭。
<div className="flex shadow-lg divide-x-2 rounded-full ">
  {list.map((item, index) => (
    <RadioGroup.Option
      id="radio-option"
      key={item.name}
      value={item.id}
      className={({ active, checked }) =>
        `${
          active
            ? "..."
            : ""
        }
          ${
            checked
              ? "bg-secondary-500 bg-opacity-75 text-white hover:bg-opacity-75"
              : "bg-white hover:bg-opacity-25"
          }
        ${index === 0 ? "rounded-l-full" : ""}
        ${index === list.length - 1 ? "rounded-r-full" : ""}
        flex w-full justify-center cursor-pointer px-5 py-4
        hover:bg-secondary-500
        focus:outline-none`
      }
    >
      {({ active, checked }) => (
        <>
          <div className="flex items-center justify-between">
            <div className="text-md">
              <RadioGroup.Label
                id={`radio-option-${item.id}`}
                as="p"
                className={`font-medium  ${
                  checked ? "text-white" : "text-gray-900"
                }`}
              >
                {item.name}
              </RadioGroup.Label>
            </div>
          </div>
        </>
      )}
    </RadioGroup.Option>
  ))}
</div>;
也可能因為這些阻礙讓使用者會有使用上的猶豫,目前有些 UI 框架也具有 headless 的套件庫,而且社群上也越來越多人推從這樣的模式開發
綜合上方的優缺點比較,也需要說明為什麼我會選擇這個組合,以及我使用的方式:
@applyTailwind CSS 的優點也可以是他的缺點,可以方便地在 class name 進行樣式設定,但同時如果樣式非常的複雜也會影響閱讀以及維護,這時候可以把一些共用的樣式定義在 CSS 檔案中,並以 @apply 接續 Tailwind CSS 樣式語法設置,在元件上加上 class name 就可以設定樣式
範例:
我專案中有許多不同類型的 Input,這時候可以將共用的樣式先設置,再調用 class name
原始
  	<input
        className={`
          peer
          w-full
          p-2
          pt-4
          font-light
          bg-white
          border-2
          rounded-md
          outline-none
          transition
          disabled:opacity-70
          disabled:cursor-not-allowed
          ${formatPrice ? 'pl-9' : 'pl-4'}
          ${Boolean(error) ? 'border-rose-500' : 'border-neutral-300'}
          ${Boolean(error) ? 'focus:border-rose-500' : 'focus:border-black'}
        `}
      />
修改後清爽許多
// css

.input-base {
  @apply w-full font-light bg-white border-2 rounded-md outline-none transition disabled:opacity-70 disabled:cursor-not-allowed;
}
<inpu
className={`
  peer
  p-2
  pt-4
  input-base
  ${formatPrice ? 'pl-9' : 'pl-4'}
  ${Boolean(error) ? 'border-rose-500' : 'border-neutral-300'}
  ${Boolean(error) ? 'focus:border-rose-500' : 'focus:border-black'}
`}
/>
https://marketplace.visualstudio.com/items?itemName=moalamri.inline-fold

幫你把 class name 全部縮起來 ( 一種眼不見為淨的概念 )

當我們想要自己定義專案專屬的樣式( 例如:色票 )或是命名時,可以在 tailwind.config.js 檔案中的 extend 進行新增
module.exports = {
	...
  theme: {
    extend: {
		// 建立設定
			fontSize:{
                '2xs': '.65rem',
             },
			colors: {
				primary: {
                  50: '#F0FDF4',
                  100: '#DCFCE7',
                  200: '#BBF7D0',
                  300: '#86EFAC',
                  400: '#4ADE80',
                  500: '#22C55E',
                  600: '#16A34A',
                  700: '#15803D',
                  800: '#166534',
                  900: '#14532D'
                },
                secondary: {
                  50: '#FFFAF3',
                  100: '#FEF5E7',
                  200: '#FDE7C2',
                  300: '#FBD89D',
                  400: '#F8BB54',
                  500: '#F59E0B',
                  600: '#DD8E0A',
                  700: '#B87708',
                  800: '#935F07',
                  900: '#784D05'
                },
				...
			}
		}
	}
}
⚠️ 要特別注意 theme 底下第一層也可以設定這些 fontSize、colors 等屬性,但這一層的設定將會直接取代原本的所有樣式。如果為以下設定,fontSize 只會出現 2xs 不會有其他 sm、md、lg、xl…等等,系統的色票也只有 primary 及 secondary 兩種色系了!
module.exports = {
	...
  theme: {
// 取代原有樣式
			fontSize:{
              '2xs': '.65rem',
            },
			colors: {
              primary: {
                  50: '#F0FDF4',
                  100: '#DCFCE7',
                  200: '#BBF7D0',
                  300: '#86EFAC',
                  400: '#4ADE80',
                  500: '#22C55E',
                  600: '#16A34A',
                  700: '#15803D',
                  800: '#166534',
                  900: '#14532D'
                },
				...
           }
	  }
}
很多時候我們會依據不同狀態為元件呈現不同的樣式,而在定義時要特別注意,Tailwind CSS 利用了 PurgeCSS 庫的功能進行優化,PurgeCSS 僅對字串進行簡單的正則比對,不會解析 HTML 或 JavaScript。如果透過字串連線動態生成 class,PurgeCSS 可能無法辨識而使得樣式設定失效。
✅ 正確寫法
<input
  disabled={disabled}
  className={`
    ${errors[id] ? 'border-rose-500' : 'border-neutral-500'}
    ${errors[id] ? 'focus:border-rose-500' : 'focus:border-neutral-500'}
  `}
/>
❌ NG 寫法
<input
  disabled={disabled}
  className={`
    border-${ errors[id] ? 'rose' : 'neutral' }-500
    focus:border-${ errors[id] ? 'rose' : 'neutral' }-500
  `}
/>
基本上 Headless UI 中的元件都可以滿足我的需求,但客製化的情況也是無法避免的,舉一個專案中的 radio group , Headless 元件也會提供 Render Prop 供狀態設置

<div className="flex shadow-lg divide-x-2 rounded-full ">
  {list.map((item, index) => (
    <RadioGroup.Option
      id="radio-option"
      key={item.name}
      value={item.id}
      className={({ active, checked }) =>
        `${
          active
            ? "..."
            : ""
        }
          ${
            checked
              ? "bg-secondary-500 bg-opacity-75 text-white hover:bg-opacity-75"
              : "bg-white hover:bg-opacity-25"
          }
        ${index === 0 ? "rounded-l-full" : ""}
        ${index === list.length - 1 ? "rounded-r-full" : ""}
        flex w-full justify-center cursor-pointer px-5 py-4
        hover:bg-secondary-500
        focus:outline-none`
      }
    >
      {({ active, checked }) => (
        <>
          <div className="flex items-center justify-between">
            <div className="text-md">
              <RadioGroup.Label
                id={`radio-option-${item.id}`}
                as="p"
                className={`font-medium  ${
                  checked ? "text-white" : "text-gray-900"
                }`}
              >
                {item.name}
              </RadioGroup.Label>
            </div>
          </div>
        </>
      )}
    </RadioGroup.Option>
  ))}
</div>;
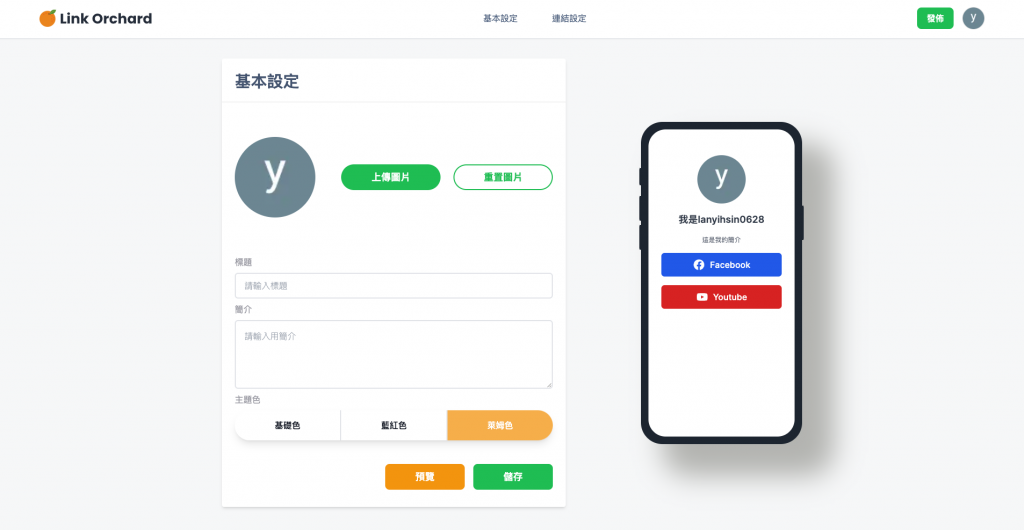
在我的專案中有非常多的 Button,每個 Button 幾乎都有相同的基本屬性,如果每次需要都要重新刻一次真的會花很多時間 ( 下圖中就有7個 ),那就一次痛苦吧!將可能會更改的樣式設為變數,使用 props 傳給元件進行判斷,整個簡潔許多!

<Button
  label="預覽"
  color="secondary"
  size="large"
  className="w-full md:w-1/4"
  type="button"
  onClick={handlePreview}
/>
如果要列舉樣式的使用真的會說不完,其實 UI 套件和無樣式的功能元件庫都各有各的優缺點,選擇何者也是取自於每個人每個專案的需求。我自己在實作元件模組化也是參考了非常多 MUI 的設計原理,做一做也是非常有趣,對我的需求來說這樣的選擇是最優先的,而且在網路上也有非常多大神們分享的樣式元件,如果真的無從下手都可以參考運用;也有許多人開發 Tailwind CSS 的延伸工具,例如我這次專案中使用到的漸層色工具,真的心懷感恩的使用。而 Tailwind CSS 也有個 Playground 平台可以讓使用者將自己的創意分享給其他使用者 https://play.tailwindcss.com/ 。
全新的 React 组件设计理念 Headless UI
https://juejin.cn/post/7160223720236122125
Headless components in React and why I stopped using a UI library for our design system
https://medium.com/@nirbenyair/headless-components-in-react-and-why-i-stopped-using-ui-libraries-a8208197c268
Compare material-ui vs ant design vs tailwindcss (speed, bundle size)
https://medium.com/@mberneti/compare-material-ui-vs-ant-design-vs-tailwindcss-speed-bundle-size-28e26977f2a6

