今天要來安裝Zabbix-Server,先簡單介紹一下環境需求,依據監控數量硬體等級建議再往上升
Centos7最高可安裝Zabbix5.0版本,因此這邊以5.0為範例
1.Zabbix-Download 官網有提供簡易安裝步驟
rpm -Uvh https://repo.zabbix.com/zabbix/5.0/rhel/7/x86_64/zabbix-release-5.0-1.el7.noarch.rpm
2.清空緩存
yum clean all
3.下載Server、資料庫、Agent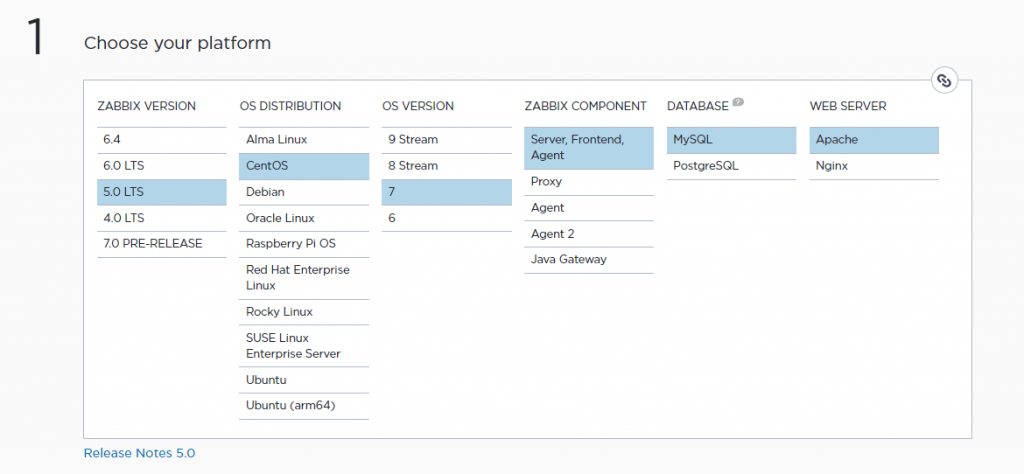
yum install zabbix-server-mysql zabbix-agent
4.安裝Zabbix 前端
yum install centos-release-scl
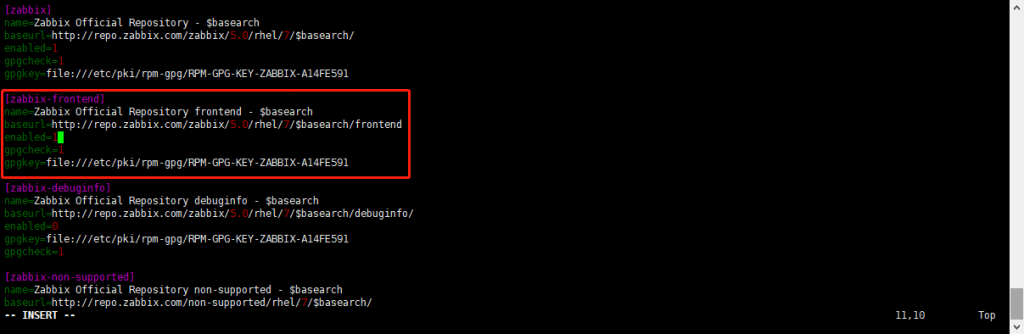
vim /etc/yum.repos.d/zabbix.repo
將zabbix-frontend中enabled=0改為1
[zabbix-frontend]
name=Zabbix Official Repository frontend - $basearch
baseurl=http://repo.zabbix.com/zabbix/5.0/rhel/7/$basearch/frontend
enabled=1
gpgcheck=1
gpgkey=file:///etc/pki/rpm-gpg/RPM-GPG-KEY-ZABBIX-A14FE591
5.下載Zabbix-Web套件
yum install zabbix-web-mysql-scl zabbix-apache-conf-scl
6.安裝MySql資料庫
yum install mariadb-server -y
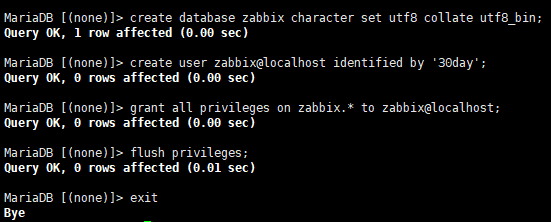
7.配置資料庫
mysql -uroot -p
create database zabbix character set utf8 collate utf8_bin;
create user zabbix@localhost identified by 'password';
grant all privileges on zabbix.* to zabbix@localhost;
flush privileges;
exit
8.導入數據庫信息
zcat /usr/share/doc/zabbix-server-mysql*/create.sql.gz | mysql -uzabbix -p zabbix
9.修改Zabbix-Server配置文件
vim /etc/zabbix/zabbix_server.conf
找到DBPasswor添加密碼,儲存退出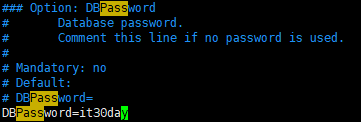
10.添加時區
vim /etc/opt/rh/rh-php72/php-fpm.d/zabbix.conf
至最底部添加時區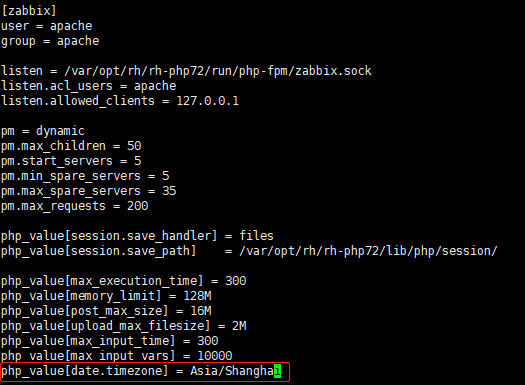
11.啟動並設定開機自起
systemctl restart zabbix-server zabbix-agent httpd rh-php72-php-fpm
systemctl enable zabbix-server zabbix-agent httpd rh-php72-php-fpm
1.至瀏覽器搜尋 Zabbix-Server-IP/zabbix ,進入啟動頁面
2.進入第二頁確認是否都安裝成功
3.輸入密碼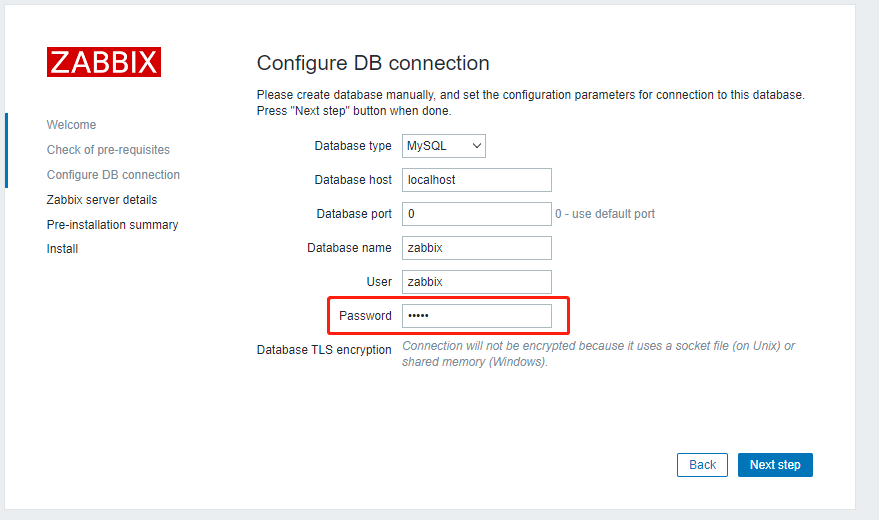
4.確認配置信息
5.預設帳號密碼為Admin/zabbix,如不確定也可至配置文檔查詢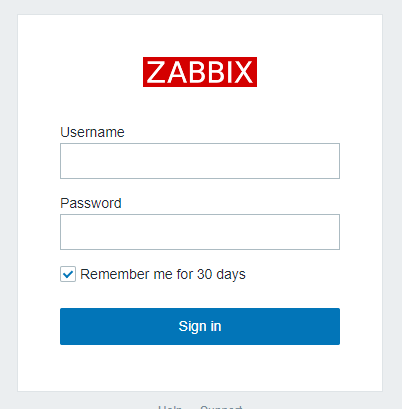
6.進入頁面
7.因為在Zabbix-Server中也有安裝Agent,進入Hosts中查看目前配置完成的Zabbix-Server是否運行正常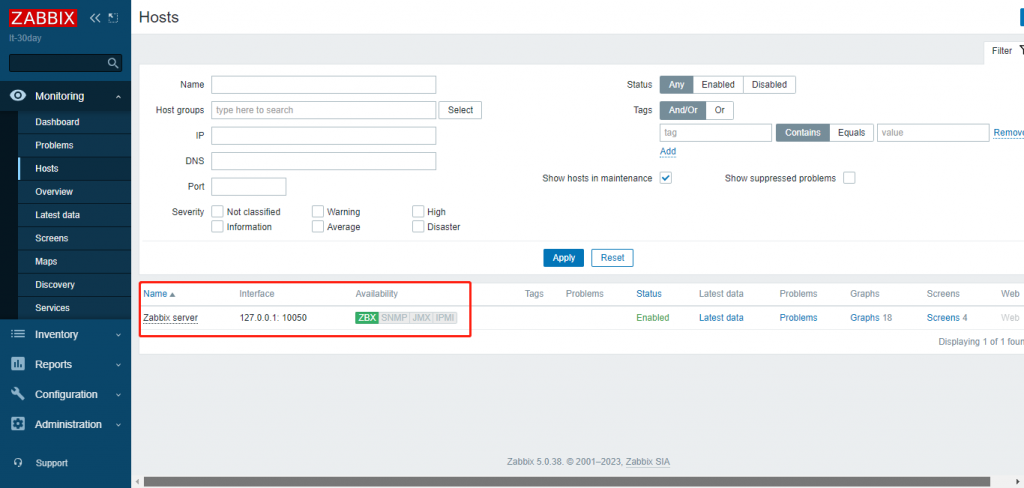
到這邊就已經成功配置完Zabbix-Server了,明天將在AWS EC2上安裝Agent並配置監控項。