大家好,恭喜你來到了Day04,今天要來了解如果我們有一個KML或GPX軌跡我們該如何放到地圖上呢?
首先,我們先要去取得我們的資料,這邊使用的範例是水利地理資訊服務平台,可以下載裡面提供的KML水位站
https://gic.wra.gov.tw/Gis/Gic/API/Google/Index.aspx
下載後我們放到專案資料夾中,就可以來看程式碼了
const map = new ol.Map({
    layers: [
        new ol.layer.Tile({
            source: new ol.source.OSM()
        })
    ],
    target: 'map',
    view: new ol.View({
        projection: "EPSG:3857",
        center: ol.proj.fromLonLat([120.846642, 23.488793]),
        zoom: 7.5,
        maxZoom: 20,
        minZoom: 5,
        enableRotation: false,
    }),
    controls: []
});

##################### 注意這邊即可 #####################
// 可以改成吃本機的路徑,未來可以使用link的方式取得kml資料
const kml = new ol.layer.Vector({
    source: new ol.source.Vector({
        url: 'RIVWLSTA_e.kml',
        format: new ol.format.KML(),
    }),
});
##################### 注意這邊即可 #####################

map.addLayer(kml);
我們使用openlayers提供的url方式來取得檔案,同時需要提供format參數,這樣openlayers就會幫我們解析kml檔案到地圖上渲染
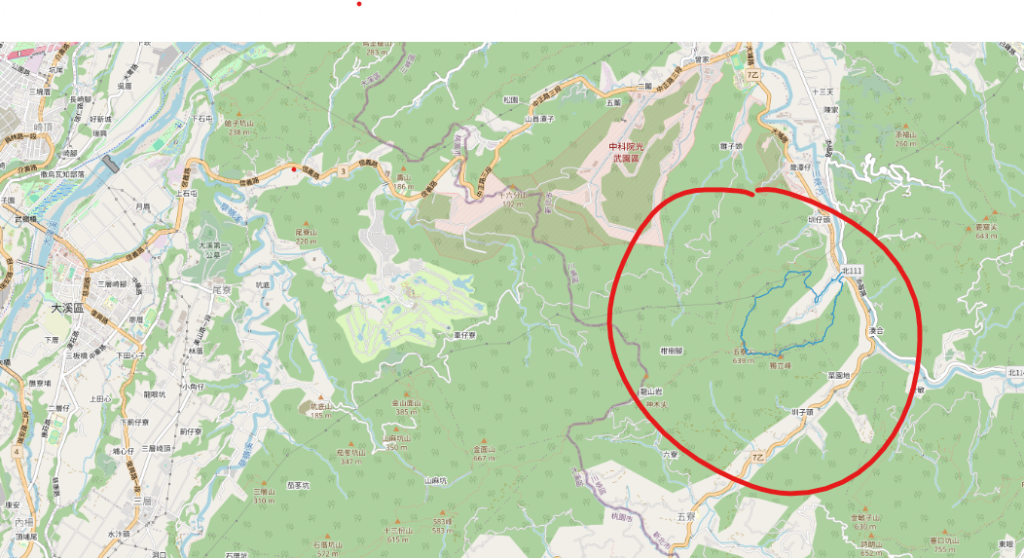
GPX檔案我們可以到健行筆記輸入你想要查看的登山軌跡來當作測試資料
https://hiking.biji.co/
const map = new ol.Map({
    layers: [
        new ol.layer.Tile({
            source: new ol.source.OSM()
        })
    ],
    target: 'map',
    view: new ol.View({
        projection: "EPSG:3857",
        center: ol.proj.fromLonLat([120.846642, 23.488793]),
        zoom: 7.5,
        maxZoom: 20,
        minZoom: 5,
        enableRotation: false,
    }),
    controls: []
});

##################### 注意這邊即可 #####################
// 這邊則改為GPX資料為範例
const gpx = new ol.layer.Vector({
    source: new ol.source.Vector({
        url: '五寮尖.gpx',
        format: new ol.format.GPX(),
    }),
});
##################### 注意這邊即可 #####################

map.addLayer(gpx);

要自己找到圖資的位置喔,後續我們會教到該如何移動到對應的位置
連結中我是將兩個layers都同時加入到地圖中,如果如果只要顯示一個記得把其中一個addLayer先註解
https://github.com/weijung0923/learning-openlayers-micromastery/tree/day04
