- 輪廓偵測:把圖形上各個外框找出來
原圖:

import cv2
import numpy as np

img = cv2.imread("image.jpg")
img = cv2.cvtColor(img, cv2.COLOR_BGR2GRAY)

cv2.imshow("img", img)
cv2.waitKey(0)

import cv2
import numpy as np

img = cv2.imread("image.jpg")
img = cv2.cvtColor(img, cv2.COLOR_BGR2GRAY)
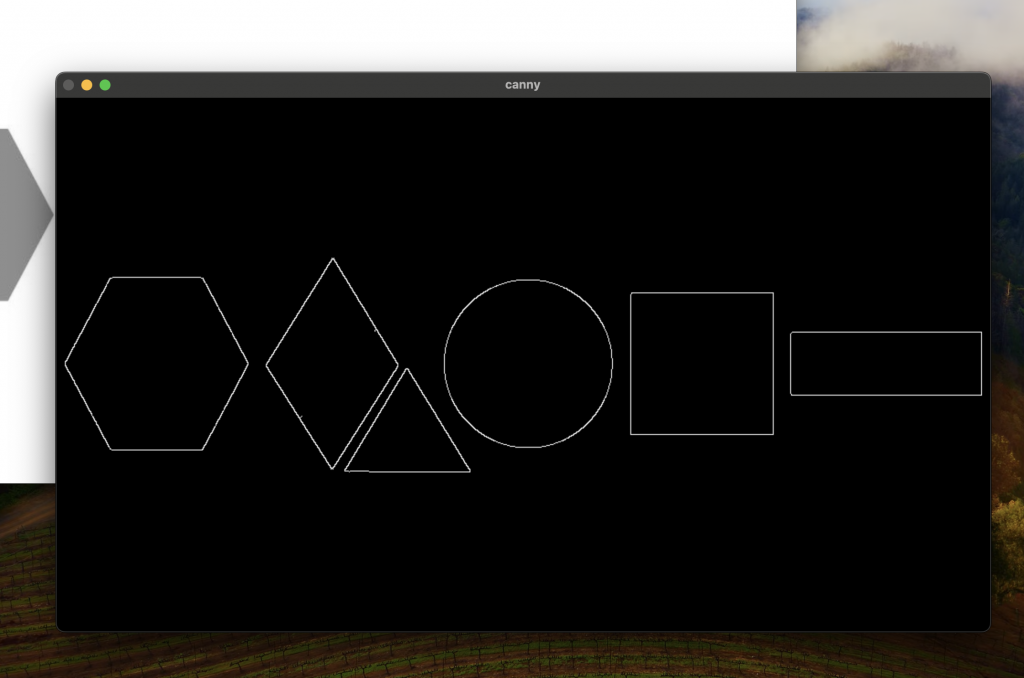
canny = cv2.Canny(img, 36, 100)

cv2.imshow("img", img)
cv2.imshow("canny", canny)
cv2.waitKey(0)

- 偵測輪廓
cv2.RETR_EXTERNAL:偵測外輪廓
cv2.CHAIN_APPROX_NONE:不壓縮水平or垂直
利用for迴圈可以跑過所有輪廓
import cv2
import numpy as np

img = cv2.imread("image.jpg")
img_contour = img.copy()
img = cv2.cvtColor(img, cv2.COLOR_BGR2GRAY)
canny = cv2.Canny(img, 36, 100)
contours, heirrchy = cv2.findContours(canny, cv2.RETR_EXTERNAL, cv2.CHAIN_APPROX_NONE)

for cnt in contours:
    cv2.drawContours(img_contour, cnt, -1, (0,255,0), 5)

cv2.imshow("img", img)
cv2.imshow("canny", canny)
cv2.imshow("img_contour", img_contour)
cv2.waitKey(0)

import cv2
import numpy as np

img = cv2.imread("image.jpg")
img_contour = img.copy()
img = cv2.cvtColor(img, cv2.COLOR_BGR2GRAY)
canny = cv2.Canny(img, 36, 100)
contours, heirrchy = cv2.findContours(canny, cv2.RETR_EXTERNAL, cv2.CHAIN_APPROX_NONE)

for cnt in contours:
    cv2.drawContours(img_contour, cnt, -1, (0,255,0), 5)
    cv2.contourArea(cnt) #面積,若要取得,可以print出來
    print(cv2.arcLength(cnt, True)) #邊長

cv2.imshow("img", img)
cv2.imshow("canny", canny)
cv2.imshow("img_contour", img_contour)
cv2.waitKey(0)
import cv2
import numpy as np

img = cv2.imread("image.jpg")
img_contour = img.copy()
img = cv2.cvtColor(img, cv2.COLOR_BGR2GRAY)
canny = cv2.Canny(img, 36, 100)
contours, heirrchy = cv2.findContours(canny, cv2.RETR_EXTERNAL, cv2.CHAIN_APPROX_NONE)

for cnt in contours:
    cv2.drawContours(img_contour, cnt, -1, (0,255,0), 5)
    area = cv2.contourArea(cnt)
    # print(cv2.arcLength(cnt, True))
    if area>500:
        peri = cv2.arcLength(cnt, True)
        vertices = cv2.approxPolyDP(cnt, peri*0.02, True)
        print(len(vertices))
        x, y, w, h = cv2.boundingRect(vertices)
        cv2.rectangle(img_contour, (x, y), (x+w, y+h), (255,0,0), 5)

cv2.imshow("img", img)
cv2.imshow("canny", canny)
cv2.imshow("img_contour", img_contour)
cv2.waitKey(0)

- 因為前一步已經用vertices = cv2.approxPolyDP(cnt, peri*0.02, True)來判斷圖形的頂點數目,所以接下來可以用if條件來判斷框出來的框框裡面是幾邊形
import cv2
import numpy as np

img = cv2.imread("image.jpg")
img_contour = img.copy()
img = cv2.cvtColor(img, cv2.COLOR_BGR2GRAY)
canny = cv2.Canny(img, 36, 100)
contours, heirrchy = cv2.findContours(canny, cv2.RETR_EXTERNAL, cv2.CHAIN_APPROX_NONE)

for cnt in contours:
    cv2.drawContours(img_contour, cnt, -1, (0,255,0), 5)
    area = cv2.contourArea(cnt)
    # print(cv2.arcLength(cnt, True))
    if area>500:
        peri = cv2.arcLength(cnt, True)
        vertices = cv2.approxPolyDP(cnt, peri*0.02, True)
        corners = len(vertices)
        x, y, w, h = cv2.boundingRect(vertices)
        cv2.rectangle(img_contour, (x, y), (x+w, y+h), (255,0,0), 5)
        if corners == 3:
            cv2.putText(img_contour, "triangle", (x, y+150), cv2.FONT_HERSHEY_COMPLEX, 1, (0,0,255),2)
        elif corners == 4:
            cv2.putText(img_contour, "rectangle", (x, y+200), cv2.FONT_HERSHEY_COMPLEX, 1, (0,0,255),2)
        elif corners == 5:
            cv2.putText(img_contour, "pentagon", (x, y+250), cv2.FONT_HERSHEY_COMPLEX, 1, (0,0,255),2)
        elif corners == 6:
            cv2.putText(img_contour, "hexagon", (x, y+250), cv2.FONT_HERSHEY_COMPLEX, 1, (0,0,255), 2)
        else:
            cv2.putText(img_contour, "circle", (x+50, y+250), cv2.FONT_HERSHEY_COMPLEX, 1, (0,0,255),2)


cv2.imshow("img", img)
cv2.imshow("canny", canny)
cv2.imshow("img_contour", img_contour)
cv2.waitKey(0)

- 人臉辨識
import cv2

img = cv2.imread("person.jpg")
gray = cv2.cvtColor(img, cv2.COLOR_BGR2GRAY)
face = cv2.CascadeClassifier("face_detect.xml")
facerac = face.detectMultiScale(gray, 1.2, 3) #(圖片, 縮小倍數, 幾個框框:臉部要被框到幾次才算)

print(len(facerac))

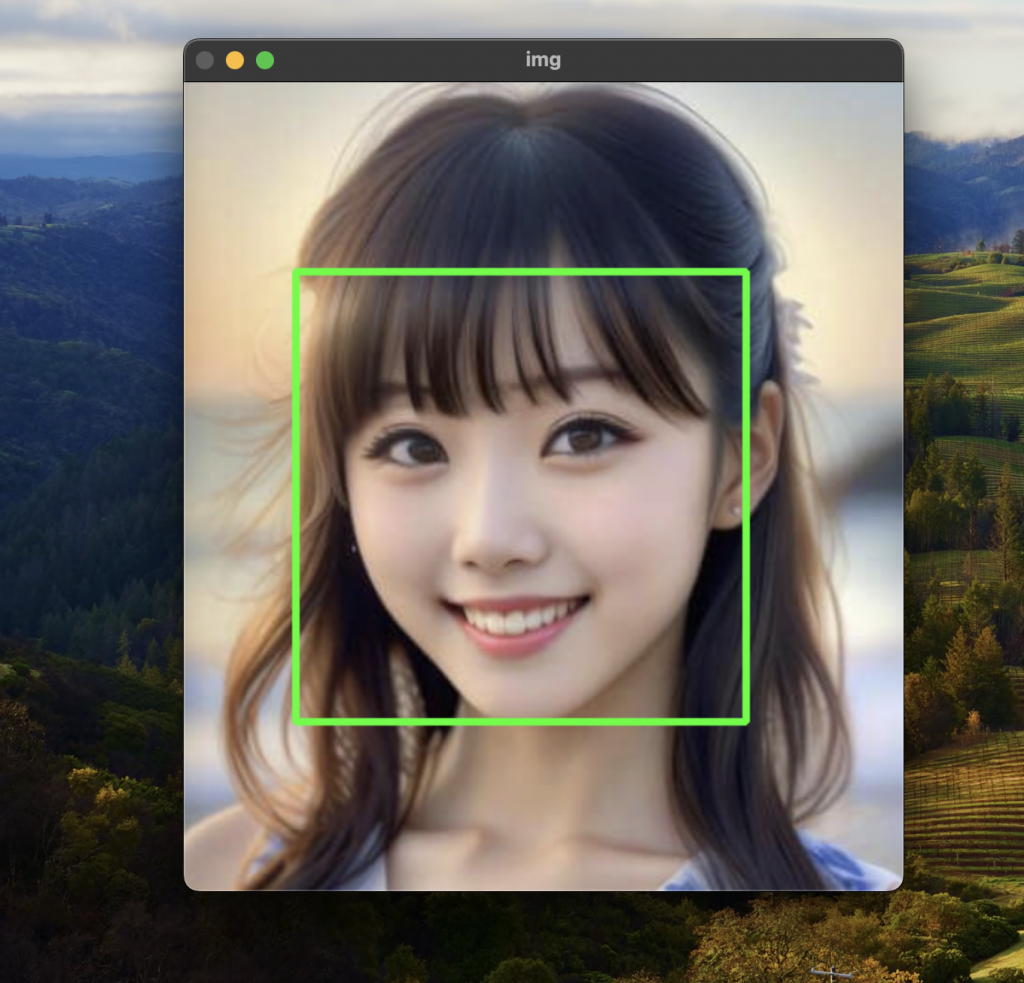
for x, y, w, h in facerac:
    cv2.rectangle(img, (x,y), (x+w, y+h), (0,255,0), 3)


cv2.imshow("img", img)
cv2.waitKey(0)


