
首先要先釐清的是Azure Active Directory 與Azure Active Directory B2C是兩種不一樣的東西, 雖然都是OpenID OAUTH 2.0的架構, 簡單來說就像斯斯有兩種.
Azure Active Directory其實就是可以把你公司的AD同步到Azure AD, 好處就是自家的AD不需要公開在Internet上, 要做SSO的話可以直接跟Azure Active Directory做認證,減少自家AD被攻擊的風險.
而Azure Active Directory B2C則是可以整合各大平台的帳號Microsoft, Google,Amazon等, 即可以建立會員Profile但是認證吃別人的, 只需寫一次Azure Active Directory B2C的認證程式, 剩下的Azure會幫你搞定的, 認證的畫面如下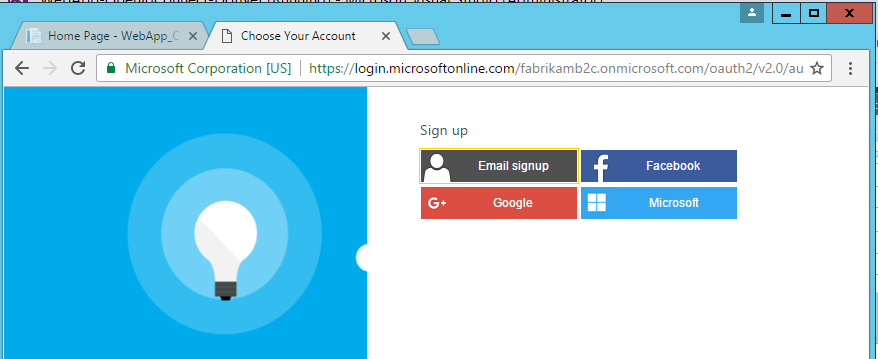
然後找了一些資料Azure Active Directory已經有很多的教學文章, 所以來挑戰Azure Active Directory B2C, 果不其然Azure Active Directory B2C搞了好幾天, 繁瑣程度, 不輸IOS Developer開發設定, 要弄這個還真是要有耐心啊, 因為Microsoft的UX做得有點掉漆, 因為配置過程如下
先到Azure舊Portal建立Azure Active Directory B2C -> 然到開發人員網站註冊一個Microsoft帳號認證 -> 到Azure新Portal做Azure Active Directory B2C設定
就不能一個地方做完所有的事嗎? 切來切去都快暈了, 尤其對剛入門的人簡直苦手
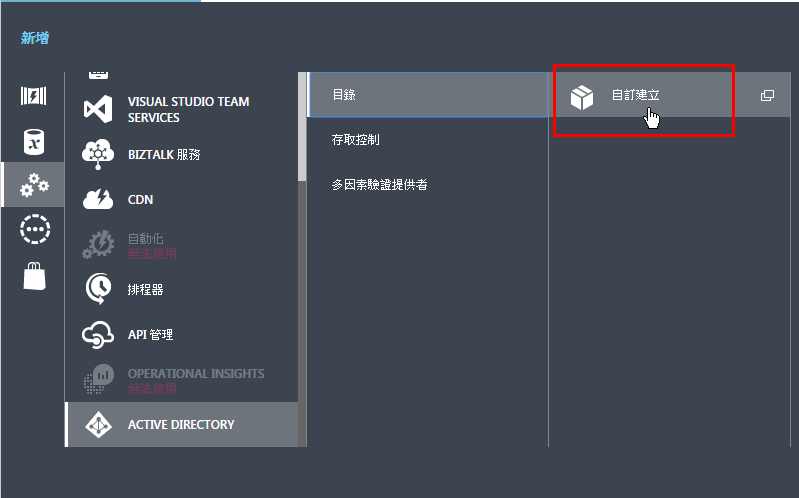
一開始登入Azure舊Portal, 按下新增, 找到ACTIVE DIRECTORY, 點選自訂建立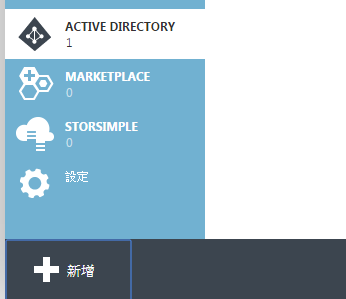
設定如下所示, 網域名稱可以自訂, 然後要記下來, 等等很多地方會用到, 然後”這是B2C目錄”, 一定要勾選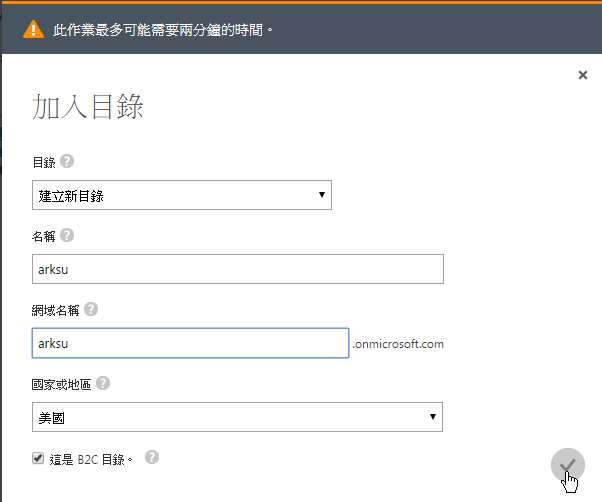
然後就會看到剛建立好目錄, 直接點擊進入如下所示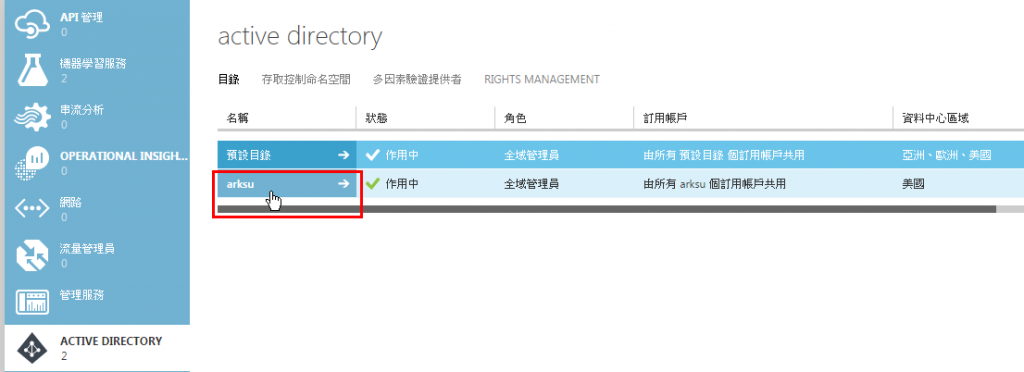
到這裡可以看到如下紅框所示的”管理B2C設定”, 先停一下, 要先去設定Microsoft帳號開發認證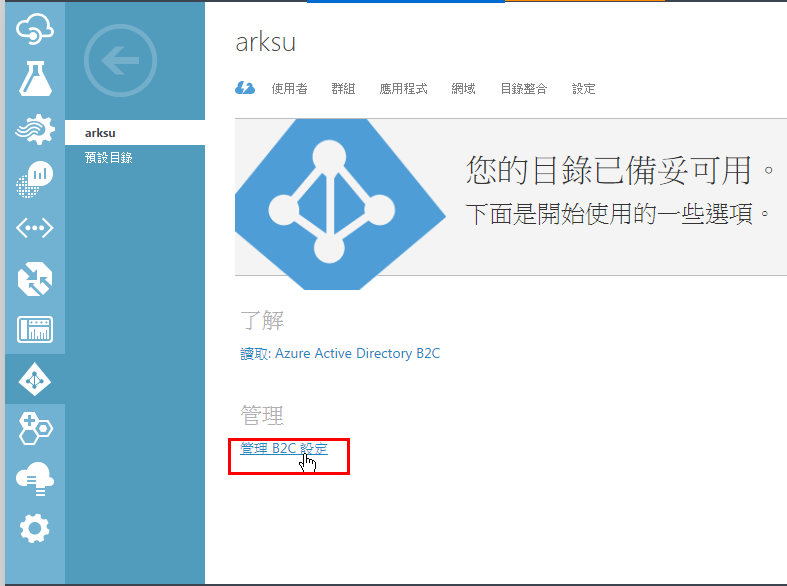
由於要採用xxx@hotmail.com或是xxx@live.com等Microsoft系列帳號做認證, 所以必須先到底下網址申請開發認證, 點擊Add an app
https://apps.dev.microsoft.com/#/appList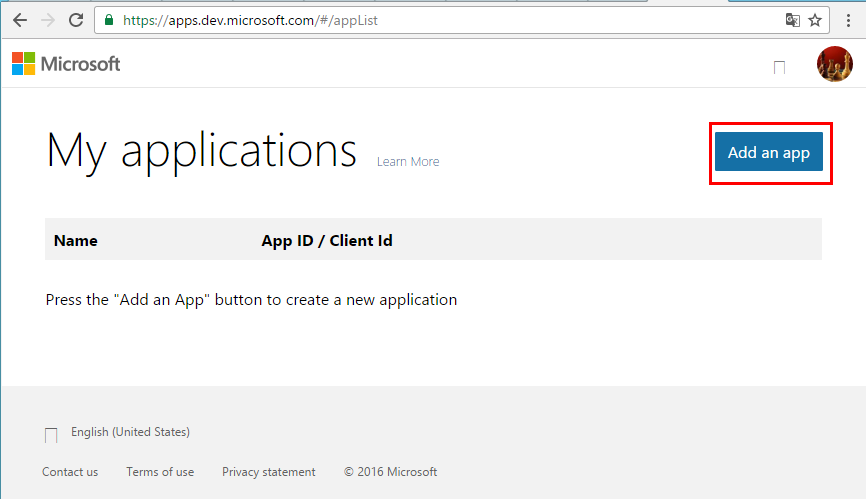
輸入名稱後按下Create application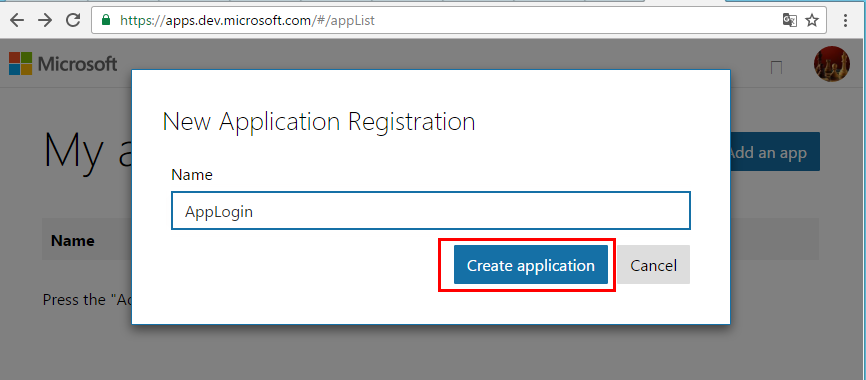
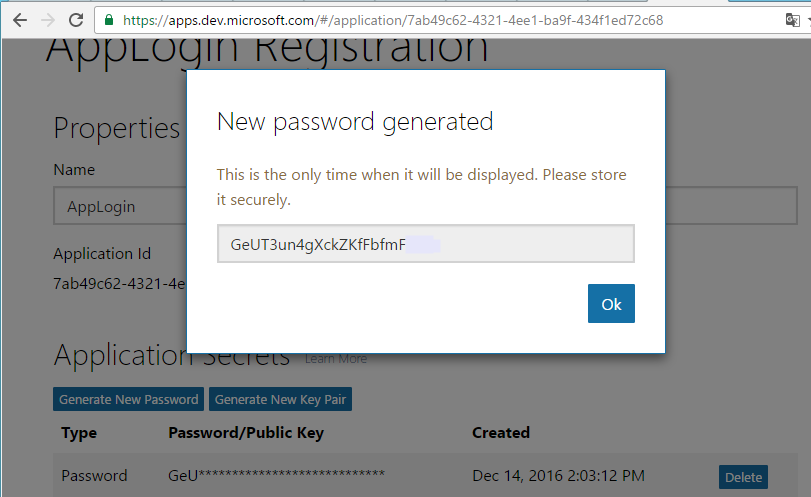
按下Generate New Password, 記得密碼複製出來,另外Application Id也要記下來之後都會用到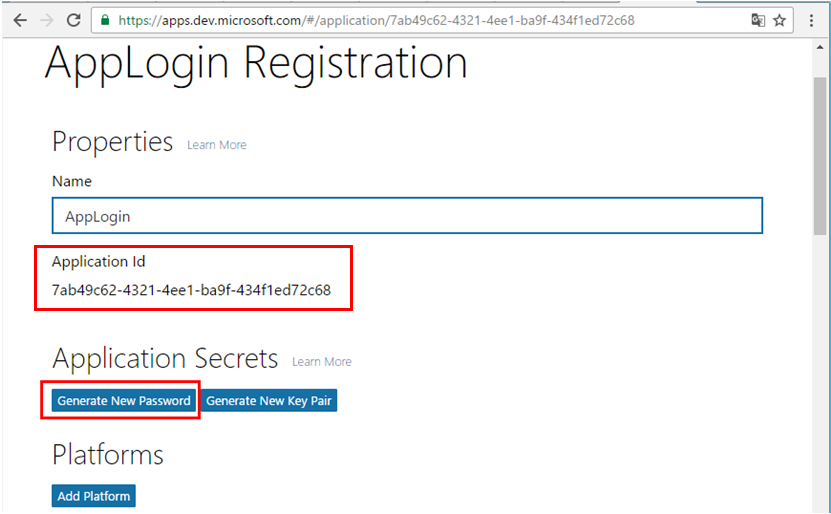
按下Add Platform, 選擇Web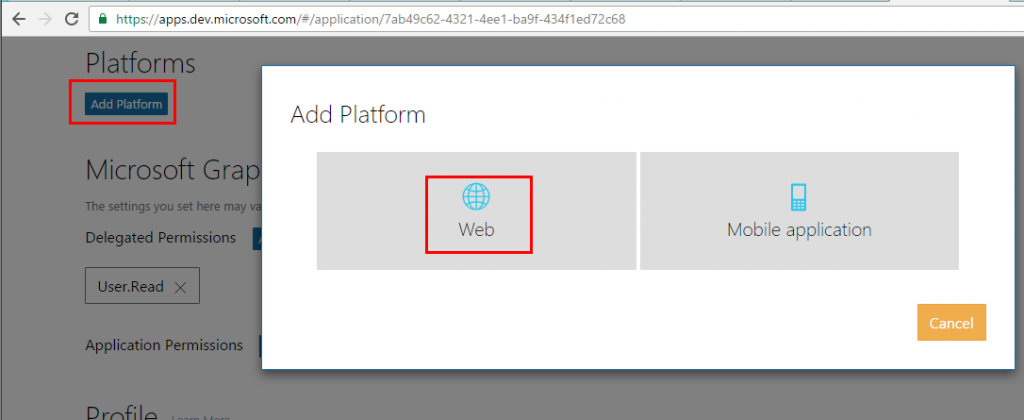
按下Add Url, 而Url如下, 把XXX替換剛剛在Azure舊Portal建立的目錄, 如下圖紅框所示
https://login.microsoftonline.com/te/XXX/oauth2/authresp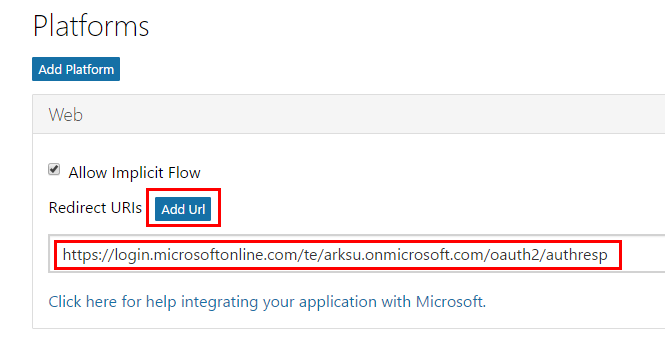
接著確認Live SDK support有被勾選, 按下Save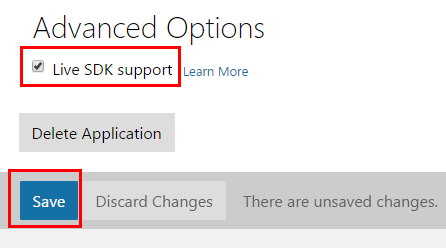
接著從Azure舊Portal點擊管理B2C設定到Azure新Portal, 按下所有設定如下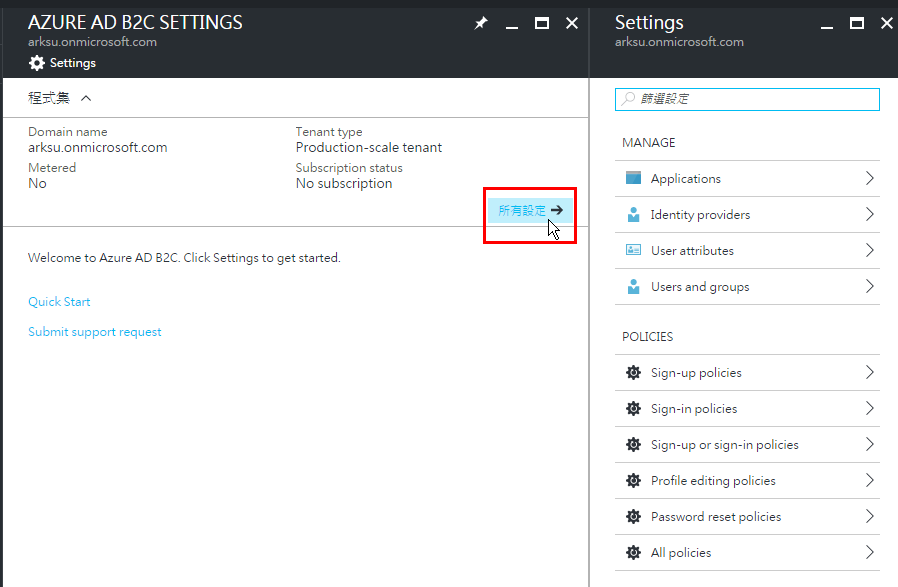
點選Application, 並按下Add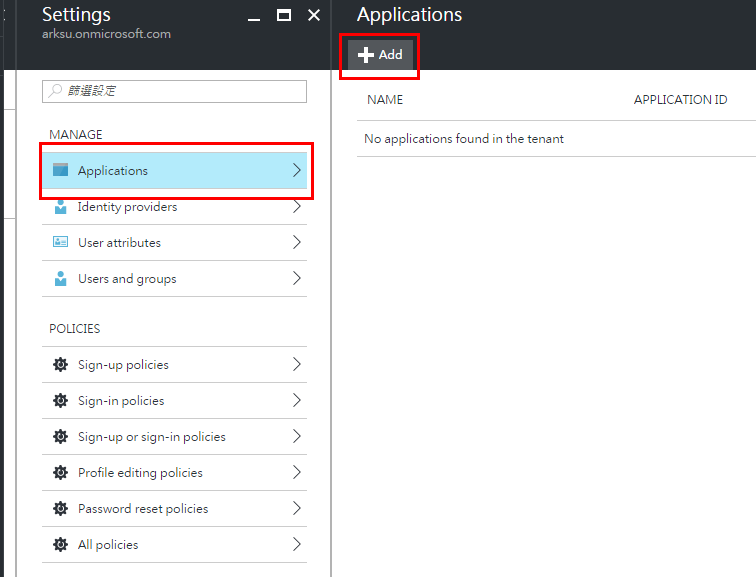
整個設定如下, Native client等到Xamarin.Forms實作時再啟用, 完成之後按下確定, Native client等要跟Xamarin.Forms整合測試再打開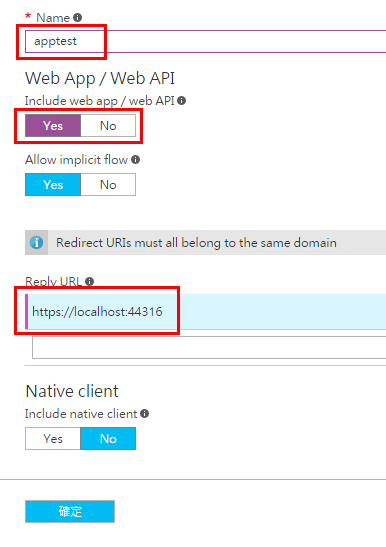
接著就可以看到產生的APPICATION ID, 這個要記下來, 之後ASP.NET的程式呼叫需要它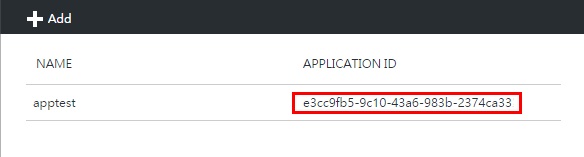
接下來按下Identity providers, 點擊Add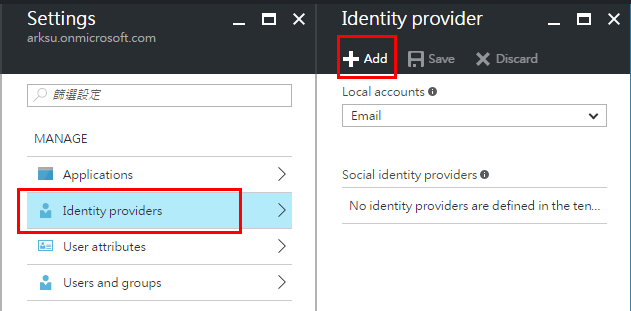
在Name的欄位輸入剛剛建立的Application名稱, 按下Identity provider type, 點選Microsoft Account按下確定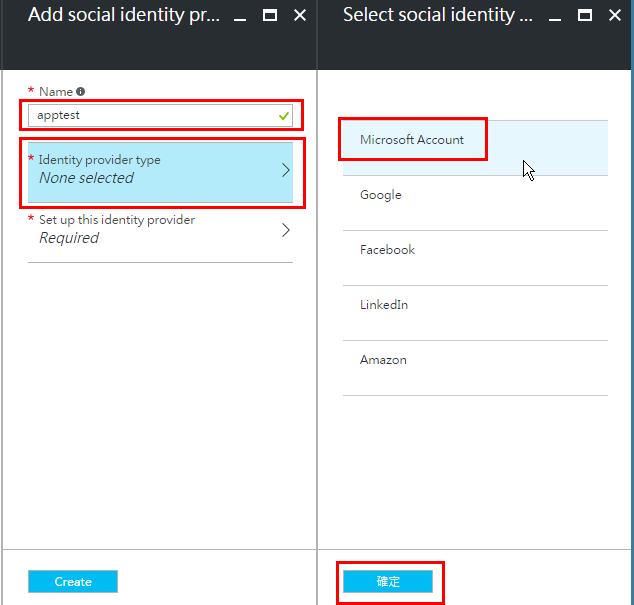
然後按下Set up this identity provider, 輸入剛剛在https://apps.dev.microsoft.com/#/appList
取得的ClientID跟Password, 並按下確定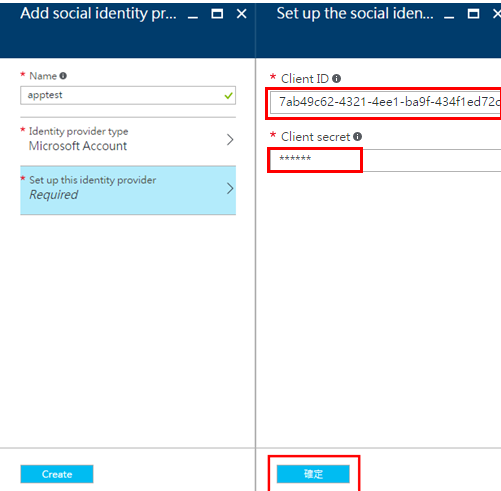
完成後按下Create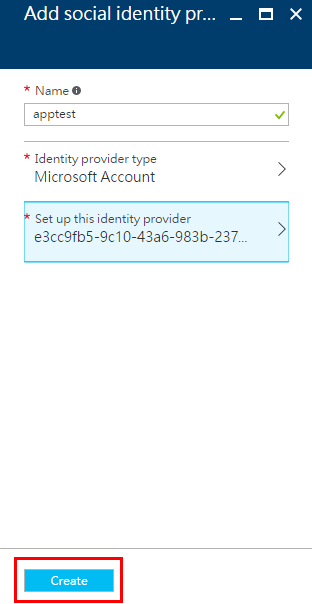
成功之後如下圖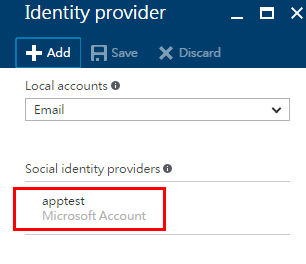
再來就是建立註冊與登入規則, 先點選Sign-up policies, 然後點擊Add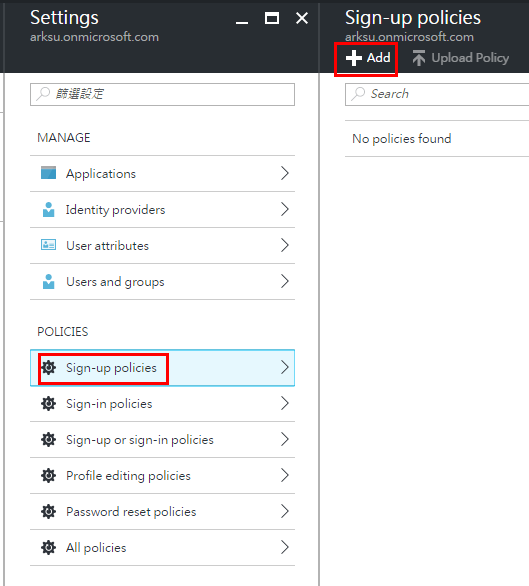
在Identity providers裡, 勾選剛剛建立的用Microsoft Account做認證的Application, 並按下確定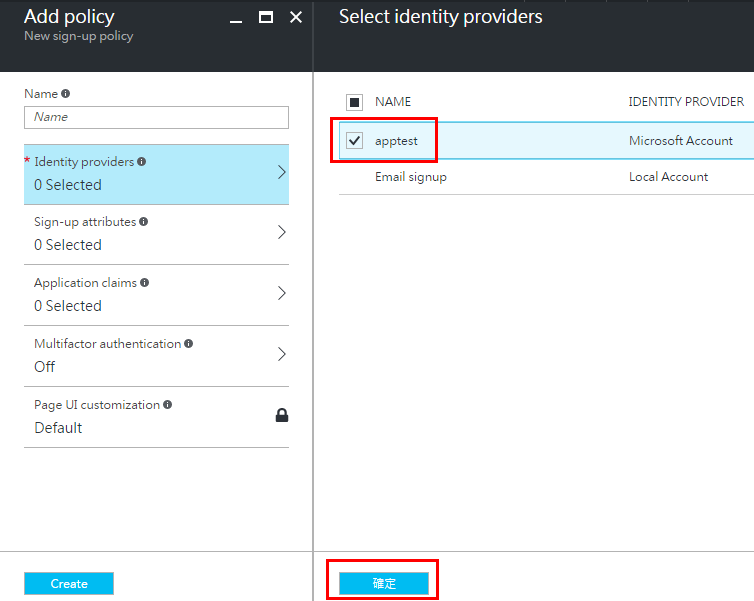
接著設定Sign-up attributes, 勾選Display name與Email Address, 然後按下確定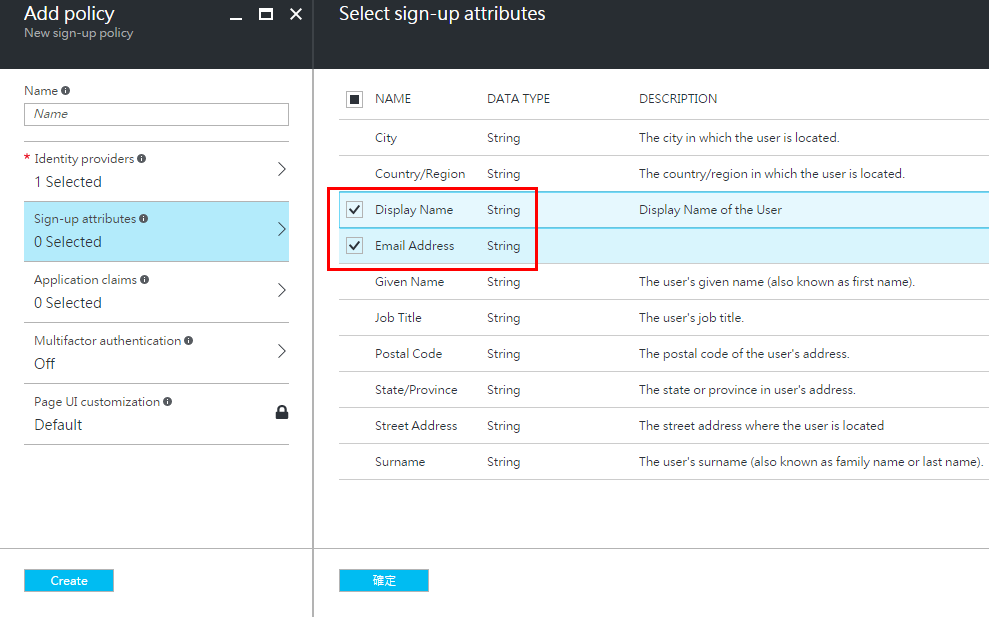
接著設定Application claims, 也是勾選Display name與Email Address, 然後按下確定
最後在Name的欄位輸入sign_up, 按下Create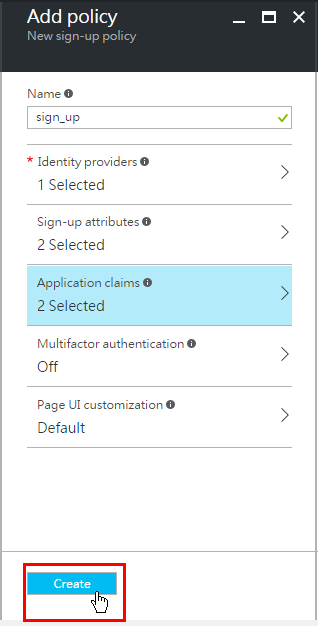
最後完成畫面如下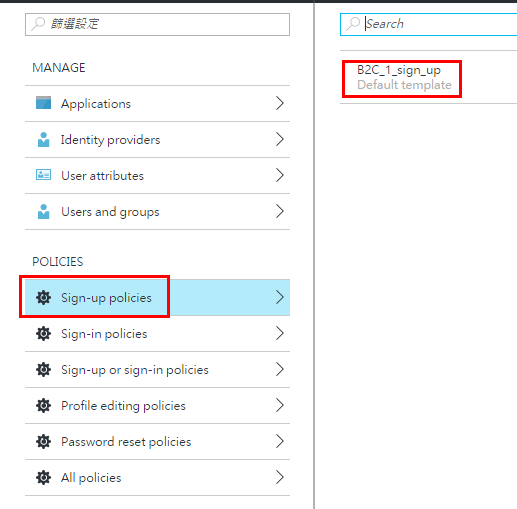
接著按下Sign-in policies, 然後設定的方式跟Sign-up policies 一模模一樣樣, 這裡不再贅述, 完成畫面如下圖, 到此設定完成, 下一篇來介紹如何測試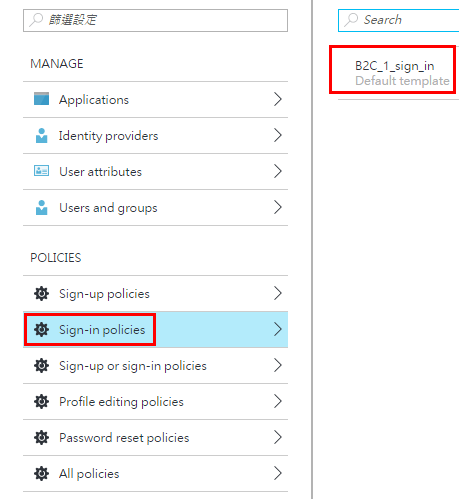
後記: 上述設定方式, 參照底下Microsoft提供有看沒有懂的官方文件, 可能是機器翻譯的關係
https://docs.microsoft.com/zh-tw/azure/active-directory-b2c/active-directory-b2c-get-started
另外在Azure新Portal找不到Azure Active Directory B2C設定的, 可以參考下圖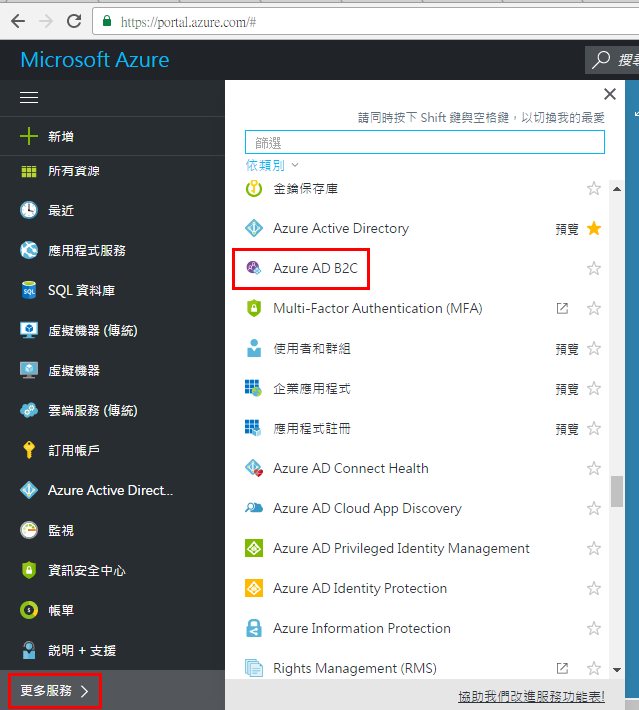


 iThome鐵人賽