
要能對Android發Push Message, 首先要註冊Firebase Cloud Messaging (FCM), 到下列網址, 點擊建立新專案
https://console.firebase.google.com/?pli=1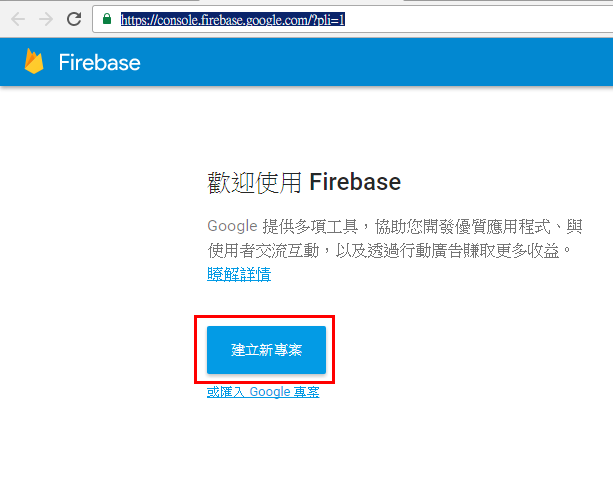
之後填入專案名稱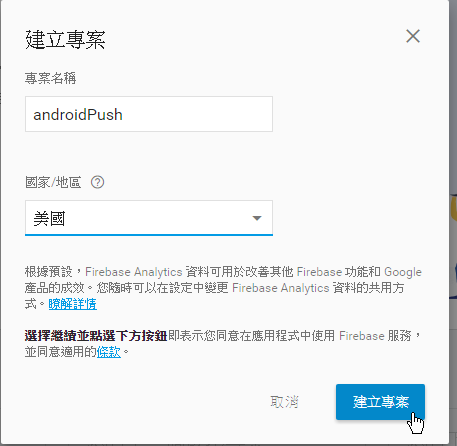
在總覽裡, 點選將Firebase加入您的Android應用程式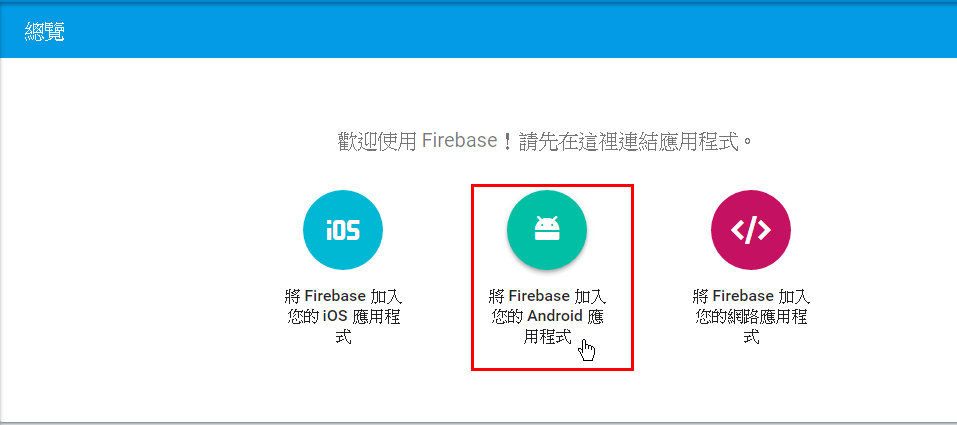
填入套件名稱, 並記下等到Visual Studio開發Android專案時會用到, 完成之後按下新增應用程式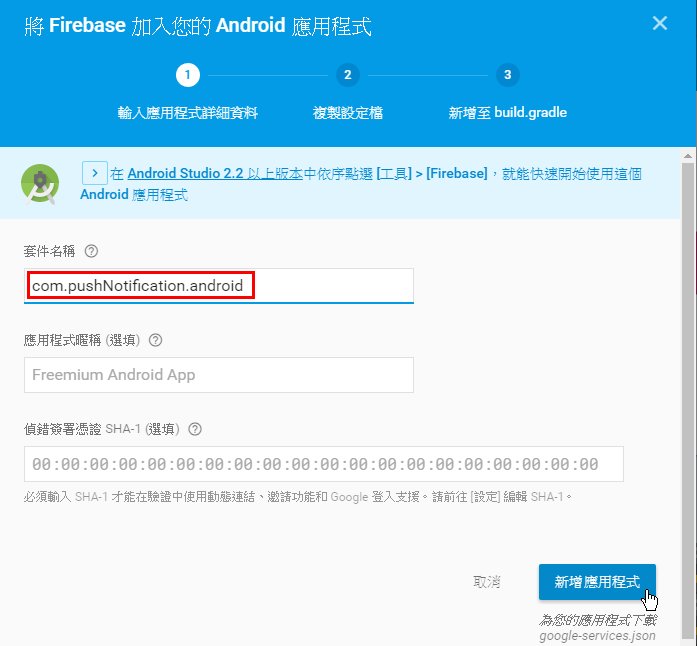
接著按下繼續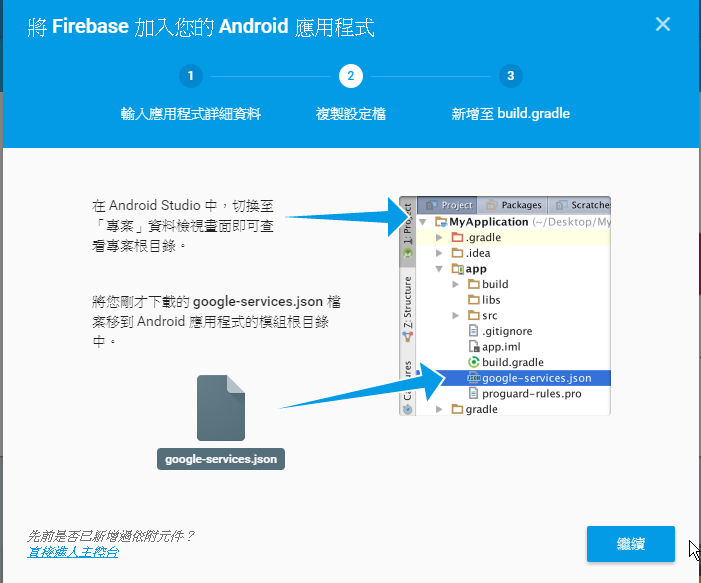
最後點選完成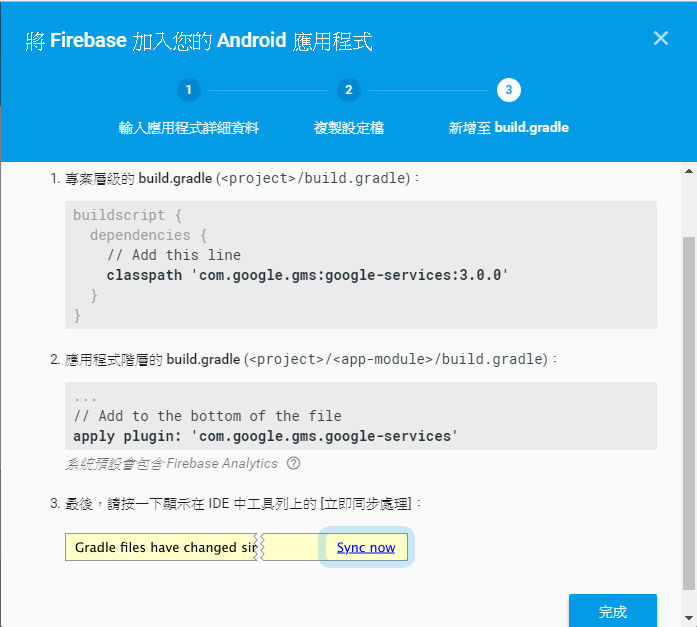
再來點選專案設定, 按下CLOUD MESSAGING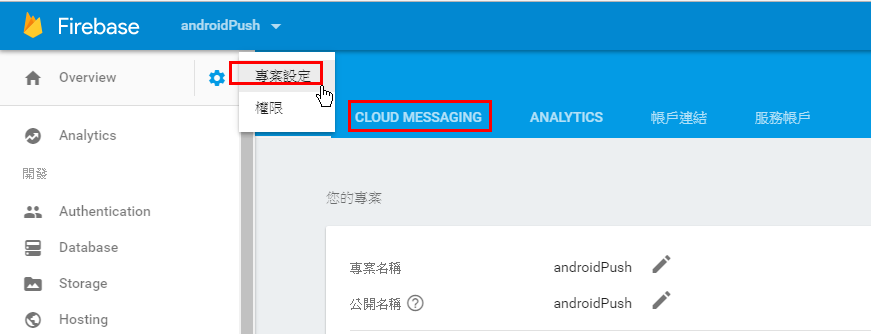
之後會看到伺服器金鑰與寄件者ID, 這兩個都要記下, 之後會用到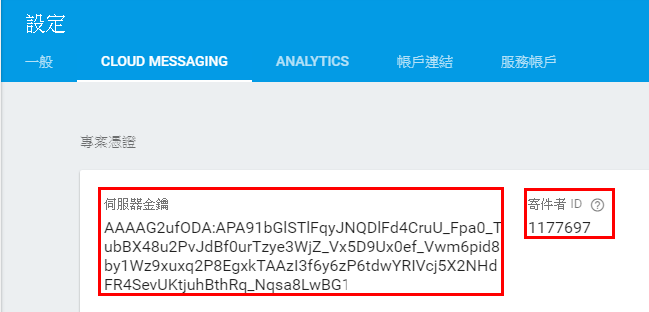
回到Azure Portal內的推播通知服務, 點選Google(GCM), 填入剛剛取得的伺服器金鑰, 按下儲存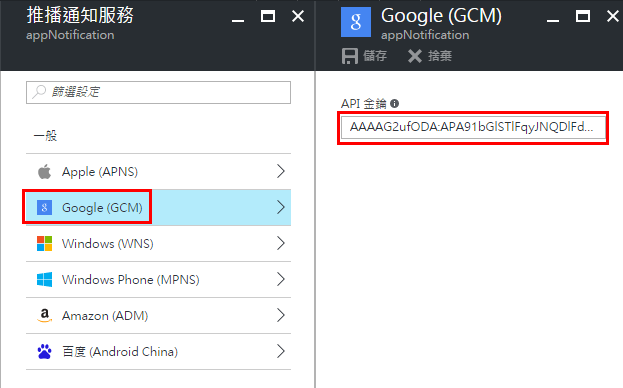
回到Visual Studio的Android專案, 在Components按下右鍵, 點選Get More Components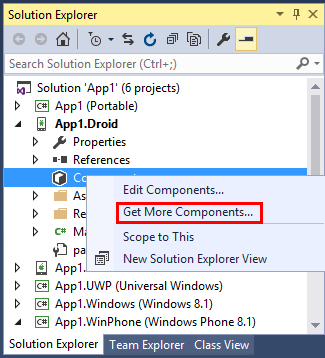
搜尋Google Cloud Messaging Client
按下Add to App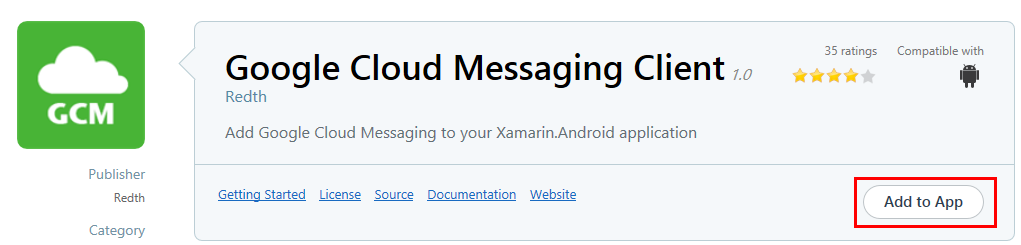
接著在Android專案屬性的Android Manifest, 在Package name填入Firebase Cloud Messaging建立的套件名稱, 這個一定要填對, 不然無法正確部署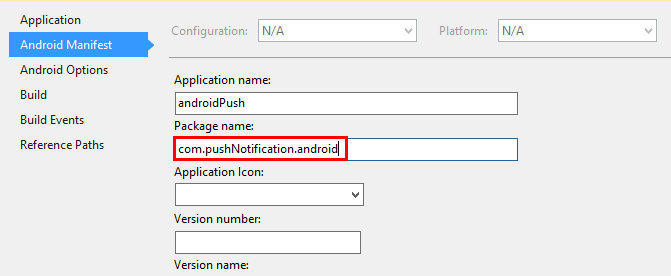
接著開始來寫程式了, 在MainActivity.cs加入Gcm.Client的參考
using Gcm.Client;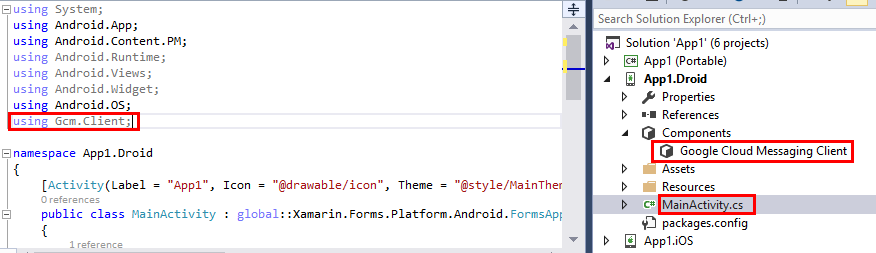
在OnCreate函式,加入底下紅框程式碼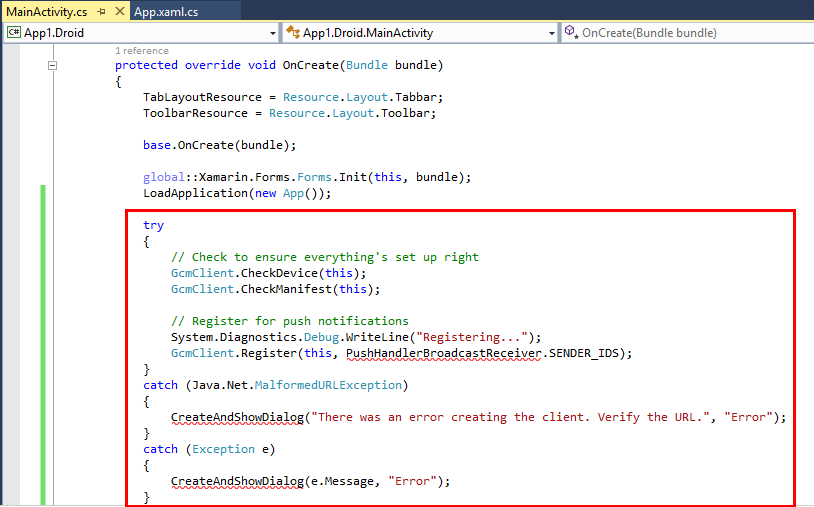
新增一個CreateAndShowDialog函式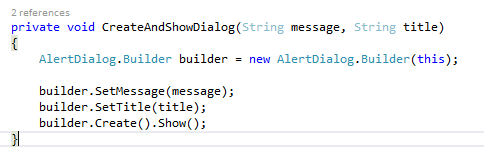
接著加入一個靜態的MainActivity宣告, 並放置到OnCreate函式一開始的地方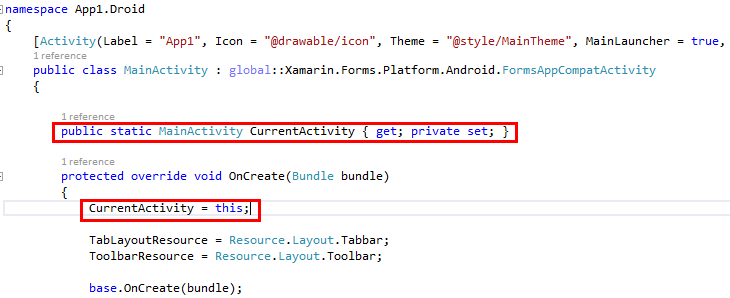
再來跟Windows Phone專案一樣, 新增Microsoft.Azure.Mobile.Client到Android裡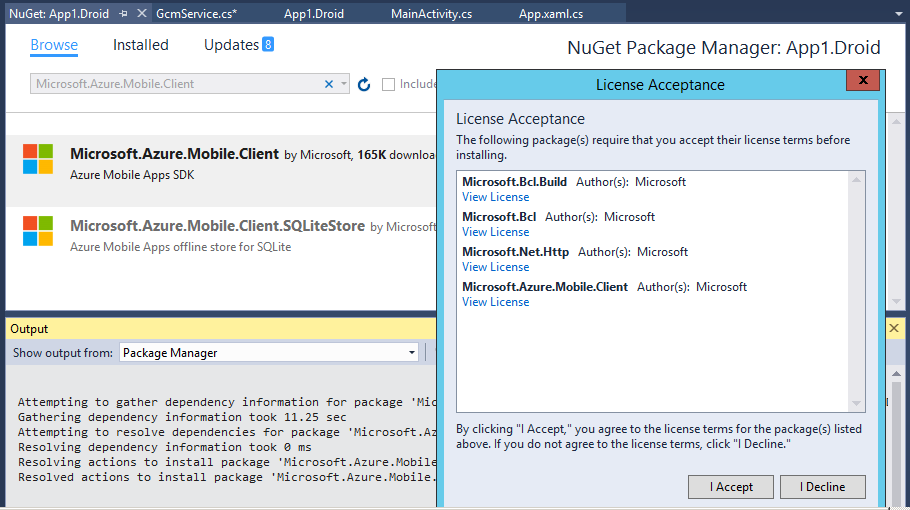
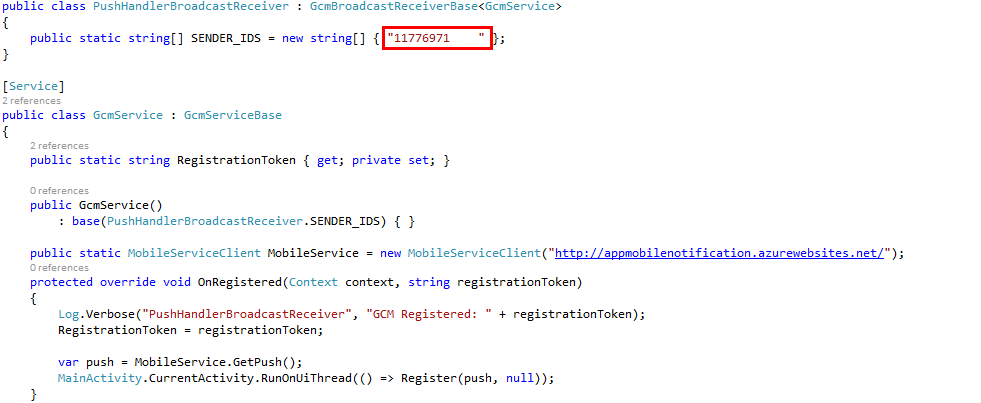
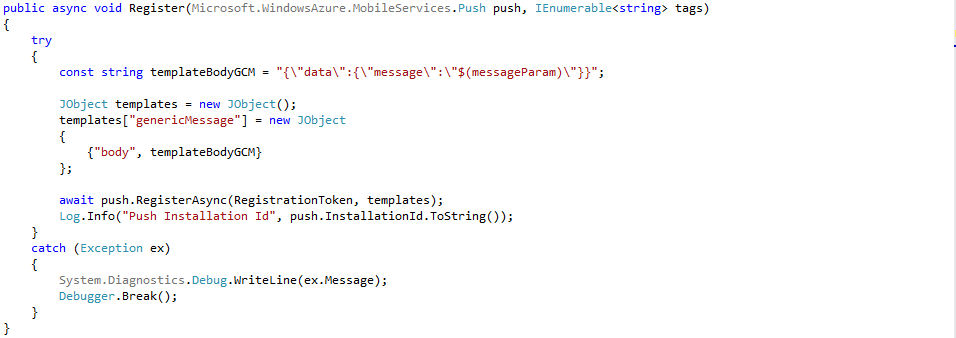
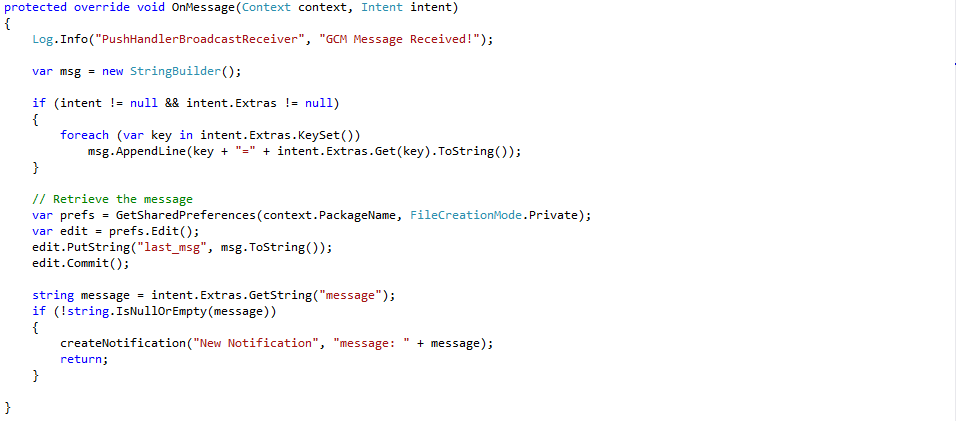
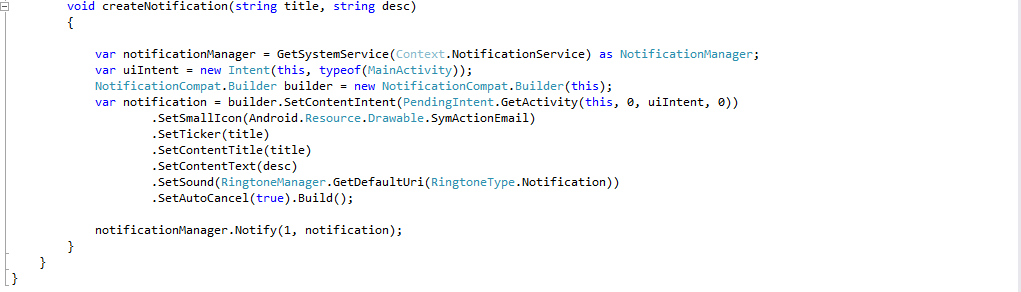
接著新增一個GcmService.cs, 其程式碼如下, 有一個重點是在SENDER_IDS, 要填入在Firebase Cloud Messaging取得的寄件者ID如下紅框所示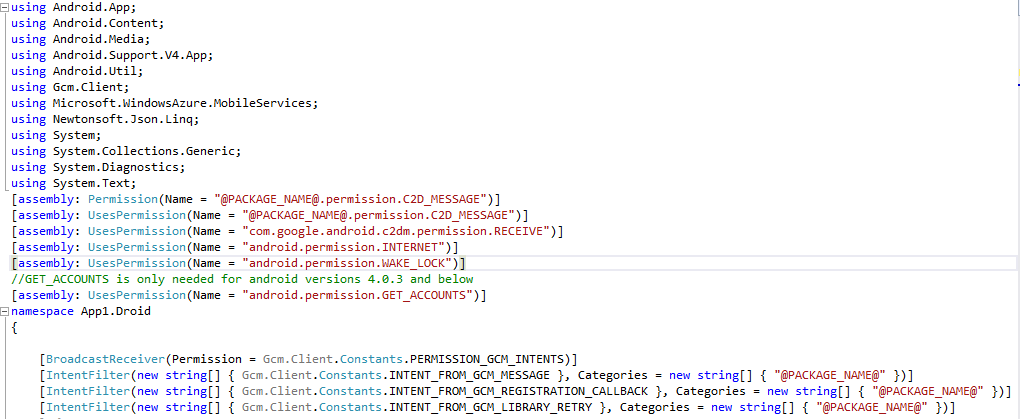

完成之後, 就可以來測試看看, 在此不建議用模擬器這個功能, 試了幾個模擬器, 都有問題, 不想花時間除錯, 直接拿實機測試, 一樣到Azure測試頁面, 選擇Android, 按下傳送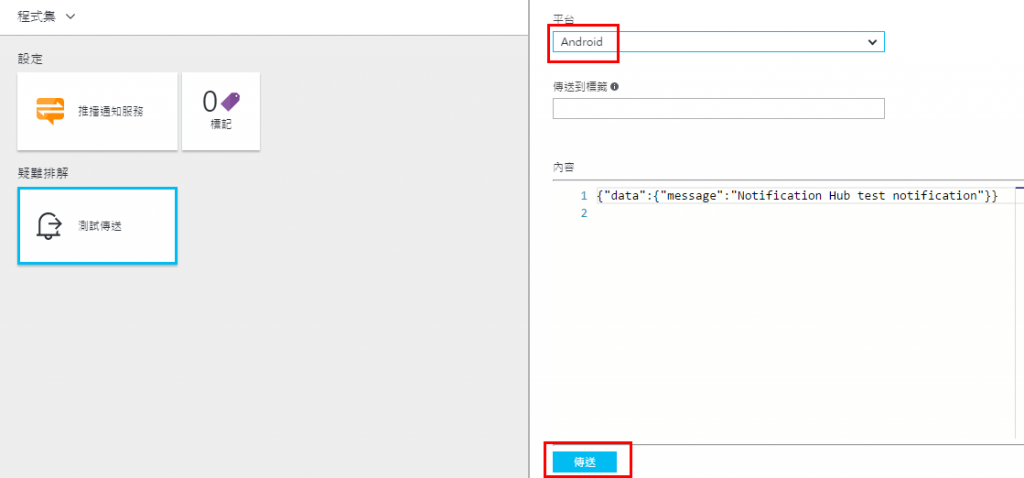
成功畫面如下, 實機測試時要先登入Google帳號, 這個是雷區啊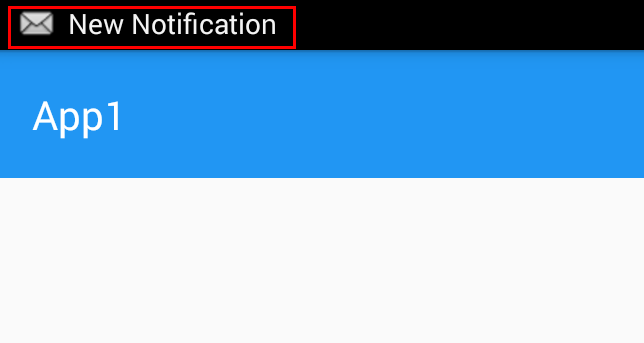

後記: Android設定挺簡單的, Code跟測試還真繁瑣, 果然世上有一好沒倆好啊, 接下來又是IOS大魔王了


 iThome鐵人賽