本文介紹於VMware ESXi 5.x及ESXi/ESX 4.x環境,Virtual Machine執行Clone作業,來源映像檔若為RHEL 6,則後續建立的Virtual Machine之網路無法正常使用問題及其解決方案
[Lab Information]
本文使用VMware ESXi 5.0進行實作,其Virtual Machine(以下簡稱VM)相關資訊如下:
<u>Source VM Information:</u>
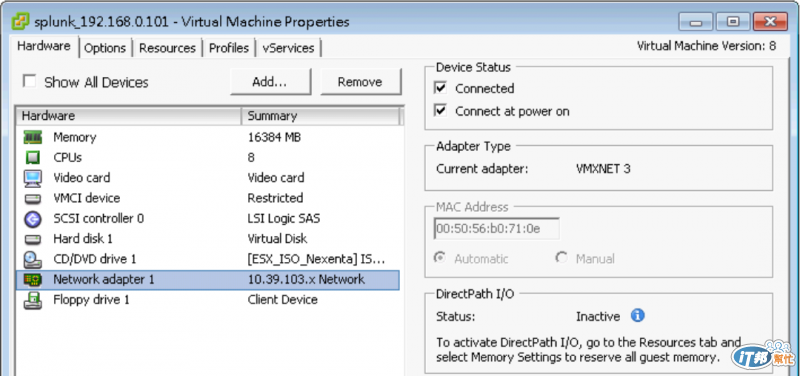
VM Name: <span style="color: blue;">splunk_192.168.0.101</span>
OS: <span style="color: blue;">Rat Hat Enterprise Linux 6.2 64 bit</span>
Linux Kernel: <span style="color: blue;">2.6.32</span>
IP Address: <span style="color: blue;">192.168.0.101</span>
Network Adapter MAC: <span style="color: blue;">00:50:56:b0:71:0e</span>
<u>Target VM Information:</u>
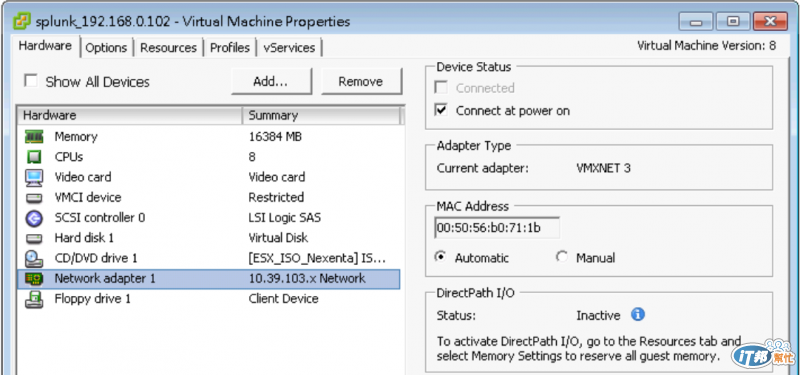
VM Name: <span style="color: blue;">splunk_192.168.0.102</span>
OS: <span style="color: blue;">Rat Hat Enterprise Linux 6.2 64 bit</span>
Linux Kernel: <span style="color: blue;">2.6.32</span>
IP Address: <span style="color: blue;">192.168.0.102</span>
Network Adapter MAC: <span style="color: blue;">00:50:56:b0:71:1b</span>
[Check Target VM Status]
當Clone作業執行完畢後,使用帳號:root登入Target VM進行下列步驟:
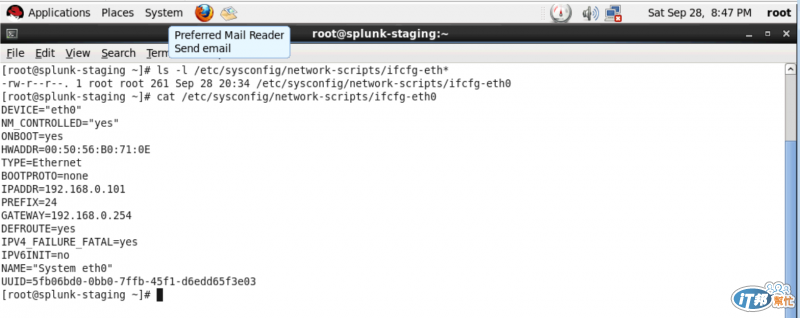
檢視檔案:/etc/sysconfig/network-scripts/ifcfg-eth0狀態
ls -l /etc/sysconfig/network-scripts/ifcfg-eth*
cat /etc/sysconfig/network-scripts/ifcfg-eth0
發現檔案內容仍為Source VM的網路設定資訊,如下圖示:
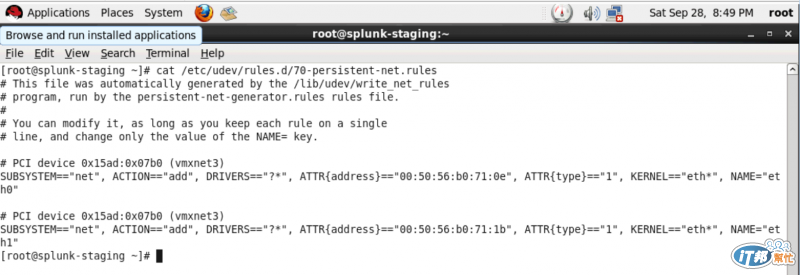
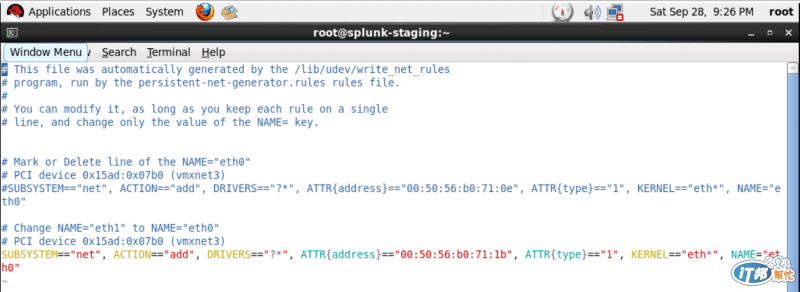
2. 檢視檔案:/etc/udev/rules.d/70-persistent-net.rules狀態,如下圖示:
cat /etc/udev/rules.d/70-persistent-net.rules
[Modify The Kernel’s Networking Interface]
編輯檔案:/etc/udev/rules.d/70-persistent-net.rules,可參照下列設定:
vi /etc/udev/rules.d/70-persistent-net.rules
'# Mark or Delete line of NAME="eth0" #'
# PCI device 0x15ad:0x07b0 (vmxnet3)
#SUBSYSTEM=="net", ACTION=="add", DRIVERS=="?*", ATTR{address}=="00:50:56:b0:71:0e", ATTR{type}=="1", KERNEL=="eth*", NAME="eth0"

'# Change NAME="eth1" to NAME="eth0" #'
# PCI device 0x15ad:0x07b0 (vmxnet3)
SUBSYSTEM=="net", ACTION=="add", DRIVERS=="?*", ATTR{address}=="00:50:56:b0:71:1b", ATTR{type}=="1", KERNEL=="eth*", NAME="eth0"
[Modify Network Interface Configuration File]
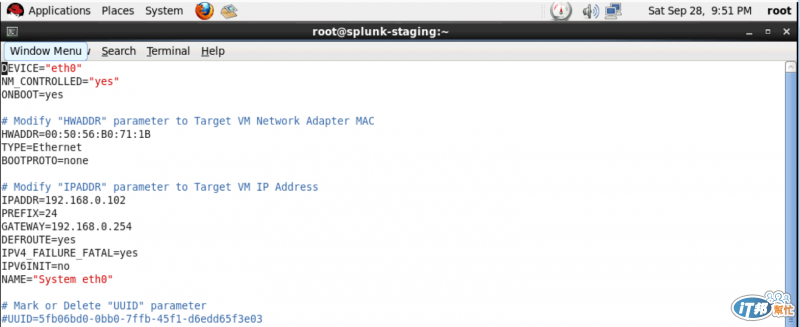
編輯檔案:/etc/sysconfig/network-scripts/ifcfg-eth0,可參照下列設定:
vi /etc/sysconfig/network-scripts/ifcfg-eth0
'# Modify "HWADDR" parameter to Target VM Network Adapter MAC #'
HWADDR=00:50:56:B0:71:1B
'# Modify "IPADDR" parameter to Target VM IP #'
IPADDR=192.168.0.102
'# Mark or Delete "UUID" parameter #'
#UUID=5fb06bd0-0bb0-7ffb-45f1-d6edd65f3e03
[Restart Target VM]
透過reboot command重新開機,網卡狀態即可正常使用
reboot
 godspeedyen


