

在 iOS 中,我們通過 UICollectionView 可以靈活的進行排版,這次打算通過 GridLayout 搭配按鈕來進行排版的切換。
RecyclerView
GridLayoutManager
建立檔案 /res/menu/menu_main.xml 為 Menu 提供一個按鈕用來切換 Layout
<menu xmlns:android="http://schemas.android.com/apk/res/android"
    xmlns:app="http://schemas.android.com/apk/res-auto">
    <item
        android:id="@+id/menu_switch_layout"
        android:title="switch"
        app:showAsAction="always"
        android:icon="@drawable/icon_menu_1"/>
</menu>
在 MainActivity 中實現 Switch 功能
 // 替換成我們的 menu layout
override fun onCreateOptionsMenu(menu: Menu?): Boolean {
    menuInflater.inflate(R.menu.menu_main, menu)
    return super.onCreateOptionsMenu(menu)
}

// 當點擊 Switch 的時候做對應的事件處理
override fun onOptionsItemSelected(item: MenuItem?): Boolean {
    if(item!!.itemId == R.id.menu_switch_layout){
        switchLayout()
        switchIcon(item)
        return true
    }

    return super.onOptionsItemSelected(item)
}
Switch 功能實現
// 切換 Layout 並重新 render 畫面
private fun switchLayout() {
    if (gridLayoutManager.spanCount == 1) {
        gridLayoutManager.spanCount = 2
    } else {
        gridLayoutManager.spanCount = 1
    }
    itemsAdapter.notifyItemRangeChanged(0, itemsAdapter.getItemCount())
}

// 切換 Switch 圖標
private fun switchIcon(item: MenuItem) {
    if (gridLayoutManager.spanCount == 2) {
        item.icon = resources.getDrawable(R.drawable.icon_menu_1)
    } else {
        item.icon = resources.getDrawable(R.drawable.icon_menu_2)
    }
}
準備好兩種佈局方案來進行切換,這兩個 Layout 都設定寬度為 match_parent 之後再使用的時候再給不同的寬達成我們要的效果。
res/layout/layout_item_big(左邊) / res/layout/layout_item_small(右邊)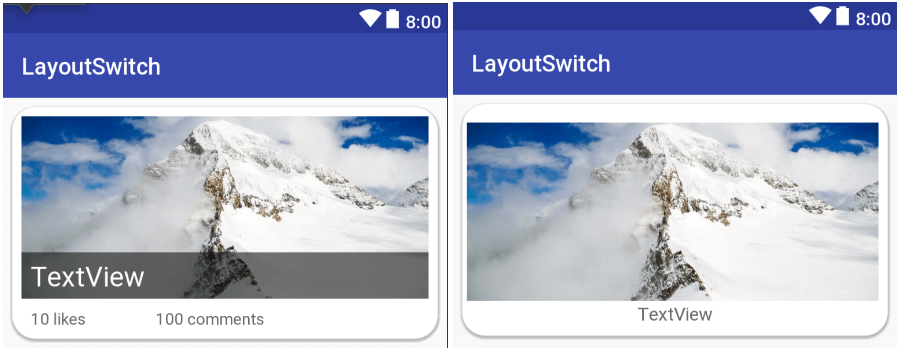
data class ItemModel(var name:String, var likeCount:Int, var commentCount:Int, var image:Int)
我們自己定義了兩種 View Type
val VIEW_TYPE_SMALL = 1
val VIEW_TYPE_BIG = 2
通過 override getItemViewType() 來重新定義 viewType 對應的 Int
override fun getItemViewType(position: Int): Int {
    val spanCount = layoutManager.spanCount

    when(spanCount){
        2 -> return VIEW_TYPE_SMALL
        else -> return VIEW_TYPE_BIG
    }
}
onCreateViewHolder 中,根據 View Type 指定 Layout 文件
// 入口
override fun onCreateViewHolder(parent: ViewGroup, viewType: Int): ViewHolder {
    val metrics = parent.context.resources.displayMetrics

    // 指定了 layout
    when(viewType){
        VIEW_TYPE_SMALL -> {
            println("create view holder small")
            val view =  LayoutInflater.from(parent.context).inflate(R.layout.layout_item_small, parent, false)
            view.minimumWidth = 900 * (1080 / metrics.widthPixels)
            view.minimumHeight = 220
            return ViewHolder(view, viewType)
        }
        else -> {
            println("create view holder big")
            val view =  LayoutInflater.from(parent.context).inflate(R.layout.layout_item_big, parent, false)
            view.minimumWidth =  metrics.widthPixels - 16
            view.minimumHeight = 220
            return ViewHolder(view, viewType)
        }
    }
}
class ViewHolder 中,根據 View Type 綁定對應的 Layout 元件,並賦予值。
其實在這裡,一開始因為引入的圖片比較大,一下子就出現了 Out of memory 的警告,後來查可以通過 BitmapFacotry 來解決。
但因為一天研究一個內容的時間有限,我這裡先直接將 1024 x 768 的圖片替換成 512 x 384 的小圖,文章後面會提到 memory 計算的內容。
// view
inner class ViewHolder(itemView: View, var viewType:Int) : RecyclerView.ViewHolder(itemView){
    var imageView: ImageView? = null
    var nameTextView: TextView? = null
    var likeTextView: TextView? = null
    var commentTextView: TextView? = null

    fun bindModel(item:ItemModel){
        // set description
        when(viewType){
            VIEW_TYPE_SMALL -> {
                imageView = itemView.findViewById(R.id.smallImageView)
                nameTextView = itemView.findViewById(R.id.smallNameTextView)
            }

            else -> {
                imageView = itemView.findViewById(R.id.bigNameImageView)
                nameTextView = itemView.findViewById(R.id.bigNameTextView)
                likeTextView = itemView.findViewById(R.id.likeTextView)
                commentTextView = itemView.findViewById(R.id.commentTextView)

            }
        }

        imageView?.setImageResource(item.image)
        nameTextView?.setText(item.name)
        likeTextView?.setText("Likes: ${item.likeCount}")
        commentTextView?.setText("comments: ${item.commentCount}")

    }

}
在寫這個應用的時候遇到了一件事情,我準備了 20 張大小差不多是 100kb 左右的圖片,長寬大概是 1024 x 800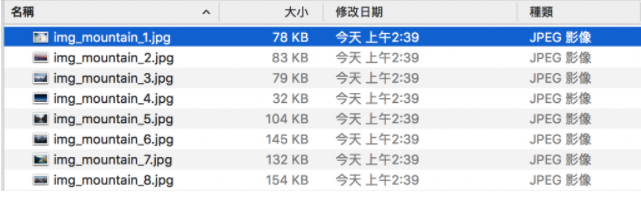
結果打開 App 以後非常快的就碰到了記憶體不足的問題
java.lang.OutOfMemoryError: Failed to allocate a 21233676 byte allocation with 5688920 free bytes and 5MB until OOM

而當我換成一系列 50kb 左右的圖片,長寬約為 512 x 400 的圖片時,
明明兩種圖片都很小,只是解析度變了就沒有出現過 OOM了。
後來專門查了一下才發現,原來加載圖片所佔用的 Memory 和檔案的大小是不一致的。
圖片在電腦上是以位圖(bitmap)的形式存在的,而位圖是一個矩形點陣,每一個點我們稱為像素也就是 pixel.
一張 MxN 大小的圖,是由 MxN 個明、暗度像素所組成的。
而每一個像素根據明暗度的不同用灰度值 (Gray Level) 來表示,將白色的灰度值定為 255、黑色定為 0.
而彩色圖片是由 R G B 三個單色圖像組成。
A 代表 Alpha(透明度) RGB 分別是 Red Green Blue
假設我們用的其中一張圖片為 1024 x 768 pixel 格式為 ARGB_8888
那麼每一個像素佔用的是 8 + 8 + 8 + 8 = 32 位 = 4 字節
而一張圖片佔用的 memory 就是 1024 * 768 * 4 / 1024 = 3072 KB = 3MB.
所以當我加載 20 張圖片的時候,直接就佔用了 60MB 的記憶體。
通過 ActivityManager 我們可以知道設備給 App 分配了多少 Memory 來使用,單位是 MB.
val activityManager = getSystemService(Context.ACTIVITY_SERVICE) as ActivityManager
val memory = activityManager.memoryClass
但實際上在 allocate memory 給圖片的時候,似乎看的不是上面所給的 memory
還有另外一種 Memory 查詢功能,不過看從數字來看是設備的 Memory
val memoryInfo = ActivityManager.MemoryInfo()
println("total memory is ${memoryInfo.totalMem / 1024 / 1024} MB")
println("available memory is  ${memoryInfo.availMem / 1024 / 1024} MB")
println("threshold memory is ${memoryInfo.threshold / 1024 / 1024} MB")


 iThome鐵人賽