Never let the demands of tomorrow interfere with the pleasures and excitement of today.
每日一句來源:Daily English
firebase 的authentication功能,為我們的系統加入了登入的功能,並且透過他我們可以簡易的使用第三方登入,甚至他能使用電信用者登入、匿名登入、google、facebook、twitter、GitHub、Email等等,今天我們就舉例台灣常用的Email、google、Facebook來實做登入功能。
我們點選設定登入方式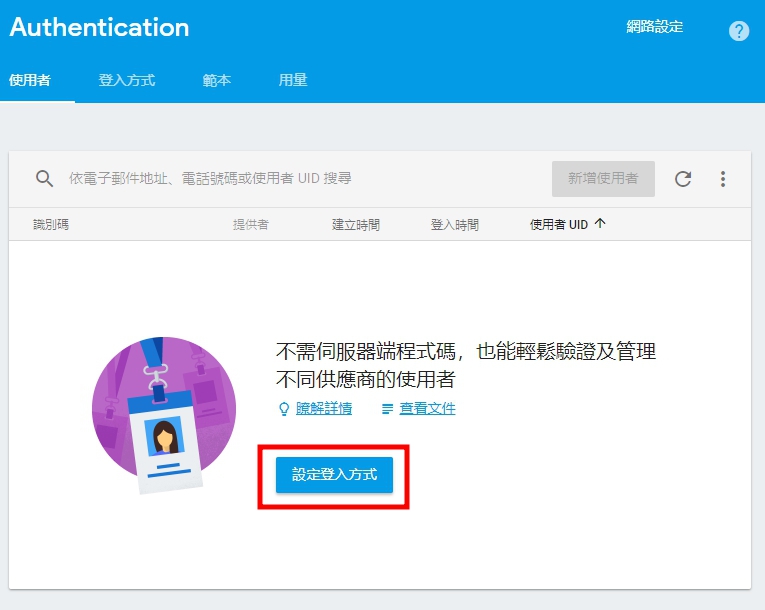
會看到有以下的登入選項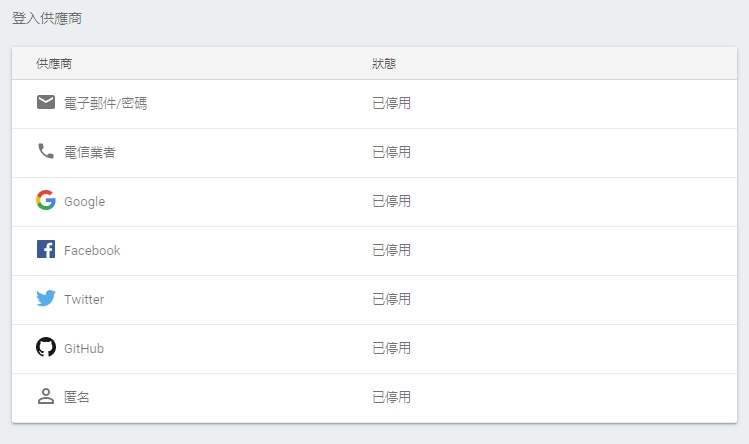
將電子郵件/密碼、google啟用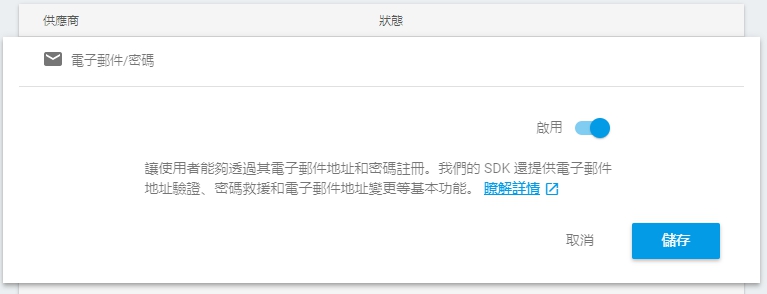
回到Angular專案,確認我們的app.module.ts有把AngularFireAuthModule加入了,
@NgModule({
  imports: [
    ...
    AngularFireAuthModule, // add auth module
    ...
  ],
  declarations: [
    AppComponent,
  ],
  providers: [],
  bootstrap: [AppComponent]
})
export class AppModule { }
import { Component } from '@angular/core';
import { AngularFireAuth } from 'angularfire2/auth';
import * as firebase from 'firebase/app';

@Component({
  selector: 'app-root',
  templateUrl: './app.component.html',
  styleUrls: ['./app.component.scss']
})
export class AppComponent {

  constructor(public afAuth: AngularFireAuth) {
  }
  login() {
    this.afAuth.auth.signInWithPopup(new firebase.auth.GoogleAuthProvider());
  }
  logout() {
    this.afAuth.auth.signOut();
  }
}
html
<div *ngIf="afAuth.authState | async; let user; else showLogin">
  <h1>Hello {{ user.displayName }}!</h1>
  <button (click)="logout()">Logout</button>
</div>
<ng-template #showLogin>
  <p>Please login.</p>
  <button (click)="login()">Login with Google</button>
</ng-template>
到這邊我們就可以透過firebase登入了!是不是很簡單

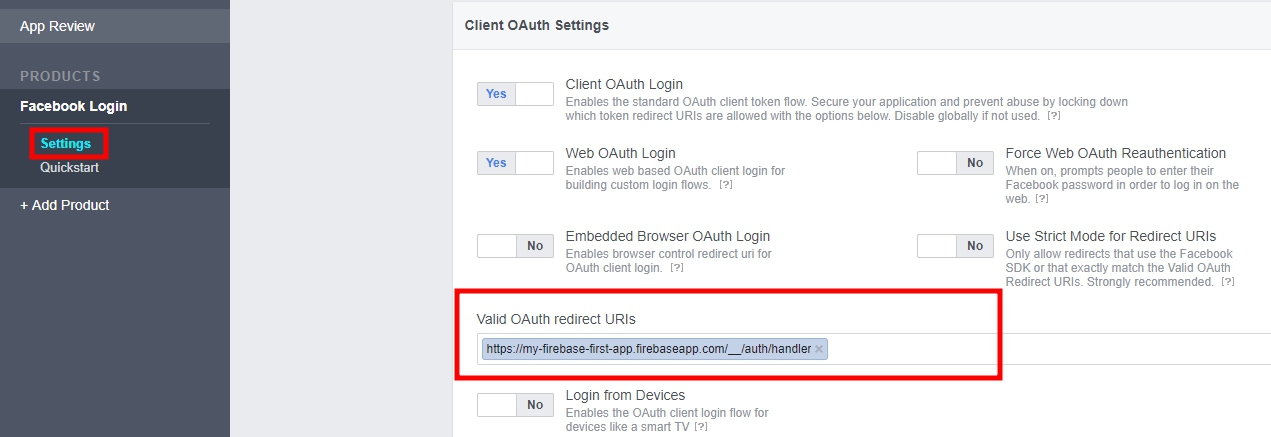
https://developers.facebook.com
我們要先在facebook建立一個APP,建立好後,再到Facebook Login得設定頁面,將剛剛得到得OAuth網址貼上
在dashboard取得IP、KEY
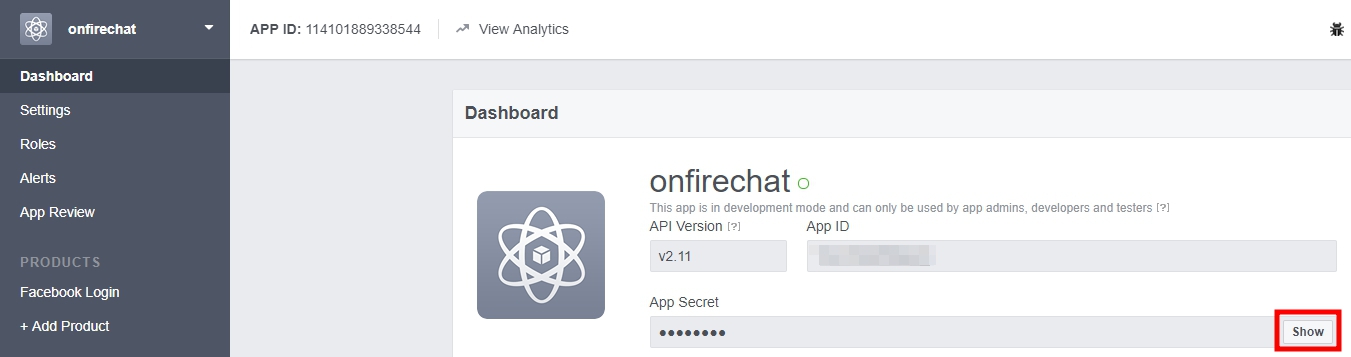
最後把IP、KEY貼回Firebase,設定就算完成了!
實作方法語Google一樣,只是這次變成FacebookAuthProvide
this._afAuth.auth.signInWithPopup(new firebase.auth.FacebookAuthProvider())
到這邊我們就能做到Facebook登入了,登入後我們可以回firebase管理中心查看,你會發現你的帳號已經被存進來了。
我們可以透過authState回傳讀firebase.User物件來得到使用者的資料
constructor(public afAuth: AngularFireAuth) {
  this.afAuth.authState.subscribe((data) => {
    console.log(data);
  });
}
當我們登入後,他會回傳一個物件,其中有些屬性是對我們比較有用的,以下舉例
{
  displayName:"",
  email:"",
  metadata:{
    a: "1514272725000",
    b: "1514273935000",
    lastSignInTime: "Tue, 26 Dec 2017 07:38:55 GMT",
    creationTime: "Tue, 26 Dec 2017 07:18:45 GMT",
    photoURL:""
  },
  providerData:[
    {
      displayName:"",
      email:"",
      phoneNumber:,
      photoURL:"",
      providerId:"",
      uid:"",
    }
  ]
}
並且會在localstorage加入一筆資料,資料的內容與我們由state取出來的內容差不多,firebase內部運作就是透過這裡取得資料的。
有興趣他存了什麼的朋友,可以把資料複製出來到 https://jsoneditoronline.org/ 看看有哪些。
到這邊我們統整一下基本邏輯,firebase登入認證基本就是透過API登入認證後,訂閱
authState取得登入者的資料,得知使用者登入,有了基本的概念後,我們一樣可以將所有方法用一個service封裝,一來可以避免當firebase API修改時我們要改很多地方,二來可以把邏輯彙整在一個service裡面。
實做比較比較繁瑣,步驟大同小異,只是我們會使用Rx做一次包裝,讓我們在處理資料順序上更加便利。
這邊舉出一些比較值得講得部分,想知道詳細的朋友可以去看原始碼,有問題再做詢問
@Injectable()
export class AuthService {
  currentUser = new BehaviorSubject<User>(null);
  userHandler: CollectionHandler<User>;

  constructor(
    private _afAuth: AngularFireAuth,
    private _http: BaseHttpService,
    private _router: Router,
  ) {
    // 建立一個users得handler
    this.userHandler = this._http.collection<User>(`users`);

    // 由於這個Service會永遠存活,我們不需對她做unsubscribe
    // 訂閱authState,當有人登入時會改變,
    this._afAuth.authState
      .switchMap(user => this.updateUser(user)) // 每次登入後我們都去修改一次使用者的資料,並更新登入的時間
      .switchMap(key => this.userHandler.getById(key)) // 再去資料庫把這個使用者得一些基本資料找出來
      .subscribe(user => {
        // 用一個BehaviorSubject存起來,外部只要訂閱就能取得當前得使用者內容(用於判斷登入與否)
        this.currentUser.next(user);
      });
  }

  // Sends email allowing user to reset password
  resetPassword(oldPassword: string, newPassword: string) {
    // 修改前要再次登入一次
    this.signInByEmail(this._afAuth.auth.currentUser.email, oldPassword)
      .switchMap(() => Observable.fromPromise(this._afAuth.auth.currentUser.updatePassword(newPassword)));
  }
  ....
}
其他相關實作可以看今日的原始碼:
本日範例:https://github.com/ZouYouShun/Angular-firebase-ironman/tree/day8_authentication
今天我們真正的了解到了firebase搭配Auth的強大之處,我們可以很輕易的串接幾個流行的大平台,並且透過Rx將其包裝起來,讓我們能更便利的操作,相當power也相當的便利!
https://github.com/angular/angularfire2/blob/master/docs/auth/getting-started.md
https://www.appcoda.com.tw/firebase-facebook-login/
https://github.com/AngularFirebase/68-multistep-firebase-signup