第一步:安裝相關套件
npm install @ngrx/core @ngrx/store @ngrx/effects @ngrx/router-store @ngrx/store-devtools reselect --save
第二步:建立目錄
在 src/app 底下
mkdir store
cd store
touch index.ts
mkdir actions
mkdir effects
mkdir reducers
mkdir selectors
並各自建立一個 index.ts,完成後如下
.
├── actions
│   └── index.ts
├── effects
│   └── index.ts
├── index.ts
├── reducers
│   └── index.ts
└── selectors
    └── index.ts
第三步:修改 src/app/store/index.ts
如下
export * from './actions';
export * from './reducers';
export * from './selectors';
export * from './effects';
先填一些東西讓 Compiler 不要抱怨
store/actions/index.ts
export const actions = 'Actions';
store/reducers/index.ts
export const reducers = 'Reducers';
store/effects/index.ts
export const effects = 'Effects';
store/selectors/index.ts
export const selectors = 'Selectors';
第四步:修改 src/app/app.module.ts
//... 省略
// for ngrx/store
import { StoreModule } from '@ngrx/store';
import { EffectsModule } from '@ngrx/effects';
import { StoreDevtoolsModule } from '@ngrx/store-devtools';
import { StoreRouterConnectingModule, RouterStateSerializer } from '@ngrx/router-store';
import { environment } from '../environments/environment';
import * as fromStore from './store';
//... 省略

@NgModule({
    //...
        imports: [
        //...
        HttpClientModule,
        StoreModule.forRoot(fromStore.reducers),
        EffectsModule.forRoot(fromStore.effects),
        !environment.production ? StoreRouterConnectingModule : [],
        !environment.production ? StoreDevtoolsModule.instrument({ maxAge: 50 }) : [],
        //...
    ],
//...
index.ts 將所有 store 的東西包起來,在 StoreModule.forRoot() 跟 EffectsModule.forRoot() 傳進 fromStore.reducers 跟 fromStore.effects
StoreDevtoolsModule 跟 StoreRouterConnectingModule
StoreDevtoolsModule 讓我們可以使用 Chrome Extensions Redux Devtools 來看 ngrx/store 的 Action 跟 State第五步:安裝 Chrome Extensions Redux Devtools
到 Google Chrome 擴充功能,尋找 Redux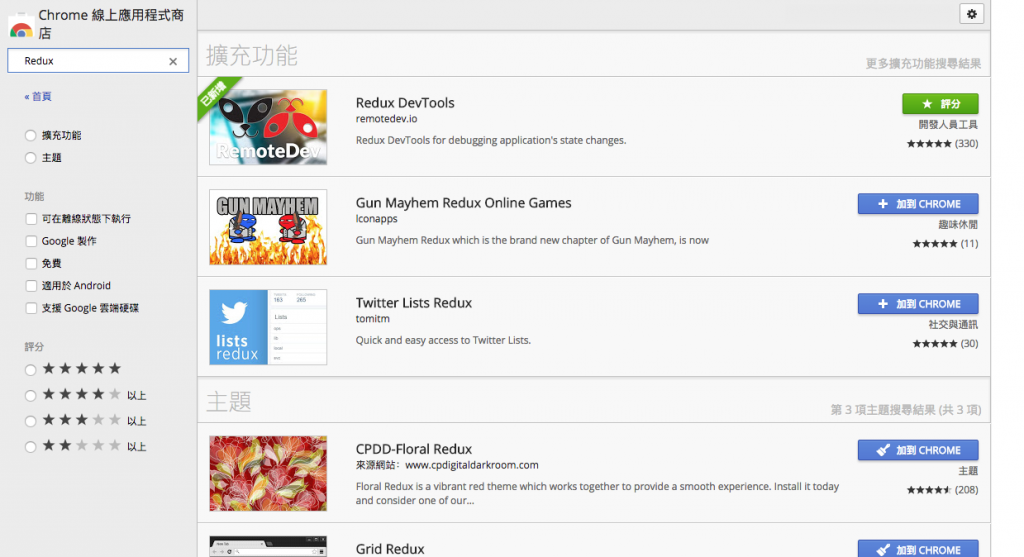
安裝後,點擊它會出現
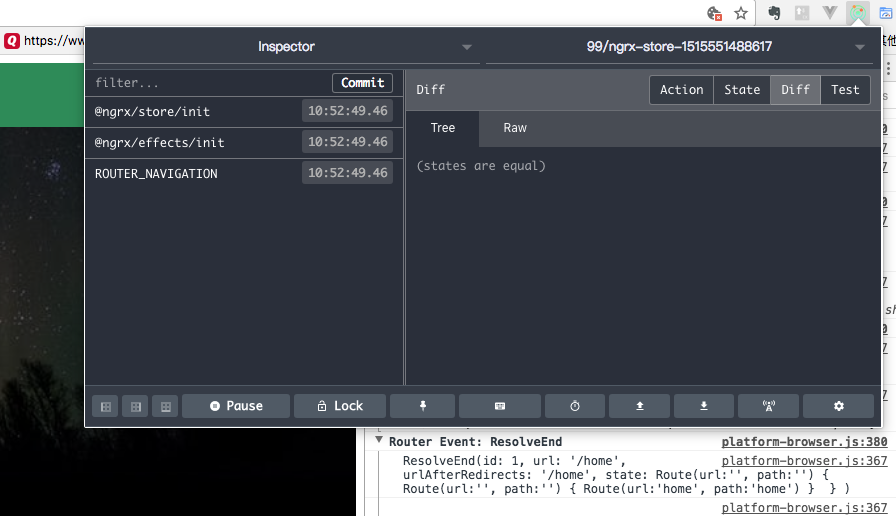
這是一個很強大的工具,官方文件,我們在開發時,會隨時用這個工具來除錯,可以看到現在我們的 store 跟 effects 已經初始化 (init),也可以看到 ROUTER_NAVIGATION
我們習慣上先定義動作(Actions),動作在 ngrx/store 裡其實是一個很簡單的物件,它的類別 (Class)如下
第一步: 在 store/actions/ 下建立 Class 檔案,並建立 spec 檔案 (測試用)
ng generate class user.actions --spec
第二步:修改 store/actions/user.actions.ts
import { Action } from '@ngrx/store';
import { User } from '../../models';

// define action types
export const LOGIN = '[user] LOGIN';
export const LOGIN_SUCCESS = '[user]  LOGIN_SUCCESS';
export const LOGIN_FAIL = '[user] LOGIN_FAIL';

export const LOGOUT = '[user] LOGOUT';
export const LOGOUT_SUCCESS = '[user] LOGOUT_SUCCESS';
export const LOGOUT_FAIL = '[user] LOGOUT_FAIL';

export const GETUSER = '[user] GETUSER';
export const GETUSER_SUCCESS = '[user] GETUSER_SUCCESS';
export const GETUSER_FAIL = '[user] GETUSER_FAIL';

// define Actions class
export class LoginAction implements Action {
    readonly type = LOGIN;
    constructor(public payload: User) { }
}
export class LoginSuccessAction implements Action {
    readonly type = LOGIN_SUCCESS;
    constructor(public payload: string) { }
}
export class LoginFailAction implements Action {
    readonly type = LOGIN_FAIL;
    constructor(public payload: any) { }
}
export class LogoutAction implements Action {
    readonly type = LOGOUT;
}
export class LogoutSuccessAction implements Action {
    readonly type = LOGOUT_SUCCESS;
}
export class LogoutFailAction implements Action {
    readonly type = LOGOUT_FAIL;
}
export class GetUserAction implements Action {
    readonly type = GETUSER;
}
export class GetUserSuccessAction implements Action {
    readonly type = GETUSER_SUCCESS;
    constructor(public payload: string) { }         // username
}
export class GetUserFailAction implements Action {
    readonly type = GETUSER_FAIL;
    constructor(public payload: any) { }
}
export type UserActions
    = LoginAction
    | LoginSuccessAction
    | LoginFailAction
    | LogoutAction
    | LogoutSuccessAction
    | LogoutFailAction
    | GetUserAction
    | GetUserSuccessAction
    | GetUserFailAction;
[user] LOGIN
payload,有些不帶,帶 payload 的類別在這裡定義它的型態UserActions 型態 (type)new LoginAction() 的方式來產生物件第三步:修改 app/store/actions/index.ts
//export const actions = 'Actions';  刪除
export * from './user.actions';
未來加新的動作檔案,只要在這裡做 export,這樣就定義好我們在會員模組用到的動作,基本上分為三類,Login, Logout 跟 GetUser
第一步:建立檔案 src/app/store/reducers 下
ng generate class user.reducers --spec
第二步:修改 user.reducers.ts
import { ActionReducer, Action, ActionReducerMap } from '@ngrx/store';
import * as actions from '../actions';

export interface UsersState {
    isLogin: boolean;
    currentUser: string;
}

const initialState: UsersState = {
    isLogin: false,
    currentUser: ''
}

export function reducer(state: UsersState = initialState, action: actions.UserActions): UsersState {
    switch (action.type) {
        case actions.LOGOUT:
            return initialState;
        case actions.LOGIN_SUCCESS:
        case actions.GETUSER_SUCCESS:
            //return Object.assign({}, state, { currentUser: action.payload, isLogin: true });
            return { ...state, currentUser: action.payload, isLogin: true };
        default:
            return state
    }
}
// for selector
export const getIsLogin = (state: UsersState) => state.isLogin;
export const getCurrentUser = (state: UsersState) => state.currentUser;
BehaviorSubject ([ngrx/store-11] Store 架構加入最簡單的 Reducer),我們需要給一個初始值Object.assign({}, state, {currentUser: action.payload, isLogin: true}); 或者擴展語法 {...state, currentUser: action.payload, isLogin: true};
selector,來讓使用者(元件或服務)訂閱最新的狀態。第三步:修改 app/store/reducers/indext.ts
import { ActionReducerMap } from '@ngrx/store';
import * as user from './user.reducers';

export interface State {
    user: user.UsersState
}
export const reducers: ActionReducerMap<State> = {
    user: user.reducer
}
index.ts 的方式讓將來要擴充 store 的時候比較方便,後面會陸續看到加入的 狀態跟reducer。下次我們來完成會員篇的 Effects 跟 Selector,以及更新元件


 iThome鐵人賽