今天的目標:將路由狀態加入 store
基本上這個部份大都是標準程式碼 (boilerplate),也就是只要照著做就可以,而且以後也可以直接拷貝這個部分的程式,在別的專案使用,官方文件 請參考,唯一有可能要改的,大概就是 CustomSerializer,等一下會看到,依照慣例,先從動作定義起
第一步: src/app/store/actions 下建立檔案
ng generate class router.actions --spec
第二步: 修改 router.actions.ts
import { Action } from '@ngrx/store';
import { NavigationExtras } from '@angular/router';

export const GO = '[router] GO';
export const BACK = '[router] BACK';
export const FORWARD = '[router] FORWARD';

export class Go implements Action {
    readonly type = GO;
    constructor(
        public payload: {
            path: any[];
            query?: Object;
            extras?: NavigationExtras
        }
    ) { }
}
export class Back implements Action {
    readonly type = BACK;
}
export class Forward implements Action {
    readonly type = FORWARD;
}
export type Actions =
    | Go
    | Back
    | Forward;
格式跟之前使用者動作檔一樣,三個動作,GO, BACK, FORWARD,只有 Go 有帶參數,也就是跟 router.navigate() 一樣,事實上,我們將會用 Go 來取代程式中的 router.navigate()
第三步:修改 src/app/store/actions/index.ts,加入
export * from './user.actions';
export * from './router.actions';
第一步: src/app/store/reducers 下建立檔案
ng generate class router.reducers --spec
第二步:修改 router.reducers.ts
import { ActivatedRouteSnapshot, RouterStateSnapshot, Params } from '@angular/router';

import { ActionReducerMap, createFeatureSelector, Action } from '@ngrx/store';
import { routerReducer, RouterReducerState, RouterStateSerializer } from '@ngrx/router-store';

export interface RouterStateUrl {
    url: string;
    queryParams: Params;
    params: Params;
};

export type RouterState = RouterReducerState<RouterStateUrl>;
export const reducer = routerReducer;

export class CustomeSerializer implements RouterStateSerializer<RouterStateUrl>{
    serialize(routerState: RouterStateSnapshot): RouterStateUrl {
        const { url } = routerState;
        const { queryParams } = routerState.root;

        let state: ActivatedRouteSnapshot = routerState.root;

        while (state.firstChild) {
            state = state.firstChild;

        }
        const { params } = state;
        return { url, queryParams, params };
    }
}
export const getRouterState = createFeatureSelector<RouterReducerState<RouterStateUrl>>('routerReducer');
State 跟 reducer 其實套件已經幫我們寫好了,我們自己只要定義我們想要的資料,將它們定義在 RouterStateUrl 中,再用 CustomeSerializer 沿著路由一層一層往下展,用 while loop,從根 (routerState.root) 往下展開,因為路由長的樣子像是 /member/report/3,這樣找出 params,這個例子是 3
第三步:修改 src/app/reducers/index.ts
import { ActionReducerMap } from '@ngrx/store';

import * as user from './user.reducers';
import * as router from './router.reducers';
export interface State {
    user: user.UsersState;
    router: router.RouterState;
}
export const reducers: ActionReducerMap<State> = {
    user: user.reducer,
    router: router.reducer
}
export { CustomeSerializer } from './router.reducers';
架構已經在,只要將 router 的 State 跟 reducer 填進即可,最後我們要告訴模組我們要的 CustomeSeriallizer
第四步:修改 src/app/app.module.ts
//... 省略
@NgModule({
    //... 省略
    providers: [
        //... 省略
        { provide: RouterStateSerializer, useClass: fromStore.CustomeSerializer }
    ],
    bootstrap: [AppComponent]
})
export class AppModule { }
第一步:在 src/app/store/effects 下建立檔案
ng generate class router.effects --spec
第二步:修改 router.effects.ts
import { Injectable } from '@angular/core';
import { Router } from '@angular/router';
import { Location } from '@angular/common';

import { Action } from '@ngrx/store';
import { Effect, Actions } from '@ngrx/effects';

import * as actions from '../actions';
import { tap, map } from 'rxjs/operators';

@Injectable()
export class RouterEffects {
    constructor(
        private actions$: Actions,
        private router: Router,
        private location: Location
    ) { }

    @Effect({ dispatch: false })
    navigate$ = this.actions$
        .ofType(actions.GO)
        .pipe(
        map((action: actions.Go) => action.payload),
        tap(({ path, query: queryParams, extras }) => {
            this.router.navigate(path, { queryParams, ...extras });
        }));

    @Effect({ dispatch: false })
    navigateBack$ = this.actions$
        .ofType(actions.BACK)
        .pipe(tap(() => this.location.back));

    @Effect({ dispatch: false })
    navigateForward$ = this.actions$
        .ofType(actions.FORWARD)
        .pipe(tap(() => this.location.forward));
}
Go 其實就是呼叫 router.navigate 而 Forward, Back 就是 location 的 forward, back
第三步:些修改 src/app/store/effects/index.ts
import { UserEffects } from './user.effects';
import { RouterEffects } from './router.effects';

export const effects: any[] = [UserEffects, RouterEffects];

export * from './user.effects';
export * from './router.effects';
可以看到,應用這樣的架構,加入一個新的 effects 其實就是照樣填進去就行,這樣 app.module.ts 就會註冊這個新進的 effects
檢查一下 redux devtools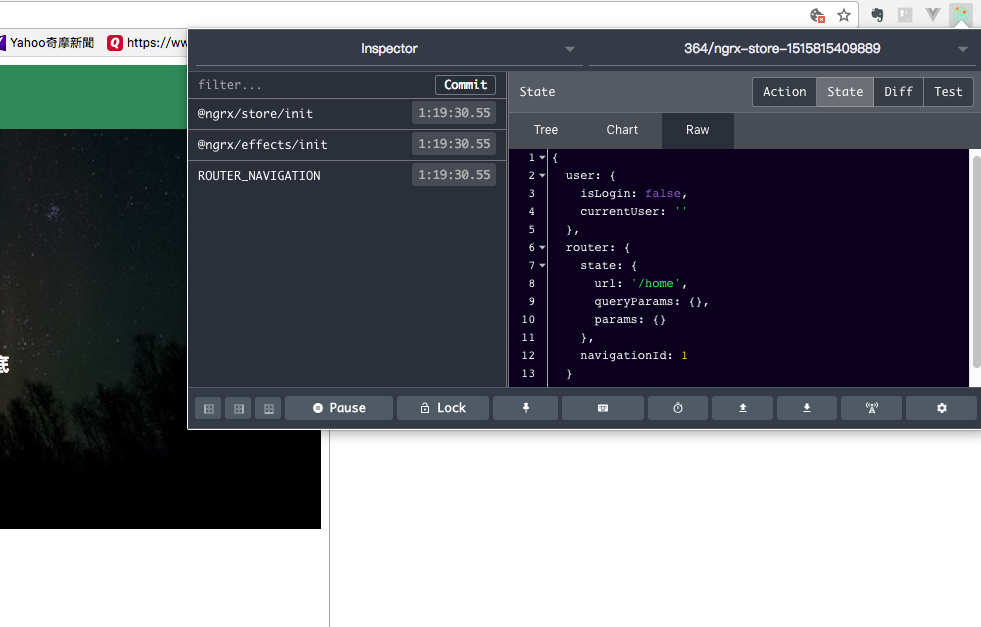
可以看到狀態樹中,已經多了 router 狀態
接下來,我們將用到 router.navigate() 的地方換成 store.dispatch.(new fromStore.Go())
第一步: src/app/user/login/login.component.ts
@Component({
    //... 省略
    constructor(
        private fb: FormBuilder,
        private store: Store<fromStore.State>,
        private snackbar: MatSnackBar
    ) { }

    //... 省略
    login() {
        this.store.dispatch(new fromStore.LoginAction(this.form.value));
        this.store.select(fromStore.getIsLogin)
            .subscribe(res => {
                if (res) {
                    this.snackbar.open('登入成功', 'OK', { duration: 3000 });
                    //this.router.navigate(['/member']);
                    this.store.dispatch(new fromStore.Go({ path: ['/member'] }));
                } else {
                //... 省略
router.navigate(['/member']) 改為 store.dispatch(new fromStore.Go({ path: ['/member'] }))
第二步:修改 src/app/services/startup.service.ts,將 injector 刪除,並將 router.navigate() 換成 store.dispatch()
//... 省略
   checkStatus() {
        if (this.utils.isTokenExpired()) {   // if token expired or not exist
            this.store.dispatch(new fromStore.LogoutAction());
            this.store.dispatch(new fromStore.Go({ path: ['/'] }));
        }
    }
第三步:同樣方式修改 src/app/navbar/navbar.component.ts
//.. 省略
    logout() {
        this.store.dispatch(new fromStore.LogoutAction());
        this.store.dispatch(new fromStore.Go({ path: ['/'] }));
    }
這樣登入後就可以看到,狀態的變化如下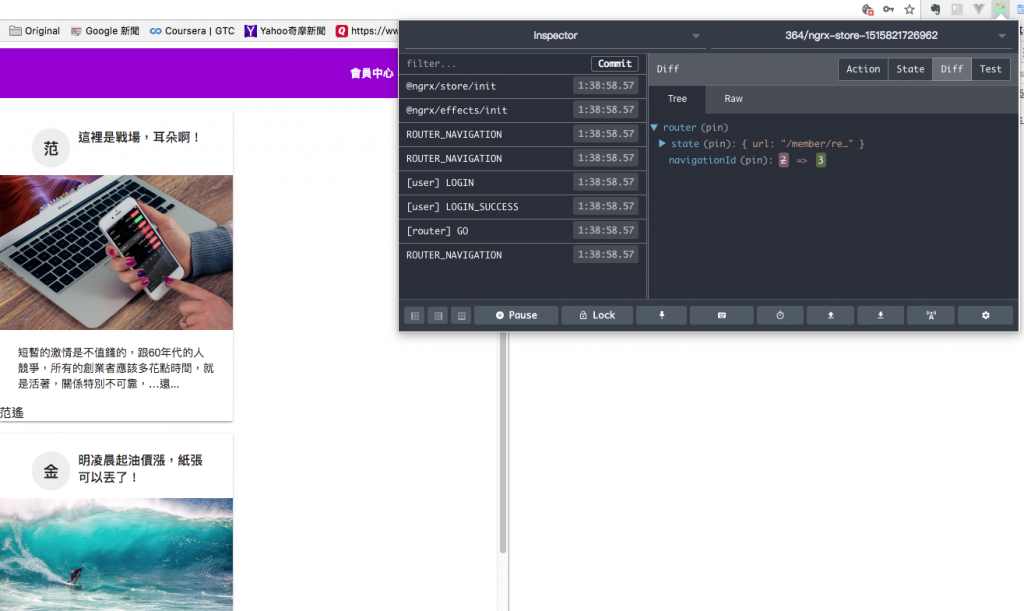
最後剩下報告的部分,我們最後兩天來完成