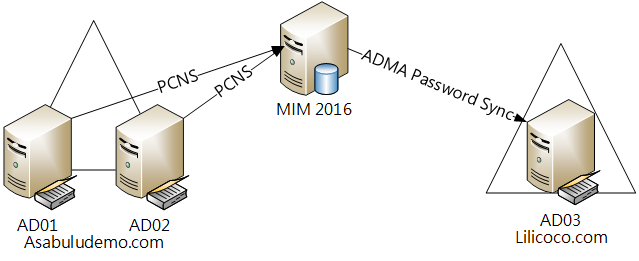
企業內部可能會有生產環境與測試環境的不同網域, 彼此互相隔離, 有些帳號可能會同時在測試環境中與生產環境使用, 因為網域之間沒有信任關係, 因此帳號的密碼往往是獨立的, 時間一久密碼難免會不相同, 因此本篇文章將介紹如何使用 MIM (Microsoft Identity Manager) 2016 的 PCNS (Password Change Notification Service) 服務同步生產與測試環境網域帳號的密碼.
設定 PCNS 之前為了保全資料, 建議先行備份 MIM 2016, 以下是備份作業步驟:
| # | 作業內容 |
|---|---|
| 1 | 備份 MIM sync 資料庫 (FIMSynchronisationService) |
| 2 | 備份 MIM sync encryption key |
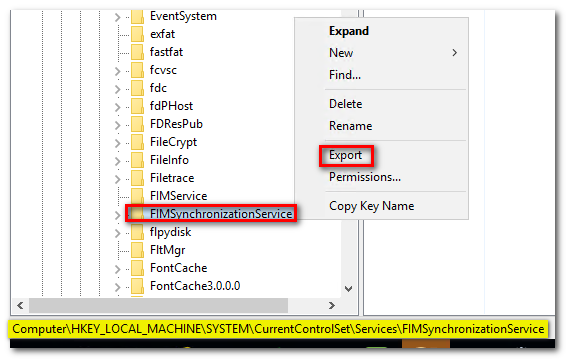
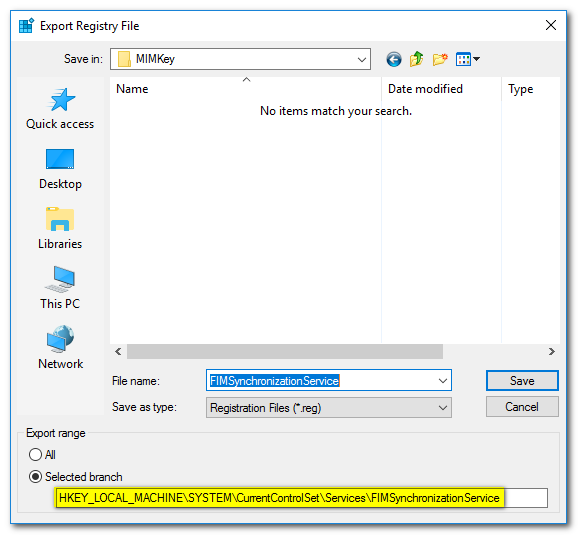
| 3 | 備份 MIM sync registry key (HKEY_LOCAL_MACHINE\SYSTEM\CurrentControlSet\Services\FIMSynchronizationService) |
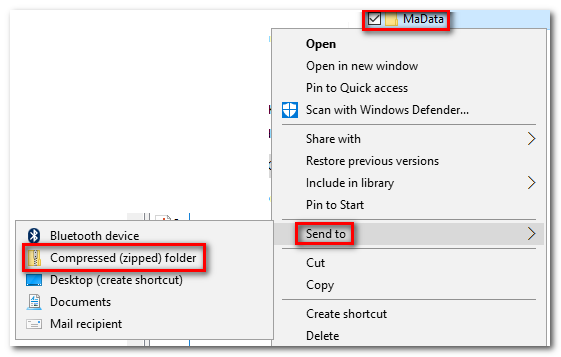
| 4 | 備份 MAData 資料夾 (C:\Program Files\Microsoft Forefront Identity Manager\2010\Synchronization Service\MaData) |
| 5 | 匯出 MIM sync server configuration (a. Export Server Configuration, b. each MA, c. Metaverse Designer > Export metaverse) |
| 6 | 備份 Task scheduler |
| 7 | 準備 PCNS configuration (選項) |
| 8 | 備份 OS snapshot (選項) |
| 9 | 備份 MIM service 資料庫 (FIMService) |
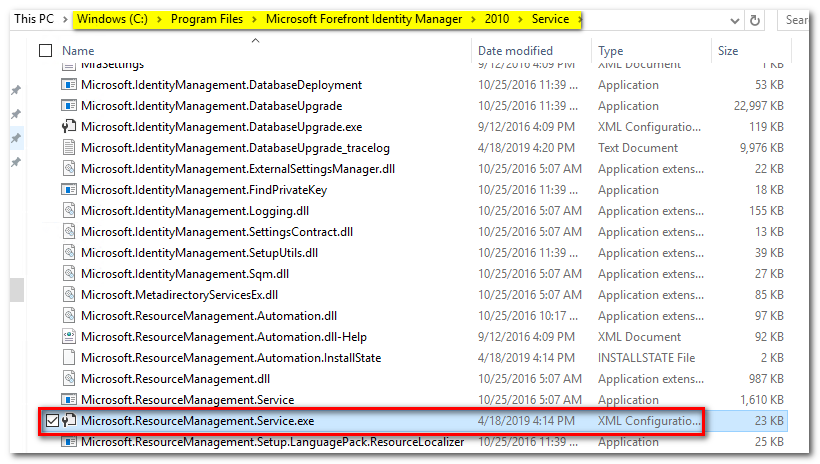
| 10 | 備份 MIM service configuration (%programfiles%\Microsoft Forefront Identity Manager\2010\Service\Microsoft.ResourceManagement.Service.exe.config) |
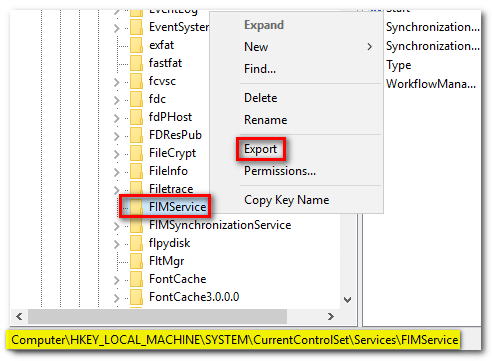
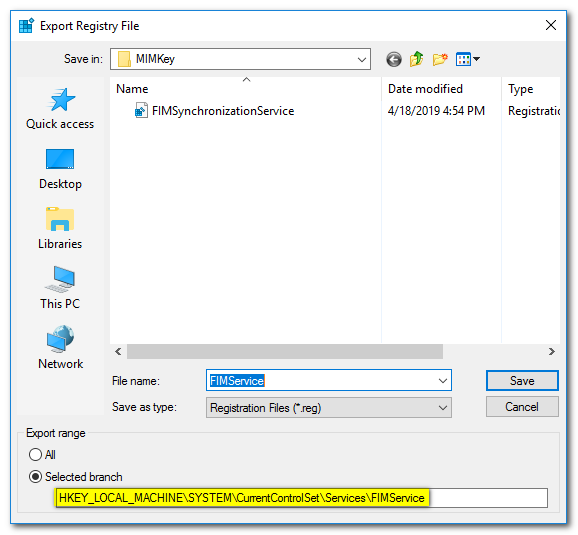
| 11 | 備份 MIM service registry key (HKEY_LOCAL_MACHINE\SYSTEM\CurrentControlSet\Services\FIMService) |
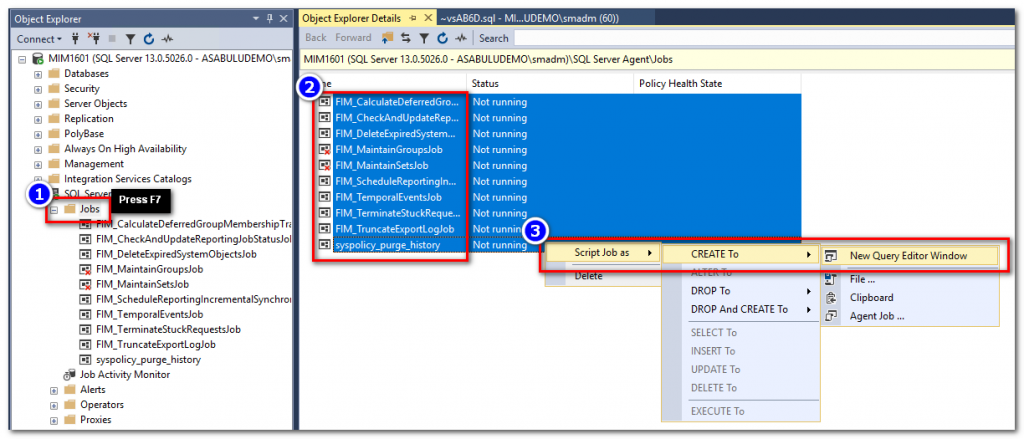
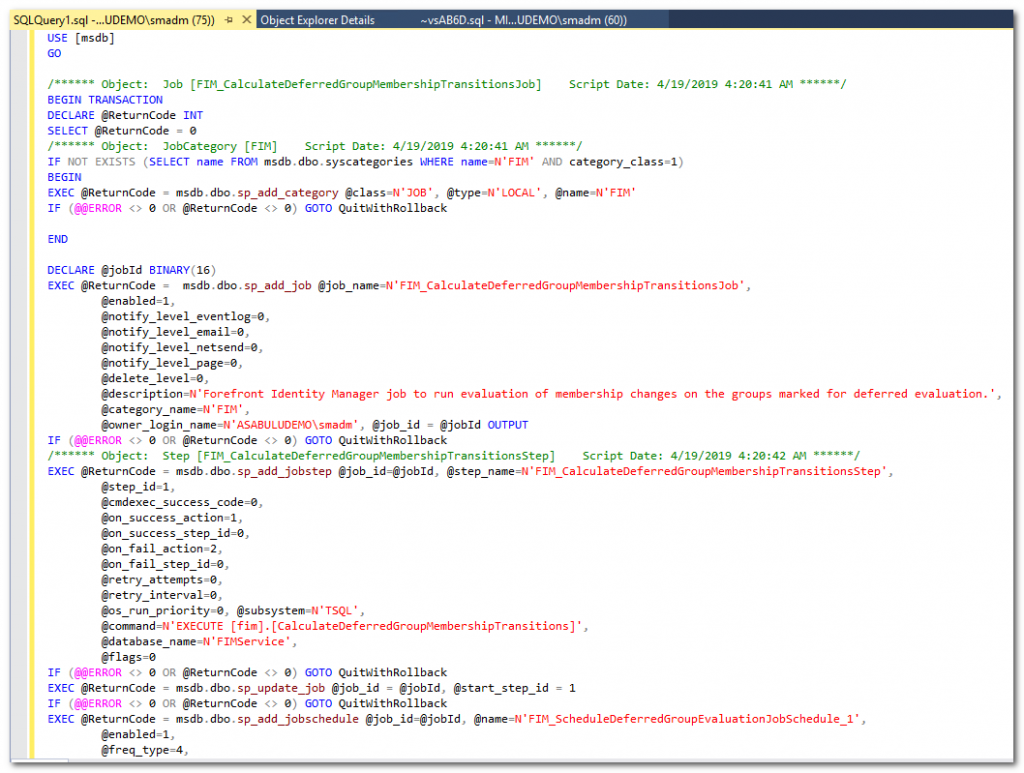
| 12 | 備份 the SQL agent jobs(FIM_DeleteExpiredSystemObjectsJob, FIM_MaintainGroupsjob, FIM_MaintainSetsJob, FIM_TemporalEventsJob) |
網路上有好心人已經寫好匯出 MIM 備份的 script, 可以從這裡下載來用, 說明網址如下, 可以省下很多時間,
https://jorgequestforknowledge.wordpress.com/2016/09/25/fimmim-configuration-export-scripts/
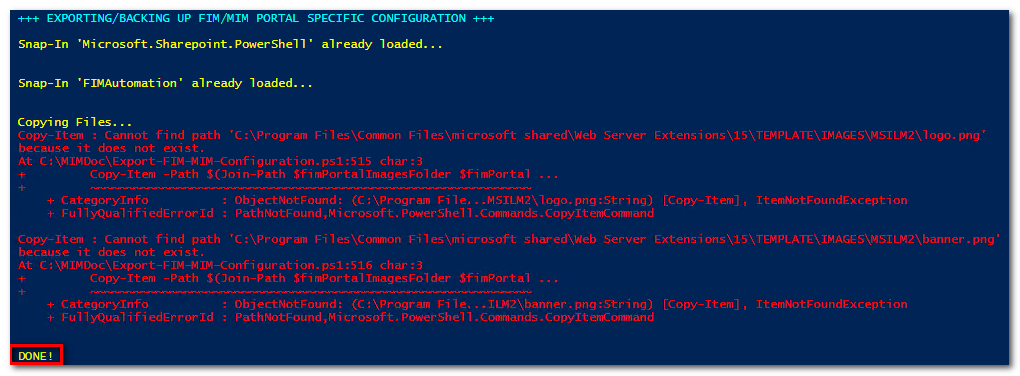
備份 main config, MIM sync config, MIM service config 和 Portal config, 可以用以下的語法備份到 C:\MIMBAK 目錄
.\Export-FIM-MIM-Configuration.ps1 -mainConfig -fimSyncConfig -fimSvcConfig -fimPortalConfig -mainBackupFolder C:\MIMBAK
執行過程可能會有些錯誤訊息, 作者也提示說他沒有一一驗證每個匯出模組.
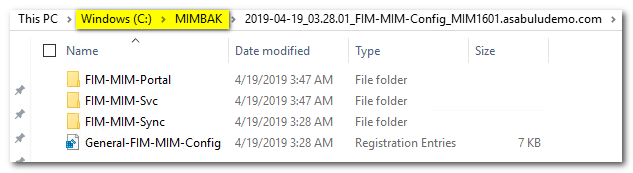
匯出的結果都會在指定的目錄中:
如果要使用 UI 進行的話, 以下是步驟說明:
(1) 備份 MIM sync 資料庫 (FIMSynchronisationService, FIMService)
開啟 MIM 所安裝所在的 SQL Server, 進行備份
BACKUP DATABASE [FIMSynchronizationService] TO  DISK = N'C:\BAK\FIMSynchronizationService.bak' WITH NOFORMAT, NOINIT,  NAME = N'FIMSynchronizationService-Full Database Backup', SKIP, NOREWIND, NOUNLOAD,  STATS = 1
GO
BACKUP DATABASE [FIMSynchronizationService] TO  DISK = N'C:\BAK\FIMService.bak' WITH NOFORMAT, NOINIT,  NAME = N'FIMService-Full Database Backup', SKIP, NOREWIND, NOUNLOAD,  STATS = 1
GO
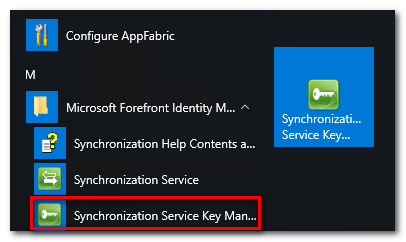
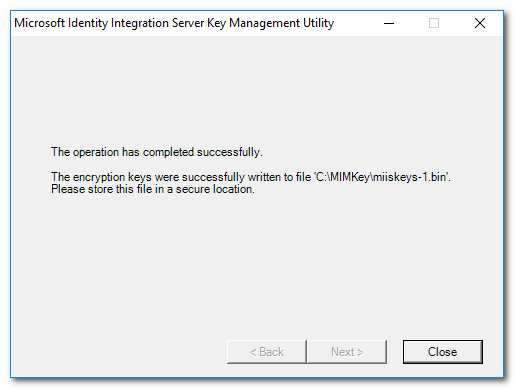
(2) 備份 MIM sync encryption key
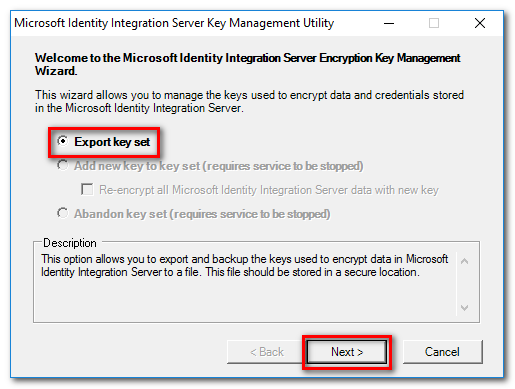
a. 從程式集中執行 Synchronization Service Key Management Utility
b. 選取 Export key set, 按 Next
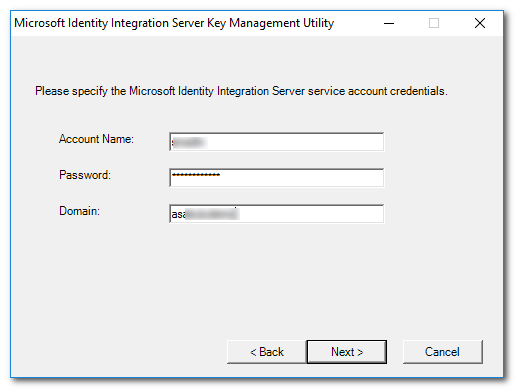
c. 輸入 MIIS 帳號密碼
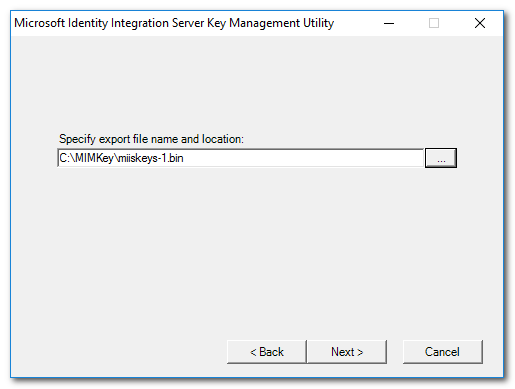
d. 將 Encryption key 匯出
e. 檢視摘要後按 Finish
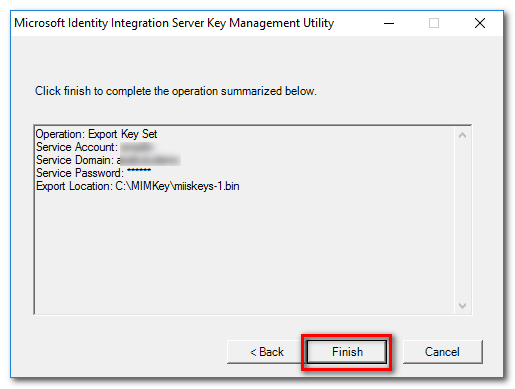
f. 關閉視窗
(3) 備份 MIM sync registry key (HKEY_LOCAL_MACHINE\SYSTEM\CurrentControlSet\Services\FIMSynchronizationService)
(4) 備份 MAData 資料夾 (C:\Program Files\Microsoft Forefront Identity Manager\2010\Synchronization Service\MaData)
(5) 匯出 MIM sync server configuration
開啟 Synchronization Service Manager
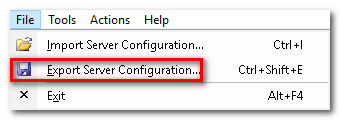
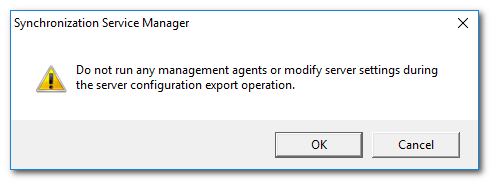
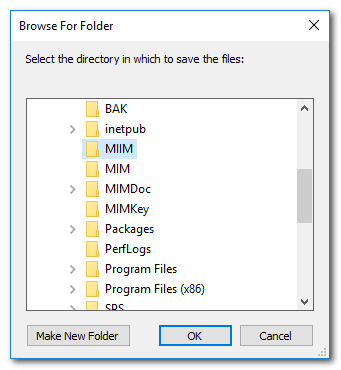
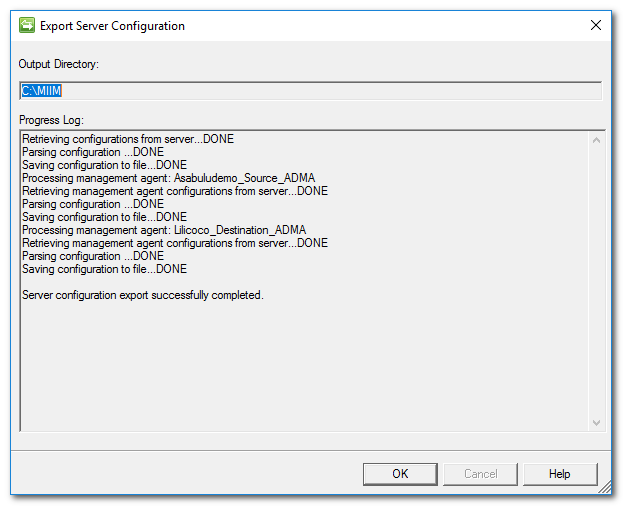
a. File > Export Server Configuration, 確認沒有 MA 正在執行或修改設定, 請選擇一個空的資料夾存放匯出檔案
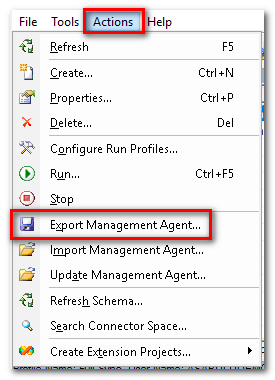
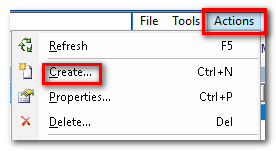
b. 依序選取每個 MA, 選取 Actions > Export Management Agent, 並選取資料夾與檔案名稱進行匯出
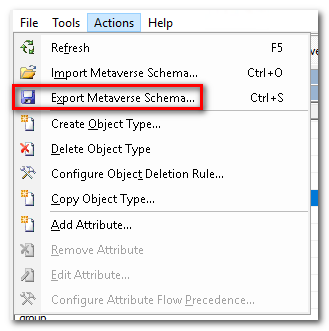
c. 選取 Metaverse Designer > 依序將 Metaverse 匯出 Actions > Export metaverse schema
(a) 選取 Metaverse Designer
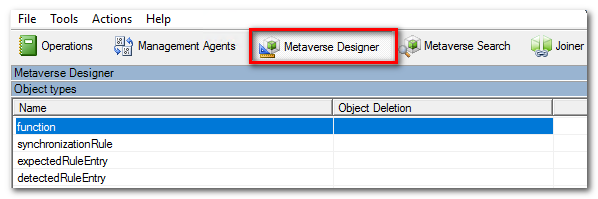
(b) 點選 Object Name (例如 person), 選取 Actions > Export metaverse schema
(6) 備份 Task scheduler, 可以使用 Export-ScheduledTask PowerShell 命令
Export-ScheduledTask -TaskName "YourTaskName" > "C:\TasksBak\YourTaskName.xml"
(7) 備份 MIM service 資料庫 (FIMService) (已經在步驟 1 完成)
(8) 備份 MIM service configuration (%programfiles%\Microsoft Forefront Identity Manager\2010\Service\Microsoft.ResourceManagement.Service.exe.config)
(9) 備份 MIM service registry key (HKEY_LOCAL_MACHINE\SYSTEM\CurrentControlSet\Services\FIMService)
(10) 備份 the SQL agent jobs(FIM_DeleteExpiredSystemObjectsJob, FIM_MaintainGroupsjob, FIM_MaintainSetsJob, FIM_TemporalEventsJob)
如果有多台 AD 需要設定, 建議在 AD 上先停用複寫功能, 使用命令如下:
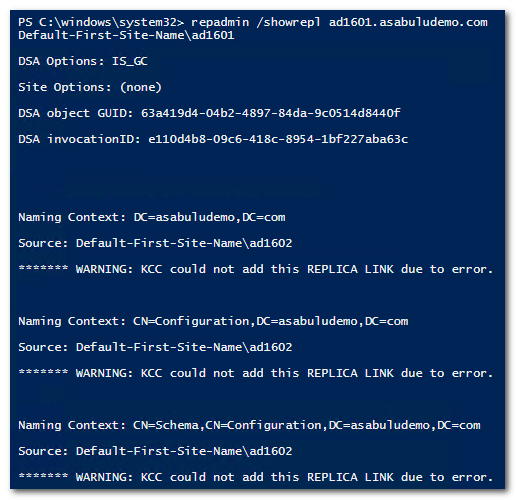
(1) 先確認複寫狀況
repadmin /showrepl ad1601.asabuludemo.com
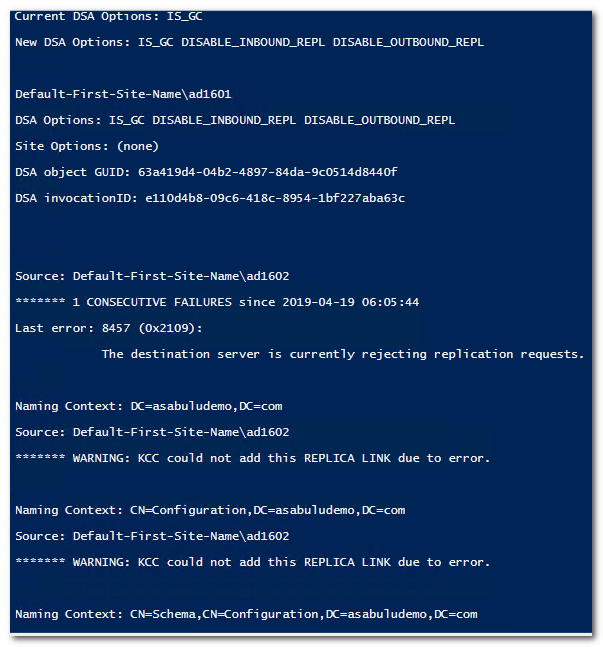
(2) 停止複寫並查看狀態
repadmin /options ad1601.asabuludemo.com +DISABLE_OUTBOUND_REPL +DISABLE_INBOUND_REPL
repadmin /showrepl ad1601.asabuludemo.com
(1) 執行以下的安裝語法進行 AD Schema extend 安裝
$MSIPCNSFile = "C:\Temp\Password Change Notification Service\x64\Password Change Notification Service.msi"
Start-Process $MSIPCNSFile "SCHEMAONLY=TRUE /q  /L*v C:\pcnslog.txt" -Wait
如果安裝 Extend 完成, 可以在 Log file: C:\pcnslog.txt 確認結果

(2) 設定 PCNS SPN
a. 檢查 SPN 是否已經存在
setspn -Q PCNSCLNT/mim1601.asabuludemo.com

b. 新增 PCNS SPN
setspn -A PCNSCLNT/mim1601.asabuludemo.com asabuludemo\smadm

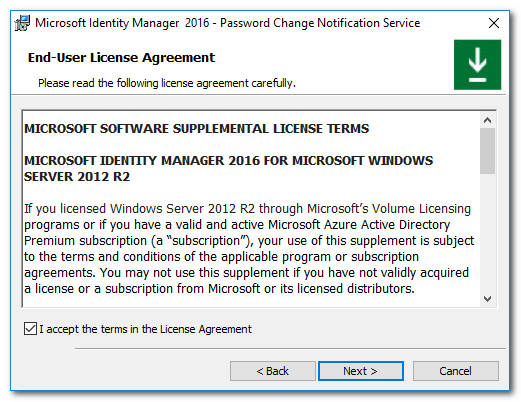
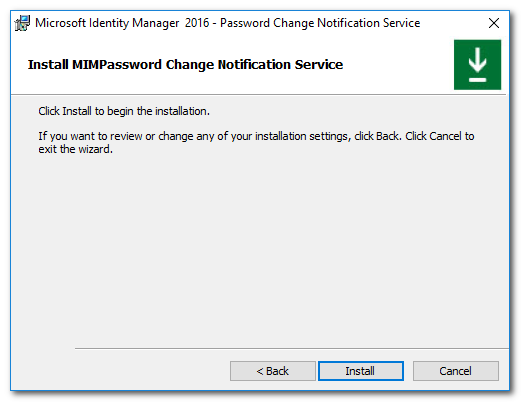
(3) 安裝 PCNS
執行 Password Change Notification Service.msi 安裝程式, 依照安裝精靈步驟完成安裝, 安裝完成後需要重新開機


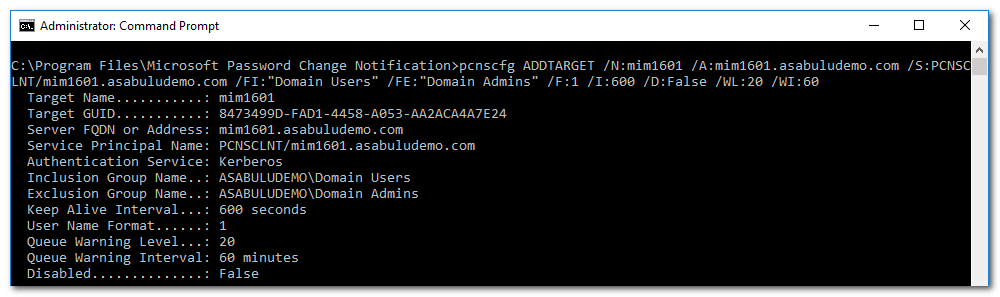
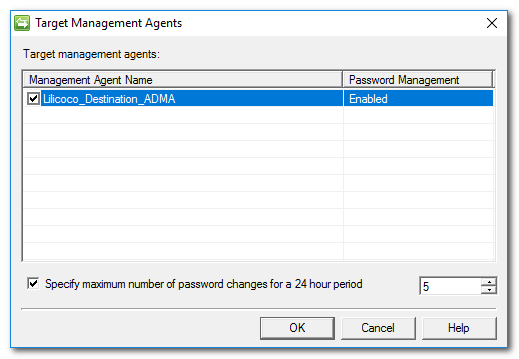
(4) 註冊 Target Server, 執行以下的命令將 MIM Server 註冊
pcnscfg ADDTARGET /N:mim1601 /A:mim1601.asabuludemo.com /S:PCNSCLNT/mim1601.asabuludemo.com /FI:"Domain Users" /FE:"Domain Admins" /F:1 /I:600 /D:False /WL:20 /WI:60
(1) 設定 Target AD 網域 MA (本例為 Lilicoco 網域)
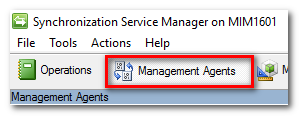
a. 開啟 MIM Synchronization Manager, 選取 Management Agent

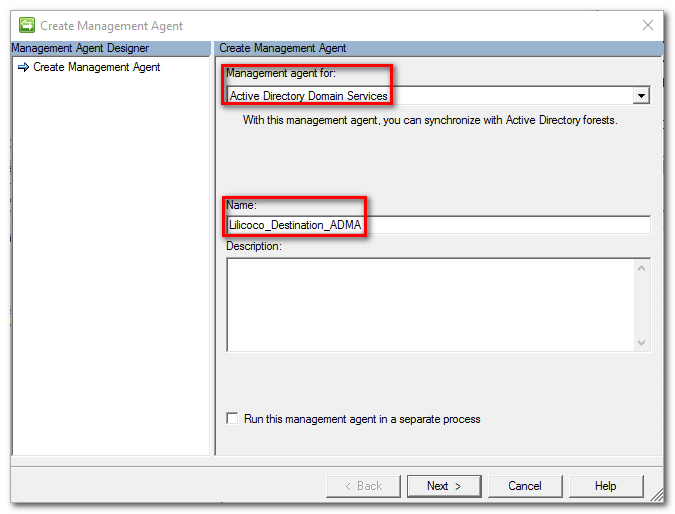
b. 點選 Create, 開始建立 MA

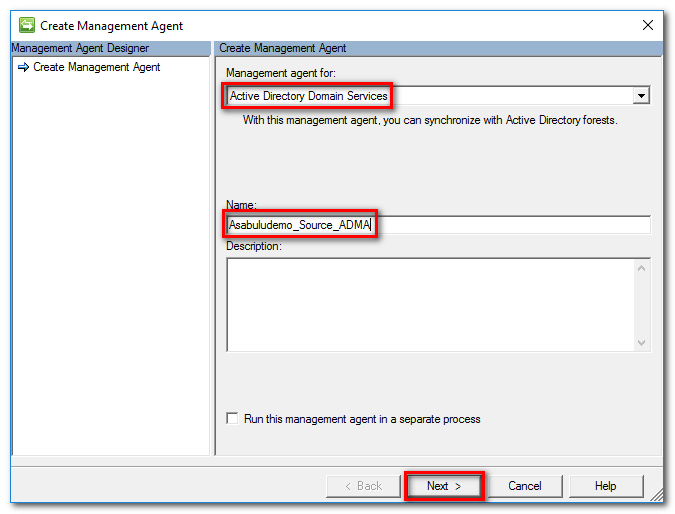
c. 依照設定精靈, 選取 Active Directory Domain Services, 並輸入 MA 名稱
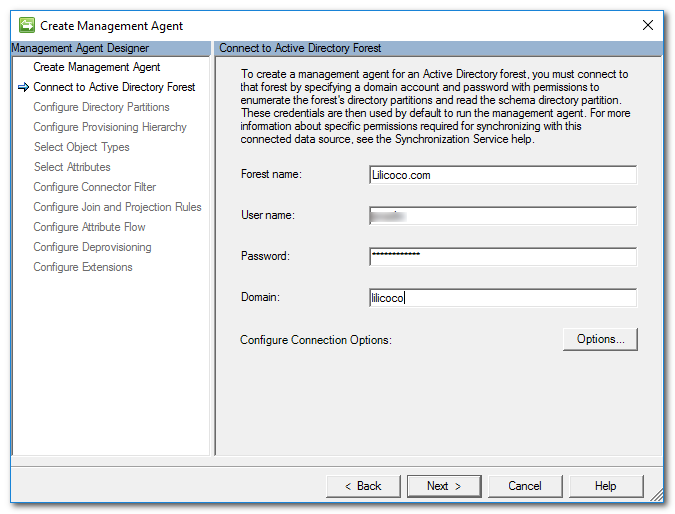
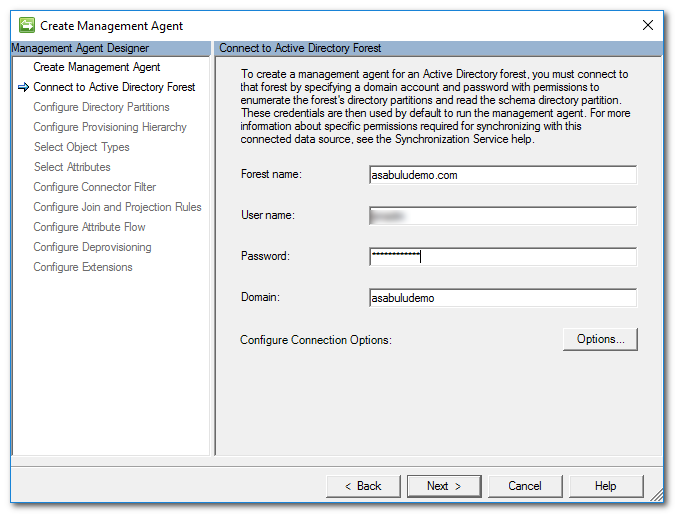
d. 輸入可以連線到 AD 的帳號
e. 設定 Directory Partitions
(a) 勾選 domain partitions
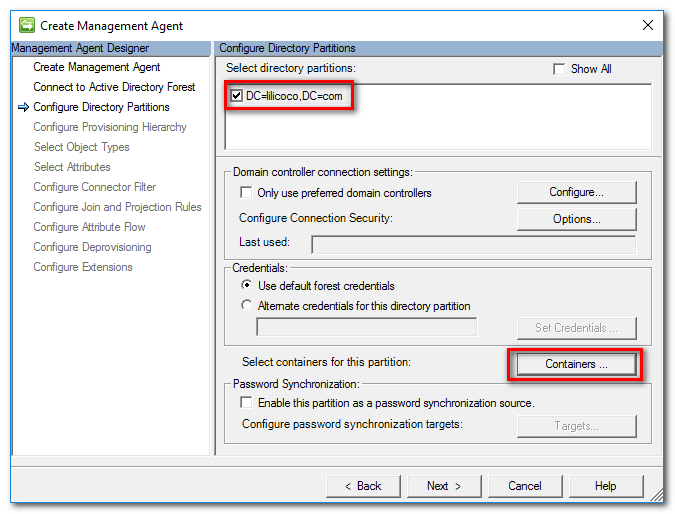
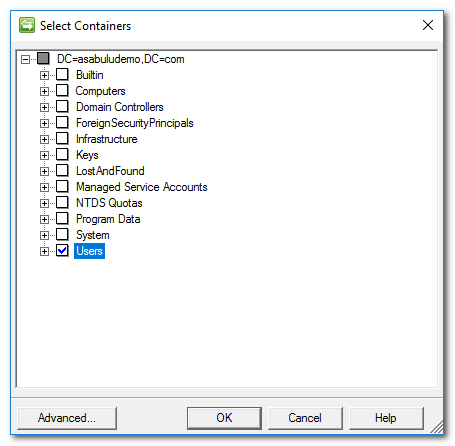
(b) 選取 Containters, 我們選取 Users Container 為範圍
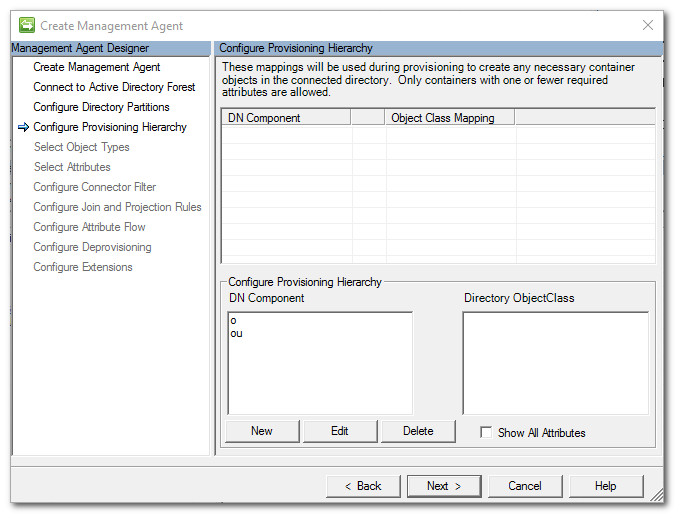
f. 使用預設的 Hierarchy

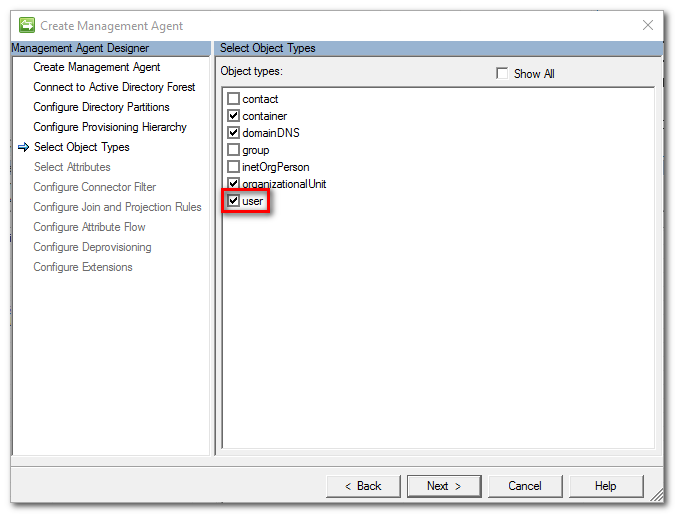
g. Object Types 勾選 user
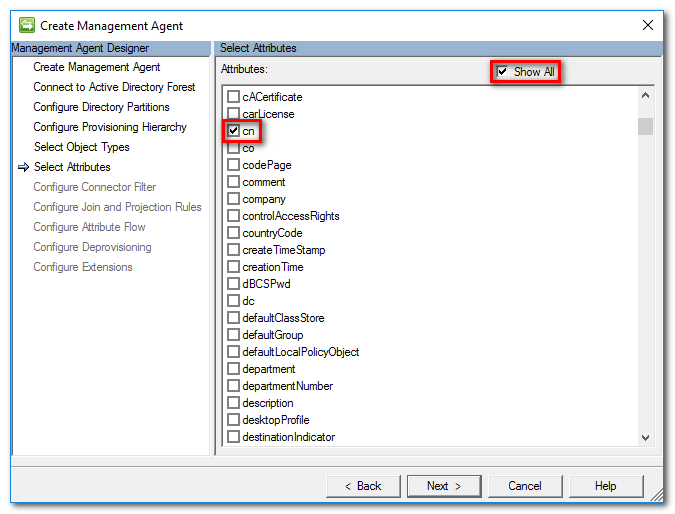
h. 在 Attributes 上先開起 Show All, 之後勾選 (cn, displayName, givenName, objectSid, sAMAccountName, sn)
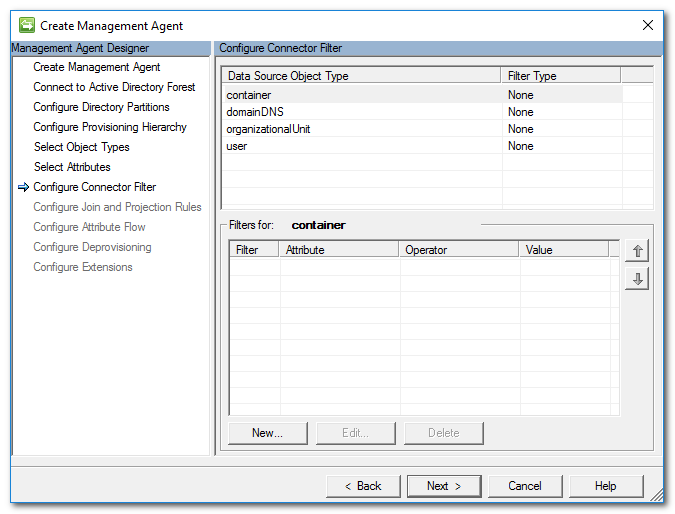
i. Connector Filter 依照預設值

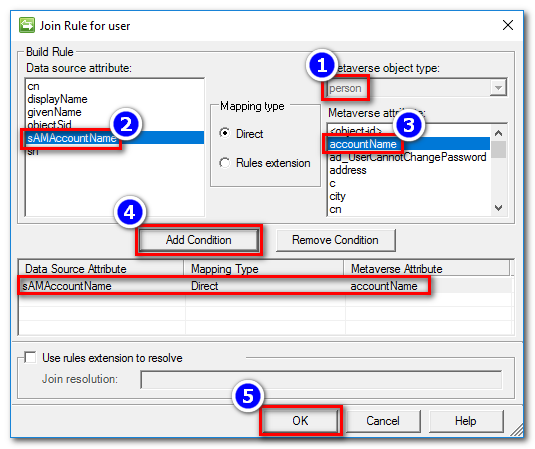
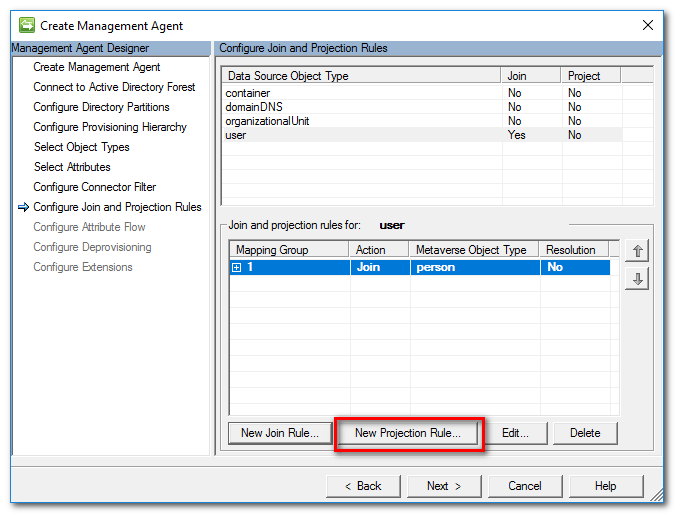
j. Join and Projection Rules, 選取 user
(a) 點選 New Join Rule

(b) 選取 person Metaverse object type, source attribute 為 sAMAccountName, Metaverse attribute 選 accountName, 再點 Add Condition 將 Join Rule 加入

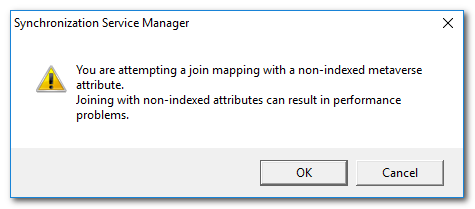
(c) 出現警告訊息可以忽略
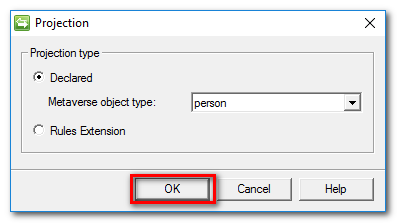
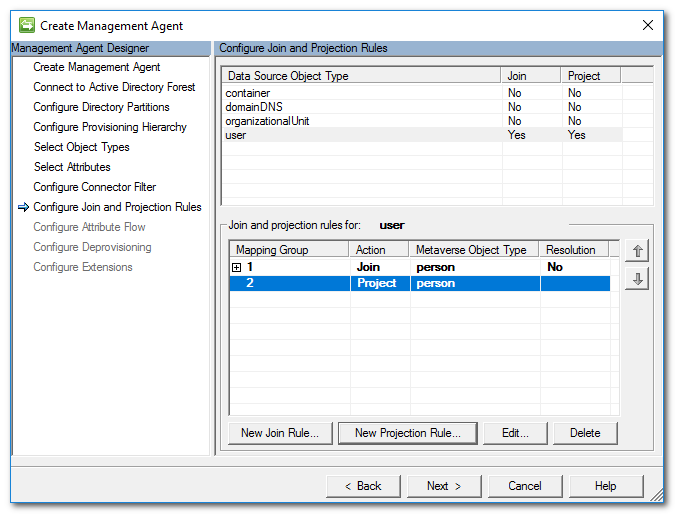
(d) 點選 New Projection Rule, 新增 Projection Rule

(e) 直接按 OK 加入 Projection Rule
(f) 結果如下

k. 設定 Attribute Flow 如下:
| Data Source Attribute | Flow Direct | Metaverse Attribute |
|---|---|---|
| cn | import | cn |
| displayName | import | displayName |
| objectSid | import | objectSid |
| sAMAccountName | import | accountName |
| givenName | import | firstName |
| sn | import | sn |

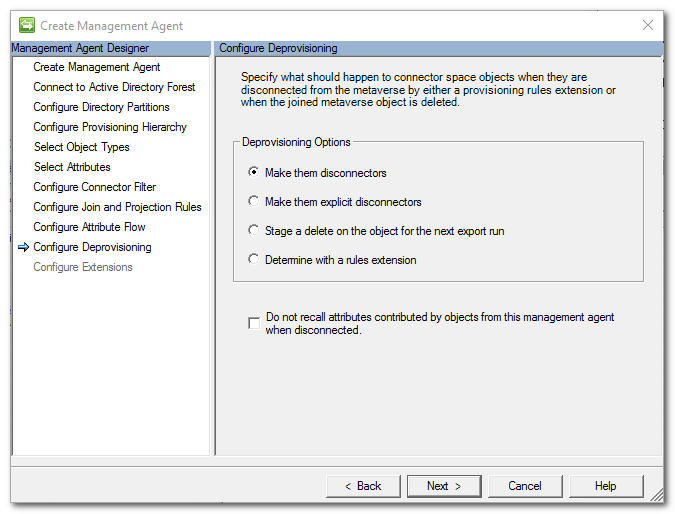
l. Deprovisioning 設定依照預設值
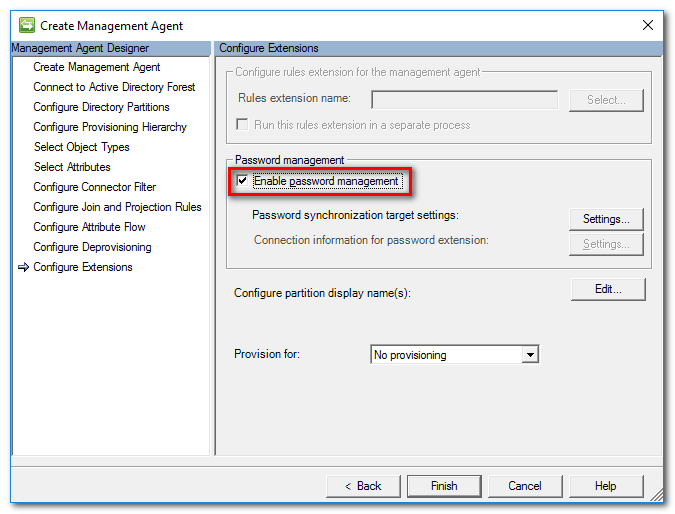
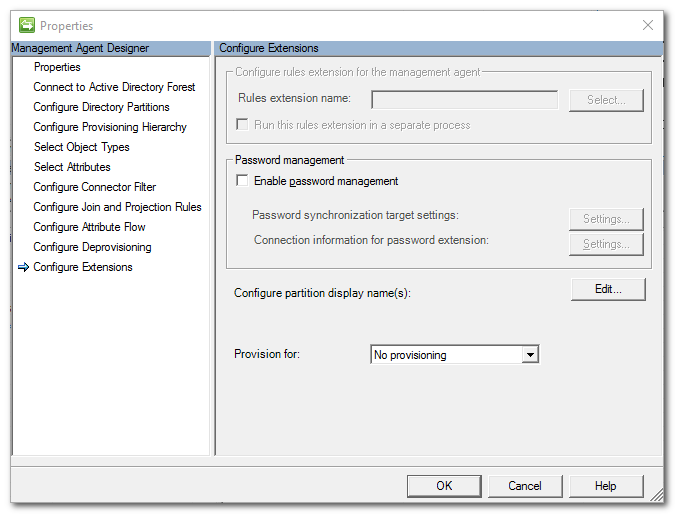
m. Extensions 中的 Password management 請記得啟用 Enable password management
(2) 設定 Source AD 網域 MA (本例為 Asabuludemo 網域)
a. 開啟 MIM Synchronization Manager, 選取 Management Agent
b. 點選 Create, 開始建立 MA
c. 依照設定精靈, 選取 Active Directory Domain Services, 並輸入 MA 名稱
d. 輸入可以連線到 AD 的帳號
e. 設定 Directory Partitions
(a) 勾選 domain partitions
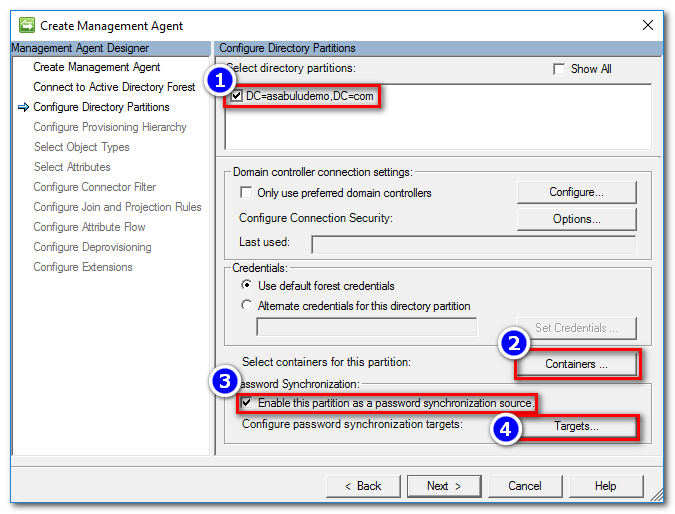
(b) 選取 Containters, 我們選取 Users Container 為範圍

(c) 啟用 Enable this partition as a password synchronization source, 並點選 Targets 按鈕, 勾選 target MA
f. 使用預設的 Hierarchy
g. Object Types 勾選 user

h. 在 Attributes 上先開起 Show All, 之後勾選 (cn, displayName, givenName, objectSid, sAMAccountName, sn)

i. Connector Filter 依照預設值
j. Join and Projection Rules, 選取 user
(a) 點選 New Join Rule

(b) 選取 person Metaverse object type, source attribute 為 sAMAccountName, Metaverse attribute 選 accountName, 再點 Add Condition 將 Join Rule 加入
(c) 出現警告訊息可以忽略

(d) 點選 New Projection Rule, 新增 Projection Rule
(e) 直接按 OK 加入 Projection Rule

(f) 結果如下
k. 設定 Attribute Flow 如下:
| Data Source Attribute | Flow Direct | Metaverse Attribute |
|---|---|---|
| cn | import | cn |
| displayName | import | displayName |
| objectSid | import | objectSid |
| sAMAccountName | import | accountName |
| givenName | import | firstName |
| sn | import | sn |

l. Deprovisioning 設定依照預設值

m. Extensions 使用預設值
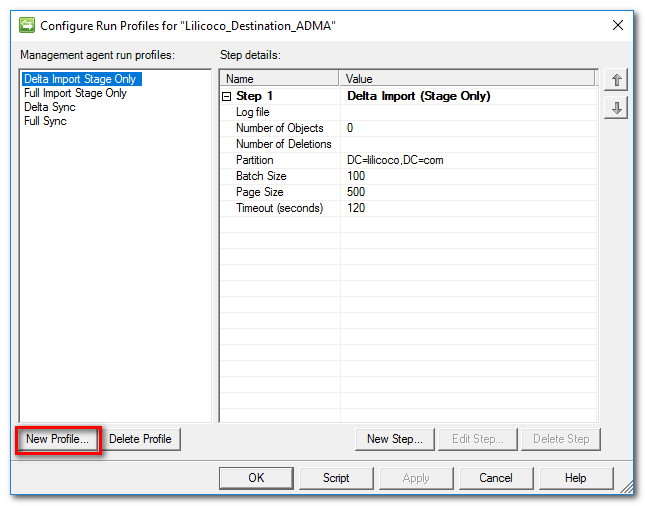
(1) 請依照步驟為 MA 各自設定以下的 Run Profiles
| Run Profile Name | Type |
|---|---|
| Delta Import Stage Only | Delta Import (Stage Only) |
| Full Import Stage Only | Full Import (Stage Only) |
| Delta Sync | Delta Synchronization |
| Full Sync | Full Synchronization |
a. 選取 MA 後, 在 Actions 上選取 Configure Run Profiles 建立 Run Profile
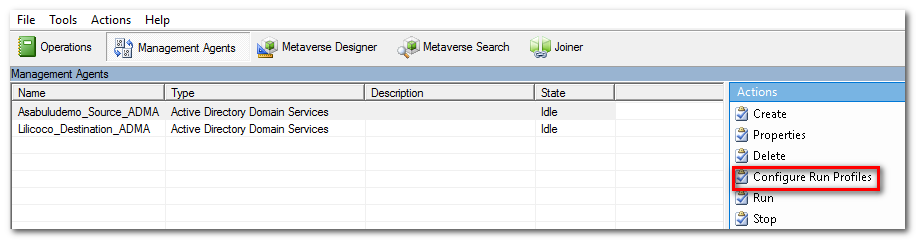
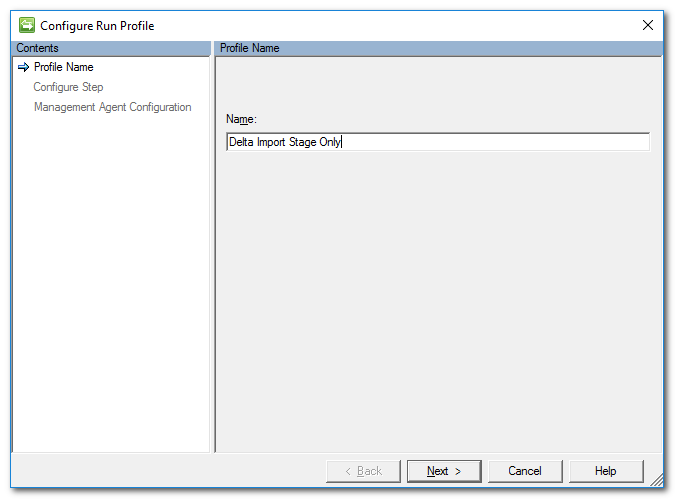
b. 點選 New Profile
c. 輸入 Profile Name
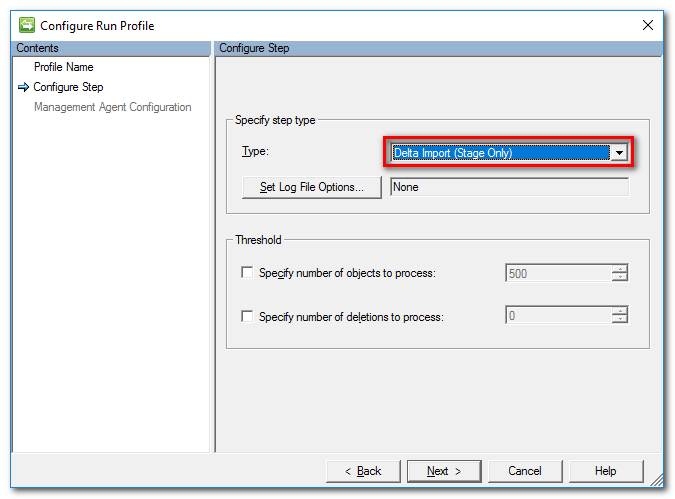
d. 選擇 Type
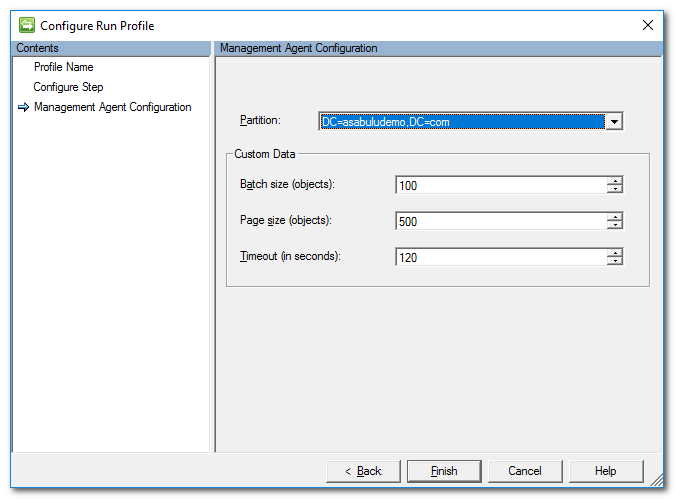
e. Partition 使用預設值
第一次設定完成需要依序執行 Run Profile
| 順序 | MA | Run Profile |
|---|---|---|
| 1 | Source MA | Full Import Stage Only |
| 2 | Source MA | Full Synchronization |
| 3 | Destination MA | Full Import Stage Only |
| 4 | Destination MA | Full Synchronization |
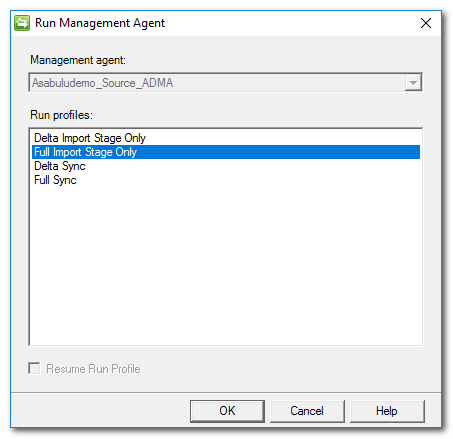
(1) 選取 MA, 點選 Run

(2) 點選 Full Import Stage Only Run Profiles
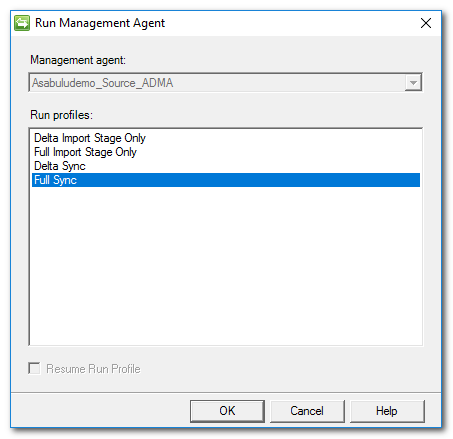
(3) 點選 Full Sync Run Profiles
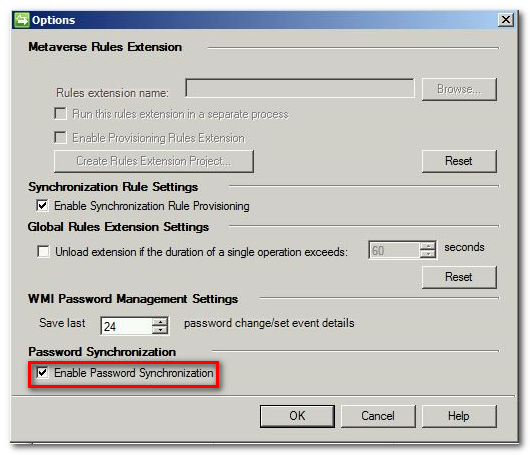
(1) 開啟 Synchronization Service Manager, 選取 Tools > Options

(2) 啟用 Enable Password Synchronization
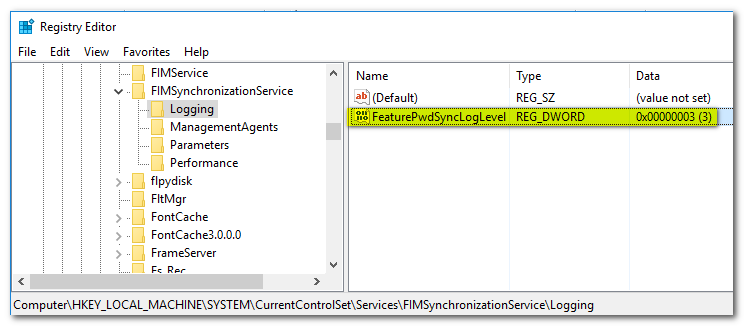
(1) 在 MIM Sync server 上設定以下機碼, 需重新啟動 FIM Sync 服務 生效
HKEY_LOCAL_MACHINE\System\CurrentControlSet\Services\FIMSynchronizationServices\Logging
Key: FeaturePwdSyncLogLevel
Type: REG_DWORD
Value: 3
數值 3 表示 Verbose Log Level
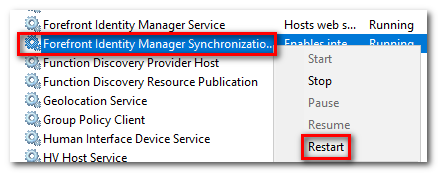
(2) 重新啟動 FIM Sync 服務
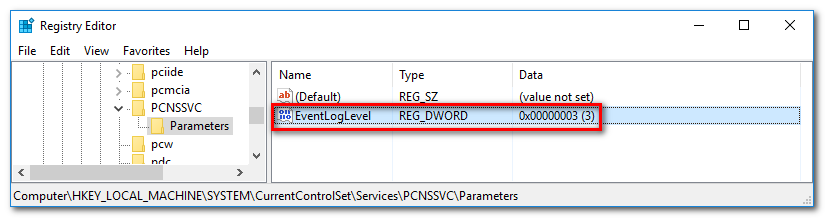
(1) 在 AD 上修改以下機碼, 需重新啟動 PCNS 服務 生效
HKEY_LOCAL_MACHINE\System\CurrentControlSet\Services\PCNSSVC\Parameters\Logging
Key: EventLogLevel
Type: REG_DWORD
Value: 3
數值 3 表示 Verbose Log Level
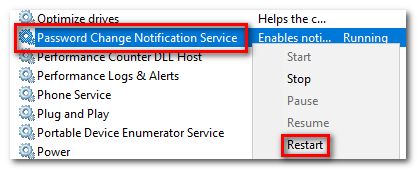
(2) 重新啟 動 PCNS 服務
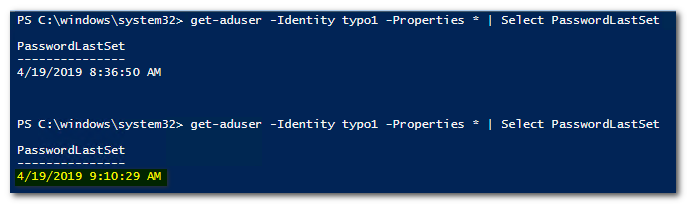
(1) 在 AD 上變更使用者密碼
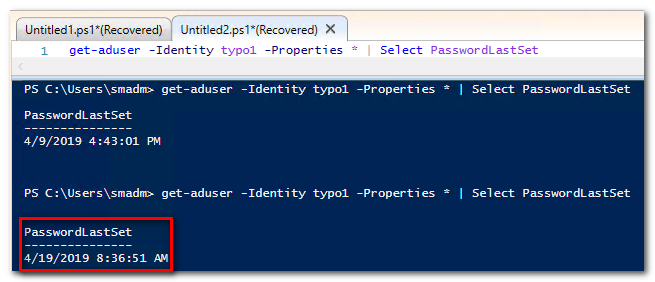
(2) 使用以下的 PowerShell 命令取得上次密碼變更時間
get-aduser -Identity typo1 -Properties * | Select PasswordLastSet
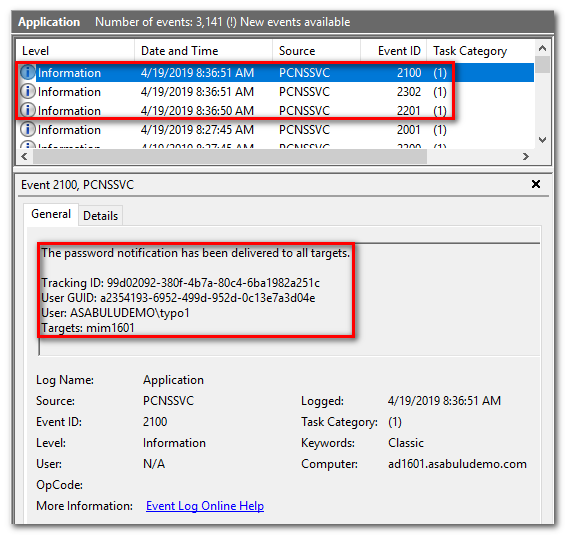
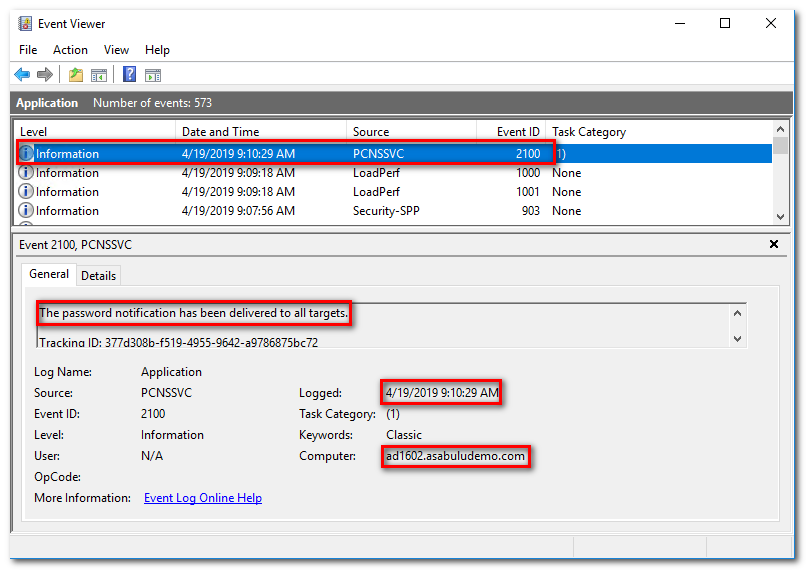
(3) 在 AD 的 Application event log 可以看到 Event Id: 2201, 2302, 2100 紀錄 PCNS 送出密碼變更及傳送通知事件
(4) 在 Target AD 主機上, 同樣使用 PowerShell 命令驗證密碼變更時間
get-aduser -Identity typo1 -Properties * | Select PasswordLastSet
(1) 在關閉 AD 複寫的主機上啟用複寫
repadmin /options ad1601.asabuludemo.com -DISABLE_OUTBOUND_REPL -DISABLE_INBOUND_REPL

(1) 確認 AD 複寫已經打開
(2)確認 PCNS SPN
a. 檢查 SPN 是否已經存在
setspn -Q PCNSCLNT/mim1601.asabuludemo.com

b. 新增 PCNS SPN
setspn -A PCNSCLNT/mim1601.asabuludemo.com asabuludemo\smadm

(3) 安裝 PCNS
執行 Password Change Notification Service.msi 安裝程式, 依照安裝精靈步驟完成安裝, 安裝完成後需要重新開機


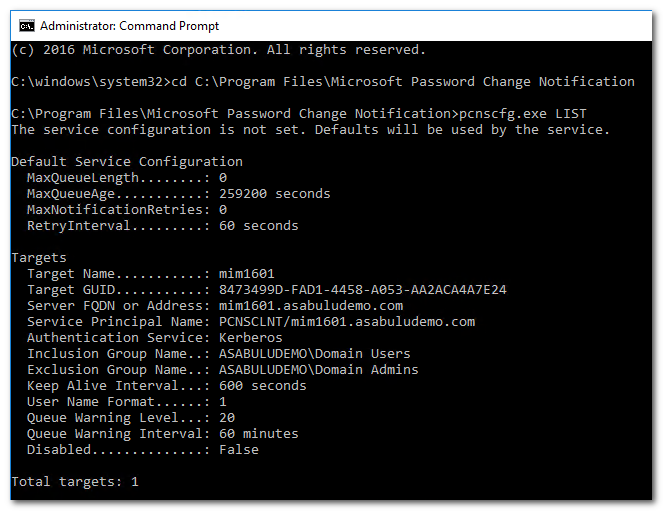
(4) 確認 Target Server, 執行以下的命令將 MIM Server 註冊
pcnscfg LIST
(1) 在 AD 上變更使用者密碼
(2) 使用以下的 PowerShell 命令取得上次密碼變更時間
get-aduser -Identity typo1 -Properties * | Select PasswordLastSet
(3) 在 AD 的 Application event log 可以看到 Event Id: 2100 紀錄 PCNS 送出密碼變更及傳送通知事件
(4) 在 Target AD 主機上, 同樣使用 PowerShell 命令驗證密碼變更時間
get-aduser -Identity typo1 -Properties * | Select PasswordLastSet

(1) PCNS 服務無法正常啟動, 事件檢視器出現以下的錯誤
Faulting application name: pcnssvc.exe, version: 4.1.3114.0, time stamp: 0x50ad5a0d
Faulting module name: pcnssvc.exe, version: 4.1.3114.0, time stamp: 0x50ad5a0d
Exception code: 0xc0000005
Fault offset: 0x0000000000027880
Faulting process id: 0x1af4
Faulting application start time: 0x01d0f50ec3aa1c95
Faulting application path: C:\Program Files\Microsoft Password Change Notification\pcnssvc.exe
Faulting module path: C:\Program Files\Microsoft Password Change Notification\pcnssvc.exe
Report Id: 028a4c56-6102-11e5-80d3-3ca82a2117f7
Faulting package full name:
Faulting package-relative application ID:
解決方法: 刪除 Schema cache, 重新啟動 PCNS 服務
C:\Windows\System32\config\systemprofile\AppData\Local\Microsoft\Windows\SchCache
https://www.virtualizationhowto.com/2015/06/sync-passwords-child-parent-domain-fim-2010-r2/
https://jorgequestforknowledge.wordpress.com/category/microsoft-identity-manager-mim/
https://blog.keyfactor.com/simplifying-fim-service-migration
https://docs.microsoft.com/en-us/previous-versions/mim/ff400265(v=ws.10)
https://www.corelan.be/index.php/2007/09/25/performing-ad-schema-updates-in-a-safe-way/
 山姆大叔
山姆大叔
