三分鐘學會安裝 LibreNMS SNMP Tools CentOS 7 (Apache)
安裝前準備
CentOS 7 mini install 最小安裝就可以了
之後始用 Telnet 從 SSH 連入 CentOS
這邊的文件照做
要記得更改 Password
其他都複製貼上就可以了
LibreNMS 安裝文件說明
https://docs.librenms.org/Installation/Installation-CentOS-7-Apache/
簡單說明如下
CentOS 7 (Apache)
使用 root 如果不是 root 就要用 sudo
版本最低需求 PHP version is 7.1.3
安裝需要的套件
這些命令就點 Copy to clipboard
再貼到 Telnet console 的畫面執行就可以了
如圖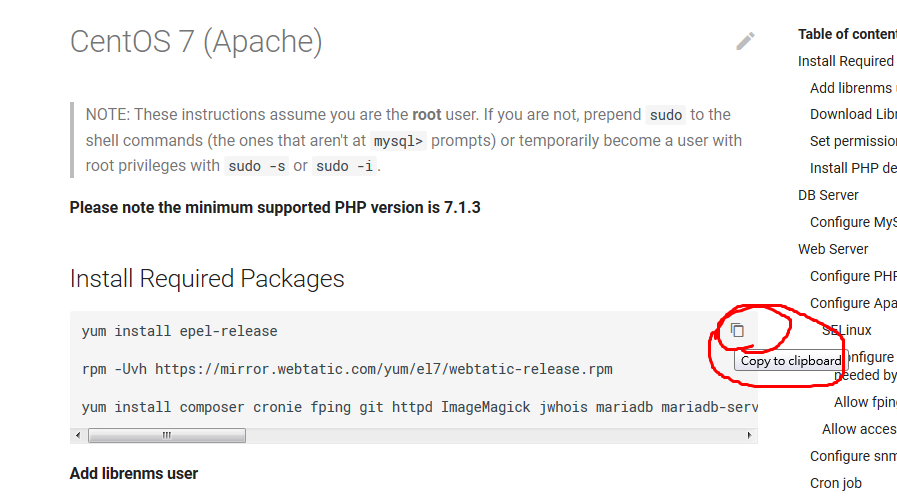
yum install epel-release
rpm -Uvh https://mirror.webtatic.com/yum/el7/webtatic-release.rpm
yum install composer cronie fping git httpd ImageMagick jwhois mariadb mariadb-server mtr MySQL-python net-snmp net-snmp-utils nmap php72w php72w-cli php72w-common php72w-curl php72w-gd php72w-mbstring php72w-mysqlnd php72w-process php72w-snmp php72w-xml php72w-zip python-memcached rrdtool
新增 librenms 使用者
useradd librenms -d /opt/librenms -M -r
usermod -a -G librenms apache
下載 LibreNMS
cd /opt
git clone https://github.com/librenms/librenms.git
設定存取權限 Set permissions
chown -R librenms:librenms /opt/librenms
chmod 770 /opt/librenms
setfacl -d -m g::rwx /opt/librenms/rrd /opt/librenms/logs /opt/librenms/bootstrap/cache/ /opt/librenms/storage/
setfacl -R -m g::rwx /opt/librenms/rrd /opt/librenms/logs /opt/librenms/bootstrap/cache/ /opt/librenms/storage/
安裝 PHP 相關套件 Install PHP dependencies
su - librenms
./scripts/composer_wrapper.php install --no-dev
exit
資料庫 DB Server
設定資料庫 Configure MySQL
systemctl start mariadb
mysql -u root
備註 NOTE: Please change the 'password' below to something secure.
這邊的 password 可以更改成你要的密碼,當然你也可以直接用他當 password
在 WebUI install setup 步ˋ驟中如果有問到 DB 密碼
那麼就是使用你設定的這組密碼
CREATE DATABASE librenms CHARACTER SET utf8 COLLATE utf8_unicode_ci;
CREATE USER 'librenms'@'localhost' IDENTIFIED BY 'password';
GRANT ALL PRIVILEGES ON librenms.* TO 'librenms'@'localhost';
FLUSH PRIVILEGES;
exit
vi /etc/my.cnf
當還在mysql步驟時新增 Within the [mysqld] section please add:
innodb_file_per_table=1
lower_case_table_names=0
systemctl enable mariadb
systemctl restart mariadb
網頁伺服器 Web Server
設定 PHP Configure PHP
Ensure date.timezone is set in php.ini to your preferred time zone. See http://php.net/manual/en/timezones.php for a list of supported timezones. Valid examples are: "America/New_York", "Australia/Brisbane", "Etc/UTC".
php.ini 要設定時區
vi /etc/php.ini
下命令 / 搜尋 timezone = "Asia/Taipei" 我是設定台灣
設定 Apache Configure Apache
使用 vi 產生一個新的檔案 librenms.conf, Create the librenms.conf:
vi /etc/httpd/conf.d/librenms.conf
Add the following config, edit ServerName as required:
新增底下的內容
我還是最簡單的 copy paste
:wq 存檔離開
<VirtualHost *:80>
  DocumentRoot /opt/librenms/html/
  ServerName  librenms.example.com

  AllowEncodedSlashes NoDecode
  <Directory "/opt/librenms/html/">
    Require all granted
    AllowOverride All
    Options FollowSymLinks MultiViews
  </Directory>
</VirtualHost>
NOTE: If this is the only site you are hosting on this server (it should be :)) then you will need to disable the default site. rm -f /etc/httpd/conf.d/welcome.conf
提醒:如果你的Defualt 網頁有 welcome.conf 檔
你要下 rm -f /etc/httpd/conf.d/welcome.conf 刪除該檔
systemctl enable httpd
systemctl restart httpd
設定 SELinux
安裝管理 SELinux 工具 Install the policy tool for SELinux:
yum install policycoreutils-python
設定 LibreNMS 所需要的項目 Configure the contexts needed by LibreNMS:
semanage fcontext -a -t httpd_sys_content_t '/opt/librenms/logs(/.)?'
semanage fcontext -a -t httpd_sys_rw_content_t '/opt/librenms/logs(/.)?'
restorecon -RFvv /opt/librenms/logs/
semanage fcontext -a -t httpd_sys_content_t '/opt/librenms/rrd(/.)?'
semanage fcontext -a -t httpd_sys_rw_content_t '/opt/librenms/rrd(/.)?'
restorecon -RFvv /opt/librenms/rrd/
semanage fcontext -a -t httpd_sys_content_t '/opt/librenms/storage(/.)?'
semanage fcontext -a -t httpd_sys_rw_content_t '/opt/librenms/storage(/.)?'
restorecon -RFvv /opt/librenms/storage/
semanage fcontext -a -t httpd_sys_content_t '/opt/librenms/bootstrap/cache(/.)?'
semanage fcontext -a -t httpd_sys_rw_content_t '/opt/librenms/bootstrap/cache(/.)?'
restorecon -RFvv /opt/librenms/bootstrap/cache/
setsebool -P httpd_can_sendmail=1
設定 Allow fping
Create the file http_fping.tt with the following contents. You can create this file anywhere, as it is a throw-away file. The last step in this install procedure will install the module in the proper location.
新增 http_fping.tt 一個檔案
方法和 新增 librenms.conf 一樣
底下內容 copy paste 到 該檔內
module http_fping 1.0;
require {
type httpd_t;
class capability net_raw;
class rawip_socket { getopt create setopt write read };
}
#============= httpd_t ==============
allow httpd_t self:capability net_raw;
allow httpd_t self:rawip_socket { getopt create setopt write read };
檔案產生後執行底下命令 Then run these commands
checkmodule -M -m -o http_fping.mod http_fping.tt
semodule_package -o http_fping.pp -m http_fping.mod
semodule -i http_fping.pp
設定這些可以通過防火牆 Allow access through firewall
firewall-cmd --zone public --add-service http
firewall-cmd --permanent --zone public --add-service http
firewall-cmd --zone public --add-service https
firewall-cmd --permanent --zone public --add-service https
設定snmpd,Configure snmpd
拷貝範本過去 Copy the example snmpd.conf from the LibreNMS install.
cp /opt/librenms/snmpd.conf.example /etc/snmp/snmpd.conf
vi /etc/snmp/snmpd.conf
Edit the text which says RANDOMSTRINGGOESHERE and set your own community string.
設定 community string
curl -o /usr/bin/distro https://raw.githubusercontent.com/librenms/librenms-agent/master/snmp/distro
chmod +x /usr/bin/distro
systemctl enable snmpd
systemctl restart snmpd
克隆(拷貝,覆製)工作 Cron job
cp /opt/librenms/librenms.nonroot.cron /etc/cron.d/librenms
NOTE: Keep in mind that cron, by default, only uses a very limited set of environment variables. You may need to configure proxy variables for the cron invocation. Alternatively adding the proxy settings in config.php is possible too. The config.php file will be created in the upcoming steps. Review the following URL after you finished librenms install steps: https://docs.librenms.org/Support/Configuration/#proxy-support
Copy logrotate config
LibreNMS keeps logs in /opt/librenms/logs. Over time these can become large and be rotated out. To rotate out the old logs you can use the provided logrotate config file:
cp /opt/librenms/misc/librenms.logrotate /etc/logrotate.d/librenms
進入到網頁安裝 Web installer
記得你的主機 IP 吧
不記得就在 telnet console 輸入 ip a 查看自己的 CentOS IP
Now head to the web installer and follow the on-screen instructions.
http://librenms.example.com/install.php
這邊不是傻傻的 Copy 到你的瀏覽器
是 http://你的CentoS IP/
正常會自動跳到 install.php 那一頁
開始六個步驟填入相關設定
會要求你輸入剛剛的那個 db password
還有新增 WebUI 的管理帳號和密碼
Mail也要填
到第五步驟會跳出要求你產生一個 config.php 的檔
The web installer might prompt you to create a config.php file in your librenms install location manually, copying the content displayed on-screen to the file. If you have to do this, please remember to set the permissions on config.php after you copied the on-screen contents to the file. Run:
和新增前兩個檔的方式一樣
vi config.php
將 WebUI 上面的內容
覆製貼到該檔
chown librenms:librenms /opt/librenms/config.php
更改檔案權限
Final steps
好了,完成安裝了
已經可以開始新增 Device 了
如果測試有其他的 Error
就找相關的 Troubleshooting 處理即可
That's it! You now should be able to log in to http://librenms.example.com/. Please note that we have not covered HTTPS setup in this example, so your LibreNMS install is not secure by default. Please do not expose it to the public Internet unless you have configured HTTPS and taken appropriate web server hardening steps.
Add the first device
We now suggest that you add localhost as your first device from within the WebUI.
Troubleshooting
If you ever have issues with your install, run validate.php as root in the librenms directory:
在 Telnet console 下面執行
cd /opt/librenms
./validate.php
這邊的錯誤說明提示相當的清楚
照做就可以解決
常見的兩個問題
http://ns2.ublink.org/viewtopic.php?f=10&t=6369
http://ns2.ublink.org/viewtopic.php?f=10&t=6368
以上就是最簡單的 LibreNMS 安裝設定說明
LibreNMS 其他說明和簡報
可以參考 LibreNMS 繁體中文化 台灣作者 節省哥的工具箱 Jason Tools
http://blog.jason.tools/
常用 Command
cd /opt/librenms/
下面執行
./daily.sh
更新
./validate.php
檢查

小的來拜神了!
XD
小弟大概裝了3小時,終於裝起來,果然跟大神等級有差
看起來不錯用,感謝大神分享
有裝起來都 ok
文件 可能真的不到一分鐘就看完了
終於安裝成功了,之前在SELinux那邊一直卡住
雖然安裝成功很多設備都能自動識別,但是Vigor2960跟3900似乎認不太出來
都是Linux的圖案,Port也有重複怪怪的@@這有解嗎?
貼一下畫面我看看
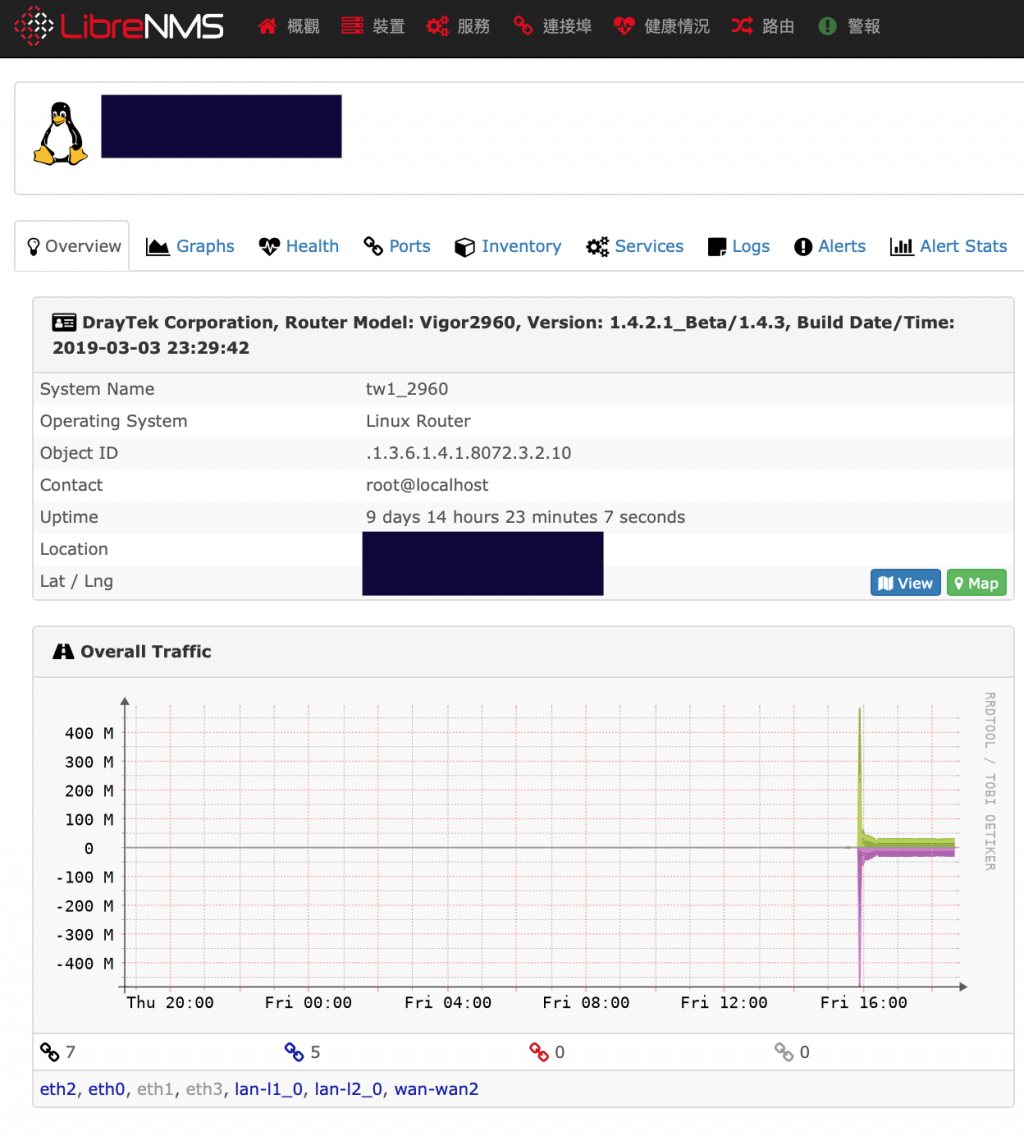
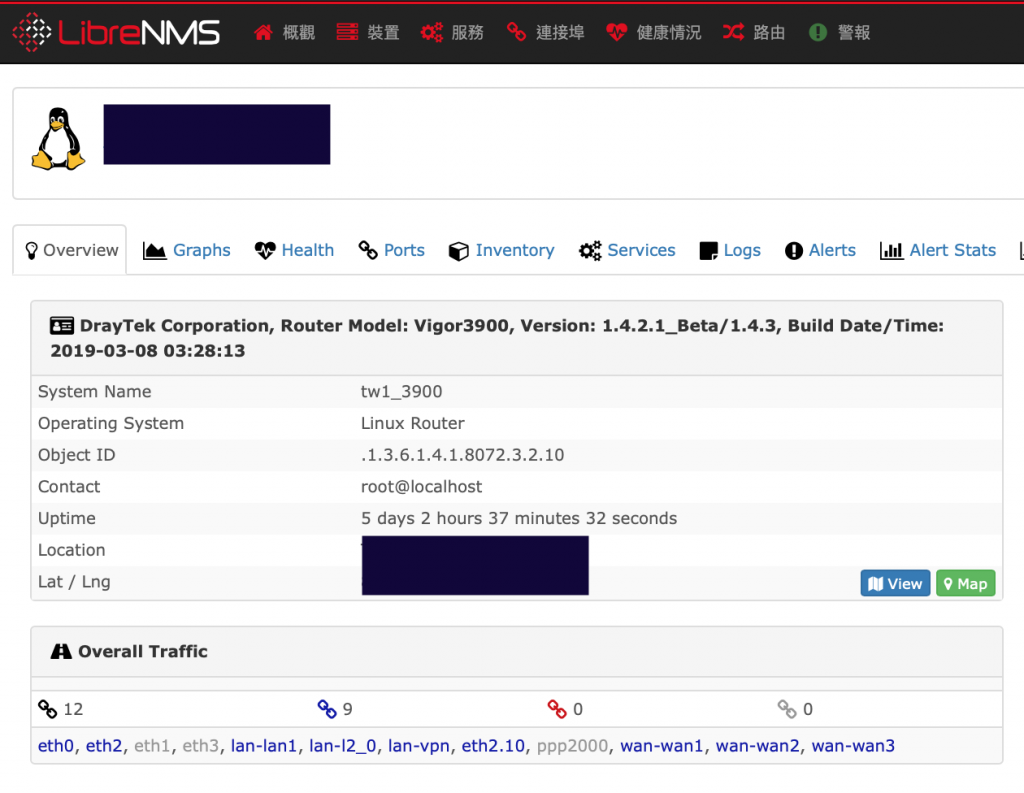
其他設備顯示都還正常,目前手頭設備只有Vigor跟NEC的識別有點怪怪的。
其他 mib 看是否正常
圖示應該是還好
圖示應該是沒抓錯
他的底層是 Linux
沒出現 Vigor 圖示表示 LibreNMS 目前還認不得這個型號
新的版本已經支援
感謝Jason哥提報修正
可以正確辨識出型出型號了
大大有試New Device Group嗎?
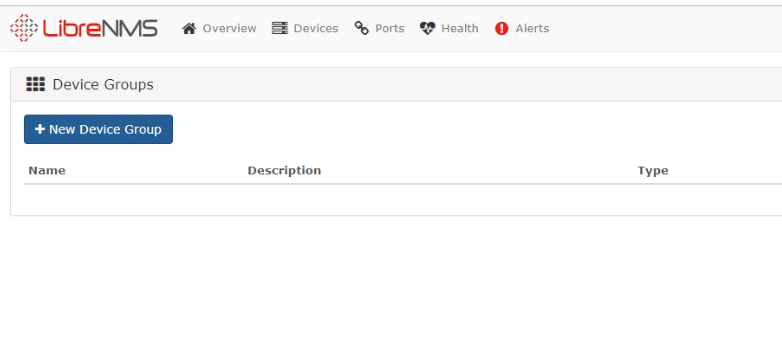

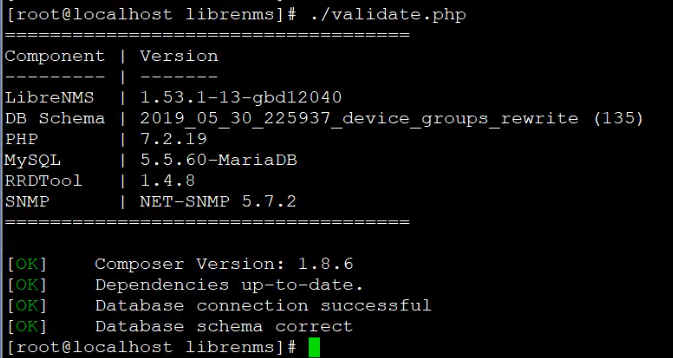

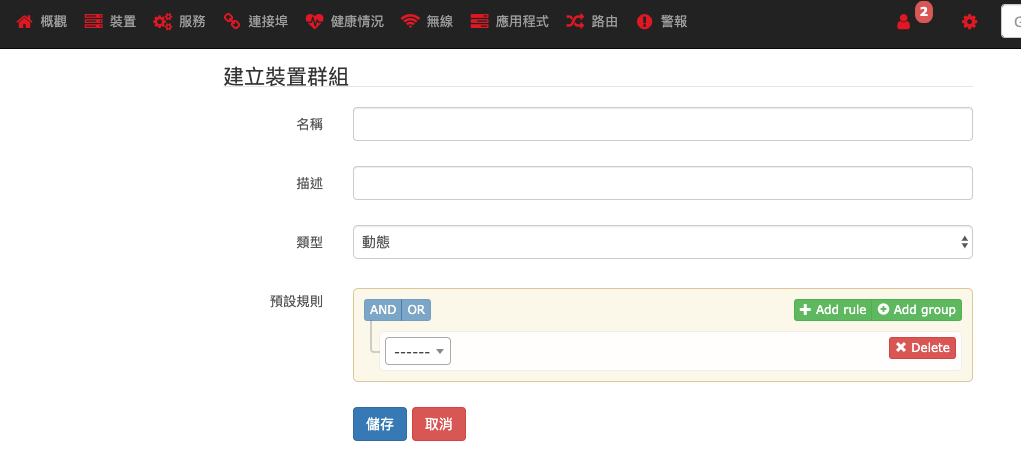
要去看173行寫什麼,我在試試看我的
我應該知道問題在那,請將新增裝置群組時的畫面(已填入資料)貼上來我看看。
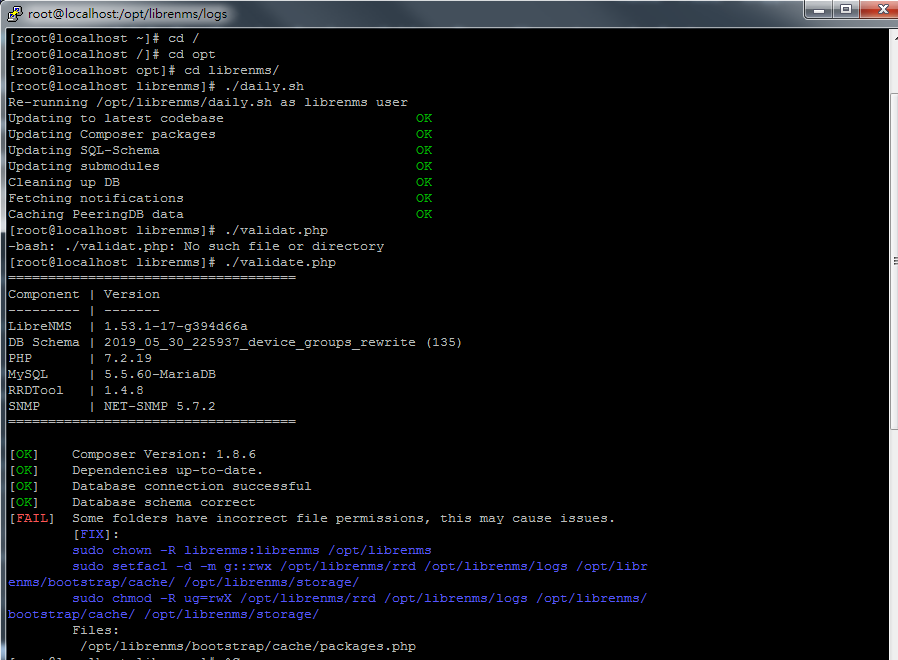
Telnet CentOS Console
root 登入後 下 commnad
cd /opt/librenms/
./daily.sh
先做更新
更新完後做一次
./validate.php
檢查
出現
[FAIL] Some folders have incorrect file permissions, this may cause issues.
[FIX]:
sudo chown -R librenms:librenms /opt/librenms
sudo setfacl -d -m g::rwx /opt/librenms/rrd /opt/librenms/logs /opt/librenms/bootstrap/cache/ /opt/librenms/storage/
sudo chmod -R ug=rwX /opt/librenms/rrd /opt/librenms/logs /opt/librenms/bootstrap/cache/ /opt/librenms/storage/
Files:
/opt/librenms/bootstrap/cache/packages.php
依上面敘述 直接 Telnet console 執行
sudo chown -R librenms:librenms /opt/librenms
sudo setfacl -d -m g::rwx /opt/librenms/rrd /opt/librenms/logs /opt/librenms/bootstrap/cache/ /opt/librenms/storage/
sudo chmod -R ug=rwX /opt/librenms/rrd /opt/librenms/logs /opt/librenms/bootstrap/cache/ /opt/librenms/storage/
再做一次check
./validate.php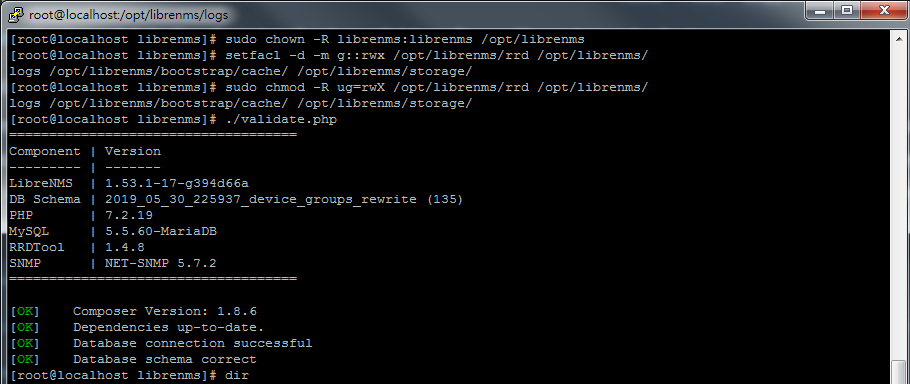
通通 ok
Manager Groups
Device Groups
New Device Group
發現還是一樣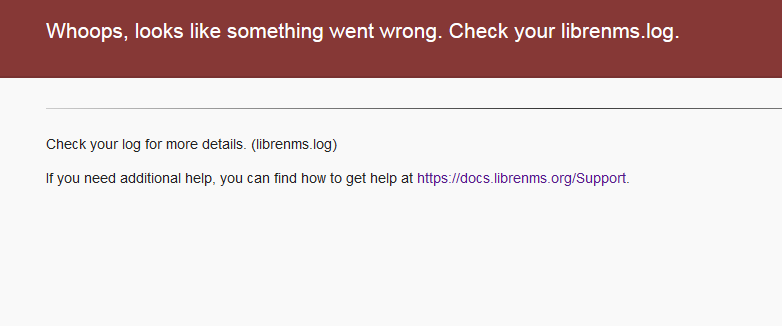
cd /opt/librenms/logs/
vi libernms
發現
[2019-07-03 17:15:24] production.ERROR: Geocoding failed: Google Maps API key missing, set geoloc.api_key
節省哥出現了
這問題他一定可以解 ^^
TO 節省哥:
按New Device Group就出現錯誤了,所以沒新增裝置群組時的畫面
TO 門神大:
我也是看這篇做的..做完還是一樣,所以上來問看看大家的經驗,不過門神大的錯誤訊息跟小弟不一樣,等等來研究一下
[2019-07-08 13:54:39] production.ERROR: require_once(): Failed opening required '../includes/device-groups.inc.php' (include_path='.:/usr/share/pear:/usr/share/php') {"userId":1,"email":"abc@abc.com","exception":"[object] (Symfony\Component\Debug\Exception\FatalErrorException(code: 64): require_once(): Failed opening required '../includes/device-groups.inc.php' (include_path='.:/usr/share/pear:/usr/share/php') at /opt/librenms/html/includes/print-menubar.php:61)
我的完整錯誤的LOG....我發現沒有device-groups.inc.php
嗯 ! 比較偏向是版本錯誤
我們研究看看
再請節省哥上呈 Bug Report
剛在更中文化...結果發生問題,用./validate.php檢查問題後回復正常英文版,結果New Device Group就能用了QQ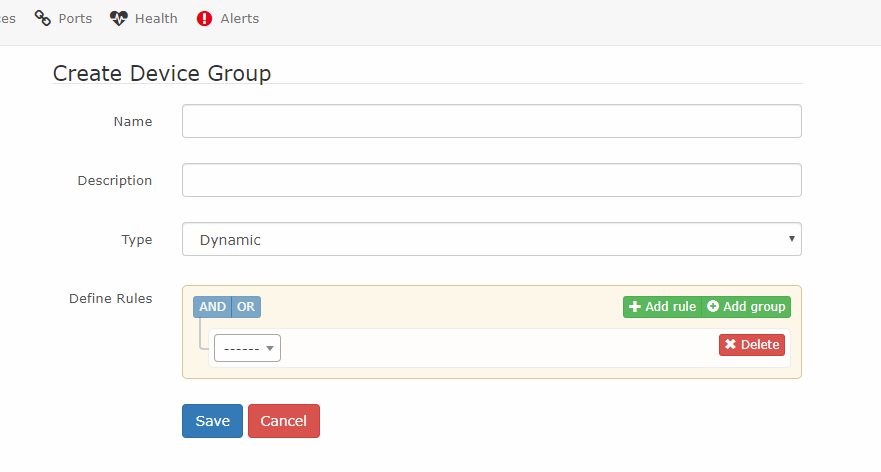
TO 門神大
[2019-07-03 17:15:24] production.ERROR: Geocoding failed: Google Maps API key missing, set geoloc.api_key
這錯誤訊息可能是這裡
geoloc.api_key 這問題 在查問題的時候就在了
wlhfor1974,請問你的中文化是指 daily.sh 更新到 1.53,還是去 https://github.com/jasoncheng7115/librenms-cpatch 下載的呢?
geoloc.api_key 這問題 在查問題的時候就在了
這個不影響
TO 節省哥:
去網址下載覆蓋原目錄
剛與門神測試,請先把 /opt/librenms/LibreNMS/DB/Schema.php 第 173 行給註解掉,可以改善這情況:
file_put_contents($cache_file, serialize($cache));
改為// file_put_contents($cache_file, serialize($cache));
但還不確定是否有其它副作用,不知為何你們的情況會無法寫入這個 cache 檔,還要再研究看看。
wlhfor1974 不要去我的 github 下載中文化了,該github專案上面有說明已經是舊版 1.33,跟現行 1.53 版差很多了。
1.53 版起已經我已經把中文直接提交回去內建了,請在功能表上的使用者 > My Settings > 裡面選擇為繁體中文,只是目前官方可以被翻譯的頁面還在一一進行中,中文程度有限。
補圖 ^^ 還是 Jason Cheng (節省哥) 厲害
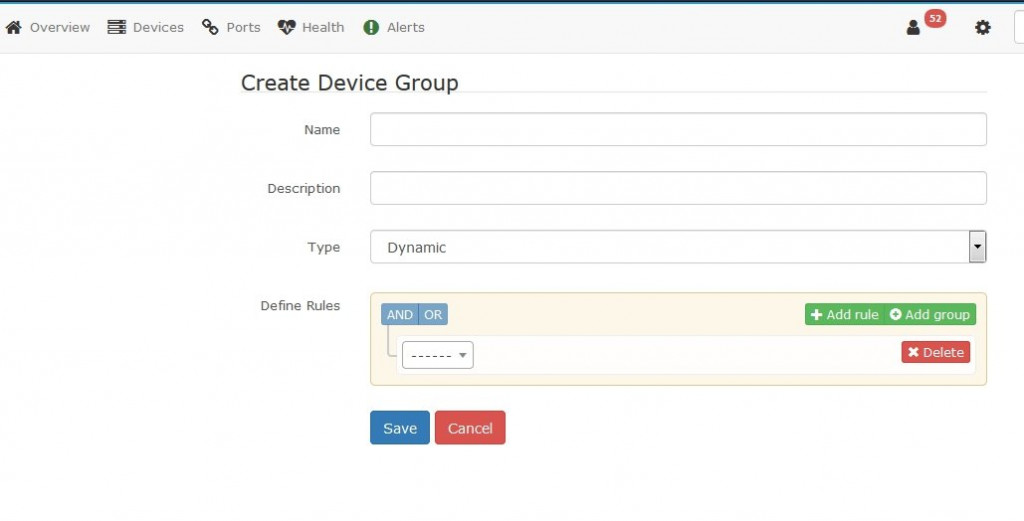
可以新增了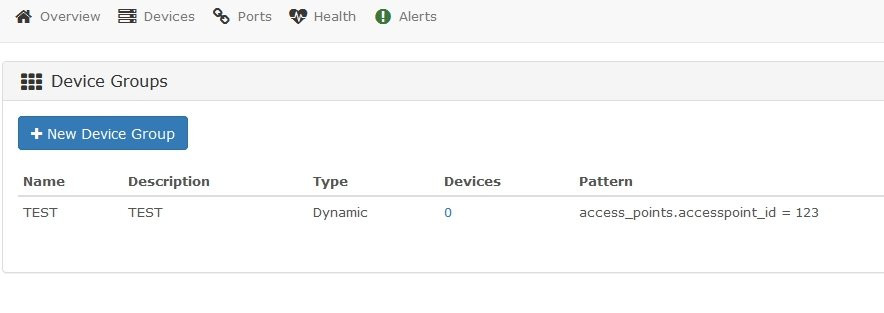
早上還用 CentOS 7 (Nginx) 重裝了一次 XD
https://docs.librenms.org/Installation/Installation-CentOS-7-Nginx/
不愧是節省哥,拜...
執行(2019-07-14)
./daily.sh
更新
./validate.php
檢查
他們已經修正此問題
補上一個新增 Device 的錯誤
Already have host 192.168.254.7 (Vigor) due to duplicate sysName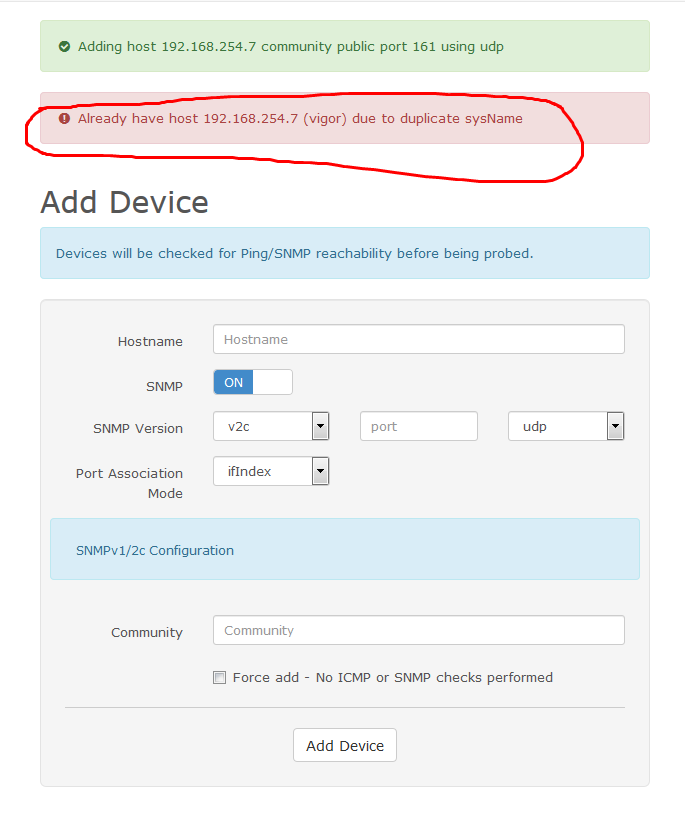
這意思是他已經有一個相同的名稱 sysName 叫做 Vigor 的
只需要在這地方把名稱改為不同就可以了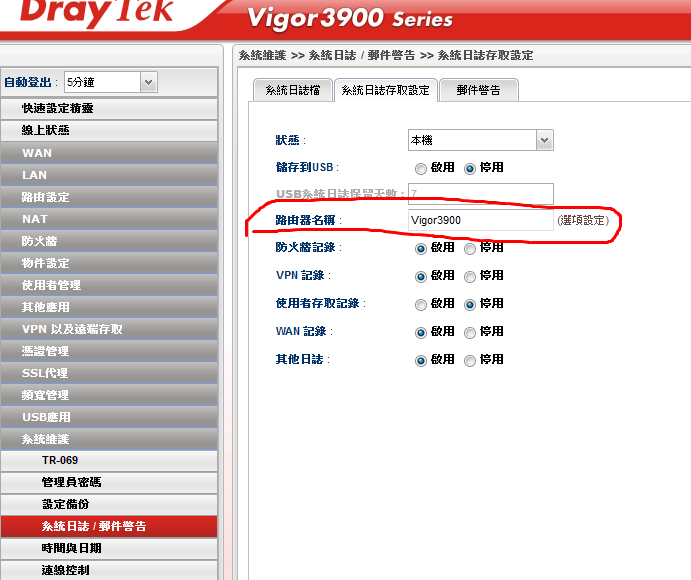
常用 Command
cd /opt/librenms/
下面執行
./daily.sh
更新
./validate.php
檢查
修正已經OK了~沒問題
他的前一動是加時區
感謝囉!
請問使用./validate.php 指令檢查出現下列訊息,該怎麼做呢?
[WARN] Your local git contains modified files, this could prevent automatic updates.
[FIX]:
You can fix this with ./scripts/github-remove
Modified Files:
bootstrap/cache/.gitignore
logs/.gitignore
rrd/.gitignore
storage/app/.gitignore
storage/app/public/.gitignore
storage/debugbar/.gitignore
storage/framework/cache/.gitignore
storage/framework/cache/data/.gitignore
storage/framework/sessions/.gitignore
storage/framework/testing/.gitignore
storage/framework/views/.gitignore
storage/logs/.gitignore
後來查了一下資料下
./scripts/github-remove -d 指令後就沒出現了
./scripts/github-remove -d 指令後就沒出現了
感謝!
Welcome
請教各位一個問題
我裝好後,登入 會出現一個警告訊息(如下圖),請問這個有方法解決嗎?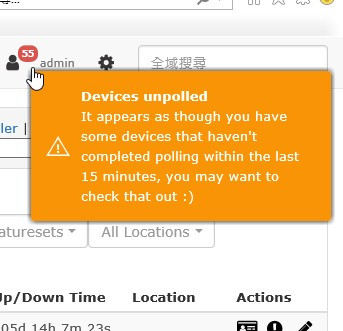
Hi 背影
試一下 Command
cd /opt/librenms/
下面執行
./daily.sh
更新
./validate.php
檢查
感謝 門神大 我等一下來測試
Welcome
各位大大安~小弟又來問問題了
小弟在測試警告通知,使用EMAIL方式通知,但設定完後都沒寄信,不知那邊設定有問題
LibreNMS小弟沒找到寄測試信的地方,所以也不能確定LibreNMS能不能由公司郵件伺服器寄信,但其他設備有做一樣的設定,寄信是沒問題
使用的版本
系統預設Device Down/up的rule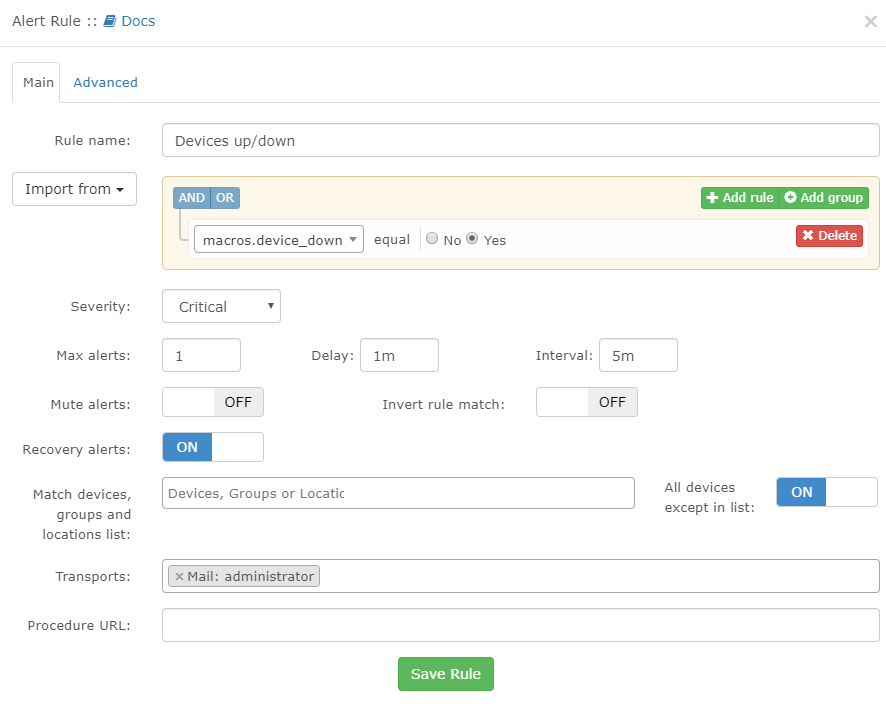
節省哥的template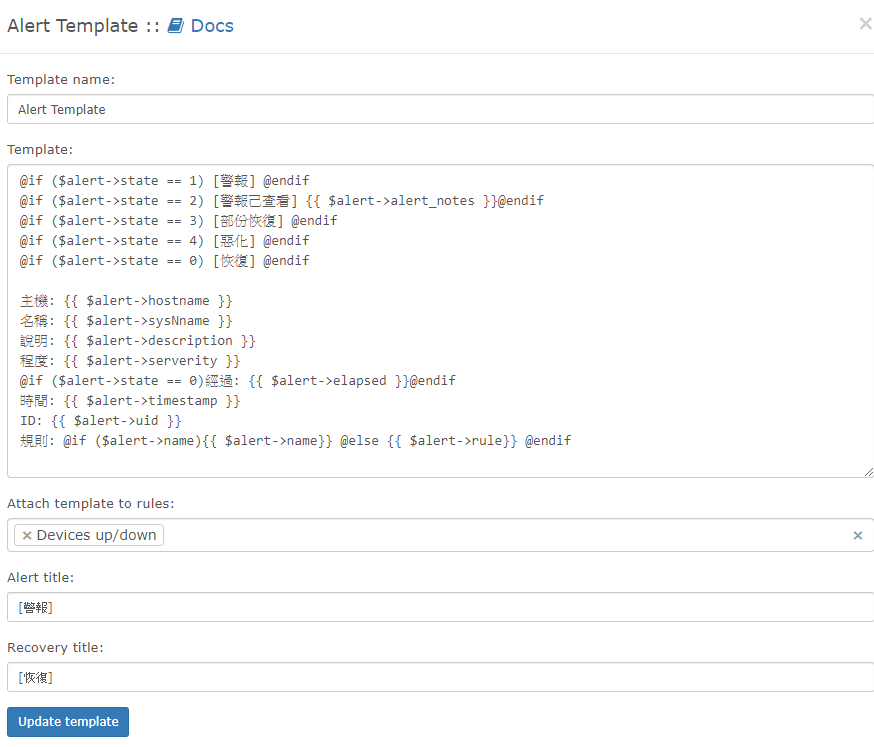
警告通知寄到我的信箱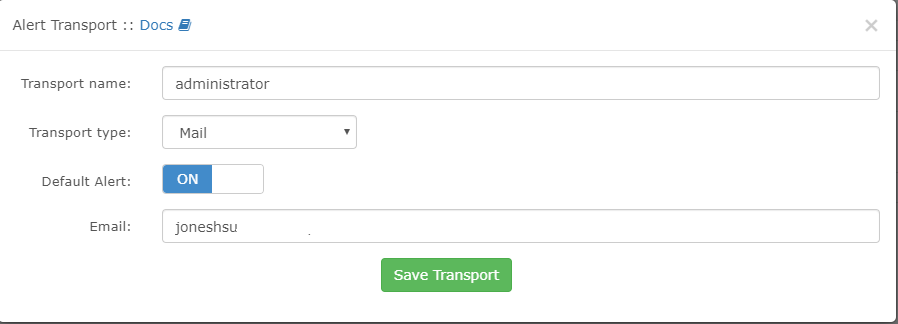
SMTP Server設公司的mail server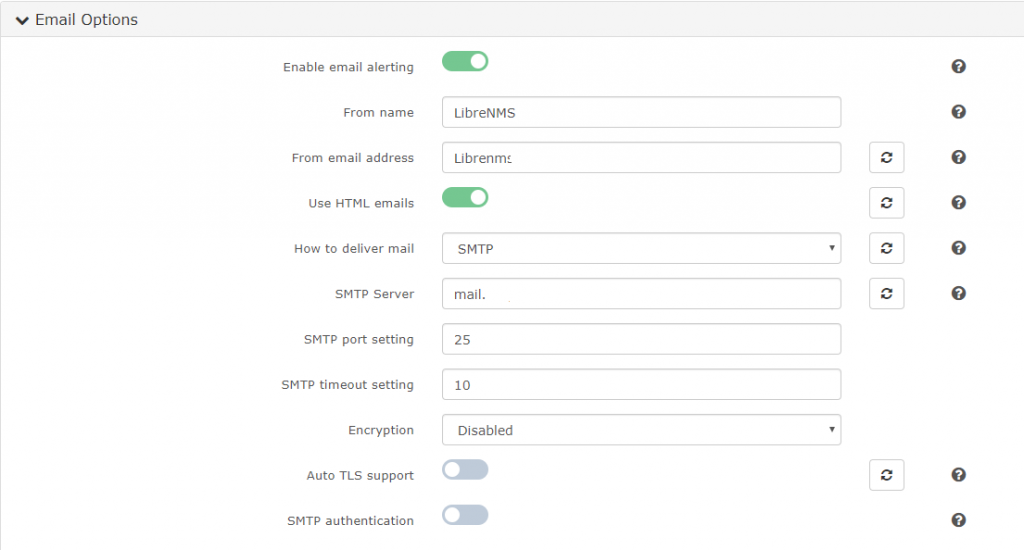
有設一台down的設備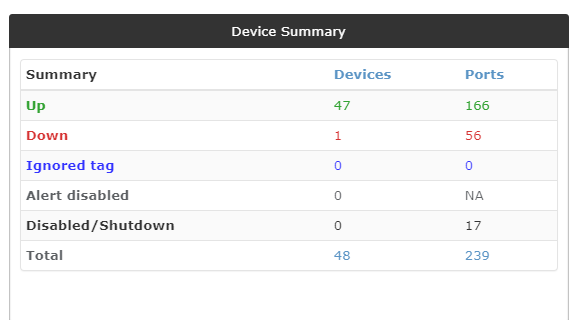
你的 Mail Server 沒有 smtp log 可以查嗎 ?
只要有進mail server都會有log,但完全沒有
Try It
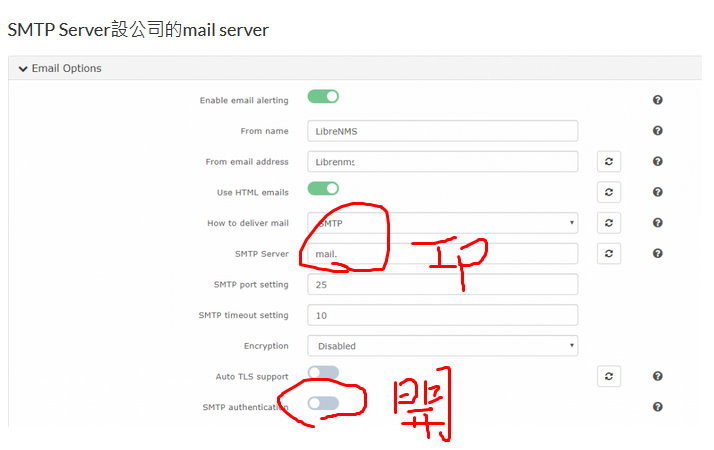
啊...SORRY,預設alert disable是ON的,改成OFF就好了.感謝門神大大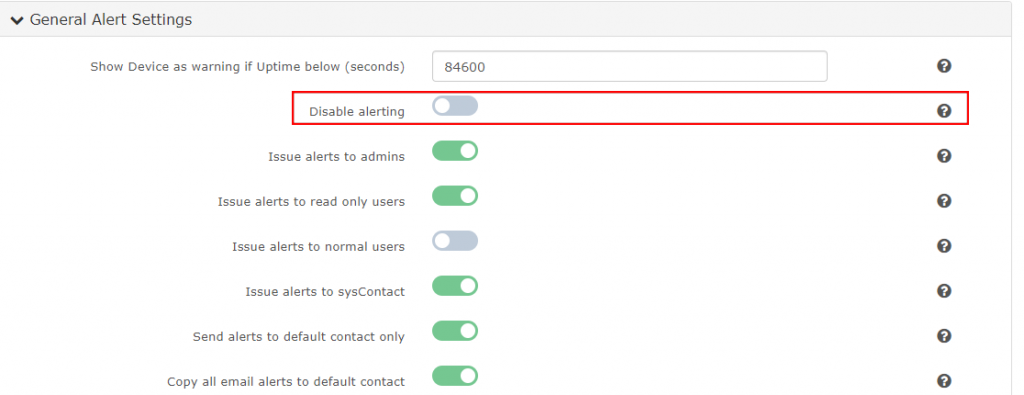
讚
小弟目前碰到額外設定的os update的監控部分無法正常...
指定監控的機器...流量等都有正常資料...但目前os update的部分不管怎麽調整都是nan..
但是lnms主機本身的是會正常的...
被監控機器也有安裝
Check_MK distro...等
監控機本身測試osupdate的sh是沒有問題的...但是就是無法讓主機抓取到資料...
有嘗試過關閉selinux但是沒有效果...
請問是否哪邊有設定是沒有設定到的...?
被監控機OS Centos7
PS:
有辦法針對weblogic的部份像nginx那樣做監控嗎?
請問我要裝在VM主機內,建議放多大的硬碟空間呢 ?
謝謝
管 10 台和管 1000 應該是不一樣的
留一年和留五年也不一樣
對耶,感謝提醒 ..
那它裝好之後多大呢 ?
我連 Linux 都 mini install
8G 都吃不光
了解 ..
謝謝
Welcome
請問我到了要進入該IP網頁的時候,出現如下 .. 這是我哪裡弄錯呢 ?
Running the following commands will fix the issue most of the time:
Cannot write to log file: "/opt/librenms/logs/librenms.log"
Make sure it exists and is writable, or change your LOG_DIR setting.
If using SELinux you may also need:
semanage fcontext -a -t httpd_sys_rw_content_t '/opt/librenms/logs/librenms.log(/.*)?'
restorecon -RFv /opt/librenms/logs/librenms.log
Check your log for more details. (/opt/librenms/logs/librenms.log)
If that doesn't fix the issue. You can find how to get help at https://docs.librenms.org/Support.
不能寫入 log
試一下 Command
cd /opt/librenms/
下面執行
./daily.sh
更新
./validate.php
檢查
做修正
| Component | Version |
|---|---|
| LibreNMS | 1.66-47-g10378f0 |
| DB Schema | Not Connected (0) |
| PHP | 7.2.32 |
| Python | 3.6.8 |
| MySQL | ? |
| RRDTool | 1.4.8 |
| SNMP | NET-SNMP 5.7.2 |
| ==================================== |
[OK] Composer Version: 1.10.10
[OK] Dependencies up-to-date.
Could not connect to database, check logs/librenms.log.
[root@localhost librenms]#
謝謝您 ...
不能連資料庫
新裝就重裝看看
OK,我再重裝試試 ..
重裝後,可以了,但是在網頁的設定,到了最後一步出現Failed to write file: /opt/librenms/.env,但是我照它說的自行修改內容,也是不行,請問這是哪部分有問題呢 ?
真的不行
就直接 Download OVA
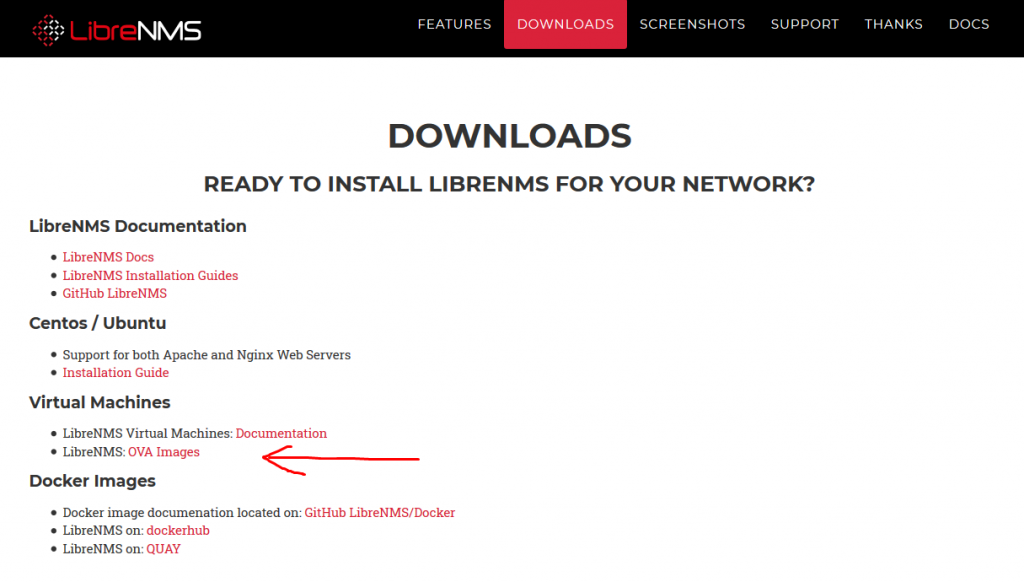
VM 開起來就可以了
vim /etc/php-fpm.d/librenms.conf
修改下方的資訊, 如果是用apache 就加入apache
試看看
user = librenms ; apache
group = librenms ; apache
請問一下門神大,我從一開始建好加入設備之後,就沒有抓到任何資料,
圖表都是空白,請問這是什麼問題呢?
====================================
| Component | Version |
|---|---|
| LibreNMS | 1.68-50-g6cd42b3 |
| DB Schema | 2020_10_03_1000_add_primary_key_transport_group_transport (186) |
| PHP | 7.2.34 |
| Python | 3.6.8 |
| MySQL | 5.5.65-MariaDB |
| RRDTool | 1.7.2 |
| SNMP | NET-SNMP 5.7.2 |
| ==================================== |
[OK] Composer Version: 1.10.19
[OK] Dependencies up-to-date.
[OK] Database connection successful
[OK] Database schema correct
[WARN] Your install is over 24 hours out of date, last update: Fri, 16 Oct 2020 13:07:29 +0000
[FIX]:
Make sure your daily.sh cron is running and run ./daily.sh by hand to see if there are any errors.
你抓的是那一種設備 ?
有Windows server .switch.Linux
上圖這是我自己的PC,監控狀況
以下為Linbrenms 自己本身,也是沒抓到資料
HI, 門神大您好
謝謝提醒,我之前已有安裝此套件,但還是無顯示任何圖型資訊。
FB 搜尋LibreNMS 中文使用者社團
問問看
謝謝 門神大
Welcome
門神大與各位大大安
小弟想在dashboard上監控幾個重要線路的流量,小弟用external image然後給固定的連結與圖片連結,結果只有固定的時間的圖不會更新,不知是否能做到這樣的功能呢?
弄出來類似像下圖這樣,但不會更新
這個應該都要告訴他多久做一次
預設是60秒,但發現圖片的連結會變,在想是不是要下變數
像下面兩個連結是同一個interface,但時間點不同,連結就不同
http://abc.abc.abc/graph.php?height=213&width=459&to=1645755000&id=106&type=port_bits&from=1645668600
http://abc.abc.abc/graph.php?height=213&width=459&to=1645694100&id=106&type=port_bits&from=1645607700