
(2024/04/06更新) 因應React在18後更新了許多不同的語法,更新後的教學之後將陸續放在 新的blog 中,歡迎讀者到該處閱讀,我依然會回覆這邊的提問
componentWillUnmount是在元件被移除時所會呼叫一次的唯一生命週期函數。
欸欸欸,為什麼我們才剛把元件生完,你就要直接快轉到他死去啊?
因為就跟講一個人的人生一樣,講他怎麼生跟死一定比講他人生中做了那些豐功偉業還要快。
因為componentWillUnmount很常跟前一篇的componentDidMount一起使用,所以先來講它。
componentWillUnmount的功用跟c-like物件中的Destructor很像,最常被用來移除componentDidMount中「只想要隨著元件新增的一切東西」。
由於
所以我們一般在componentDidMount中做。
那為什麼要搭配componentWillUnmount呢?我們來看這個範例:
index.js
import React from 'react';
import ReactDOM from 'react-dom';
import './index.css';
import App from './App'
import * as serviceWorker from './serviceWorker';

ReactDOM.render(
    <div>
        <App/>
        <div id="talk"></div>
    </div>,
    document.getElementById('root')
);

// If you want your app to work offline and load faster, you can change
// unregister() to register() below. Note this comes with some pitfalls.
// Learn more about service workers: https://bit.ly/CRA-PWA
serviceWorker.unregister();
App.js
import React, { Component } from 'react';
import Baby from './Baby'

class App extends Component{
  constructor(props) {
    super(props);
    this.state={
      rate:"",
      isBorn:true
    }
    this.handleClick=this.handleClick.bind(this);
    this.spawnBaby=this.spawnBaby.bind(this);
  }

  handleClick(){
    this.setState({isBorn:!this.state.isBorn})
  }

  spawnBaby(){
    if(this.state.isBorn)
      return <Baby/>
  }

    render(){
        return(
          <div>
            <button onClick={this.handleClick}>
                {(this.state.isBorn===true)?"讓他回去肚子裡":"讓他生"}
            </button>
              {this.spawnBaby()}
          </div>
        );
    }
}
export default App;
Baby.js
import React, { Component } from 'react';
class Baby extends Component{
  constructor(props) {
    super(props);
    this.state={
        isRightDad: true,
        isGetData: false,
        Mom: ""
    }
    this.ajaxSimulator=this.ajaxSimulator.bind(this)
  }

    componentWillMount(){
        if(this.props.dad!=="Chang")
            this.setState({isRightDad:false})
    }

    ajaxSimulator(){
        setTimeout(()=>{this.setState({isGetData:true, Mom:"小美"})},3000)
    }

    componentDidMount(){
        this.ajaxSimulator();
        document.getElementById("talk").append("爸!")
    }


    render(){
        if(this.state.isGetData===false)
            return(
                <div id="msg">讀取中</div>
            );
        else
            return(
                <div id="msg">他的媽媽是{this.state.Mom}</div>
            );
    }
}
export default Baby;
總之做的事情是Baby出生完的時候(componentDidMount())會叫一聲爸,點擊一下按鍵時,Baby就會被塞回肚子裡(?)再點一次就會生出來。按了很多次之後,你發現變成這樣:

注意到了嗎? 「爸!」並沒有隨著Baby被移除而消失,這是因為我們在Baby誕生後更改的元素是index.js中的div,而它並不在Baby.js中,所以並不會隨著Baby被移除而消失。
這樣重複新增的情形大部份的時候不是我們想要的狀況,而是希望他能隨著元素移除而跟著不見,這時候就要搭配componentWillUnmount()作移除的動作。
假使我們是這樣新增元素
componentDidMount(){
    document.getElementById("talk").append(
        '<div id="callDad">爸!</div>'
    )
}
移除時就要找到該元素並remove
componentWillUnmount(){
    document.getElementById("callDad").remove();
}
另外在上面的範例中,我們只要使用
componentWillUnmount(){
    document.getElementById("talk").innerHTML="";
}
就能把talk清空
監聽事件也是我們很常對DOM做的操作,假使我們今天是這樣監聽視窗的點擊事件:
IWasClick(){
    console.log("啊!我被點了!")
}

componentDidMount(){
    window.addEventListener('mousedown', this.IWasClick)
}
我們就要這樣避免重複監聽:
componentWillUnmount(){
    window.removeEventListener('mousedown',this.IWasClick);
}
setInterval就不特別講了,原理及方式都和前面這幾個一樣。改成以clearInterval()移除就可以。
如果你學過其他物件導向語言,應該對componentWillUnmount的使用能更很快理解。
Mount和Unmount講完了,接下來會講Update系列,因為不是每個Update函數都很常用到+有些使用原理跟前面差不多,所以下一篇有些部分會比較快帶過,然後一口氣把Update系列講完。
Andy大大您好,
我照著您此篇的最後修改的範例
componentDidMount(){
document.getElementById("talk").append(
爸!
)
}
但畫面上卻render出[object Object],如下圖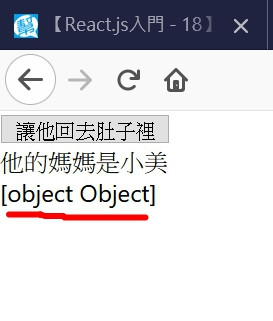
字串能正常work,請教該如何讓那個div能正常render呢?
啊那裡應該是我複製code的時候漏掉了,應該要是字串。
componentDidMount(){
    document.getElementById("talk").append(
        '<div id="callDad">爸!</div>'
    )
}
至於為什麼用JSX不用字串的時候會變成Object,原因是這樣的:
React.createElement轉成「專給React virtual DOM去比對是否要更新DOM用的物件」Object了理論上這裡比較好的寫法應該是全部改成用DOM api來寫:
componentDidMount(){
    let dadElement = document.createElement('div');
    dadElement.setAttribute('id','callDad');
    dadElement.textContent = "爸!";
    document.getElementById("talk").append(dadElement)
}
不過這裡只是想示意說如果逼不得已要直接操作DOM的時候要在這邊做而已,能用React的方法就用React吧!
感謝大大,使用DOM api的方式就work了
