當專案越來越大,頁面一定也越來越多,在 Android 中,占滿整個螢幕的 View 幾乎都是用 Activity 和 Fragment 來顯示,這時候頁面的切換和返回的處理就相當重要。
如果都用 Activity 的話
要解決上述的問題使用較輕量級的 Fragment 是個不錯的選擇,雖然 Fragment 的坑比較多
但是當 Fragment 越來越多時:
.
.
.
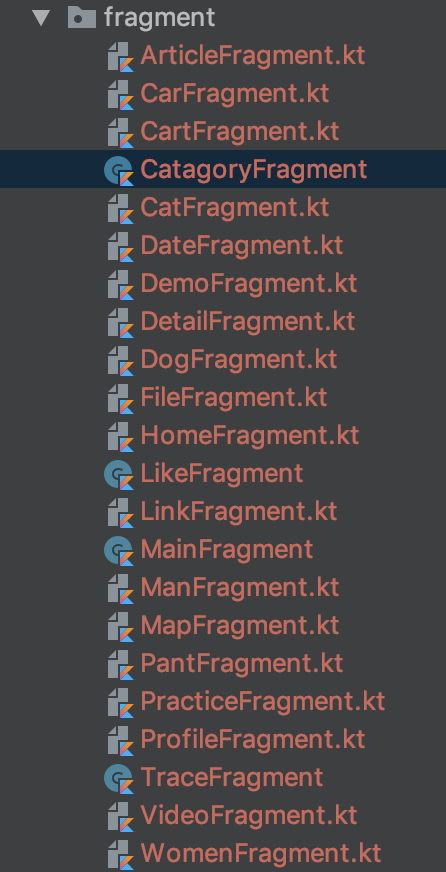
(之前參加讀書會時有瞄到別間公司的專案,fragment 的 package 打開來的長度是超過螢幕長度的,要一直大幅度的滑動來找檔案)
在切換 Fragment 時就需要寫很多重複的代碼來保持按下返回鍵時頁面不會亂掉
    fun transToProfilefragment() {

      val fragmentTransaction = fragmentManager.beginTransaction()

      if (postFragment != null && !postFragment.isHidden()) {
          fragmentManager.popBackStack()
      }
      if (mapFragment != null && !mapFragment.isHidden()) {
          fragmentManager.popBackStack()
      }
      .
      .
      .

      fragmentTransaction.show(profileFragment)
      fragmentTransaction.commit()
   }
Navigation 就是為了解決這些惱人的問題,能更方便的管理 fragment,官方文件列出了一些應該遵守的原則
(註:即使沒有使用 Navigation 組件,也應遵循這些設計原則。)
Android Studio 版本必須是 3.3 或更高
build.gradle 添加依賴
dependencies {
  def nav_version = "2.1.0"

  // Java
  implementation "androidx.navigation:navigation-fragment:$nav_version"
  implementation "androidx.navigation:navigation-ui:$nav_version"

  // Kotlin
  implementation "androidx.navigation:navigation-fragment-ktx:$nav_version"
  implementation "androidx.navigation:navigation-ui-ktx:$nav_version"

}
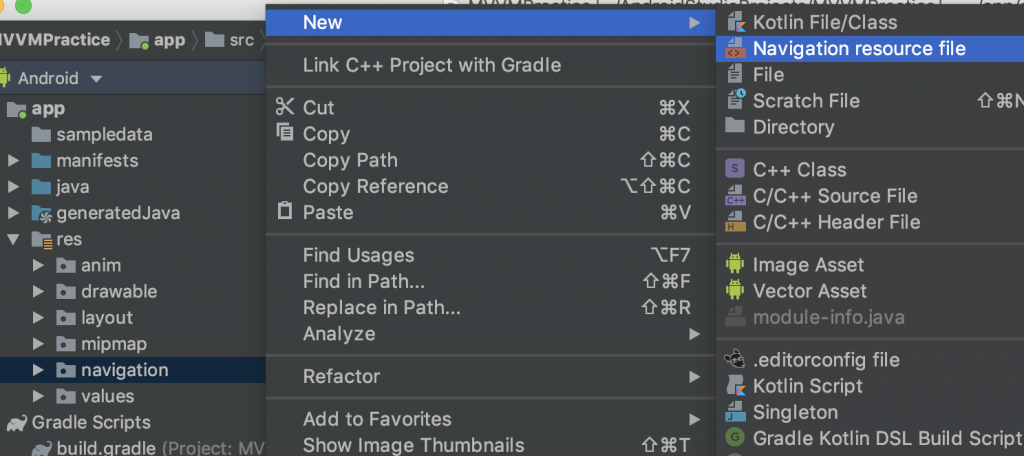
新增 Navigation 資料夾 res -> New -> Android Resource File -> 輸入 navigation -> OK
在這個資料夾底下新增一個 Navigation Resource File,這裡命名為 nav_graph_main

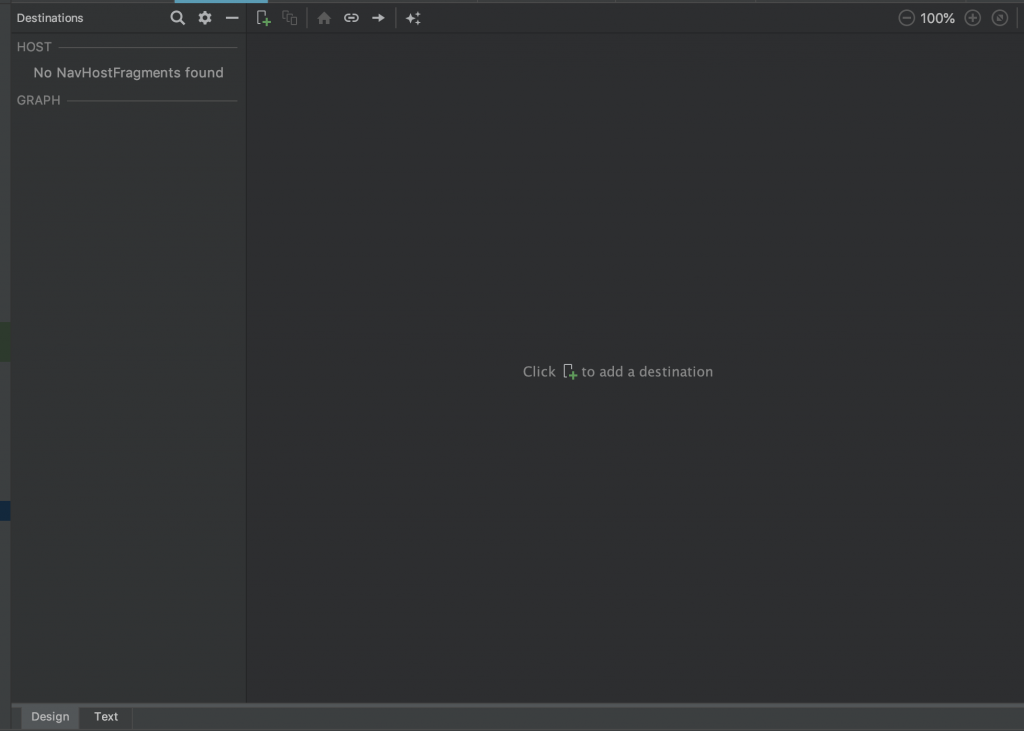
這時候會看到之前從沒看過的介面

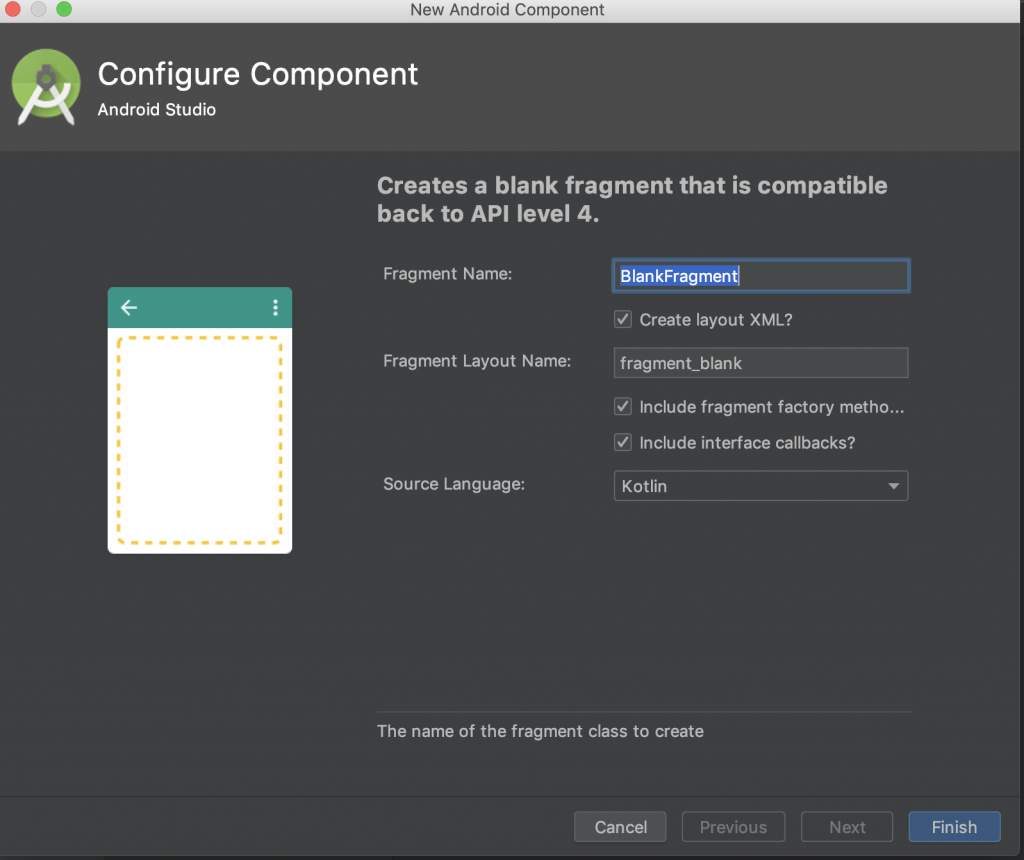
按下中間那顆按鈕後能夠自動生成 Fragment,按下 finish,基本的 Java code 和 xml 也都幫我們寫好了
當然要用本來就已經存在的 fragment 也可以,切換到 text 面板
可以看到最外面是 navigation,我們在裡面加入兩個 fragment 並設定好 package 名稱和 xml 檔
<?xml version="1.0" encoding="utf-8"?>
<navigation xmlns:android="http://schemas.android.com/apk/res/android"
    xmlns:app="http://schemas.android.com/apk/res-auto"
    xmlns:tools="http://schemas.android.com/tools"
    android:id="@+id/nav_graph_main"
    app:startDestination="@id/page1Fragment">

    <fragment
        android:id="@+id/page1Fragment"
        android:name="com.guanhong.mvvmpractice.view.navigation.FragmentOne"
        tools:layout="@layout/fragment_navigation_one">

        <action
            android:id="@+id/action_page1_to_page2"
            app:destination="@id/page2Fragment" />
    </fragment>

    <fragment
        android:id="@+id/page2Fragment"
        android:name="com.guanhong.mvvmpractice.view.navigation.FragmentTwo"
        tools:layout="@layout/fragment_navigation_two">
    </fragment>

</navigation>
這裡的 startDestination 很關鍵,表示這個 navigation 初始化時要顯示的是哪個 fragment
<action
    android:id="@+id/action_page1_to_page2"
    app:destination="@id/page2Fragment" />
表示一個跳轉頁面的動作,並設定這個動作要切換到哪個 fragment 以及 id ,
之後就可以用程式碼決定這些 action 要何時執行。
當然,一個 fragment 可以有多個 action
在 Activity 的 xml
<?xml version="1.0" encoding="utf-8"?>
<androidx.constraintlayout.widget.ConstraintLayout xmlns:android="http://schemas.android.com/apk/res/android"
    android:layout_width="match_parent"
    android:layout_height="match_parent"
    xmlns:app="http://schemas.android.com/apk/res-auto"
    android:orientation="vertical">

    <fragment
        android:id="@+id/my_nav_host_fragment"
        android:name="androidx.navigation.fragment.NavHostFragment"
        android:layout_width="0dp"
        android:layout_height="0dp"
        app:layout_constraintBottom_toBottomOf="parent"
        app:layout_constraintLeft_toLeftOf="parent"
        app:layout_constraintRight_toRightOf="parent"
        app:layout_constraintTop_toTopOf="parent"
        app:defaultNavHost="true"
        app:navGraph="@navigation/nav_graph_main" />
</androidx.constraintlayout.widget.ConstraintLayout>
表示 fragment 的容器
其中 defaultNavHost="true" 可以確保 NavHostFragment 攔截系統的返回事件。
你也可以重寫 AppCompatActivity.onSupportNavigateUp()方法並且調用 NavController.navigateUp 來定義自己的返回事件。
NavigationActivity.kt
class NavigationActivity : AppCompatActivity() {

    override fun onCreate(savedInstanceState: Bundle?) {
        super.onCreate(savedInstanceState)
        setContentView(R.layout.activity_navigation)
    }

    override fun onSupportNavigateUp(): Boolean {

       return findNavController(R.id.my_nav_host_fragment).navigateUp()
    }
}
FragmentOne.kt
  override fun onViewCreated(view: View, savedInstanceState: Bundle?) {
        super.onViewCreated(view, savedInstanceState)

        textView.setOnClickListener {

            Navigation.findNavController(it).navigate(R.id.action_page1_to_page2)
        }
    }
利用 剛剛設定的 id 找到像要執行的 action,點擊 textView 後就會跳轉到 FragmentTwo 了!
到這邊已經完成了最基本的 Fragment 切換
有任何問題或講得不清楚的地方歡迎留言和我討論。
更歡迎留言糾正我任何說錯的地方!
