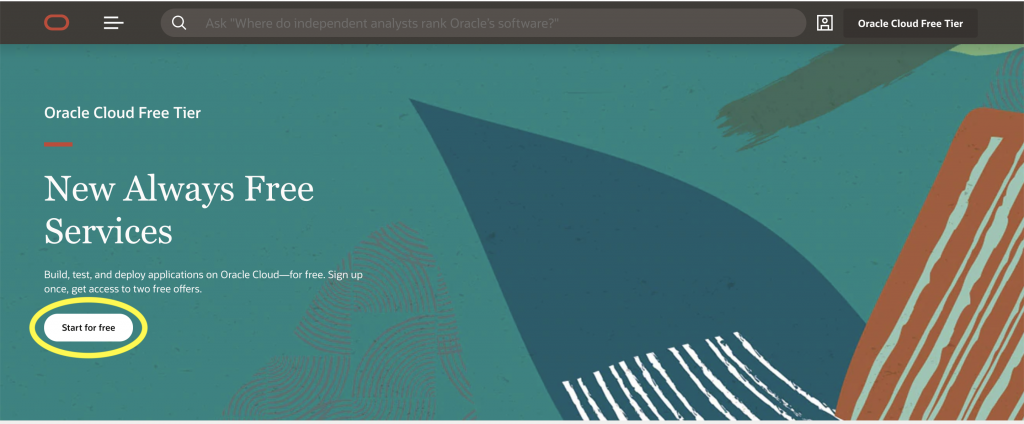
去Oracle 官網:https://www.oracle.com/cloud/free/?source=:ow:o:p:nav:0916BCButton&intcmp=:ow:o:p:nav:0916BCButton
Click Start for free
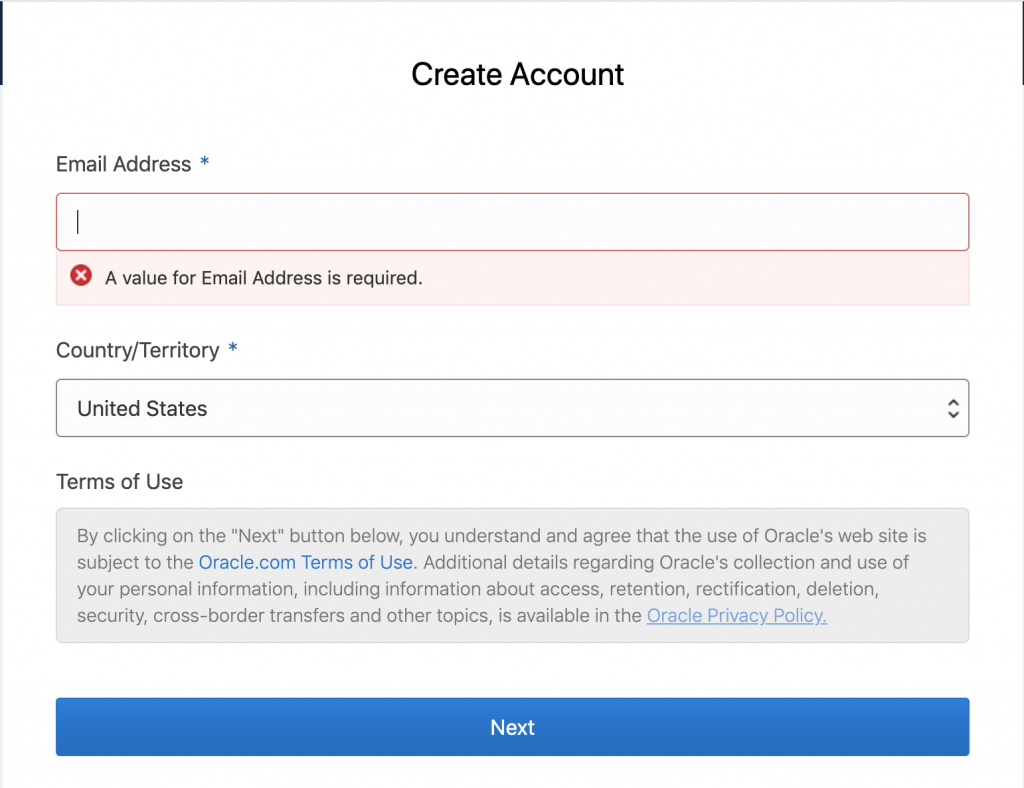
之後寫電郵地址(要記得)和位置,位置可以隨便寫,不是Server位置。
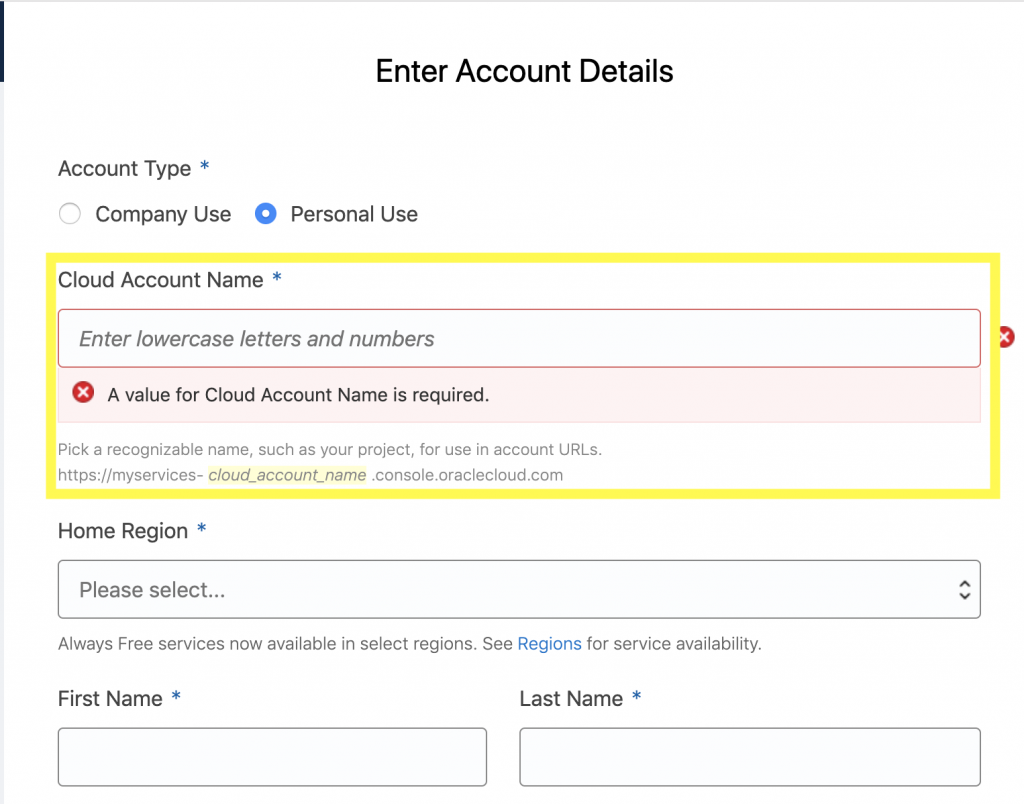
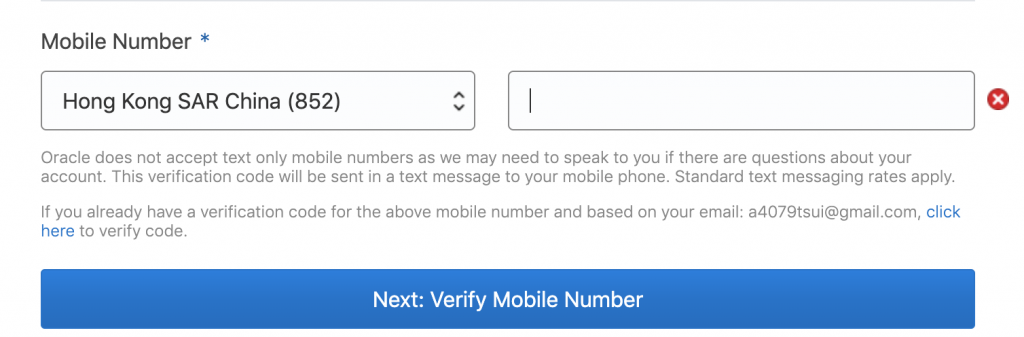
下一步最重要既就係填寫Account Name(要記得),Home Region 同 tel number,其他可以隨便寫
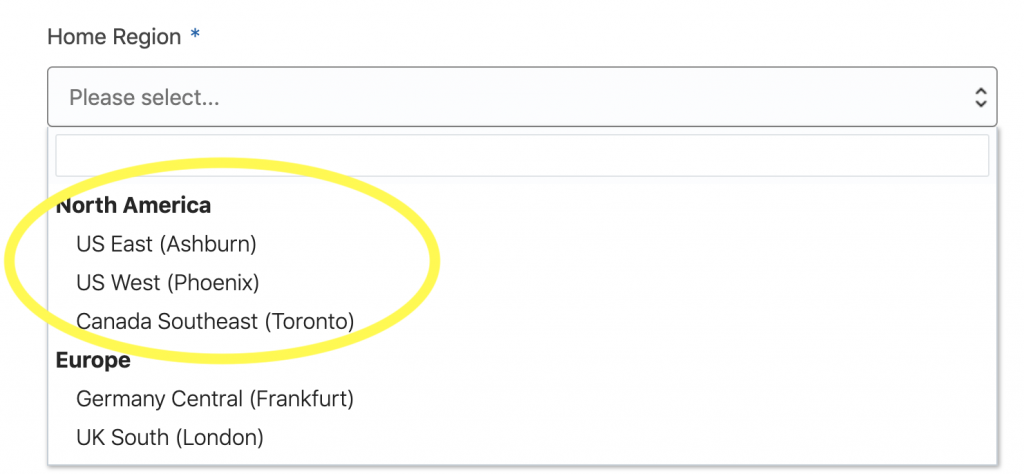
選擇home region要注意,得呢3個地方有免費Server 用
click Next既時候要等一陣,如果佢話你錯要寫翻岩個地址
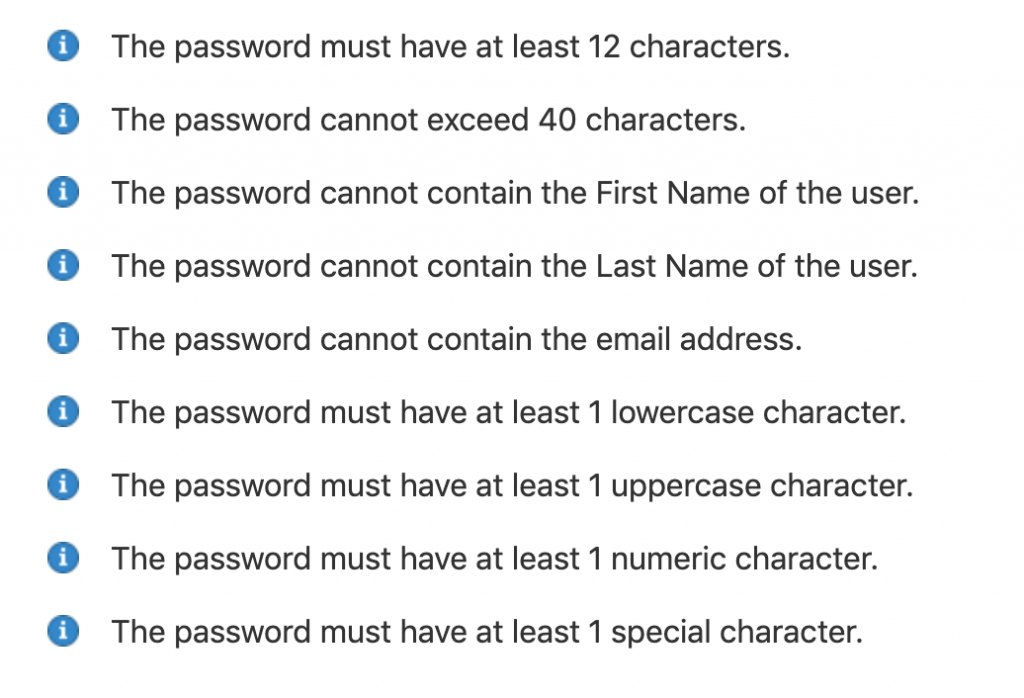
寫Password要符合咁多個要求(都係要記得Password的)
之後就係填信用卡資料
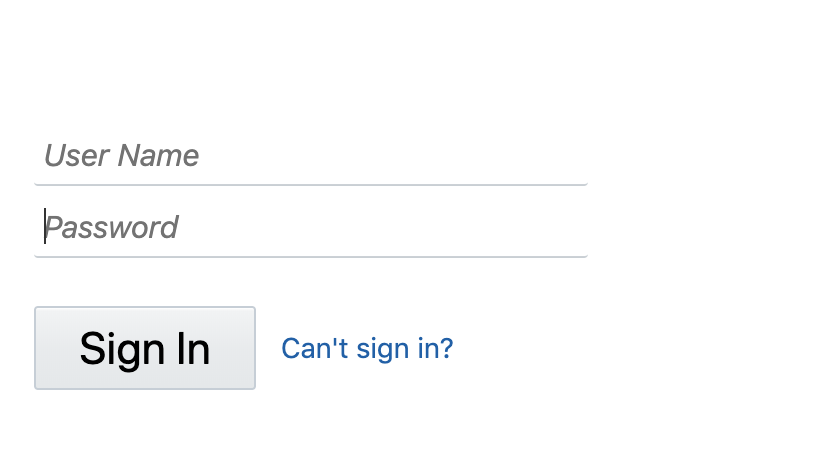
入呢個Link:https://cloud.oracle.com/sign-in ,寫Account 名

跟著打Email Address 同埋 Password
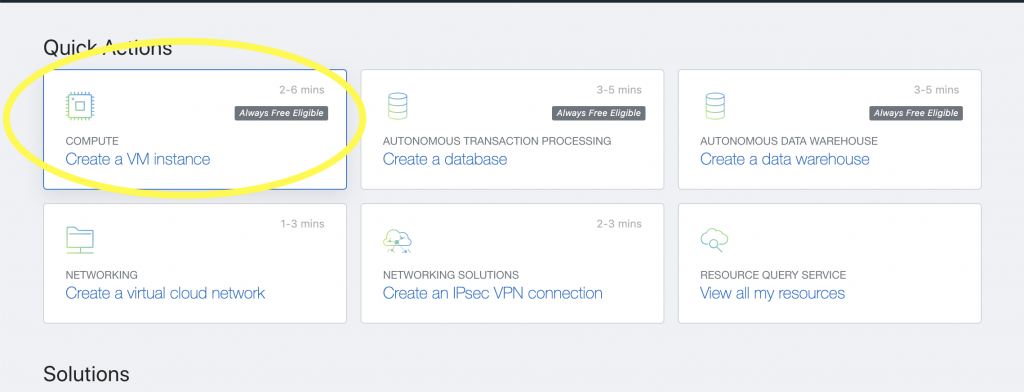
進入到Oracle 帳號頁面,之後,選Create a VM instance
為你的VM改一個名字,然後按change image source
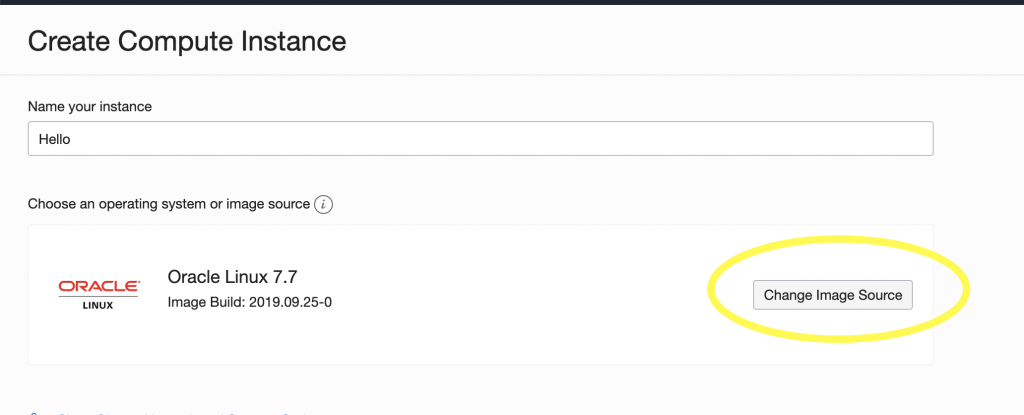
選Ubuntu或者CentOS都可以,我選Ubuntu 18.04 Minimal

記得在最底按 Select Image
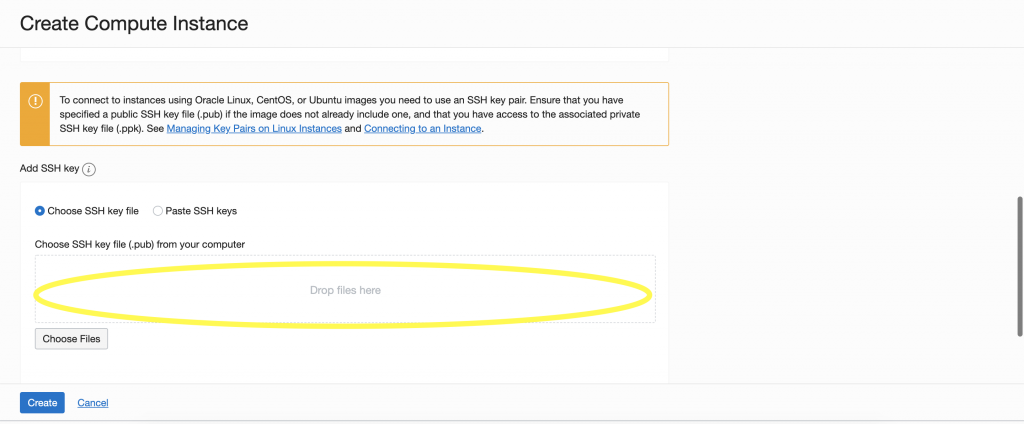
下一步就係SSH Key,你們可以看以下Website
在File Browser打開 ~/.ssh文件夾 (Windows 是 %userprofile%/.ssh)
將 id_rsa.pub 拖到黃圈位置,然後按 create
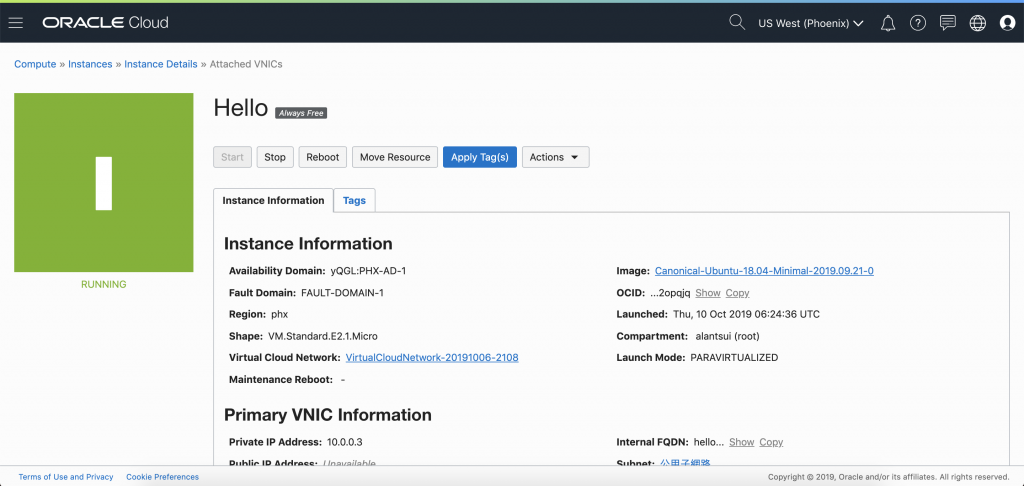
之後你應該會見到以下頁面
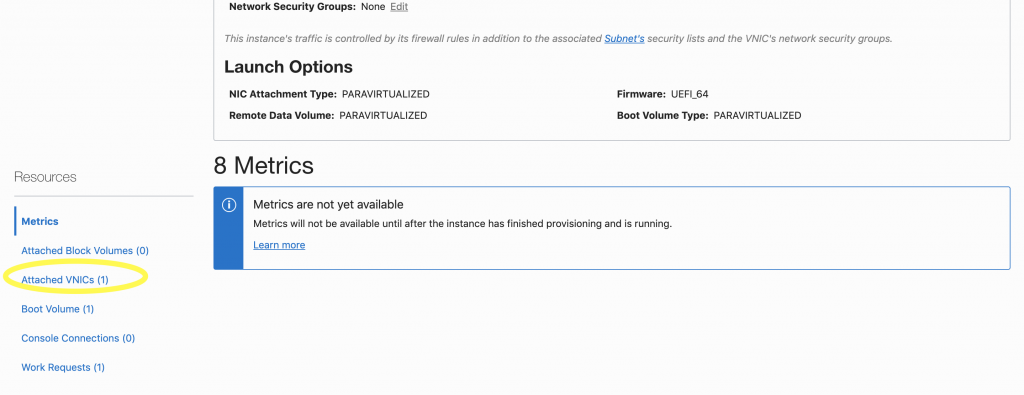
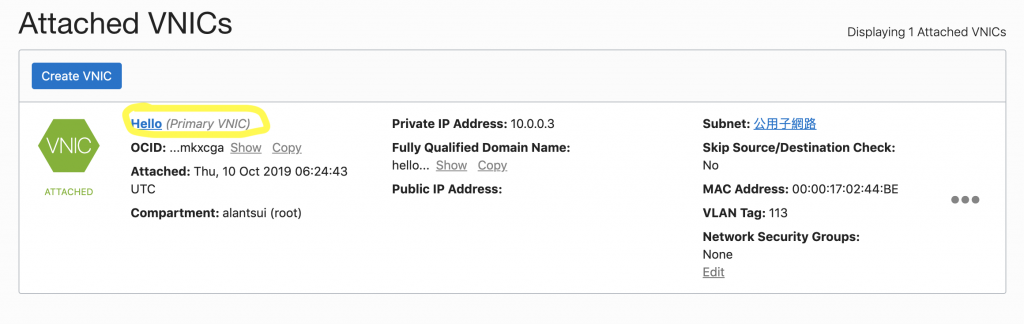
滾到下面,當看到下面的情況,選Attached VNIC
選這個,不同人有不同名字
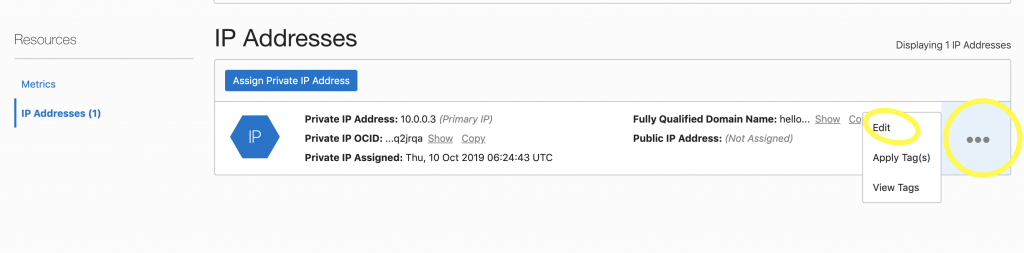
選IP Address
選Edit!!
選EPHEMERAL PUBLIC IP和Update

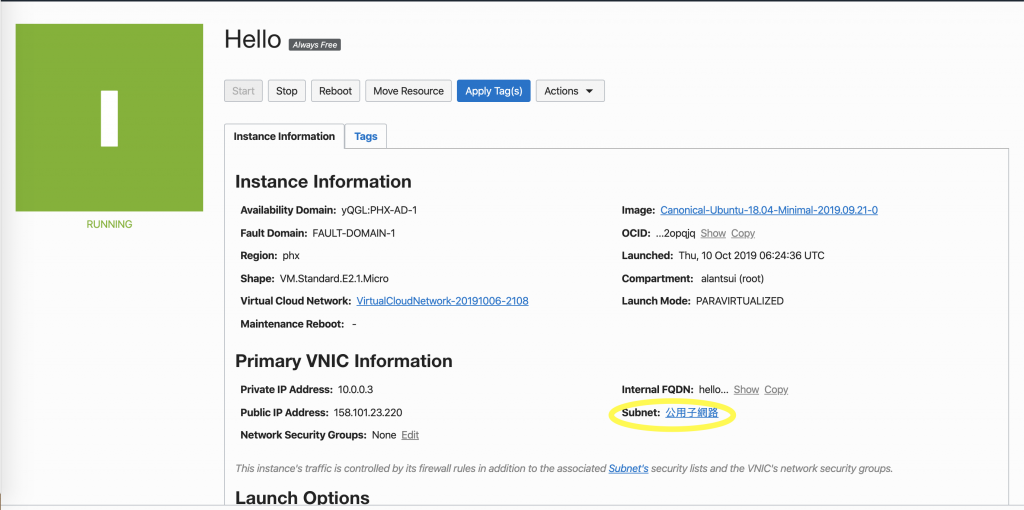
然後你就可以在同一頁得到Public IP了。把Public IP 複製儲存


打開terminal
把以下代碼貼進去
 ssh ubuntu@"你的Public IP Address" -i ~/.ssh/id_rsa
 yes
Windows 打開Powershell
 ssh ubuntu@"你的Public IP Address" -i %userprofile%/.ssh/id_rsa
 yes
你可以發現你應該登入了那個Oracle Server,如果你見到 ubuntu@"你的server名字" 那麼就成功了。
不要把Terminal關掉
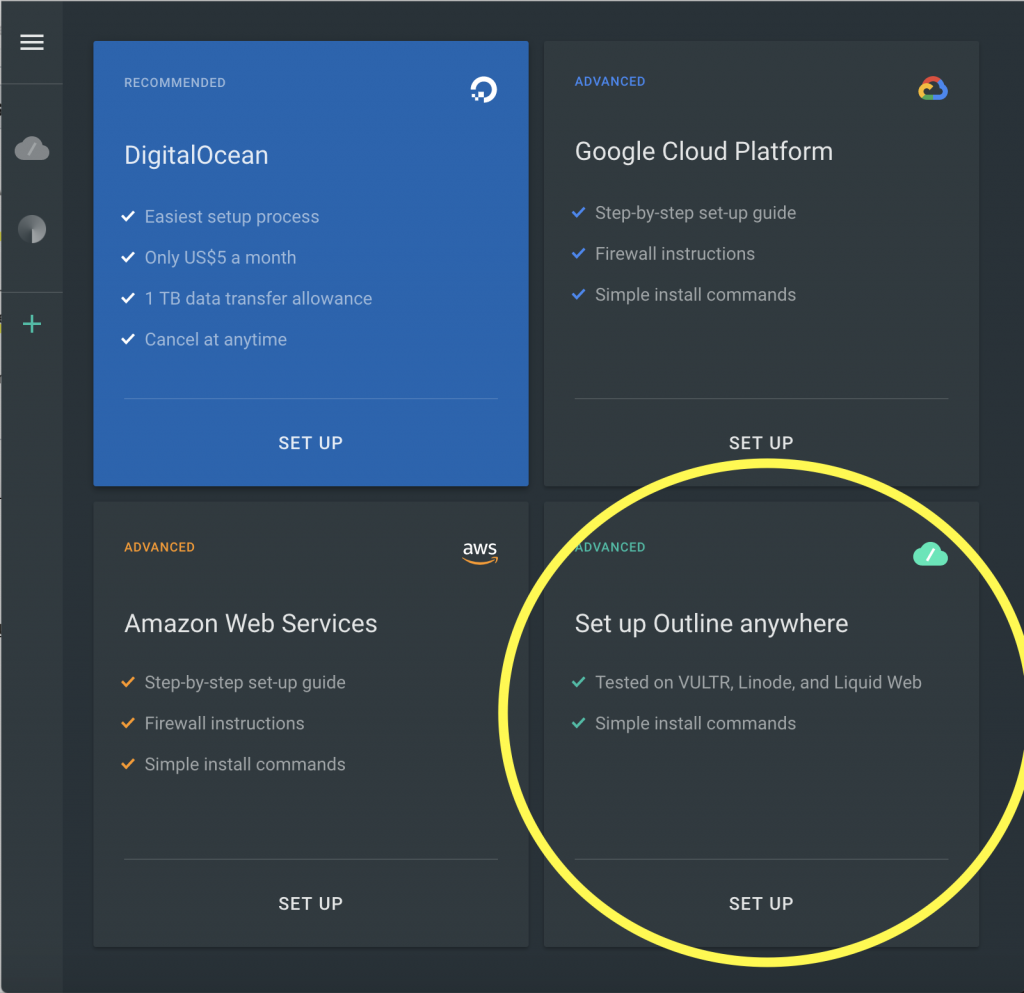
去這個網頁https://getoutline.org/en/home下載與安裝Outline Manager 和Outline
打開Outline Manager,選anywhere
複製這些代碼到terminal中,然後enter
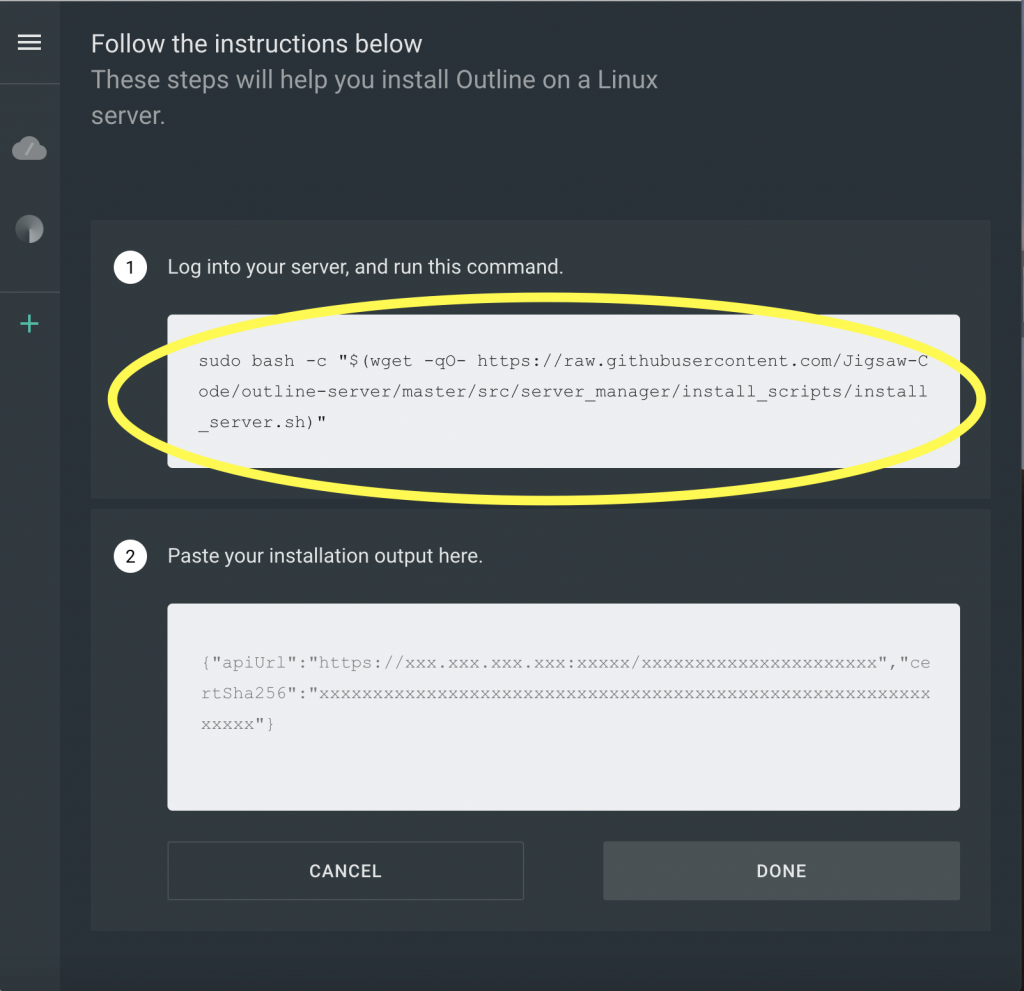
然後打以下代碼
Y
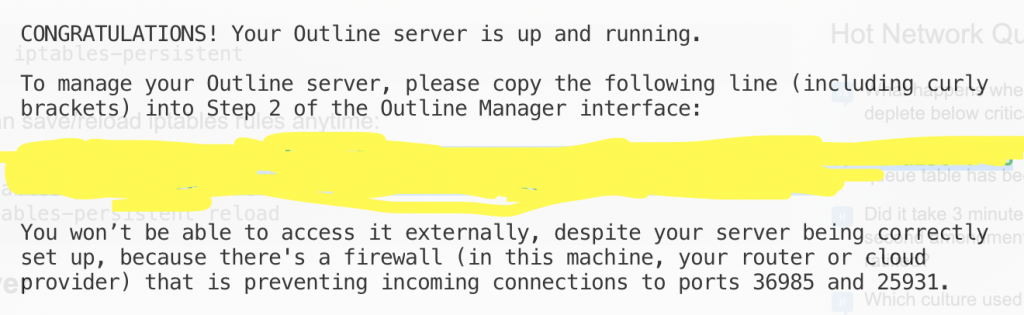
安裝完成你會見到這兩個message

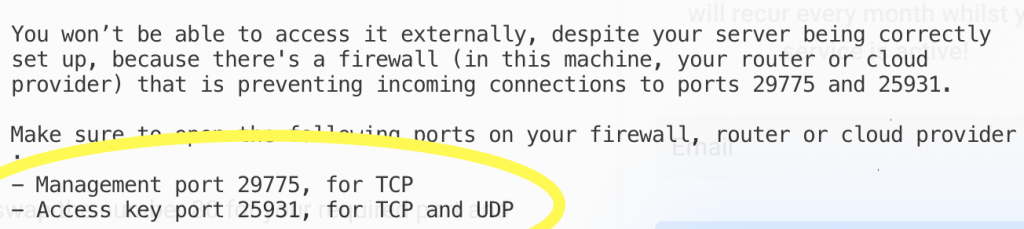
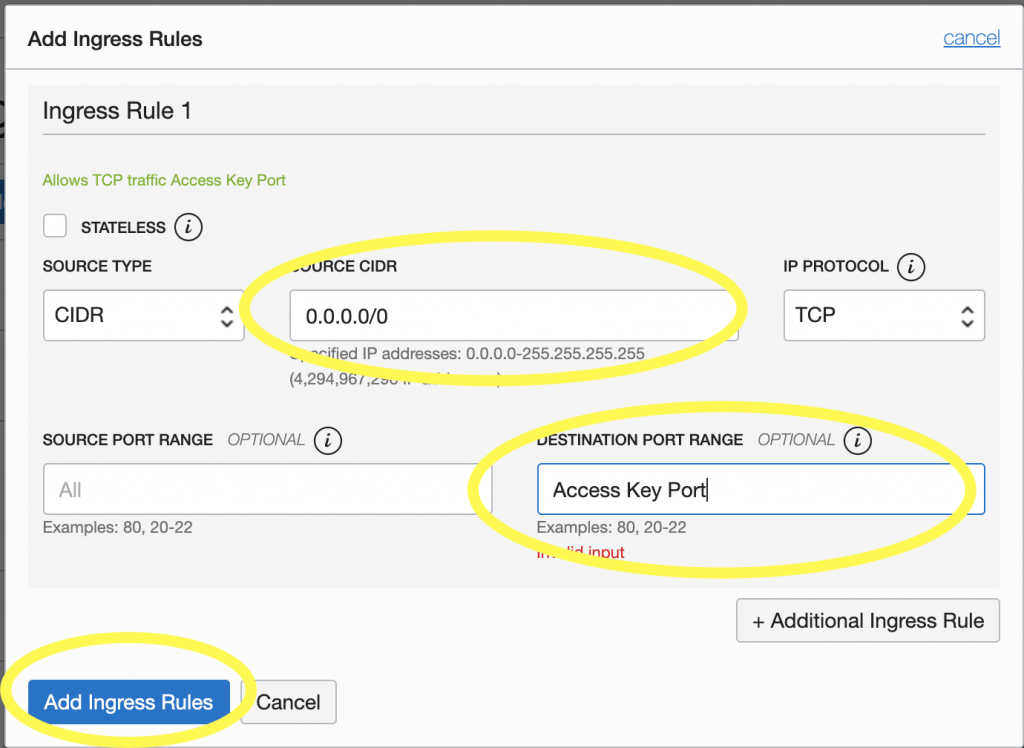
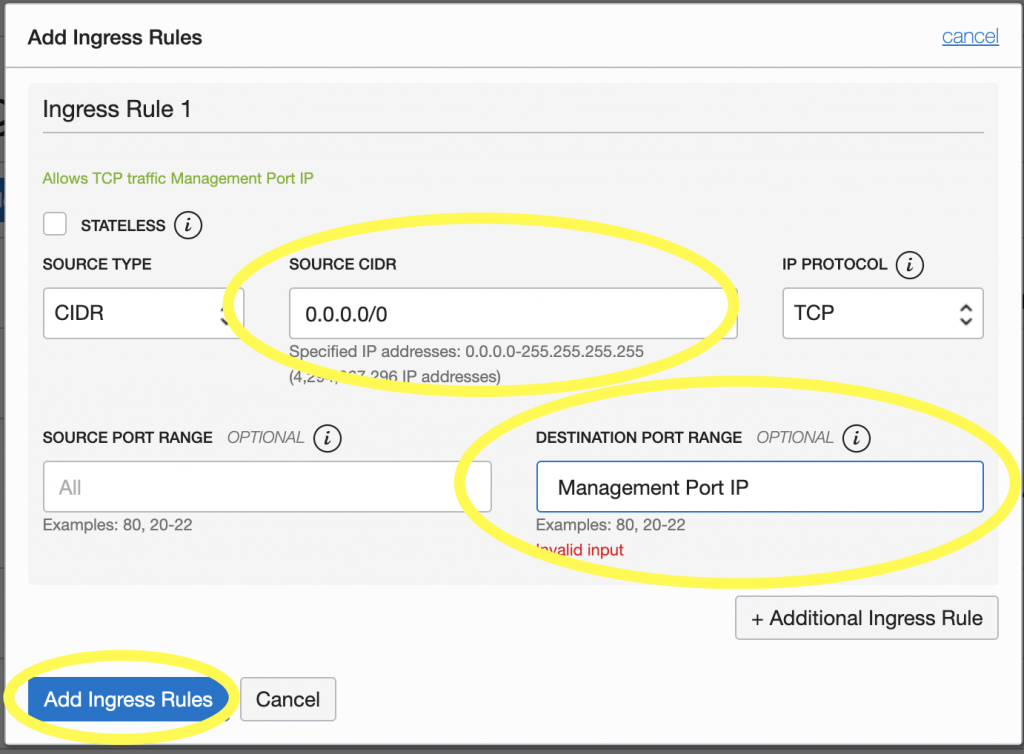
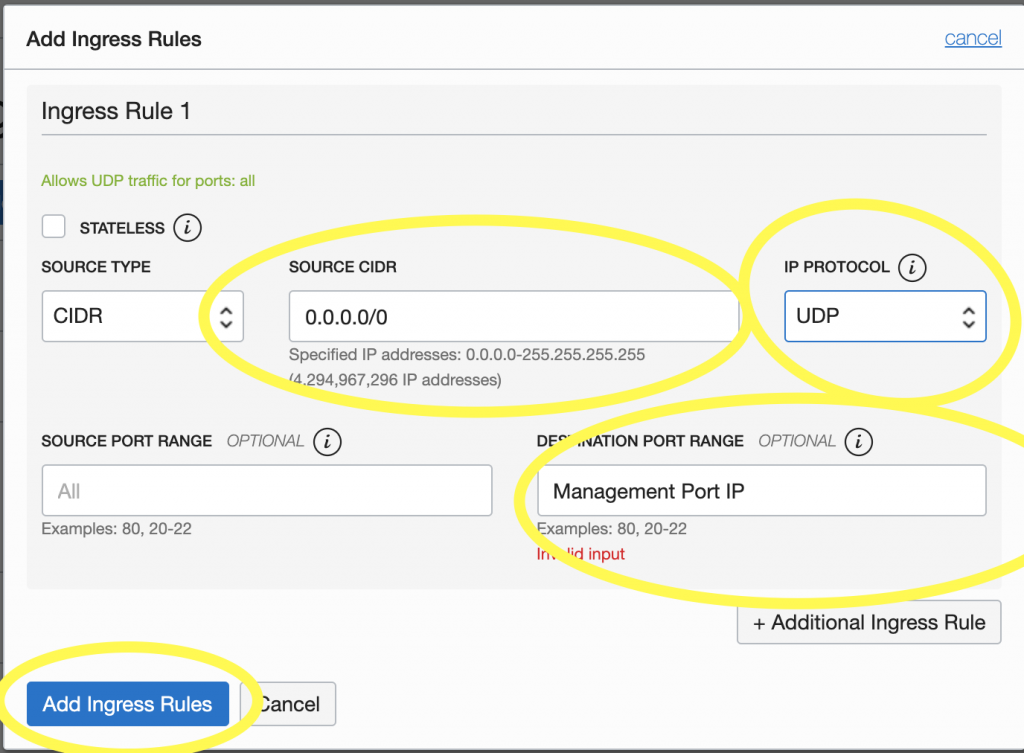
然後我們要打以下代碼,記得要將 29775 轉換成Management Port。25931 轉換成你的Access Key Port
 sudo iptables -I INPUT -p tcp -m tcp --dport 29775 -j ACCEPT
 sudo iptables -I INPUT -p tcp -m tcp --dport 25932 -j ACCEPT
 sudo iptables -I INPUT -p udp -m udp --dport 25932 -j ACCEPT
 sudo netfilter-persistent save
 sudo netfilter-persistent reload
把你的Terminal綠色Output部分(圖上被黃色覆蓋的部分)複製到Outline的第二部分
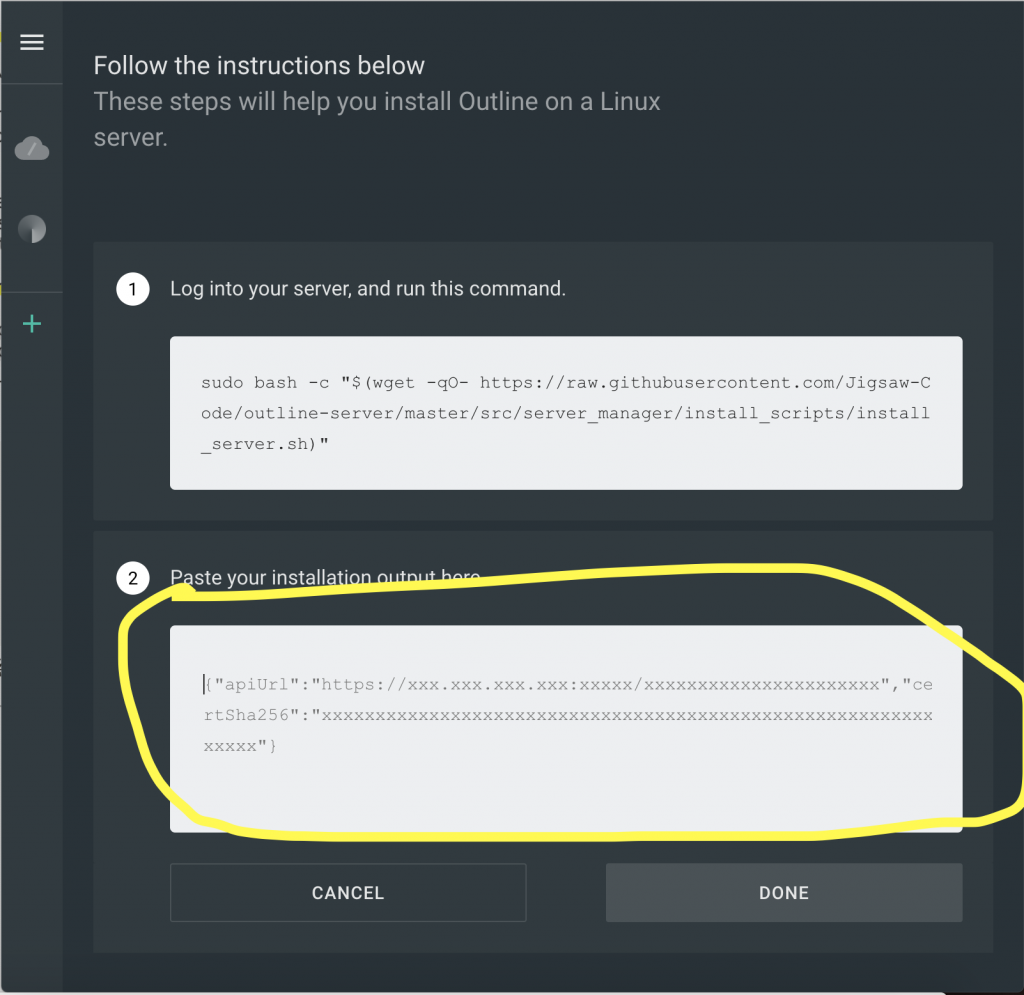
按Done,大功告成
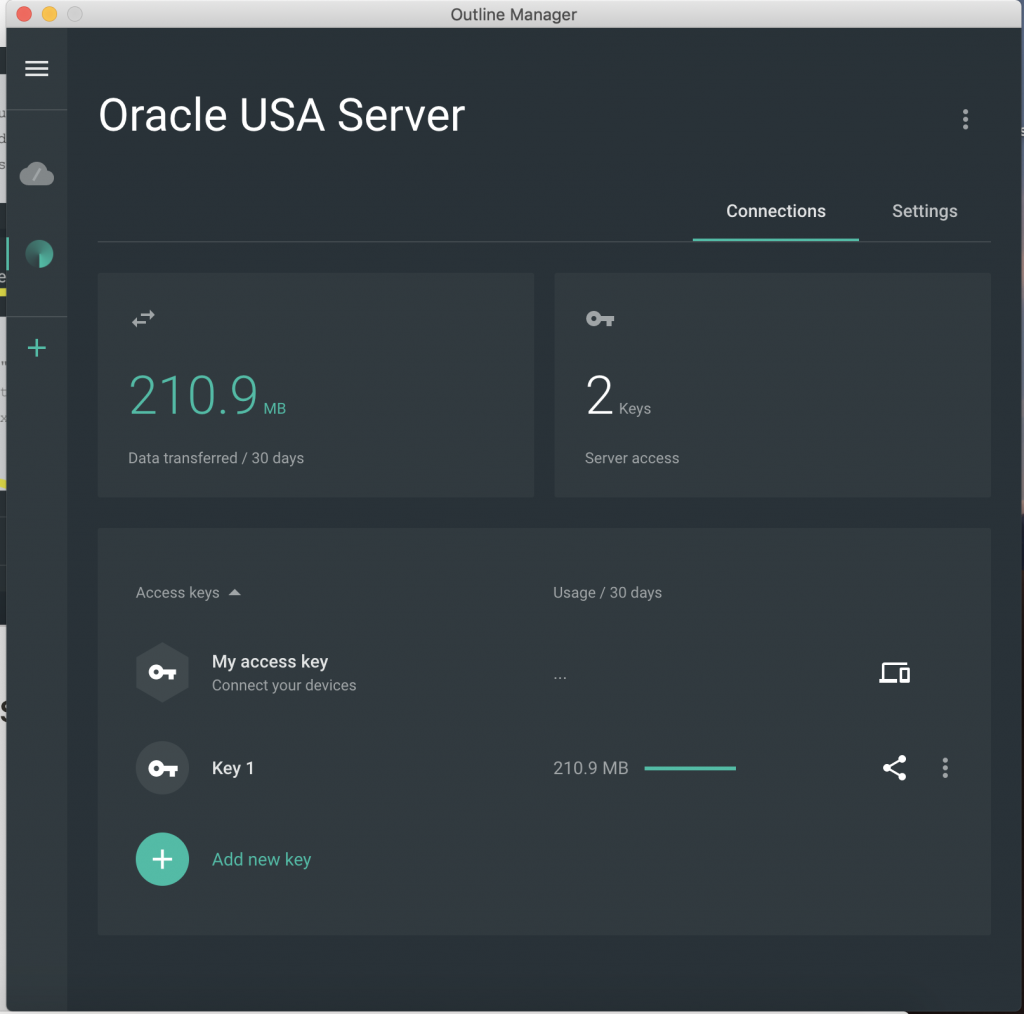
Key 1 旁邊有個share icon,按他會得到 ss開頭的Link(在 "1. copy your access Key"下面 )
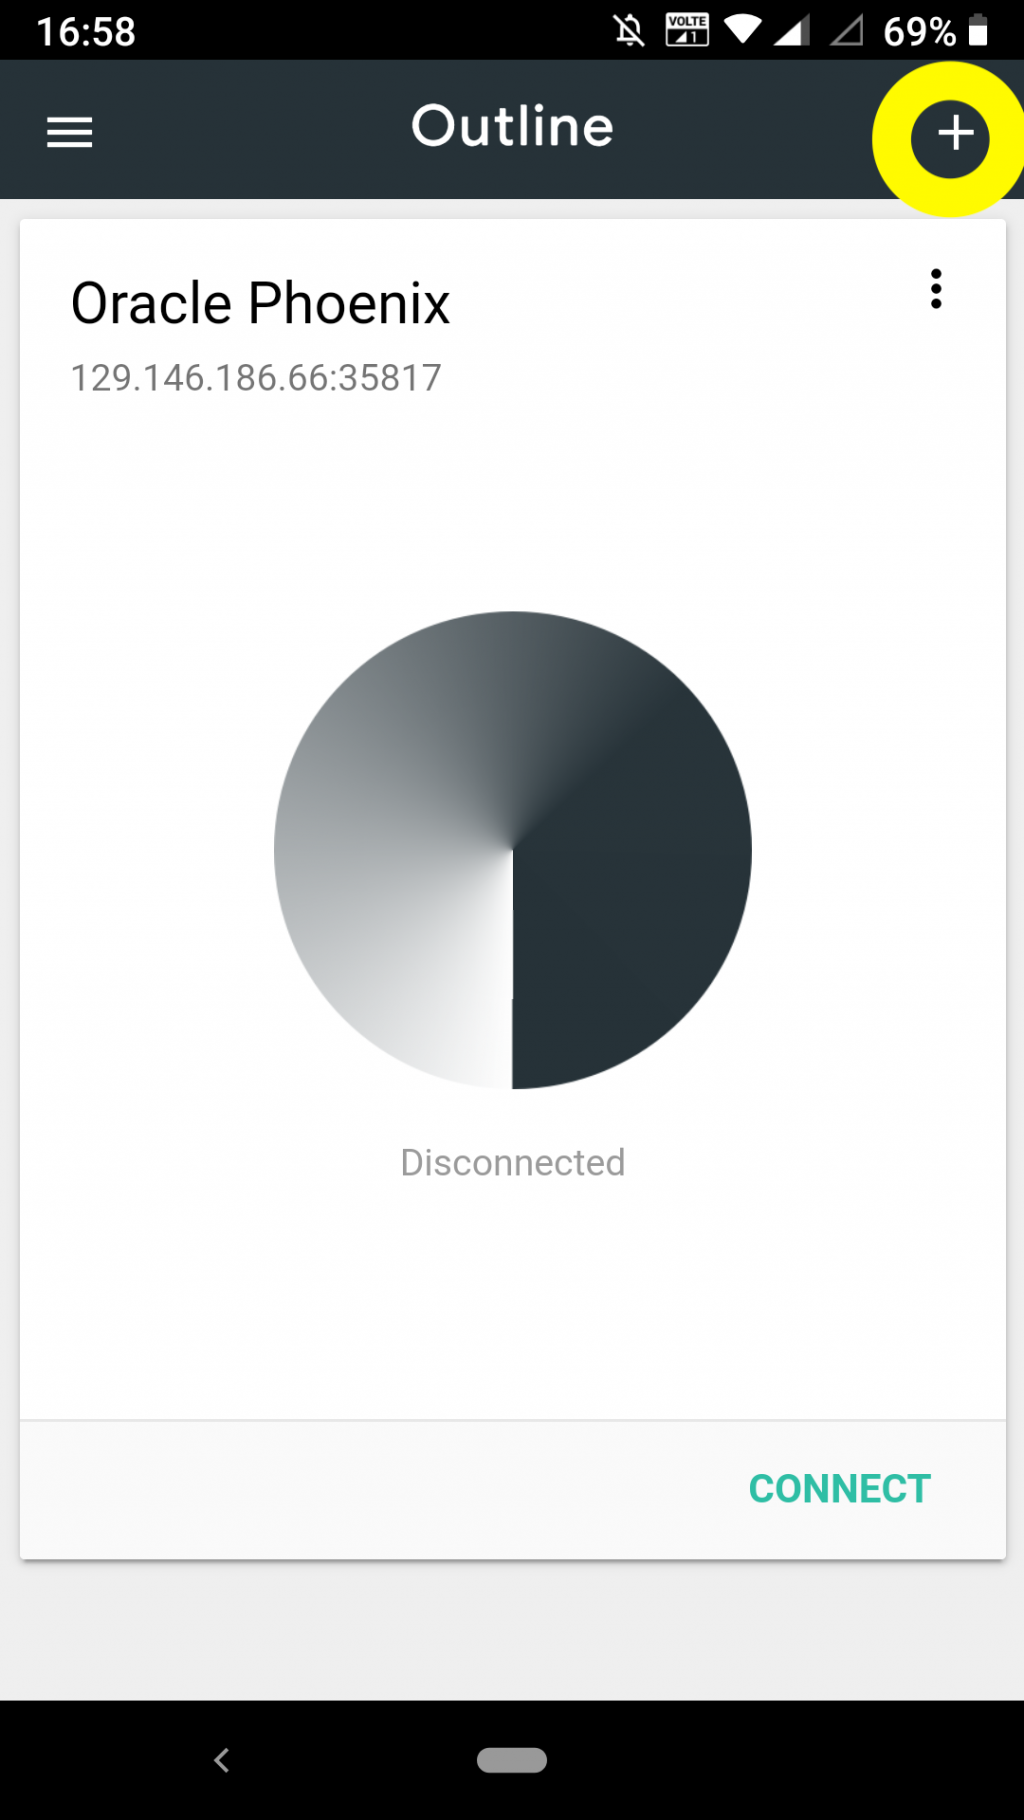
在手機上點 +
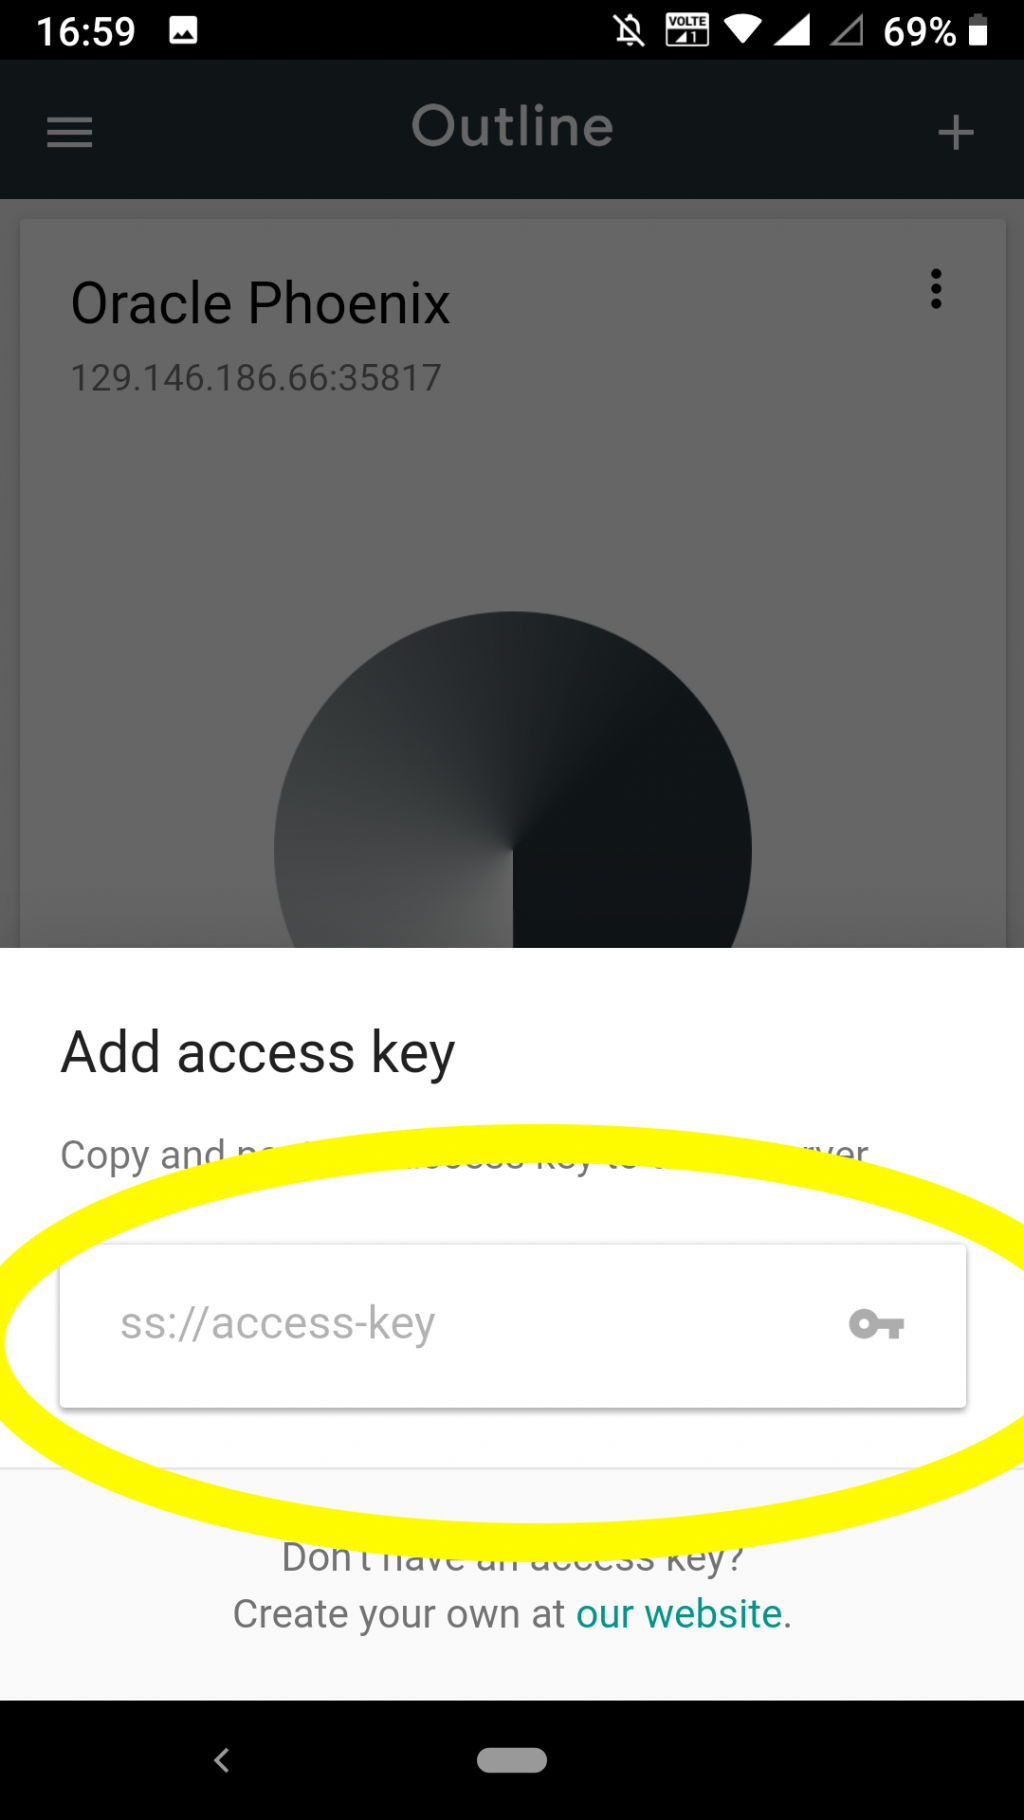
複製ss key到這裏
大功告成,現在你已經擁有了一個VPN Server了。非常感謝你看完這個很長的教學。
以下操作可以用來處理第五部分 iptables 的異常情況,例如Outline的無法連結你的Server.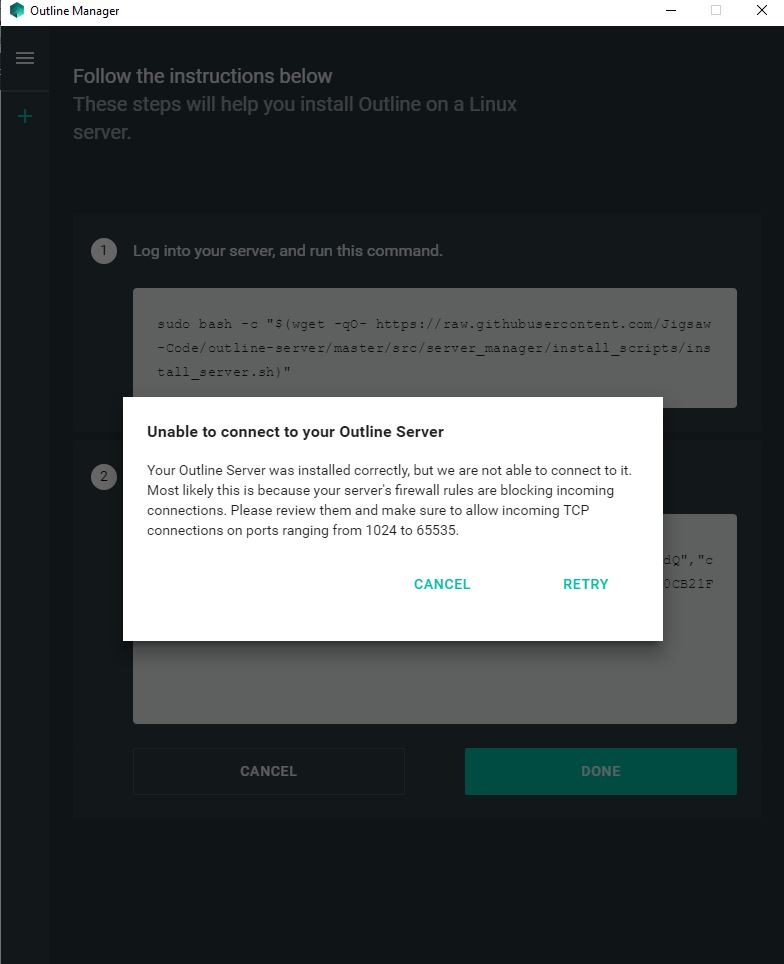
解決辦法如下
iptables -P INPUT ACCEPT
iptables -P OUTPUT ACCEPT
iptables -P FORWARD ACCEPT
iptables -F
但此舉將大幅增加你的資安風險,務必嘗試過其他辦法後再試過。
感謝教學
非常詳細!!!!
卡在第三部分:Oracle 防火牆設定 的人
那個access key 跟manage key
是等一下出現才要設定的
 alantsui
