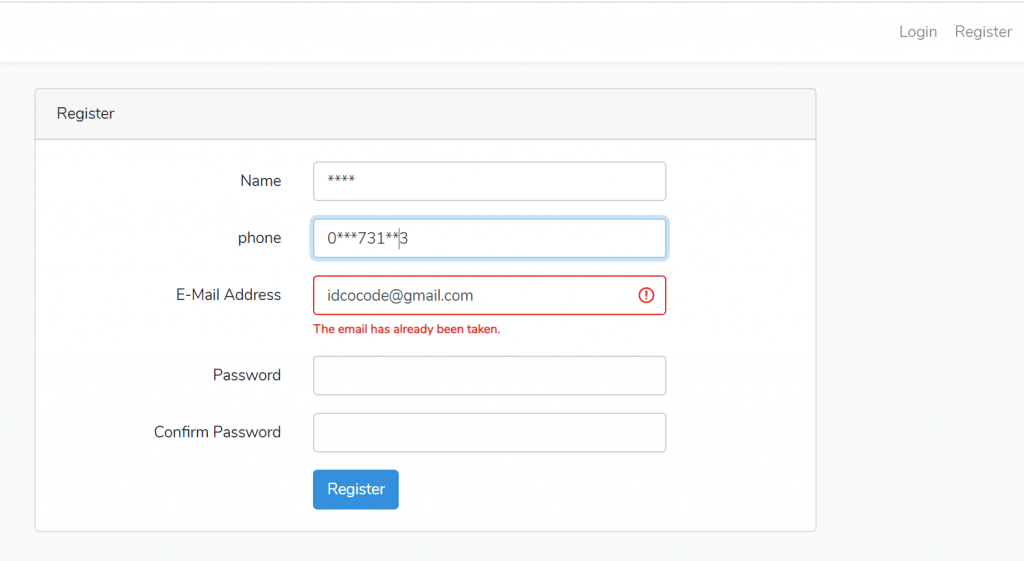
請教大神門:
我客戶要求會員需使用電話號碼註冊,我原本使用Laravel 自帶的
composer require laravel/ui --dev
php artisan ui vue --auth
生成註冊功能:
原本使用 email註冊,若 email有重複時,會提醒,但改為 phone卻直接報錯
請教我該從哪裡設置錯誤訊息?
我的register.blade.php 'phone', 'E-mail'如下:
                        <div class="form-group row">
                            <label for="phone" class="col-md-4 col-form-label text-md-right">{{ __('phone') }}</label>

                            <div class="col-md-6">
                                <input id="phone" type="phone" class="form-control @error('phone') is-invalid @enderror" name="phone" value="{{ old('phone') }}" required autocomplete="phone">

                                @error('phone')
                                    <span class="invalid-feedback" role="alert">
                                        <strong>{{ $message }}</strong>
                                    </span>
                                @enderror
                            </div>
                        </div>

                        <div class="form-group row">
                            <label for="email" class="col-md-4 col-form-label text-md-right">{{ __('E-Mail Address') }}</label>

                            <div class="col-md-6">
                                <input id="email" type="email" class="form-control @error('email') is-invalid @enderror" name="email" value="{{ old('email') }}" required autocomplete="email">

                                @error('email')
                                    <span class="invalid-feedback" role="alert">
                                        <strong>{{ $message }}</strong>
                                    </span>
                                @enderror
                            </div>
                        </div>

<input id="phone" type="phone" class="form-control @error('phone') is-invalid @enderror" name="phone" value="{{ old('phone') }}" required autocomplete="phone">

type改成text
已經修改過,但是無效果
                        <div class="form-group row">
                            <label for="phone" class="col-md-4 col-form-label text-md-right">{{ __('phone') }}</label>

                            <div class="col-md-6">
                                <input id="phone" type="text" class="form-control @error('phone') is-invalid @enderror" name="phone" value="{{ old('phone') }}" required autocomplete="phone">

                                @error('phone')
                                    <span class="invalid-feedback" role="alert">
                                        <strong>{{ $message }}</strong>
                                    </span>
                                @enderror
                            </div>
                        </div>
你是用laravel Validation?
我只在 RegisterController 和 Register,blade.php -添加 "phone"
protected function validator(array $data)
    {
        return Validator::make($data, [
            'name' => ['required', 'string', 'max:255'],
            'phone' => ['required', 'string', 'max:255'],
            'email' => ['required', 'string', 'email', 'max:255', 'unique:users'],
            'password' => ['required', 'string', 'min:4', 'confirmed'],
        ]);
    }

protected function create(array $data)
    {
        return User::create([
            'name' => $data['name'],
            'phone' => $data['phone'],
            'email' => $data['email'],
            'password' => Hash::make($data['password']),
        ]);
    }
其餘的都沒有動過
感謝您提醒。指引我找到答案,謝謝!
找到方法了,原來是那麼簡單:
方法就是只要在 RegisterController 加上 'unique:users'
    protected function validator(array $data)
    {
        return Validator::make($data, [
            'name' => ['required', 'string', 'max:255'],
            'phone' => ['required', 'string', 'max:255', 'unique:users'],
            'email' => ['required', 'string', 'email', 'max:255', 'unique:users'],
            'password' => ['required', 'string', 'min:8', 'confirmed'],
        ]);
    }
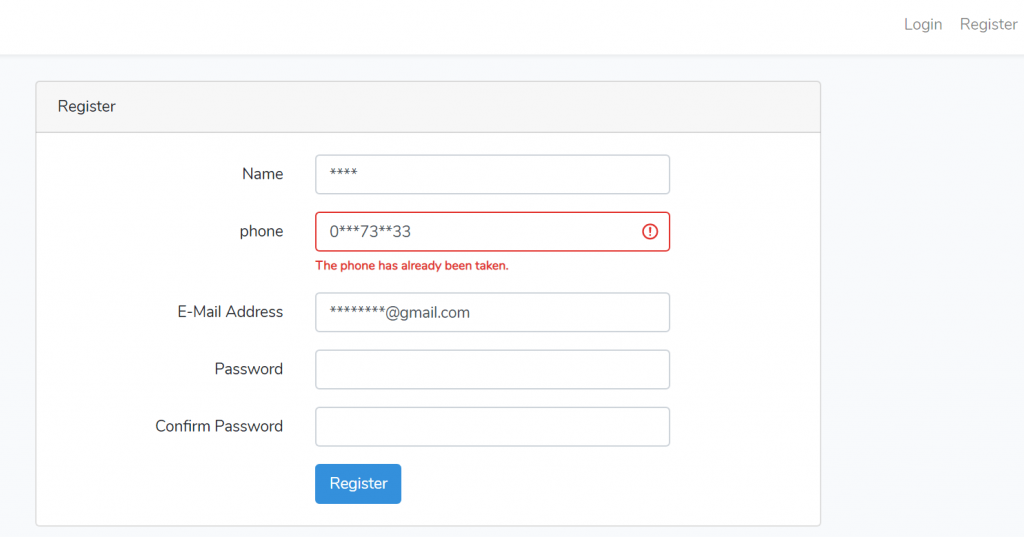
已經可以完美呈現了
恭喜