iT邦幫忙

0

[ Raspberry Pi ] 使用PiShirnk.sh 壓縮映像檔 Linux /Winsows 映像檔案瘦身

  • 分享至 

  • xImage
  •  

參考: https://github.com/Drewsif/PiShrink

==工具==

  1. Linux 系統((Windows 系統需使用virtualbox 官網下載 + Ubuntu 官網下載+ 為了在虛擬環境裡讀取windows資料夾,需掛載本機文件夾,可以參考這篇
  2. PiShirnk.sh ((下面說明如何下載使用 原作者github

使用PiShirnk.sh 壓縮RaspberryPi 映像檔

很多人在使用樹莓派時,為了有更大的儲存空間,都會使用到64GB的SD記憶卡來安裝Raspbian作業系統。
但是在進行系統映像檔備分時堪稱悲劇。
即便整張SD卡只用了10GB,轉成映像檔後仍舊會是60G左右。

幸好可以使用PuShrink腳本來進行映像檔的大瘦身。

按下Ctrl + Alt +T,打開Termial,輸入以下指令。
sudo wget http://raw.githubusercontent.com/Drewsif/PiShrink/master/pishrink.sh
https://ithelp.ithome.com.tw/upload/images/20200429/20115086RJIay4CVCf.png

修改sh檔權限,輸入以下指令。
sudo chmod +x pishirnk.sh
https://ithelp.ithome.com.tw/upload/images/20200429/20115086I330sGlaTQ.png

把檔案移動到bin目錄,輸入以下指令。
sudo mv pishirnk.sh /usr/local/bin
https://ithelp.ithome.com.tw/upload/images/20200429/20115086n7RmhQcIwh.png

利用cd移動到要瘦身的映像檔案資料夾位置,輸入以下指令。
cd 文件/[DesDir]
https://ithelp.ithome.com.tw/upload/images/20200429/20115086J8IsJdAf8d.png

檢查映像檔按大小。輸入以下指令。這邊可以看到,映像檔瘦身前是60GB的大小。
du -h [filename.img]
https://ithelp.ithome.com.tw/upload/images/20200429/20115086jRmMztliFc.png

開始進行映像檔大瘦身,輸入以指令。
sudo PiShirnk.sh [filename.img]
https://ithelp.ithome.com.tw/upload/images/20200429/201150868k1hFZJyF8.png

如果出現以下畫面,就代表映像檔已經成功大瘦身搂!!!
從60GB→22GB ,大大節省儲存空間。
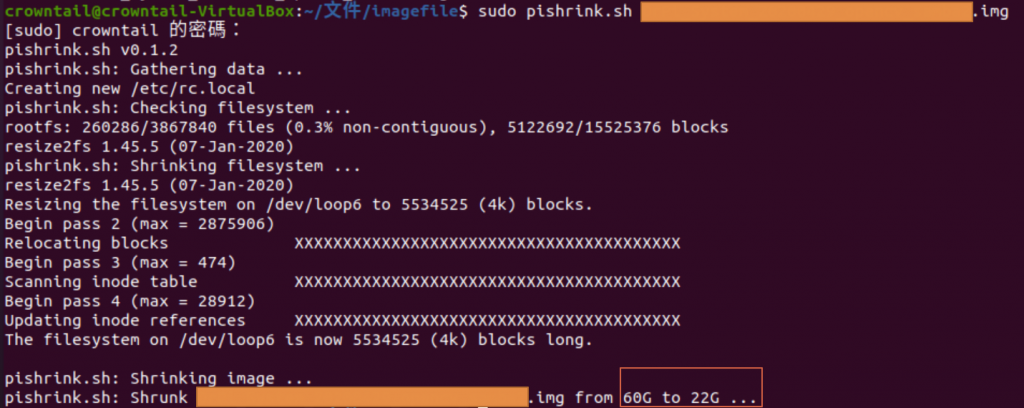
https://ithelp.ithome.com.tw/upload/images/20200429/20115086OGLVbTlgaZ.png


圖片
  直播研討會
圖片
{{ item.channelVendor }} {{ item.webinarstarted }} |
{{ formatDate(item.duration) }}
直播中

2 則留言

0
oooopppp1
iT邦新手 5 級 ‧ 2021-01-08 22:00:52

shrink?? 跟您貼得好像不太一樣唷! 小妹被耍了幾次原來是大大筆誤的感覺

crowntail iT邦新手 4 級 ‧ 2021-01-12 18:07:05 檢舉

oops感謝提醒

0
oooopppp1
iT邦新手 5 級 ‧ 2021-04-27 00:23:14

謝謝您的分享唷~ =)

我要留言

立即登入留言