如果要單獨一台VM,開來跑drone的朋友們看過來!
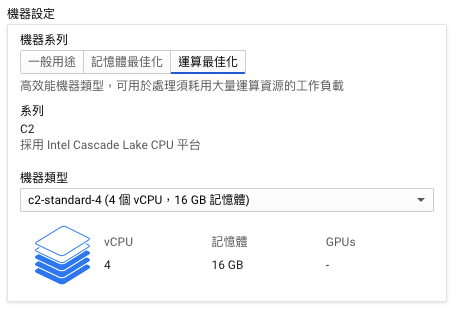
在VM的規格,挑選上因為Drone會比較耗CPU
所以我推薦使用c2的CPU
使用drone build image比較
價位上比較
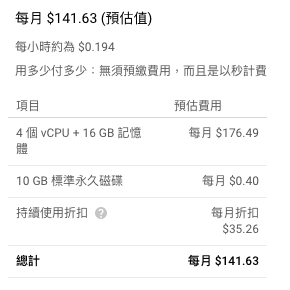
c2-standard-4 (4 個 vCPU,16 GB 記憶體)
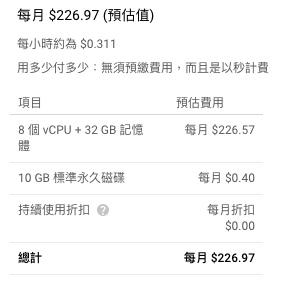
e2-standard-8 (8 個 vCPU,32 GB 記憶體)
 所以要用Drone的VM建議開c2的CPU!超有CP值的呢~
當然啦,在GCP上VM規格可以自由調整,非常有彈性的空間,大家可以切換看看。
機器建置完成後,就可以來進行安裝drone囉
因為本人是使用docker-compose來安裝的唷
麻煩讀者們連到機器上安裝:
version: "3"

services:
  drone-server:
    image: drone/drone:1.8.1
    ports:
      - "80:80"
    volumes:
      - ./drone:/data
      - /var/run/docker.sock:/var/run/docker.sock
    restart: always
    environment:
      - DRONE_GITEA_SERVER=${gitea_host}
      - DRONE_GITEA_CLIENT_SECRET=XXXXXXX
      - DRONE_GITEA_CLIENT_ID=XXXXX
      - DRONE_GIT_ALWAYS_AUTH=true
      - DRONE_SERVER_HOST=${drone_host}
      - DRONE_SERVER_PROTO=http
      - DRONE_RPC_SECRET=請自行產生
      - DRONE_AGENTS_ENABLED=true
      # 先自行建立admin
      - DRONE_USER_CREATE=username:${your_gitea_username},admin:true
      - DRONE_UI_USERNAME=root
      - DRONE_UI_PASSWORD=root

  drone-agent:
    image: drone/drone-runner-docker:1.4
    ports:
      - "3000:3000"
    restart: always
    volumes:
      - /var/run/docker.sock:/var/run/docker.sock
    environment:
      - DRONE_RPC_PROTO=http
      - DRONE_RPC_HOST=${drone_host}
      - DRONE_RPC_SECRET=請自行產生
      - DRONE_RUNNER_CAPACITY=10
      - DRONE_RUNNER_NAME=agent-01
DRONE_RPC_SECRET
請自行輸入主要是給機器驗證使用,自行產生。 ex: 使用md5
DRONE_GITEA_CLIENT_SECRET
DRONE_GITEA_CLIENT_ID
這兩個請至gitea頁面產生
以下面圖片進行示範
step 1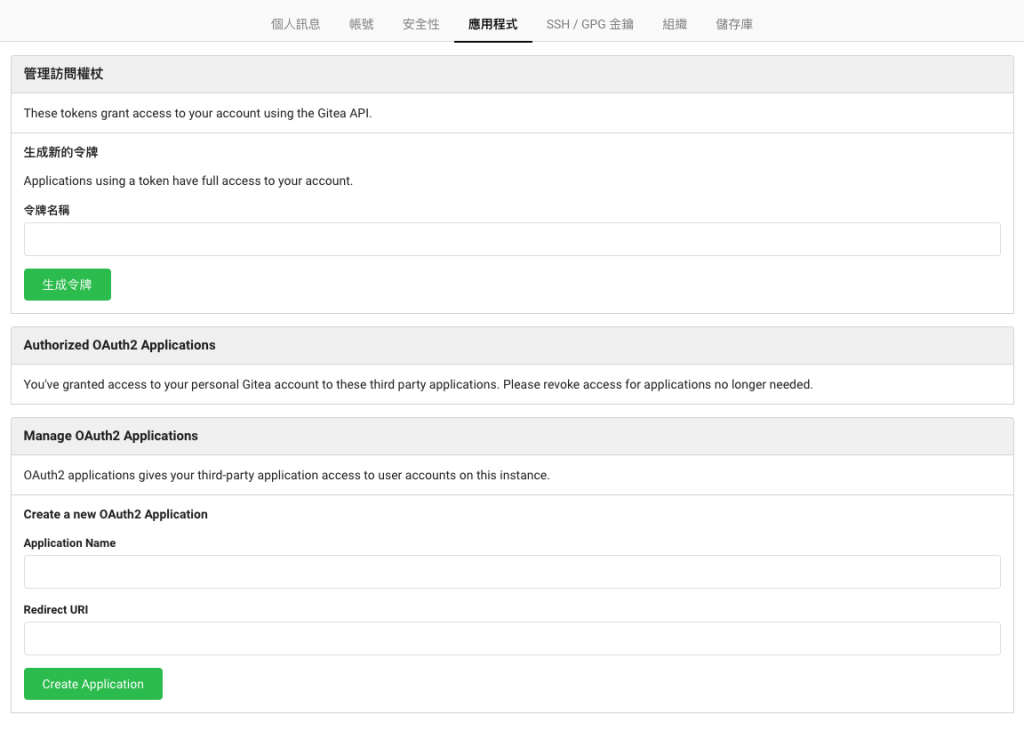
step 2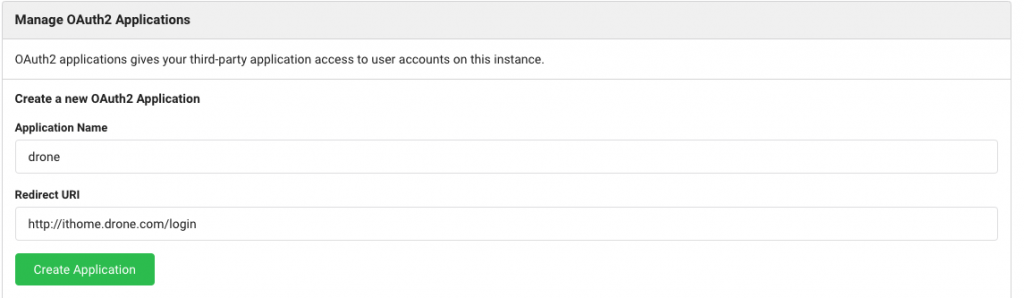
step 3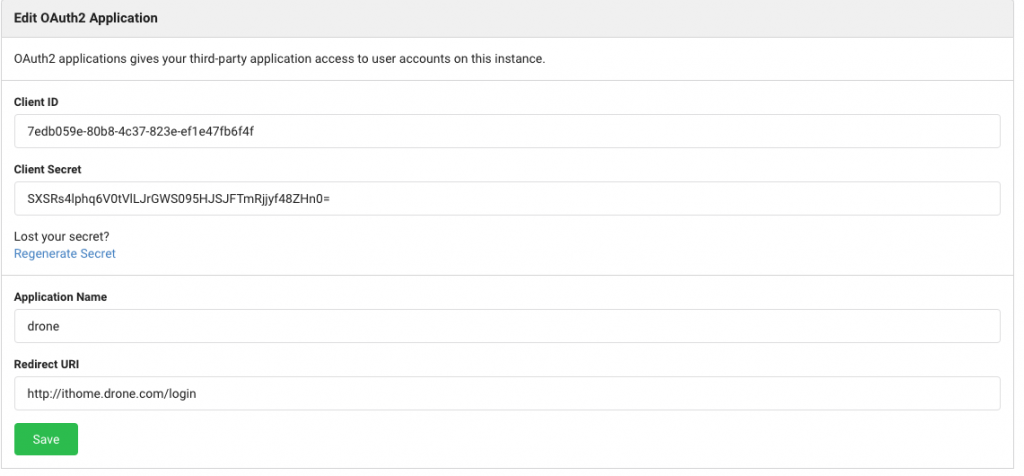
再把這兩個資訊貼在 docker-compose.yaml 上的
DRONE_GITEA_CLIENT_ID
DRONE_GITEA_CLIENT_SECRET
上述步驟確實做完後
透過docker-compose 安裝gitea即可
docker-compose up -d
安裝完成後,從瀏覽器打開你的${drone_host}
就會被轉導到 gitea Oauth 的畫面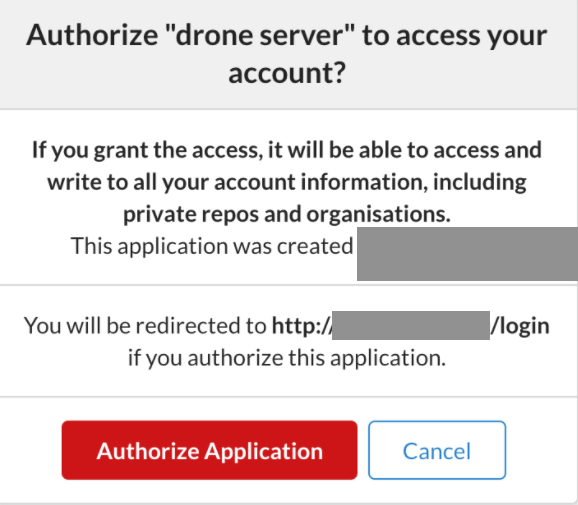
這樣就可以開始使用drone囉!
至於Oops的細節部分也跟 Oops!Gitea - 建置與安裝 大同小異,大家可以再複習一次
萬事起頭難,裝好Drone之後,接下來幾天我就可以帶大家進入Drone的世界啦~