Quiz的專案結構相當簡單,只需要建立測驗及結果的畫面,從quiz/urls.py來看:
urlpatterns = [
    path('play/', views.play),
    path('results/', views.answer_count),
    ]
測驗表單的畫面:
http://127.0.0.1:8000/quiz/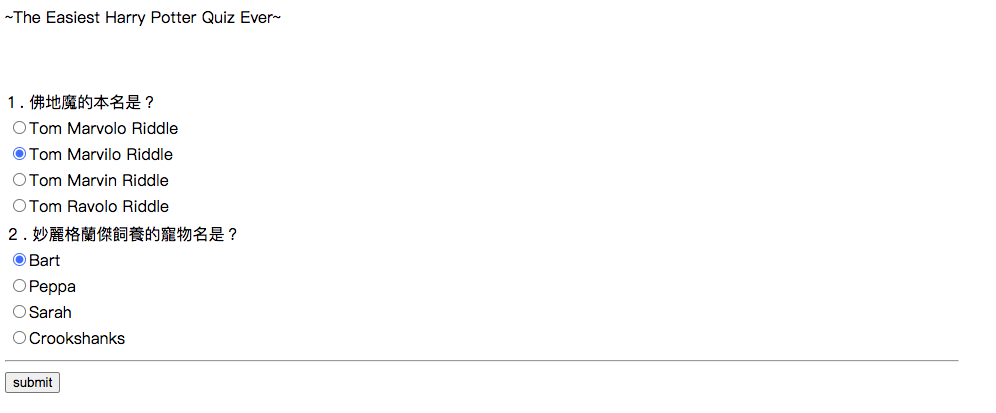
# quiz/views.py
from django.shortcuts import render
from .models import Question

def play(request):
    question = Question.objects.all()
    return render(request, 'play.html', {'question':question})
藉由QuerySet取得所有題目question,再用render渲染play.html樣板。
先在template下新增play.html:
<!DOCTYPE html>
<html lang="en">
<head>
    <meta charset="UTF-8">
    <title>The Easiest Harry Potter Quiz Ever</title>
</head>
<body>
<div id="set" style="padding-top: 50px;">
~The Easiest Harry Potter Quiz Ever~
</div>
<form action="" method="post">
<div style="padding-top: 60px;">
    {% csrf_token %}
    {% for q in question %}
    <table>
        <tr>
            <td>{{ forloop.counter }}.{{q.question_text}}</td>
        </tr>

        {% for c in q.choice_set.all %}
            <tr>
            <td><input type="radio" name="{{ q.id }}" id="c-{{ forloop.counter }}"                            required>{{ c.choice_text }}</td>
            </tr>
        {% endfor %}
    </table>
    {% endfor %}
    <hr width="50%" align="left">

    <input type="submit" value="submit"/>
</div>
</form>
</body>
</html>
小結:關於分數計算的部分明天繼續。
選項的標籤要加上value屬性 不然下一篇表單處理的select抓不到選項文字內容
 <tr>
            <td><input type="radio" name="{{ q.id }}" value = {{c.choice_text}} id="c-{{ forloop.counter }}" required>{{ c.choice_text }}</td>
            </tr>