ConstraintLayout 使用扁平視圖層次結構創建複雜的佈局。它與 RelativeLayout 相似,其中所有的視圖均根據同級視圖與父佈局之間的關係進行佈局,但其靈活性要高於 RelativeLayout,並且更易於與 Android Studio 的佈局編輯器配合使用。引至
如何使用,首先需要在 build.gradle import
dependencies {
   implementation 'androidx.constraintlayout:constraintlayout:1.1.3'
 }
建立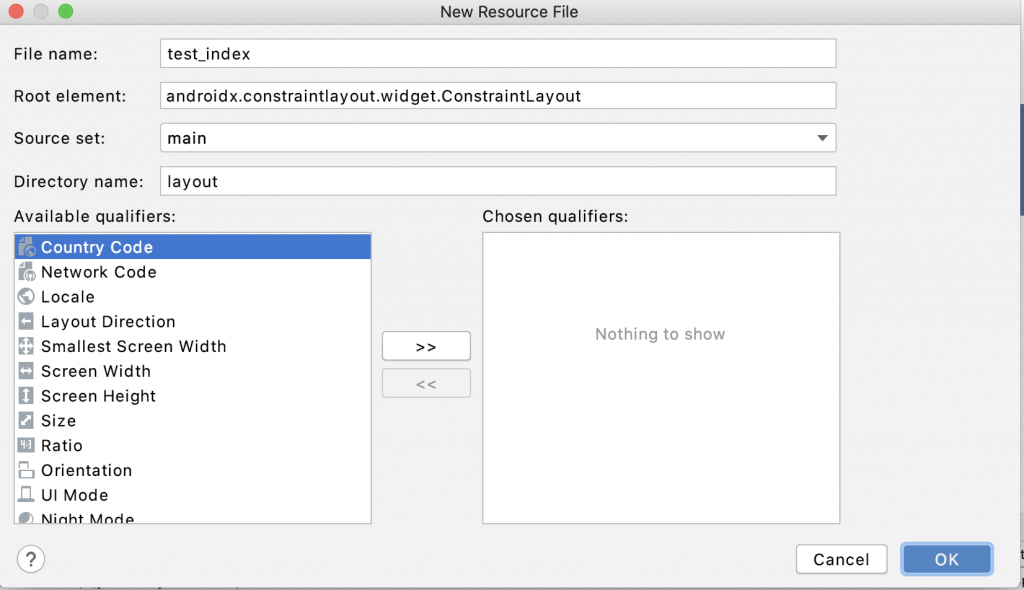
產生結果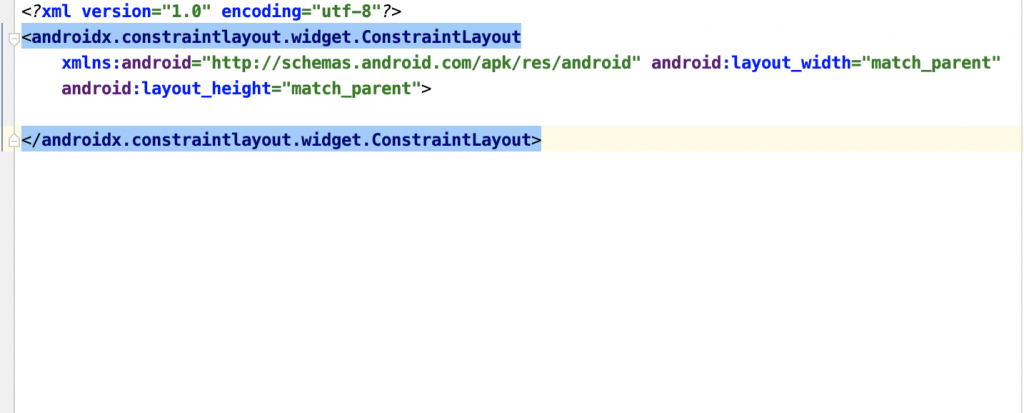
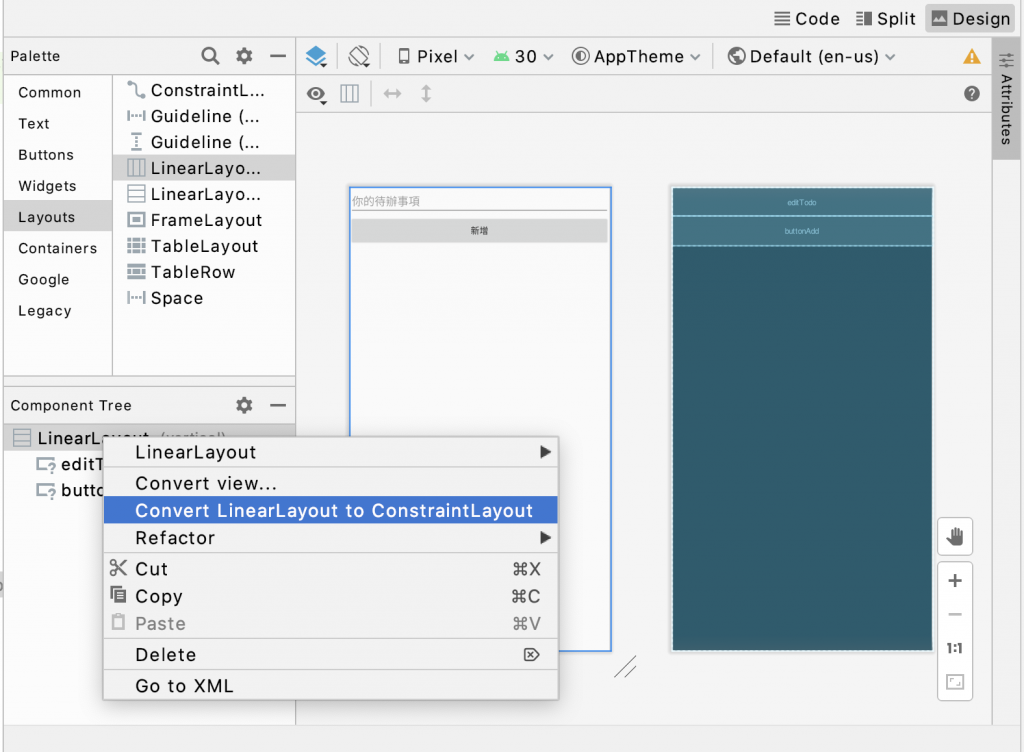
ex. B按鈕在A按鈕左邊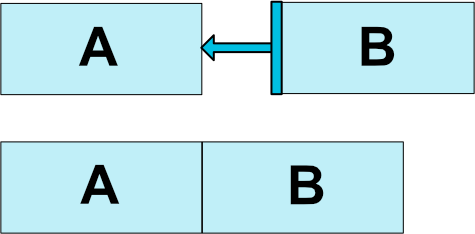
<Button android:id="@+id/buttonA" ... />
<Button android:id="@+id/buttonB" ...
              app:layout_constraintLeft_toRightOf="@+id/buttonA" />
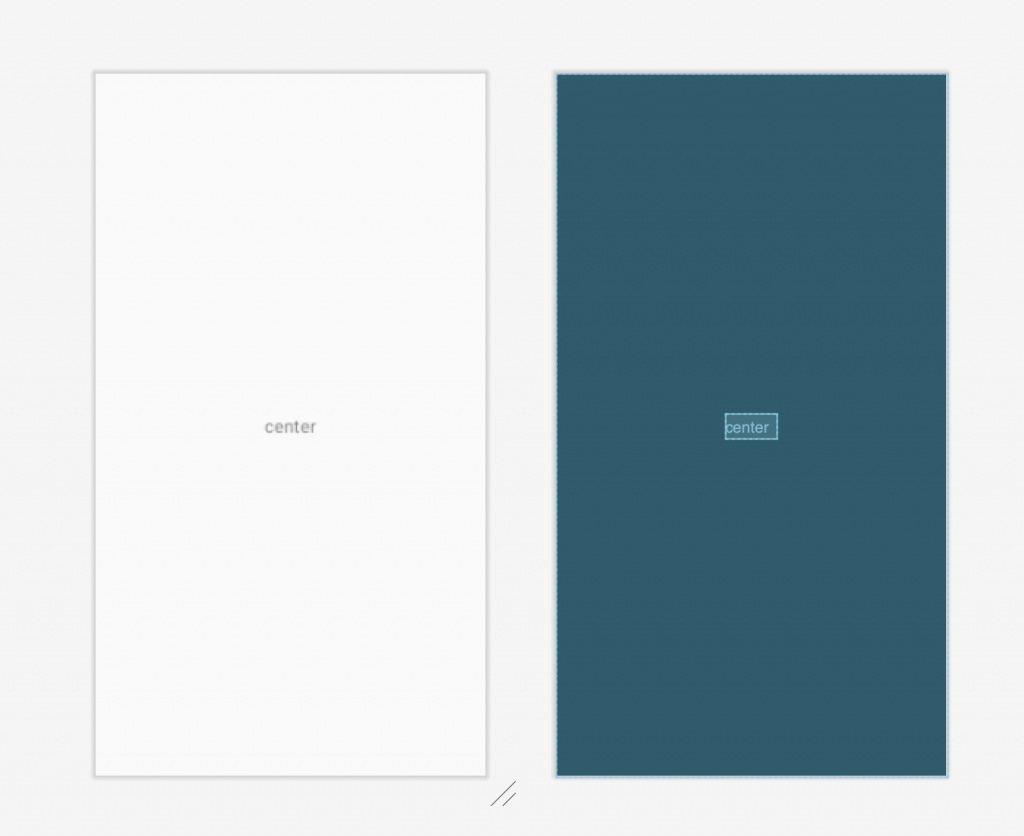
ex. TextView 置中
app:layout_constraintStart_toStartOf表示自身的左邊被目標view的左邊拉住; app:layout_constraintEnd_toEndOf表示自身的右邊被目標view的右邊拉住
app:layout_constraintTop_toTopOf="parent" 表示自身的上方被目標view的上方拉住;
app:layout_constraintBottom_toBottomOf="parent" 表示自身的下方被目標view的下方拉住;
成果
code
<androidx.constraintlayout.widget.ConstraintLayout
xmlns:android="http://schemas.android.com/apk/res/android"
xmlns:app="http://schemas.android.com/apk/res-auto"
android:layout_width="match_parent"
android:layout_height="match_parent">
<TextView
android:layout_width="wrap_content"
android:layout_height="wrap_content"
android:text="center"
app:layout_constraintStart_toStartOf="parent"
app:layout_constraintEnd_toEndOf="parent"
app:layout_constraintTop_toTopOf="parent"
app:layout_constraintBottom_toBottomOf="parent"
/>
</androidx.constraintlayout.widget.ConstraintLayout>
** ex. A按鈕 與 B 按鈕 設定 margin **

code
<?xml version="1.0" encoding="utf-8"?>
<androidx.constraintlayout.widget.ConstraintLayout
xmlns:android="http://schemas.android.com/apk/res/android"
xmlns:tools="http://schemas.android.com/tools"
android:layout_width="match_parent"
xmlns:app="http://schemas.android.com/apk/res-auto"
android:layout_height="match_parent">


<Button android:layout_width="wrap_content"
 android:id="@+id/btnA"
 android:layout_marginTop ="10dp"
 android:layout_height="wrap_content"
 android:text="ButtonA"
 app:layout_constraintStart_toStartOf="parent"
 app:layout_constraintTop_toTopOf="parent"
 />

<Button android:layout_width="wrap_content"
 android:layout_height="wrap_content"
 android:layout_marginLeft="20dp"
 android:id="@+id/btnb"
 android:text="ButtonB"
 app:layout_constraintLeft_toRightOf="@+id/btnA"
 app:layout_constraintTop_toTopOf="parent"
 />

</androidx.constraintlayout.widget.ConstraintLayout>
ex. A button 父畫面的0.8 的水平 位置, b button 父畫面的0.3 的水平 位置
成果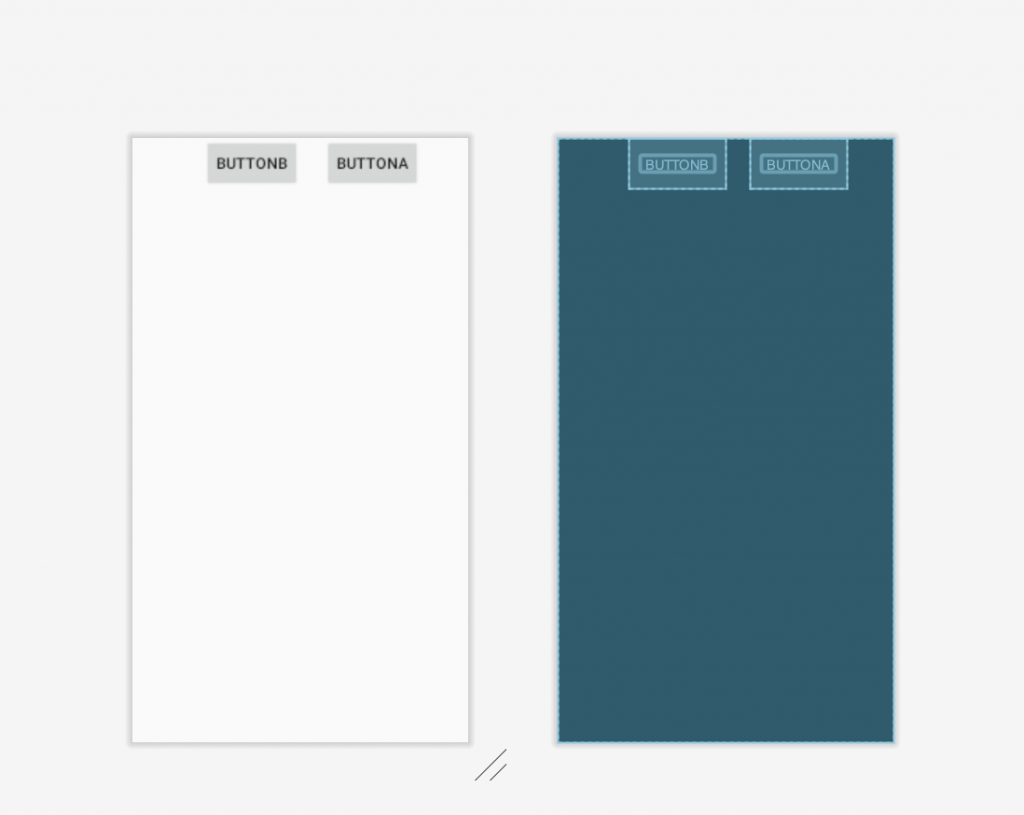
code
<?xml version="1.0" encoding="utf-8"?>
<androidx.constraintlayout.widget.ConstraintLayout
xmlns:android="http://schemas.android.com/apk/res/android"
xmlns:tools="http://schemas.android.com/tools"
android:layout_width="match_parent"
xmlns:app="http://schemas.android.com/apk/res-auto"
android:layout_height="match_parent">


<Button android:layout_width="wrap_content"
  android:id="@+id/btnA"
  android:layout_height="wrap_content"
  android:text="ButtonA"
  app:layout_constraintHorizontal_bias="0.8"
  app:layout_constraintLeft_toLeftOf="parent"
  app:layout_constraintRight_toRightOf="parent"
  app:layout_constraintTop_toTopOf="parent"
  />

  <Button android:layout_width="wrap_content"
      android:id="@+id/btnB"
      android:layout_height="wrap_content"
      android:text="Buttonb"
      app:layout_constraintHorizontal_bias="0.3"
      app:layout_constraintLeft_toLeftOf="parent"
      app:layout_constraintRight_toRightOf="parent"
      app:layout_constraintTop_toTopOf="parent"
      />

</androidx.constraintlayout.widget.ConstraintLayout>
reference :https://developer.android.com/training/constraint-layout
reference:https://developer.android.com/reference/androidx/constraintlayout/widget/ConstraintLayout
