今天要來快速完成 About Page
css 附上
首先介紹一下 react-timeline-scribble這個 package。
它雖然只有兩個 component 和 ,但卻能夠快速建立起一系列時間軸,簡單直白~
註:透過使用
npm i react-timeline-scribble進行下載
話不多說,馬上來試用看看吧
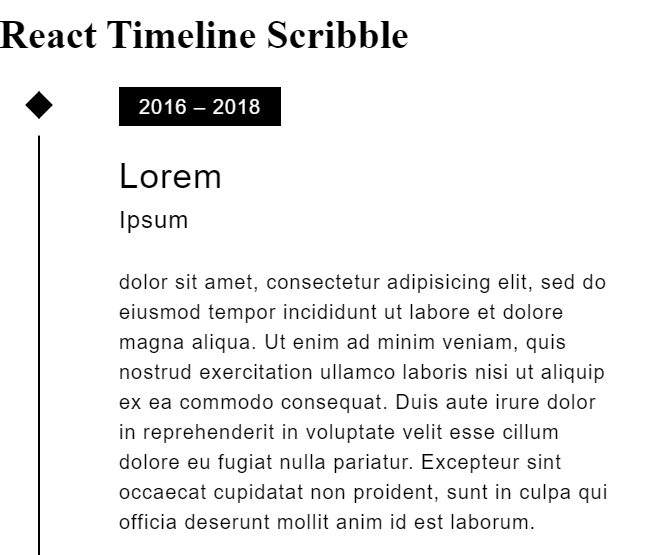
下圖是實際上看起來的樣子

這個 package 給了幾個 api 接口,分別是
interval={"年分"}
 title={"大標"}
subtitle={"副標"}
以及用  <Event>{"文章"}</Event>  包起來的內文部分
現在打開 about Page ,在昨天的基礎上進行改造吧
我們需要準備包含以上接口的資料,為了省時間我用假資料代替,大概長這樣:
let experience= [
    {
      year: "2016 Sep",
      title: "Lorem",
      subtitle: "Ipsum",
      post: "Bla bla bla bla bla bla bla bla bla bla bla bla bla bla bla bla bla",
    },
]
然後意思上複製個幾次就好,就可以稱版面哩。
接下來按照前幾次設計版面的思路來做,在about page 用 board 類的 component 包住內容 component,就會像這樣:
//about page
<InfoBoard pic={pic}> Experience here </InfoBoard>
然後由於 Timeline 本身不太需要照片來跟它搶版面,所以我們來魔改一下 InfoBoard 讓 timeline 可以適應吧:
 //Info board
import React from "react";
export default function InfoBoard({className,children,pic}) {
  return (
    <div className={className}>
      {children}
      <img alt=" " src={pic} />
    </div>
  );
}
InfoBoard.defaultProps={
  className:"board-nopic"
}
註:使用 defaultProps 的話可以預設參數,所以只要我不傳 classname 來改變預設參數的話,就不會有 pic ,很方便吧,詳細情況可以看 css。
接下來在 src/component 裡新增 Experience.js,並像之前做內容一樣,預設一些接口讓值可以流進來:
 //Experience
import React from "react";
import Title from "./Title";
import { Timeline, Event } from "react-timeline-scribble";
export default function Experience({ experience, title, className }) {
  return (
    <div className="experience">
      <Title title={title} className={className} />
      <div className="timeline">
        {experience.map((item, index) => {
          return (
            <Timeline key={index}>
              <Event
                interval={item.year}
                title={item.title}
                subtitle={item.subtitle}
              >
                {item.post}
              </Event>
            </Timeline>
          );
        })}
      </div>
    </div>
  );
}
註:timeline 這個 package 基本上沒有太難的用法,所以不多加贅述,就按照他的接口一個一個給他值就好了~
接下來回到 about page 把剛剛的假資料放進去,並實作 Experience 吧:
import React from "react";
import Banner from "../components/Banner";
import FeaturedBoard from "../components/FeaturedBoard";
import InfoBoard from "../components/InfoBoard";
import Experience from "../components/Experience";
export default function About() {

  let article = [...];
  let experience = [...];

  return (
    <div>
      <FeaturedBoard title="About Me" className="title">
        <Banner article={article} />
      </FeaturedBoard>
      <InfoBoard pic={null}>
        <Experience experience={experience} title="Experence" className="subtitle" />
      </InfoBoard>
    </div>
  );
}
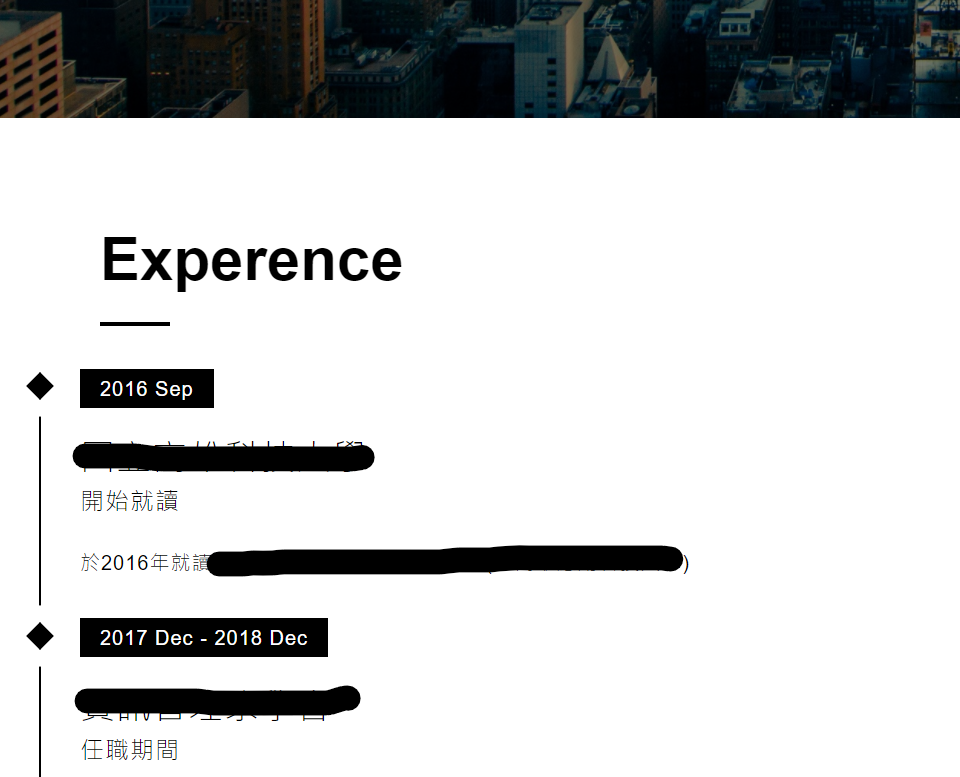
讓我們看一下畫面大致上長怎樣

註:我拿之前的資料來用,為了避嫌還是遮一下好了:P。
可以看到畫面出來了,接下來就偷個懶,把之前已經寫好的 component 組一組吧:
  //about page
  return (
    <div>
      <FeaturedBoard title="About Me" className="title">
        <Banner article={article} />
      </FeaturedBoard>
      <InfoBoard pic={null}>
        <Experience experience={experience} title="Experence" className="subtitle" />
      </InfoBoard>
      <InfoBoard pic={null}>
        <Article article={article} title="Something Else" className="subtitle" />
      </InfoBoard>
    </div>
  );
整體畫面應該就跟預想中的一樣,因為我每次截整頁的圖都會超過 2MB(上傳上限),就不特別傳過來了。
今天時間有點趕我怕會來不及所以就沒調甚麼 css 了,過幾天假日我再補好嗚嗚,請你們先忍受一下醜版面,喔對了其他要用 pic 的 infoboad 要自行加上 classname 當 props 喔,不然會沒有圖片。
我是 Chris ,今天把 about page 整頁補完了,鐵人賽也只剩一個禮拜,除了快解脫了之外,我也要趕快趕進度惹,希望來得即,明天將把最後一個 ui page 也補完,就可以講資料層的部分了~ 明天見!
