op.10 陰晴不定的 IoT
每當看到妳
總會思考妳此時此刻的心情
我想更清楚的知道
妳那富有情感的內心......
今天是一個慵懶的一天,依舊是睡好睡滿睡到下午才起床XD
哎呀,今天天氣到底怎麼樣呢?會不會太熱啊,有了 NodeMCU 就可以一鍵取得今天的天氣囉~是不是很棒呢XD
那就直接進入主題吧!
其實要取得天氣,要嘛就是去爬資料,要嘛就是透過相關的 API 取得資訊,而 NodeMCU 當然是選擇後者去取得資料,那這裡使用可以免費的限量使用網站來取得資料,這裡將使用 Openweathermap 來作為使用的 API 服務。
首先先來看看計價方式(先幫大家偷偷翻譯一下了)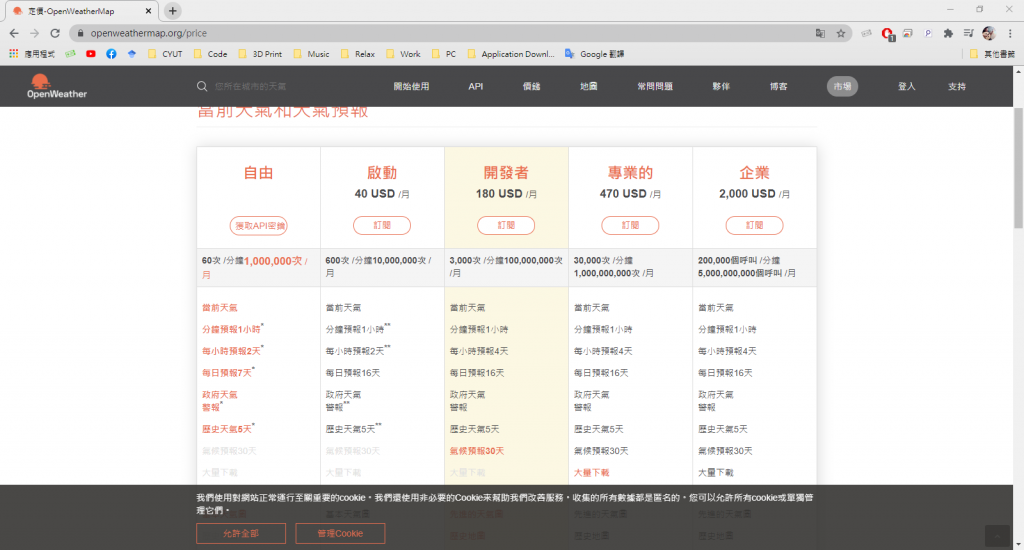
所以其實使用基本的就可以了,後期如果有需要也可以再自行升級方案。
第一步註冊帳號,詳細情形請參考這篇 文章,並且取得 API Key。
API Key 在登入後,可以點選 API keys 就可以看到了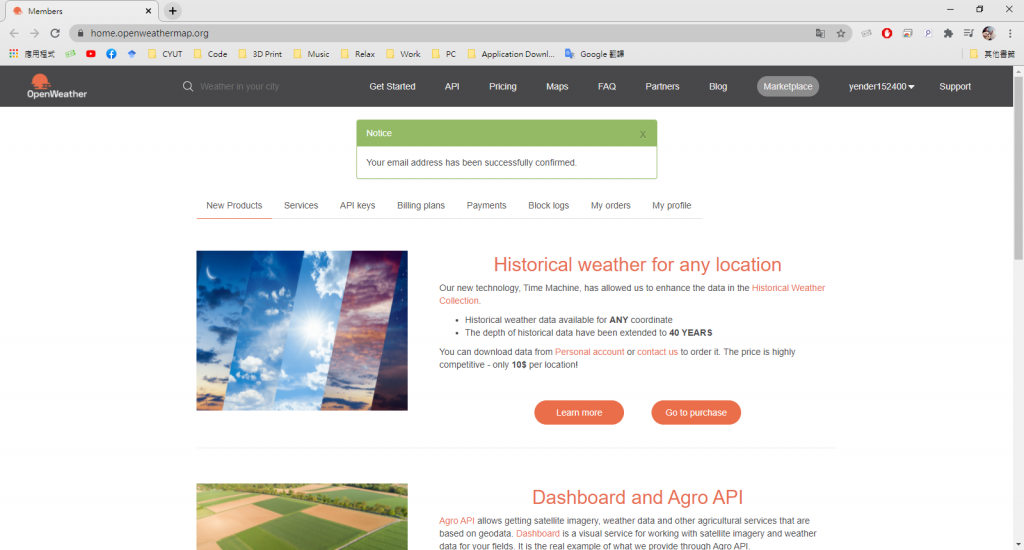
接下來需要研究這套 API 如何使用,這裡有詳細介紹 (Link)
這裡先試著取得一個位置的當前天氣
api.openweathermap.org/data/2.5/weather?q={city name}&appid={API key}
{city name}請替換成想取得的城市英文名。
{API key} 請替換成自己的 API Key。
範例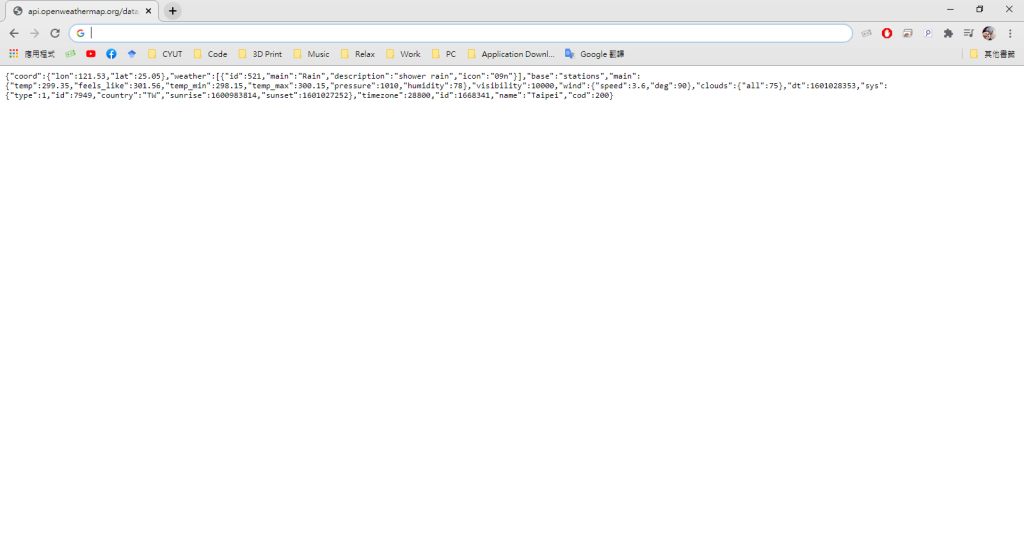
這裡可以從中可以看到許多的資訊,包含溫度、濕度、壓力、風、能見度等資訊。
那接下來就是要透過NodeMCU來去取得這包數據並且做拆解,準備進入程式碼的部分。
可以回頭看一下 op.7 Link我與Iot的心 裡的連接程式碼,今天會用到這個區塊的程式碼。
#include<ESP8266WiFi.h>

const char* ssid = "M408_Daniel";
const char* password = "derder152400";

void setup(){
  Serial.begin(115200);
  WiFi.mode(WIFI_STA);
  WiFi.begin(ssid, password);
  while (WiFi.status() != WL_CONNECTED) {
    delay(500);
    Serial.println(".");
  }
  Serial.println("WiFi connected");
}

void loop(){

}
需要新增新的程式庫 Arduino_JSON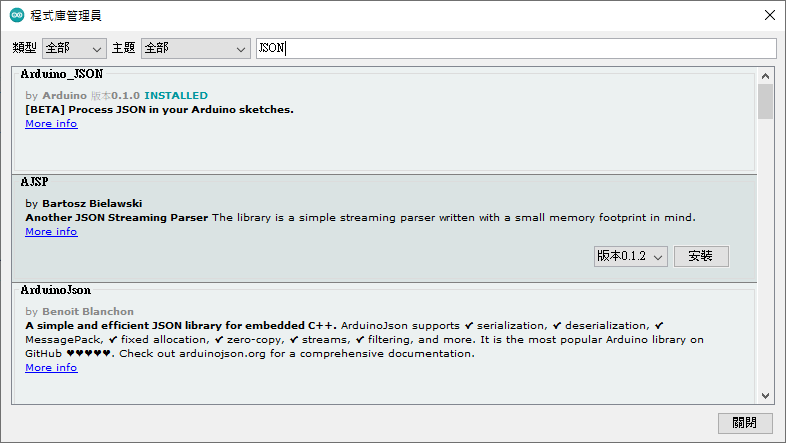
新增新的標頭檔
#include <ESP8266HTTPClient.h>
#include <WiFiClient.h>
#include <Arduino_JSON.h>
宣告五個字串變數與兩個整數。
String openWeatherMapApiKey = "你的API KEY";
String city = "城市";               //taipei
String countryCode = "國家簡碼";    //TW
String units="metric";             //單位格式
String jsonBuffer;

unsigned long lastTime = 0;
unsigned long timerDelay = 10000;
在loop裡我們需要新增取得剛剛網頁內容的程式碼。
  if ((millis() - lastTime) > timerDelay) {
    if(WiFi.status()== WL_CONNECTED){
      String serverPath = "http://api.openweathermap.org/data/2.5/weather?q=" + city + "," + countryCode + "&APPID=" + openWeatherMapApiKey;

      jsonBuffer = httpGETRequest(serverPath.c_str());
      Serial.println(jsonBuffer);
      JSONVar myObject = JSON.parse(jsonBuffer);

      if (JSON.typeof(myObject) == "undefined") {
        Serial.println("Parsing input failed!");
        return;
      }
      Serial.print("Temperature: ");
      Serial.println(myObject["main"]["temp"]);
      Serial.print("Pressure: ");
      Serial.println(myObject["main"]["pressure"]);
      Serial.print("Humidity: ");
      Serial.println(myObject["main"]["humidity"]);
      Serial.print("Wind Speed: ");
      Serial.println(myObject["wind"]["speed"]);
    }
    else {
      Serial.println("WiFi Disconnected");
    }
    lastTime = millis();
  }
另外,我們要來寫一段 http取得回應的程式碼。
String httpGETRequest(const char* serverName) {
  HTTPClient http;
  http.begin(serverName);
  int httpResponseCode = http.GET();

  String payload = "{}";

  if (httpResponseCode>0) {
    Serial.print("HTTP Response code: ");
    Serial.println(httpResponseCode);
    payload = http.getString();
  }
  else {
    Serial.print("Error code: ");
    Serial.println(httpResponseCode);
  }
  http.end();
  return payload;
}
最後整體的程式碼應該會長得像這樣
#include <ESP8266WiFi.h>
#include <ESP8266HTTPClient.h>
#include <WiFiClient.h>
#include <Arduino_JSON.h>

const char* ssid = "M408_Daniel";
const char* password = "derder152400";

String openWeatherMapApiKey = "5265a8a1c061ffcc7f9a4057b1557016";
String city = "taipei";
String countryCode = "TW";
String units= "metric";

unsigned long lastTime = 0;
unsigned long timerDelay = 10000;

String jsonBuffer;

void setup() {
  Serial.begin(115200);

  WiFi.begin(ssid, password);
  Serial.println("Connecting");
  while(WiFi.status() != WL_CONNECTED) {
    delay(500);
    Serial.print(".");
  }
  Serial.println("");
  Serial.print("Connected to WiFi network with IP Address: ");
  Serial.println(WiFi.localIP());
}

void loop() {
  if ((millis() - lastTime) > timerDelay) {
    if(WiFi.status()== WL_CONNECTED){
      String serverPath = "http://api.openweathermap.org/data/2.5/weather?q=" + city + "," + countryCode + "&APPID=" + openWeatherMapApiKey + "&units=" + units;
      jsonBuffer = httpGETRequest(serverPath.c_str());
      JSONVar myObject = JSON.parse(jsonBuffer);
      if (JSON.typeof(myObject) == "undefined") {
        Serial.println("Parsing input failed!");
        return;
      }
      Serial.print("Temperature: ");
      Serial.println(myObject["main"]["temp"]);
      Serial.print("Pressure: ");
      Serial.println(myObject["main"]["pressure"]);
      Serial.print("Humidity: ");
      Serial.println(myObject["main"]["humidity"]);
      Serial.print("Wind Speed: ");
      Serial.println(myObject["wind"]["speed"]);
    }
    else {
      Serial.println("WiFi Disconnected");
    }
    lastTime = millis();
  }
}

String httpGETRequest(const char* serverName) {
  HTTPClient http;
  http.begin(serverName);
  int httpResponseCode = http.GET();
  String payload = "{}";
  if (httpResponseCode>0) {
    Serial.print("HTTP Response code: ");
    Serial.println(httpResponseCode);
    payload = http.getString();
  }
  else {
    Serial.print("Error code: ");
    Serial.println(httpResponseCode);
  }
  http.end();
  return payload;
}
執行結果: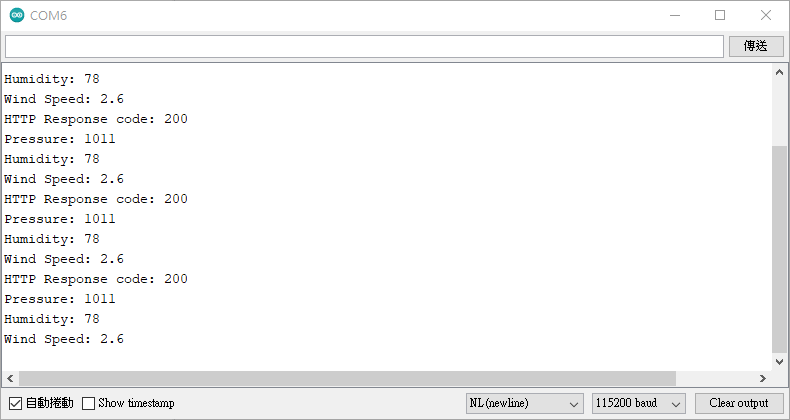
今天也一樣到這裡啦~感謝各位的收看!
