大家好,今天我們會用到跟先前不一樣的Widget有TabBar、indicator、IndexedStack以及TabController。
今天我們要繼續來做Series Detail的頁面。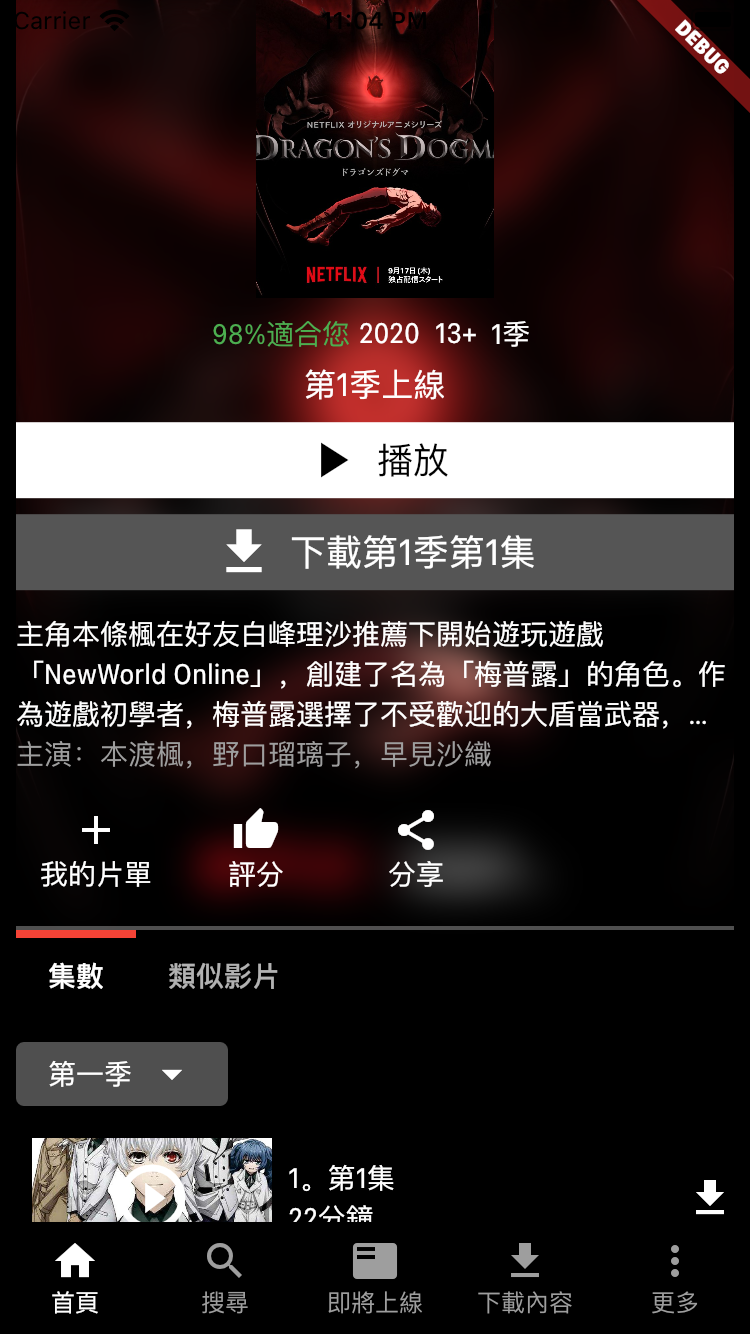
這邊要做的是選擇集數或者類似影片的這個TabBar,以下這是我們通常看到TabBar的範例。
這個範例的TabBar是放在Scaffold的AppBar的下方然後body帶TabBarView,並用DefaultTabController來控制頁面轉換
DefaultTabController(
  length: 2,
  child: MaterialApp(
    home: Scaffold(
      appBar: AppBar(
        bottom: TabBar(
          onTap: (index) {
           // Tab index when user select it, it start from zero
          },
          tabs: [
            Tab(icon: Icon(Icons.card_travel)),
            Tab(icon: Icon(Icons.add_shopping_cart)),
          ],
        ),
        title: Text('Tabs Demo'),
      ),
      body: TabBarView(
        children: [
          Center(
              child: Text(
            "0",
            style: TextStyle(fontSize: 40),
          )),
          Center(
              child: Text(
            "1",
            style: TextStyle(fontSize: 40),
          )),
        ],
      ),
    ),
  ),
);
不過今天我們是直接把這兩個放在ListView裡面,這邊要注意調整的是indicator,預設的indicator是顯示在下方的border,所以我們要修改它
我們給indicator BoxDecoration,在decoration內設置了一個上方的Border,就行了
TabBar(
              indicator: BoxDecoration(
                  border: Border(
                top: BorderSide(color: Colors.red, width: 4.0),
              )),
              controller: _tabController,
              tabs: [
                Tab(
                  text: "集數",
                ),
                Tab(
                  text: "類似影片",
                ),
              ],
              isScrollable: true,
              onTap: (int index) {
                setState(() {
                  selectedIndex = index;
                  _tabController.animateTo(index);
                });
              },
            ),
預設的indicator或label是自動變分配螢幕寬度,設定成scrollable之後就會看到它變小了
isScrollable: true,
直接使用TabController來控制TabBar,
  TabController _tabController;
  int selectedIndex = 0;
  @override
  void initState() {
    _tabController = TabController(
      initialIndex: selectedIndex,
      length: 2,
      vsync: this,
    );
    super.initState();
    generateEpisodes();
  }
點擊的時候做的事情就是更新selectedIndex,並且控制TabBar變化
 onTap: (int index) {
                setState(() {
                  selectedIndex = index;
                  _tabController.animateTo(index);
                });
              },
TabBar的部分處理好了,但是因為我要放在LisView的裡面,假如直接把TabBarView放入裡面會發生
flutter: Vertical viewport was given unbounded height.
flutter: Viewports expand in the scrolling direction to fill their container. In this case, a vertical
這個錯誤發生的原因是因為會造成無限的高,所以其中一個直接的解決方法是用SizedBox去限制高
但這不是我們想要的效果。這個問題困了我很久,最後找個下方這個方法可以解決。
也就不使用TabBarView改使用IndexedStack,A Stack that shows a single child from a list of children.
使用方法是在IndexedStack的children放入要顯示的集數列表或者類似影片列表
接著讓index放selectedIndex,它就會隨著我們的點擊去顯示兩種列表
 IndexedStack(
              children: [
                _buildAllEpisodes(),
                _buildRelatedSeries(),
              ],
              index: selectedIndex,
            ),
今天還做了每一集的code,因為跟先前介紹的差不多,就不多說了,程式碼給大家看看
Widget _buildAllEpisodes() {
    //集數或者類似影片
    return Column(
      children: [
        Align(
          alignment: Alignment.centerLeft,
          child: Container(
            margin: EdgeInsets.symmetric(vertical: 8.0),
            decoration: BoxDecoration(
                color: Colors.grey.withOpacity(0.5),
                borderRadius: BorderRadius.circular(4.0)),
            padding: EdgeInsets.symmetric(horizontal: 16.0, vertical: 4.0),
            child: Row(
              mainAxisSize: MainAxisSize.min,
              children: [
                Padding(
                  padding: const EdgeInsets.only(right: 8.0),
                  child: Text("第一季"),
                ),
                Icon(Icons.arrow_drop_down),
              ],
            ),
          ),
        ),
        for (Episode i in _listEpisodes) _buildEachEpisode(i),
      ],
    );
  }


  _buildEachEpisode(Episode data) {
    //每一集的樣子
    return Column(
      mainAxisSize: MainAxisSize.min,
      children: [
        Row(
          mainAxisSize: MainAxisSize.min,
          children: [
            Stack(
              alignment: Alignment.center,
              children: [
                Padding(
                  padding: const EdgeInsets.all(8.0),
                  child: Image.asset(
                    data.imageAssetsName,
                    width: 120,
                    height: 60,
                    fit: BoxFit.cover,
                  ),
                ),
                Icon(
                  Icons.play_circle_outline,
                  size: 40.0,
                )
              ],
            ),
            Expanded(
                child: Column(
              crossAxisAlignment: CrossAxisAlignment.start,
              children: [Text("${data.name}"), Text("${data.duration}")],
            )),
            Icon(Icons.file_download)
          ],
        ),
        Text(
          data.description,
          maxLines: 3,
          overflow: TextOverflow.ellipsis,
          style: TextStyle(fontSize: 12),
        ),
        SizedBox(
          height: 8.0,
        )
      ],
    );
  }

今日完成之效果圖
GitHub連結: flutter-netflix-clone