今天來介紹一個新的服務 Amazon Elastic Container Service 通常簡稱它為 ECS,它是一個可以幫助使用者建置微服務叢集的服務,它可以同時使用三種不同的機器 Amazon EC2、AWS Fargate 與 Spot 做一個混搭,我覺得是一個滿用的服務,如果服務的大小沒有龐大到需要用到 Amazon Elastic Kubernetes Service(Amazon EKS)其實可以考慮使用 ECS 就好

今天會先用比較簡單的方法先說明 ECS 叢集
要建立 ECS 服務之前要先建立一個 ECS 叢集,可以把這個叢集當成是一個管理器而它不用另外付費這點與 EKS 不太一樣,而建立完成如下:

其實 CDK 封裝的很簡單,只要實體化它就 OK 了!而命名方法一樣會由 CDK 會用我們的 id 去自動產生
import * as ecs from "@aws-cdk/aws-ecs";

const cluster = new ecs.Cluster(this, "EcsCluster", { vpc });
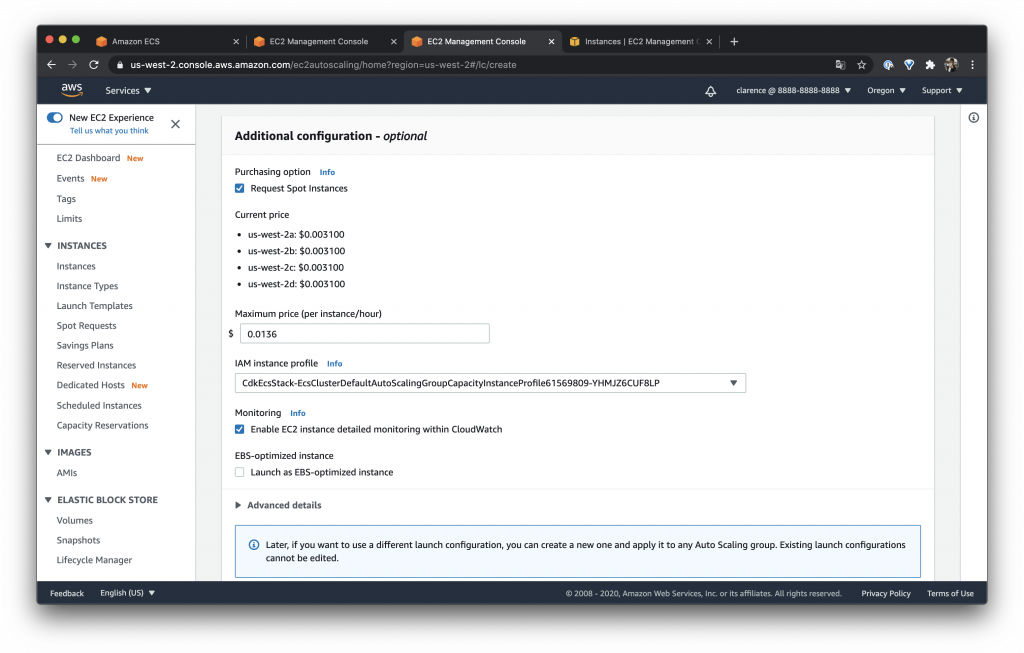
在 ECS 中我們可以用 ECS 裡面提供的 addCapacity 來建立我們的 EC2 機器,我們可以在裡面選擇機器的等級、數量與 Image 等 ...... 另外還可以宣告它是 spot,像是此範例宣告的機器等級是 m3.micro,它每小時的價錢是 $0.0136 所以我這邊就設定他的 spot price 為 0.0136,在這邊 AWS 會使用目前最便宜的價錢來計算所以 spot price 只要使用一個大概價錢就好
const autoScalingGroup = cluster.addCapacity(
  "DefaultAutoScalingGroupCapacity",
  {
    instanceType: ec2.InstanceType.of(
      ec2.InstanceClass.T3,
      ec2.InstanceSize.MICRO
    ),
    minCapacity: 1,
    desiredCapacity: 1,
    maxCapacity: 6,
    machineImage: ecs.EcsOptimizedImage.amazonLinux2(),
    spotPrice: "0.0136",
    spotInstanceDraining: true,
  }
);
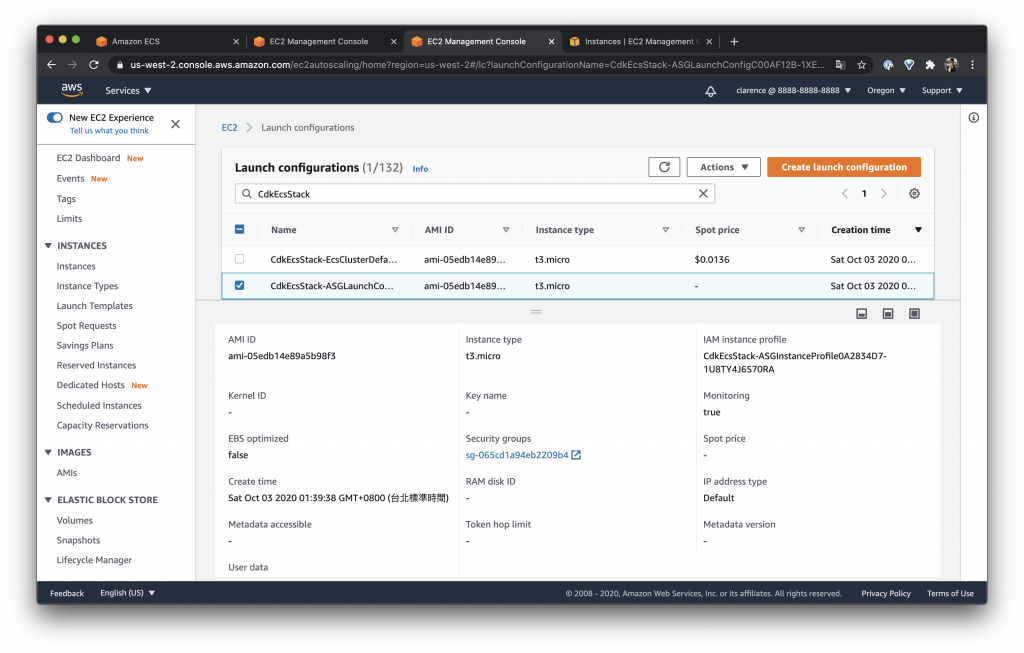
部署完後我們可以在 Launch configurations 看到目前的設定與 Spot price 的費用
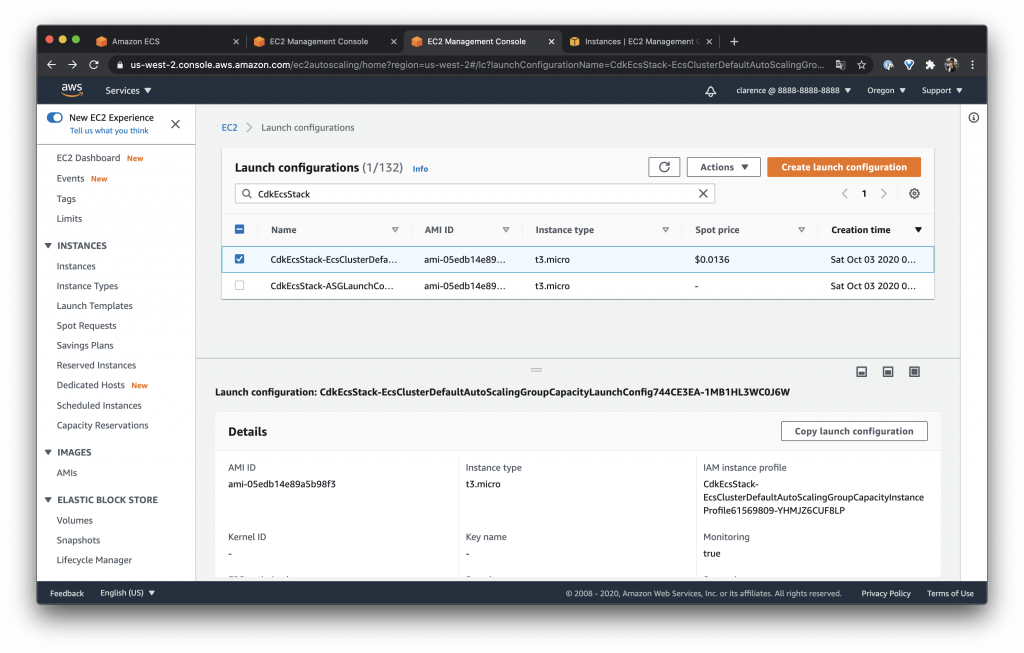
而如果想要看目前的價錢可以按 Copy launch configuration 就可以看到目前的 spot 價錢了
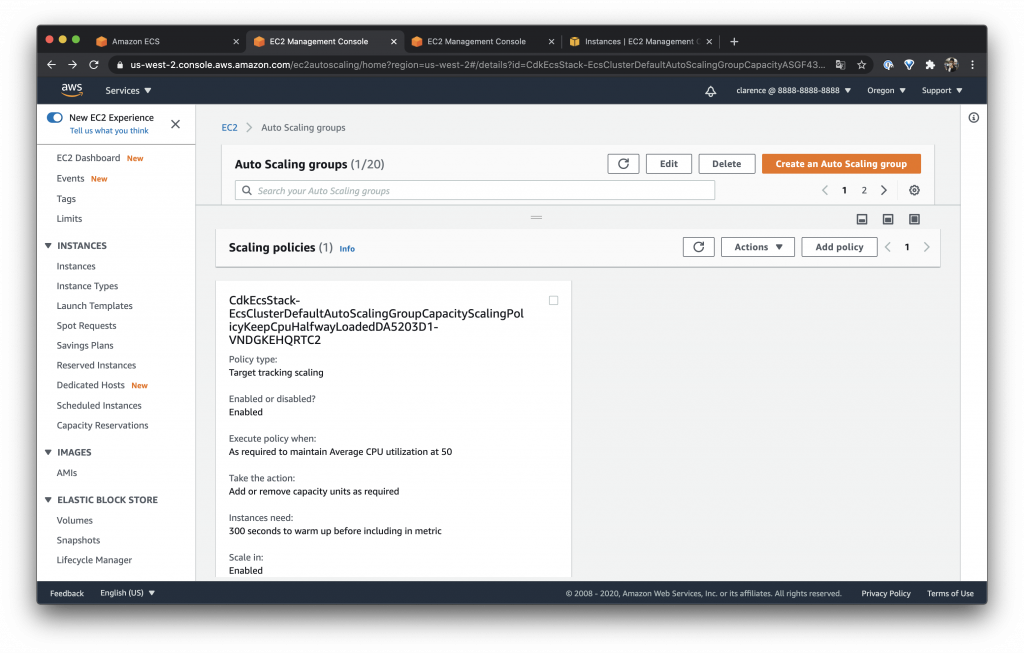
如此的設定其實沒有設定目前在什麼情況下會做擴展,所以我們還是需要對它設定一下,以目前的需求設定 CPU 50% 好了!
autoScalingGroup.scaleOnCpuUtilization("KeepCpuHalfwayLoaded", {
  targetUtilizationPercent: 50,
});
設定完後一樣可以在 Auto Scaling groups -> Automatic scaling 看到結果
另外可以在 ASG 看一下 ECS 預設的 User Data
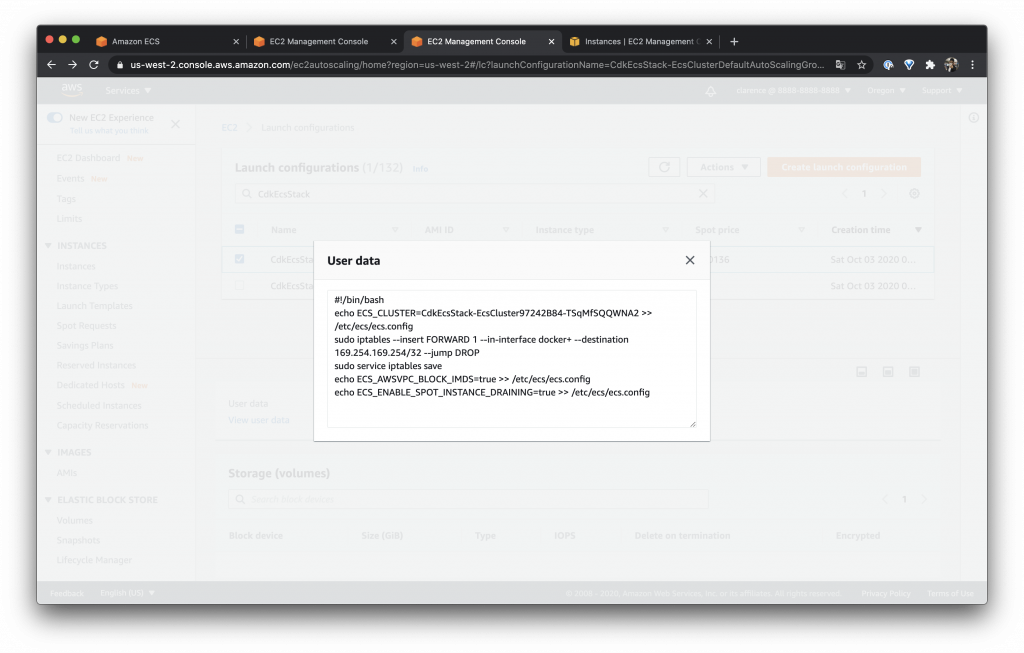
#!/bin/bash
echo ECS_CLUSTER=CdkEcsStack-EcsCluster97242B84-TSqMfSQQWNA2 >> /etc/ecs/ecs.config
sudo iptables --insert FORWARD 1 --in-interface docker+ --destination 169.254.169.254/32 --jump DROP
sudo service iptables save
echo ECS_AWSVPC_BLOCK_IMDS=true >> /etc/ecs/ecs.config
除了原本 ECS 提供的方法之外我們其實還可以自己使用 autoscaling 建立一個擴展機制,建立多個的原因是可以能不同場合可以設定不同的機器大小或是不同條件來讓整個叢集可以更符合實際情況
const asg = new autoscaling.AutoScalingGroup(this, "ASG", {
  instanceType: ec2.InstanceType.of(
    ec2.InstanceClass.T3,
    ec2.InstanceSize.MICRO
  ),
  machineImage: ecs.EcsOptimizedImage.amazonLinux2(),
  updateType: autoscaling.UpdateType.REPLACING_UPDATE,
  minCapacity: 1,
  desiredCapacity: 1,
  maxCapacity: 6,
  vpc,
});
建立完後加入到 ECS
cluster.addAutoScalingGroup(asg);
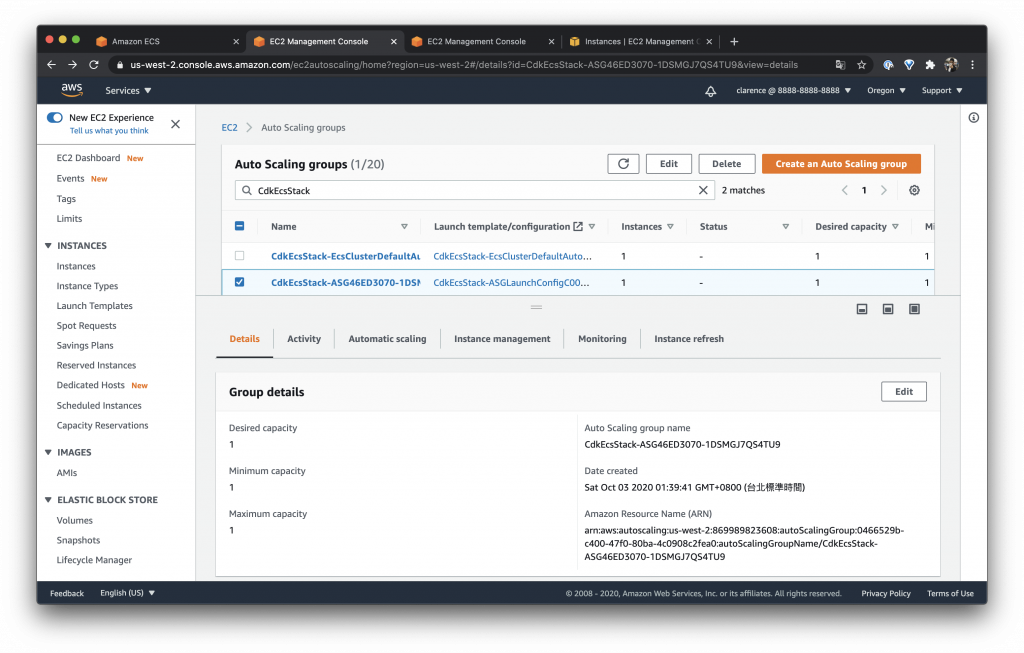
可以在 Auto Scaling groups 看到設定
Launch configurations 看到 Spot price 是空的,代表它不是 spot,通常我們不會把所有機器都做成 spot 畢竟 spot 機器有一定的機率會被抽走,這樣可能就會造成服務有中斷的風險
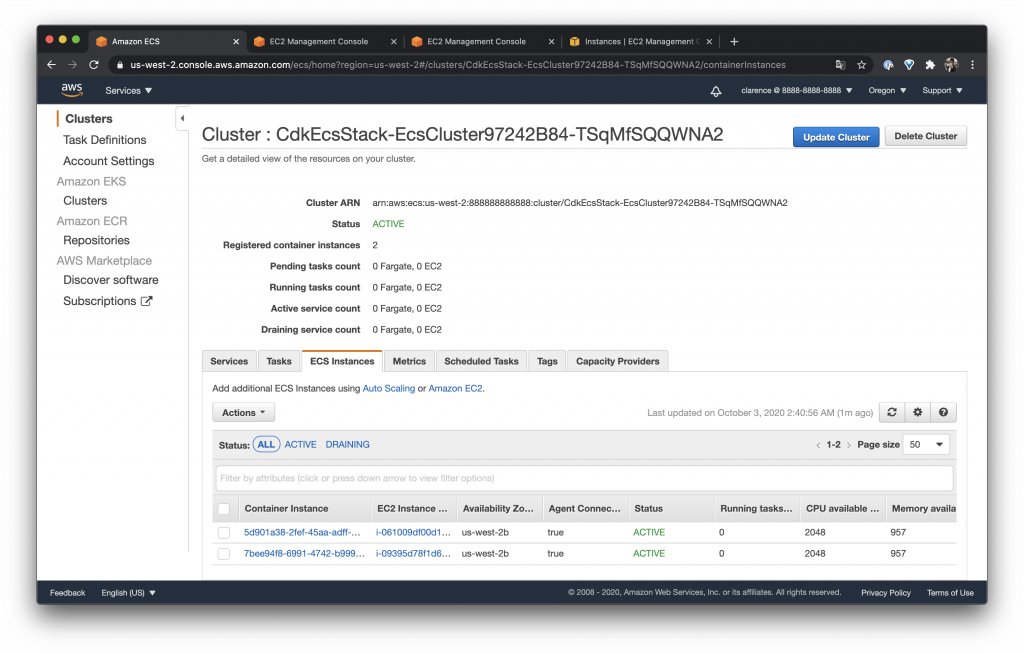
最後可以到 ECS Instances 看一下註冊上去的機器
const vpc = new ec2.Vpc(this, "Vpc", { maxAzs: 3, natGateways: 1 });

const cluster = new ecs.Cluster(this, "EcsCluster", { vpc });

const autoScalingGroup = cluster.addCapacity(
  "DefaultAutoScalingGroupCapacity",
  {
    instanceType: ec2.InstanceType.of(
      ec2.InstanceClass.T3,
      ec2.InstanceSize.MICRO
    ),
    minCapacity: 1,
    desiredCapacity: 1,
    maxCapacity: 6,
    machineImage: ecs.EcsOptimizedImage.amazonLinux2(),
    spotPrice: "0.0136",
    spotInstanceDraining: true,
  }
);
autoScalingGroup.scaleOnCpuUtilization("KeepCpuHalfwayLoaded", {
  targetUtilizationPercent: 50,
});

const asg = new autoscaling.AutoScalingGroup(this, "ASG", {
  instanceType: ec2.InstanceType.of(
    ec2.InstanceClass.T3,
    ec2.InstanceSize.MICRO
  ),
  machineImage: ecs.EcsOptimizedImage.amazonLinux2(),
  updateType: autoscaling.UpdateType.REPLACING_UPDATE,
  desiredCapacity: 1,
  vpc,
});

cluster.addAutoScalingGroup(asg);
今天的說明是 ECS Cluster 希望有幫助到大家!
文章內容主要是網路或是程式開發類型的文章
本文同步刊載於 Clarence 部落格:Day 19 - CDK 建置 Amazon Elastic Container Service(ECS)Cluster
「AWS CDK 完全學習手冊:打造雲端基礎架構程式碼 IaC」
本書改編並延伸自第 12 屆 iT 邦幫忙鐵人賽獲得 DevOps 組冠軍的《用 CDK 定義 AWS 架構》系列文章,以簡單、好讀的行文風格詳述技術細節,並提供完整的程式碼範例與說明,一步一步帶領新手從零開始踏上 AWS CDK 技術達人之路。有興趣的朋友歡迎至天瓏書局選購!
