把Image比喻做Class則Container就是Object,Container就是實際Docker上的貨櫃,裝載一個一個的Application。
承接昨天的文章,我們已經建立好了一個appache image。我們看看如何docker 有哪些重要指令:
docker ps -a 查看目前所有container (不論有無運行)docker rm -fv <Container Id> 刪除container,-f是強制刪除正在運行的container (不然一般要先停止container),-v 是刪除這個container的volumedocker inspect <Container Id> 查看Container詳細資訊docker logs <Container Id> 查看Container執行logdocker start <Container Id> 啟動Containerdocker stop <Container Id> 停止Containerdocker restart <Container Id> 重新啟動Containerdocker run <OPTIONS> <ImageName>:<tag> 建立新的Container
建立新的container有很多重要的參數,可以參考這這裡,我在下面寫一些重要的參數
-d 背景執行-it 可以用terminal交互-w <Inside_dir> 指定工作目錄-v <Outside_dir>:<Inside_dir> 指定volume位置-p <Outside_port>:<Inside_port> 指定開放port--name <Name> 指令Container名稱 (不指定就是Container隨便給)舉個例子,開啟上一篇的apache服務,port外部8080映射內部80,將container取名為Web_APPdocker run -d -it -p 8080:80 --name Web_APP httpd:2.4

打開你的瀏覽器,輸入http://localhost:8080,可以發現電腦的8080 port正運行默認的Apache !!! It works !!! 太神奇啦,我們電腦沒有安裝任何Web Server居然也能運行 !!!
可以把Container當作是一個獨立運行的簡化系統,所以也可以進去裡面進行操作。
docker exec -it <Container ID> bash 進入運行中的Container當然也有一些重要參數
-u root 用root身分進入進入container後默認會在Container的workdir內。你可以改裡面的檔案,不過默認是沒有vim、nano的,透過一下指令安裝:
apt-get install
apt-get install vim
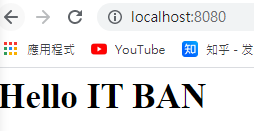
以剛剛的apache container,網頁會在/usr/local/apache2/htdocs/index.html,進入修改成<h1>Hello IT BAN</h1>,ctrl+F5重新整理http://localhost:8080
當然實際上不用這麼麻煩要進入裡面修改程式,之後文章教你怎麼內外部檔案映射。
我們可以將修改好的container輸出成image,讓其他人使用,imageName必須全部小寫。
docker commit <Container ID> <imageName>
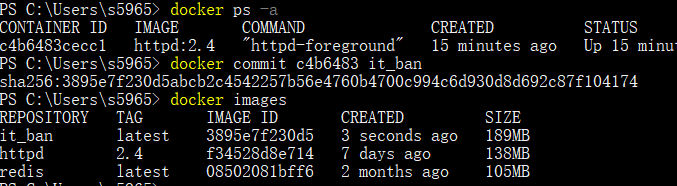
如上圖,下一次別人使用你的image後就會發現內容被修改過了。