在大部分的網站中,上傳圖片也是很重要的功能,今天我們就來實作。
(註:這是用 Blazor Server 的方式,但最好不要上傳太多檔案,所以限定上傳4張照片的話就會提示,畢竟這些事都是在伺服器上做,負擔太大,微軟也建議用 .NET Core API 的方式實作)
我們先建立一個 Component FileUpload。
下面程式碼為FileUpload.razor,使用 Blazor 提供的 Component <InputFile>,multiple代表可以傳送多個檔案
@page "/FileUpload"

<div>
    <div>
        <InputFile OnChange="OnChange" multiple></InputFile>
    </div>
    <div>
        <MyButton value="Submit" class="btn btn-primary" type="submit" @onclick="OnSubmit" />
    </div>
</div>
@if (ImageList != null)
{
    <table>
        <tr>
            @foreach (var img in ImageList)
            {
                <td>
                    <img src="@img" width="150" height="150" />
                </td>
            }
        </tr>
    </table>
}
下面程式碼為FileUpload.razor.cs,這裡用partial class
using BlazorServer.ViewModels;
using Microsoft.AspNetCore.Components;
using Microsoft.AspNetCore.Components.Forms;
using Microsoft.AspNetCore.Hosting;
using Microsoft.JSInterop;
using System;
using System.Collections.Generic;
using System.IO;
using System.Linq;
using System.Text.Json;
using System.Threading.Tasks;
namespace BlazorServer.Shared
{
public partial class FileUpload
{
[Inject] protected IJSRuntime js { get; set; }
//用以判斷runtime期間在什麼環境執行
[Inject] protected IWebHostEnvironment env { get; set; }
private JsInteropClasses jsClass;
public List<string> ImageList = new List<string>();
//取得`<InputFile>`的檔案內容
public IReadOnlyList<IBrowserFile> ImgFiles;
public string ImgSrc;
protected override Task OnInitializedAsync()
{
jsClass = new(js);
return base.OnInitializedAsync();
}
public async Task OnChange(InputFileChangeEventArgs e)
{
ImageList = new List<string>();
string format = "image/jpeg";
//取得檔案
ImgFiles = e.GetMultipleFiles();
foreach (var file in ImgFiles)
{
//將圖片內容轉換成指定類型及最大尺寸
var imageFile = await file.RequestImageFileAsync(format, 1280, 960);
//利用 Stream 讀取圖片內容
using var fileStream = imageFile.OpenReadStream();
//將 Stream 讀到記憶體中,如果沒有要上傳前預覽就不要這麼做,以免耗費記憶體
using var memoryStream = new MemoryStream();
await fileStream.CopyToAsync(memoryStream);
ImgSrc = $"data:{format};base64,{Convert.ToBase64String(memoryStream.ToArray())}";
//以 Data URI 的方式將圖片呈現
ImageList.Add(ImgSrc);
}
}
public async Task OnSubmit()
{
//將提示訊息變成 ViewModel
SweetConfirmViewModel sweetConfirm = new SweetConfirmViewModel()
{
RequestTitle = "是否確定上傳圖片?",
ResponseTitle = "上傳成功",
};
string jsonString = JsonSerializer.Serialize(sweetConfirm);
bool result = await jsClass.Confirm(jsonString);
if (result && ImgFiles.Any())
{
long maxFileSize = 1024 * 1024 * 15;
//指定圖片要存到哪個路徑
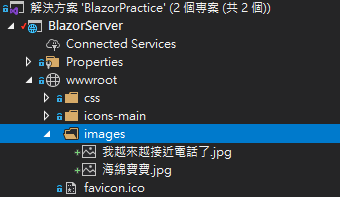
string folder = $@"{env.WebRootPath}\images";
foreach (var file in ImgFiles)
{
//使用 Stream 將檔案存到指定路徑
using (var stream = file.OpenReadStream(maxFileSize))
{
//如果資料夾不在會先建立
Directory.CreateDirectory(folder);
var path = $@"{env.WebRootPath}\images\{file.Name}";
//建立檔案
FileStream fs = File.Create(path);
//將圖片 Stream 複製到檔案中
await stream.CopyToAsync(fs);
//Stream 用完一定要關閉
stream.Close();
fs.Close();
}
}
}
}
}
}
為了方便,NavMenu.razor.cs加上路由通往這個 Component
        <li class="nav-item px-3">
            <NavLink class="nav-link" href="FileUpload" Match="NavLinkMatch.All">
                <span class="bi bi-card-image h4 p-2 mb-0" aria-hidden="true"></span> File Upload
            </NavLink>
        </li>
建立新的 ViewModel 讓SweetConfirm可以通用
namespace BlazorServer.ViewModels
{
    public class SweetConfirmViewModel
    {
        public string RequestTitle { get; set; }
        public string RequestText { get; set; }
        public string ResponseTitle { get; set; }
        public string ResponseText { get; set; }
    }
}
再把_Host.cshtml的SweetConfirm修改一下
        function SweetConfirm(jsonString) {
			// 這邊要 parse 才能正常轉回來
            var arg = JSON.parse(jsonString);
            return new Promise((resolve) => {
                Swal.fire({
                    title: arg.RequestTitle,
                    text: arg.RequestText,
                    icon: "warning",
                    showCancelButton: true,
                    cancelButtonText: "取消",
                    confirmButtonColor: "#3085d6",
                    cancelButtonColor: "#d33",
                    confirmButtonText: "確定"
                }).then((result) => {
                    resolve(result.isConfirmed);
                    if (result.isConfirmed) {
                        Swal.fire(
                            arg.ResponseTitle,
                            arg.ResponseText,
                            "success"
                        );
                    }
                })
            });
        }
既然這邊改了,PostBase.razor.cs的deletePost也要修改
        protected async Task deletePost()
        {
            // 改成 ViewModel
            SweetConfirmViewModel sweetConfirm = new SweetConfirmViewModel()
            {
                RequestTitle = $"是否確定刪除日誌{Post.Title}?",
                RequestText = "這個動作不可復原",
                ResponseTitle = "刪除成功",
                ResponseText = "日誌被刪除了",
            };
            string jsonString = JsonSerializer.Serialize(sweetConfirm);
            bool result = await jsClass.Confirm(jsonString);

            if (result)
            {
                var deleted = await PostRepository.DeletePost(Post.PostId);
                if (deleted.IsSuccess)
                {
                    await getPostId.InvokeAsync(Post.PostId);
                }
                else
                {
                    await jsClass.Alert(deleted.Message);
                }
            }
        }
JsInteropClasses.cs的Confirm()改成 JSON 字串
        public async ValueTask<bool> Confirm(string jsonString)
        {
            bool confirm = await js.InvokeAsync<bool>("SweetConfirm", jsonString);
            return confirm;
        }
可以看到圖片上傳成功了

Ref: ASP.NET Core Blazor file uploads
Ref: Upload Files Using InputFile Component In Blazor
Ref:What scope does a using statement have without curly braces
Ref:BrowserFileExtensions.RequestImageFileAsync(IBrowserFile, String, Int32, Int32) 方法
Ref:Day 26:Blazor WebAssembly 上傳檔案

