本系列文已改編成書「Arduino 自造趣:結合 JavaScript x Vue x Phaser 輕鬆打造個人遊戲機」,本書改用 Vue3 與 TypeScript 全面重構且加上更詳細的說明,
在此感謝 iT 邦幫忙、博碩文化與編輯小 p 的協助,歡迎大家前往購書,鱈魚在此感謝大家 (。・∀・)。
若想 DIY 卻不知道零件去哪裡買的讀者,可以參考此連結 。( •̀ ω •́ )✧
電子助教:「這個標題...我聞到了停刊的味道... (́⊙◞౪◟⊙‵)」
這個章節開始我們要建立「數位功能 I/O 視窗」。
簡單來說就是 0 與 1,只有開與關兩種狀態的訊號。問題來了,所以到底要怎麼用電壓表示 0、1?電壓不是可以連續變化嗎?
將連續變化的電壓定義為 0 或 1,這個過程我們稱之為「邏輯電壓準位」。
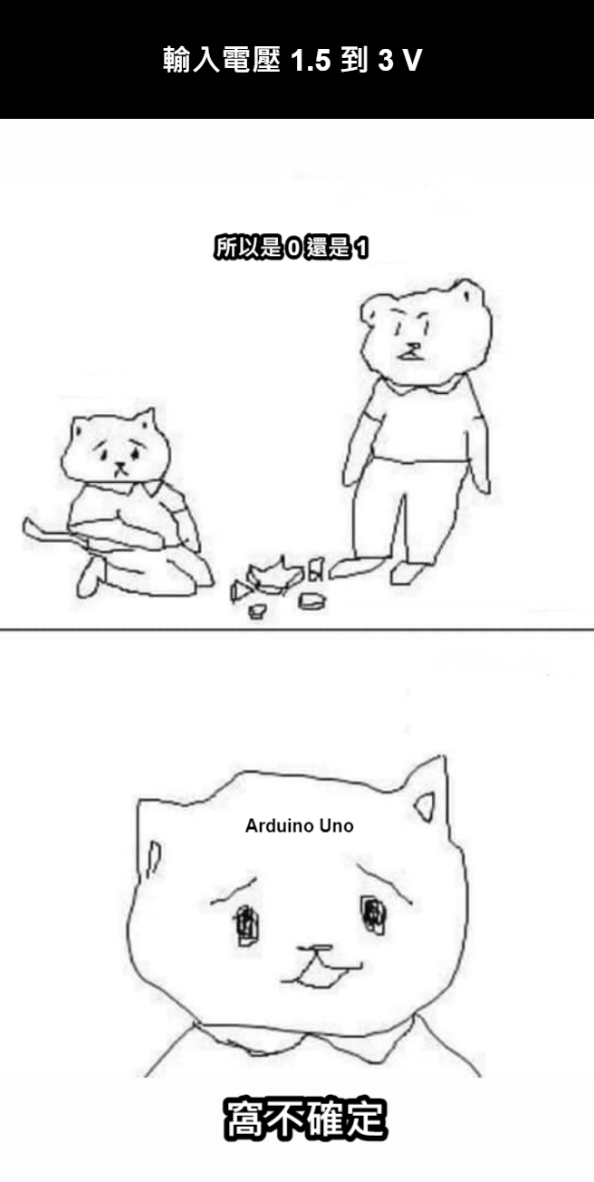
以 Arduino Uno 為例,若輸入電壓在 0.5 到 1.5 V 之間,則判斷為 0;3 到 5.5 V 之間,則判斷為 1。
1.5 到 3 V 這個區間稱之為「不確定」區間,意思是如果輸入電壓在這之間,Arduino Uno 不能保證讀取到的狀態到底是 0 還是 1。
若有興趣想了解更深入的說明,可以參考以下連結。
從 protocol 我們可以知道腳位模式等等資訊都是數值代號,無法直覺閱讀,所以我們建立一個轉換 firmata 資訊的工具,並設計每個模式對應的顏色(使用 Quasar Color Palette)。
src\script\utils\firmata.utils.js
const pinModeDefinition = [
  {
    code: 0x00,
    key: 'digitalInput',
    name: 'Digital Input',
    color: 'light-blue-3',
  },
  {
    code: 0x01,
    key: 'digitalOutput',
    name: 'Digital Output',
    color: 'cyan-3',
  },
  {
    code: 0x02,
    key: 'analogInput',
    name: 'Analog Input',
    color: 'red-4',
  },
  {
    code: 0x03,
    key: 'pwm',
    name: 'PWM',
    color: 'light-green-4',
  },
  {
    code: 0x04,
    key: 'servo',
    name: 'Servo',
    color: 'blue-5',
  },
  {
    code: 0x05,
    key: 'shift',
    name: 'Shift',
    color: 'purple-3',
  },
  {
    code: 0x06,
    key: 'i2c',
    name: 'I2C',
    color: 'green-4',
  },
  {
    code: 0x07,
    key: 'onewire',
    name: 'Onewire',
    color: 'indigo-4',
  },
  {
    code: 0x08,
    key: 'stepper',
    name: 'Stepper',
    color: 'lime-4',
  },
  {
    code: 0x09,
    key: 'encoder',
    name: 'Encoder',
    color: 'yellow-4',
  },
  {
    code: 0x0A,
    key: 'serial',
    name: 'Serial',
    color: 'amber-5',
  },

  {
    code: 0x0B,
    key: 'inputPullup',
    name: 'Input Pullup',
    color: 'teal-3',
  },
  {
    code: 0x0C,
    key: 'spi',
    name: 'SPI',
    color: 'amber-4',
  },
  {
    code: 0x0D,
    key: 'sonar',
    name: 'Sonar',
    color: 'orange-4',
  },
  {
    code: 0x0E,
    key: 'tone',
    name: 'Tone',
    color: 'deep-orange-4',
  },
  {
    code: 0x0F,
    key: 'dht',
    name: 'DHT',
    color: 'brown-3',
  },
];

export const PinMode = {
  /** 數位輸入 : 0x00 */
  DIGITAL_INPUT: 0x00,
  /** 數位輸出 : 0x01 */
  DIGITAL_OUTPUT: 0x01,
  /** 類比輸入 : 0x02 */
  ANALOG_INPUT: 0x02,
  /** PWM : 0x03 */
  PWM: 0x03,
  /** 數位上拉輸入 : 0x0B */
  INPUT_PULLUP: 0x0B,
}

export default {
  getDefineByCode(mode) {
    const target = pinModeDefinition.find((item) => item.code === mode);
    if (!target) {
      return null;
    }

    return target;
  },
};
將 window-example.vue 複製一份後改個名字,建立 src\components\window-digital-io.vue。
<template lang="pug">
base-window.window-digital-io(
  :pos='pos',
  headerIconColor='teal-3',
  body-class='c-col p-20px pt-20px',
  title='數位 I/O 功能'
)
</template>

<style lang="sass">
.window-digital-io
  width: 330px
  height: 440px
</style>

<script>
import BaseWindow from '@/components/base-window.vue';

export default {
  name: 'WindowDigitalIo',
  components: {
    'base-window': BaseWindow,
  },
  props: {
    pos: {
      type: Object,
      default() {
        return {
          x: 0,
          y: 0,
        };
      },
    },
  },
  data() {
    return {
      id: this.$vnode.key,
    };
  },
  provide() {
    return {
      id: this.id,
    };
  },
  computed: {},
  watch: {},
  created() {},
  mounted() {},
  methods: {},
};
</script>
可以觀察到 props 中的 pos 在每個 wnidow 都會使用,所以抽離、獨立成 mixin。
src\mixins\mixin-window.js
/**
 * 標準 window 共用內容
 */

export default {
  props: {
    pos: {
      type: Object,
      default() {
        return {
          x: 0,
          y: 0,
        };
      },
    },
  },
}
window-digital-io.vue 加入 mixin-window.js 並移除 props 原本的 pos。
src\components\window-digital-io.vue <script>
import BaseWindow from '@/components/base-window.vue';
import mixinWindow from '@/mixins/mixin-window';

export default {
  name: 'WindowDigitalIo',
  components: {
    'base-window': BaseWindow,
  },
  mixins: [mixinWindow],
  props: {},
  data() {
    return {
      id: this.$vnode.key,
    };
  },
  provide() {
    return {
      id: this.id,
    };
  },
  computed: {},
  watch: {},
  created() {},
  mounted() {},
  methods: {},
};
回到 app.vue,將右鍵選單內的「範例視窗」改為新增「數位 I/O 視窗」,並引入組件。
src\app.vue <template lang="pug">
.screen(@click='handleClick')
  // ...

	// 右鍵選單
  q-menu(context-menu, content-class='border-radius-s')
    q-list.min-w-260px
      q-item(@click='addWindow("window-digital-io")', clickable, v-close-popup)
        q-item-section
          | 新增「數位 I/O 視窗」
src\app.vue <script>
// ...

import WindowDigitalIo from '@/components/window-digital-io.vue';

export default {
  name: 'App',
  components: {
    'dialog-system-setting': DialogSystemSetting,
    'window-digital-io': WindowDigitalIo,
  },
  // ...
};
稍微規劃一下 UI 呈現。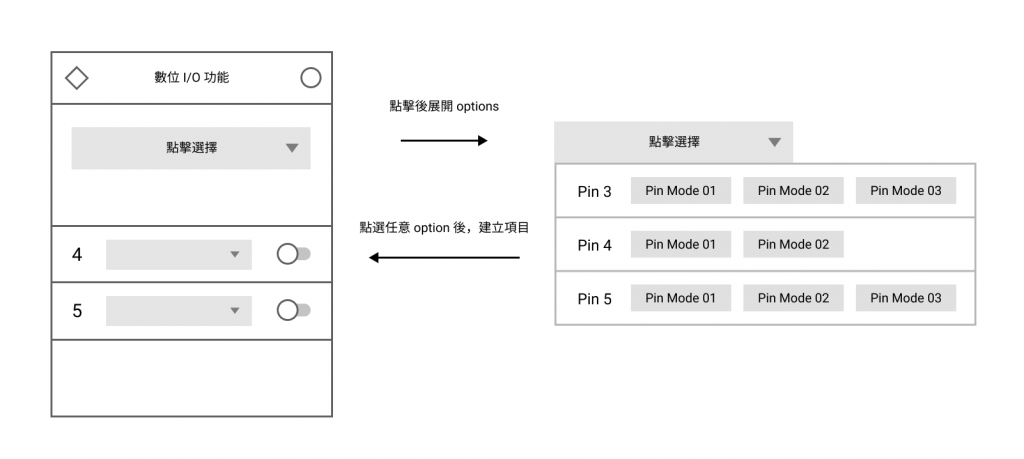
首先需要設計「選擇 pin 腳的下拉選單」,功能預計如下:
v-model 綁定選擇數值,也可以選取後 emit 選擇項目。建立 base-select-pin.vue,使用並魔改 Quasar Select 組件。
src\components\base-select-pin.vue <template lang="pug">
q-select.text-shadow.base-select-pin(
  :value='value',
  use-input,
  :bg-color='color',
  :color='color',
  :clearable='clearable',
  :options='filterOptions',
  :placeholder='placeholderText',
  :input-debounce='0',
  :option-label='calcOptionLabel',
  rounded,
  outlined,
  hide-dropdown-icon,
  dense,
  input-class='text-center font-black placeholder-black',
  popup-content-class='border-radius-m',
  @filter='filterFn'
)
  template(v-slot:no-option)
    // 替換 option 為空時,顯示的內容
    q-item.py-10px.border-b-1.text-red.text-center
      q-item-section(v-if='pins.length === 0')
        q-item-label
          | 無腳位資料
      q-item-section(v-else)
        q-item-label
          | 無符合關鍵字的腳位

  template(v-slot:option='{ opt }')
    // 自定 option 內容
    q-item.py-10px.border-b-1(
      @click='handleClick(opt)',
      dense,
      clickable,
      v-close-popup,
      :key='opt.number'
    )
      // 顯示腳位編號
      q-item-section(avatar)
        q-item-label.c-row.items-end.font-orbitron.w-50px.text-grey-8
          .text-14px.mr-4px.text-grey
            | Pin
          .text-20px.font-100
            | {{ opt.label }}

      // 顯示腳位模式
      q-item-section
        q-item-label
          q-chip.text-shadow-md.font-700(
            v-for='chip in opt.chips',
            rounded,
            size='md',
            :color='chip.color',
            text-color='white',
            :key='chip.name'
          )
            | {{ chip.name }}
src\components\base-select-pin.vue <style lang="sass">
@import '@/styles/quasar.variables.sass'

.base-select-pin
  position: relative
  .q-field__control
    &::before
      border: none !important
src\components\base-select-pin.vue <script>
/**
 * @typedef {import('@/types/type').PinInfo} PinInfo
 */

import firmataUtils from '@/script/utils/firmata.utils';

export default {
  name: 'BaseSelectPin',
  components: {},
  props: {
    value: {
      type: Object,
      default() {
        return null;
      },
    },

    /** 候選腳位
     * @type {PinInfo[]}
     */
    pins: {
      type: Array,
      default() {
        return [];
      },
    },

    placeholder: {
      type: String,
      default: '選擇新增腳位',
    },
    color: {
      type: String,
      default: 'blue-grey-4',
    },
    clearable: {
      type: Boolean,
      default: false,
    },
  },
  data() {
    return {
			// 過濾完成的 options
      filterOptions: [],
    };
  },
  computed: {
    options() {
      /** @type {PinInfo[]} */
      const pins = this.pins;

      const options = pins.map((pin) => {
        const chips = pin.capabilities.map((capability) =>
          firmataUtils.getDefineByCode(capability.mode)
        );

        return {
          label: pin.number,
          chips,
          value: pin,
        };
      });

      return options;
    },

    placeholderText() {
      if (!this.value) {
        return this.placeholder;
      }

      return '';
    },
  },
  watch: {},
  created() {},
  mounted() {},
  methods: {
    handleClick(option) {
      const pin = option.value;
      if (!pin) {
        return;
      }

      this.$emit('selected', pin);

      // 更新 v-model 綁定數值
      this.$emit('input', pin);
    },

    /** 計算 Label 顯示文字
     * @param {PinInfo} pin
     */
    calcOptionLabel(pin) {
      if (!pin) {
        return '';
      }

      return `Pin ${pin.number}`;
    },

		/**
     * Quasar Select 過濾功能
		 * https://v1.quasar.dev/vue-components/select#filtering-and-autocomplete
		 */
    filterFn(keyWord, update) {
      if (!keyWord) {
        update(() => {
          this.filterOptions = this.options;
        });
        return;
      }

      update(() => {
        // 根據關鍵字過濾
        const regex = new RegExp(keyWord, 'i');

        this.filterOptions = this.options.filter((option) => {
          const pinNum = option.label;
          const chips = option.chips;

          // 搜尋腳位模式名稱
          const matchChip = chips.some((chip) => {
            return regex.test(chip.name);
          });

          return regex.test(pinNum) || matchChip;
        });
      });
    },
  },
};
在 window-digital-io.vue 引入 base-select-pin.vue。

接著便是提供腳位清單資料作為 base-select-pin.vue 的 options 顯示。
在 window-digital-io.vue 之 computed 增加 supportPins,提供支援數位功能腳位清單。
src\components\window-digital-io.vue <script>
// ...

import { PinMode } from '@/script/utils/firmata.utils';
const { DIGITAL_INPUT, DIGITAL_OUTPUT, INPUT_PULLUP } = PinMode;

export default {
  name: 'WindowDigitalIo',
  // ...
  computed: {
		...mapState({
      boardPins: (state) => state.board.info.pins,
    }),

		// 支援功能的腳位
    supportPins() {
      /** @type {PinInfo[]} */
      const boardPins = this.boardPins;

      return boardPins.filter((pin) => {
        const hasDigitalFcn = pin.capabilities.some((capability) =>
          [DIGITAL_INPUT, DIGITAL_OUTPUT, INPUT_PULLUP].includes(
            capability.mode
          )
        );

        return hasDigitalFcn;
      });
    },
  },
  // ...
};
將 supportPins 輸入 base-select-pin.vue。
src\components\window-digital-io.vue <template lang="pug">
base-window.window-digital-io(
  :pos='pos',
  headerIconColor='teal-3',
  body-class='c-col p-20px pt-20px',
  title='數位 I/O 功能'
)
  base-select-pin(:pins='supportPins', color='teal-3')
嘗試看看效果。

接著增加新增腳位的部分:
existPins 變數,儲存目前已建立腳位base-select-pin.vue 之 selected 事件,接收被選擇的腳位。src\components\window-digital-io.vue <script>
/**
 * @typedef {import('@/types/type').PinInfo} PinInfo
 */

// ...

export default {
  name: 'WindowDigitalIo',
	// ...
	data() {
    return {
      id: this.$vnode.key,

      /** @type {PinInfo[]} */
      existPins: [],
    };
  },
  // ...
  methods: {
    /** 新增腳位
     * @param {PinInfo} pin
     */
    addPin(pin) {
      if (!pin) {
        return;
      }

      this.existPins.push(pin);
    },
    /** 移除腳位
     * @param {PinInfo} pin
     */
    deletePin(pin) {
      if (!pin) {
        return;
      }

      const index = this.existPins.findIndex(
        (existPin) => existPin.number === pin.number
      );
      this.existPins.splice(index, 1);
    },

    /** 接收錯誤訊息 */
    handleErr(msg) {
      this.$q.notify({
        type: 'negative',
        message: msg,
      });
    },
  },
};
src\components\window-digital-io.vue <template lang="pug">
base-window.window-digital-io(
  :pos='pos',
  headerIconColor='teal-3',
  body-class='c-col p-20px pt-20px',
  title='數位 I/O 功能'
)
  base-select-pin(
    :pins='supportPins',
    color='teal-3',
    @selected='addPin',
    @err='handleErr'
  )

可以看到成功在 existPins 增加對應的腳位。
但是有一個嚴重的問題,就是「可以重複新增腳位」,不只單一視窗內有此問題,不同視窗也會發生腳位占用問題,所以必須將已使用的腳位儲存至 Vuex,並進行限制。
在 window.store.js 新增腳位占用相關功能:
Window 物件新增 occupiedPins,紀錄目前已佔用腳位。mutations 新增 addOccupiedPin、deleteOccupiedPin 處理占用腳位新增與移除。getters 新增 occupiedPins 列出所有被占用的腳位。src\store\modules\window.store.js
/**
 * 管理視窗相關資料
 */

/**
 * @typedef {import('vuex').Module} Module
 *
 * @typedef {import('@/types/type').Window} Window
 * @typedef {import('@/types/type').OccupiedPin} OccupiedPin
 */

// ...

/** @type {Module} */
const self = {
  // ...
  mutations: {
    // ...

    /** Window 新增占用腳位 */
    addOccupiedPin(state, { id, pin }) {
      /** @type {Window[]} */
      const windows = state.list;

      const target = windows.find((window) => window.id === id);
      if (!target) {
        console.error(`[ window.store addOccupiedPin ] window 不存在,id : `, id);
        return;
      }

      target.occupiedPins.push(pin);
    },

    /** Window 移除占用腳位 */
    deleteOccupiedPin(state, { id, pin }) {
      /** @type {Window[]} */
      const windows = state.list;

      const target = windows.find((window) => window.id === id);
      if (!target) {
        console.error(`[ window.store deleteOccupiedPin ] window 不存在,id : `, id);
        return;
      }

      const targetPinIndex = target.occupiedPins.findIndex(({ number }) =>
        number === pin.number
      );
      if (targetPinIndex < 0) {
        return;
      }

      target.occupiedPins.splice(targetPinIndex, 1);
    },
  },
  // ...
  getters: {
    // ...

    /** 列出所有被占用的腳位
     * @return {OccupiedPin[]}
     */
    occupiedPins: (state) => {
      /** @type {Window[]} */
      const windows = state.list;

      // 找出有占用腳位的 window
      const occupiedPinWindows = windows.filter(({ occupiedPins }) =>
        occupiedPins.length !== 0
      );

      const occupiedPins = occupiedPinWindows.reduce((acc, window) => {
        const { component, id } = window;

        window.occupiedPins.forEach((pin) => {

          acc.push({
            info: pin,
            occupier: {
              component, id,
            },
          });
        });

        return acc;
      }, []);

      return occupiedPins;
    },
  },
  // ...
};

export default self;
在 window-digital-io.vue 之 addPin() 與 deletePin() 分別呼叫 window.store.js 之 addOccupiedPin() 與 deleteOccupiedPin()。
src\components\window-digital-io.vue <script>
// ...

export default {
  name: 'WindowDigitalIo',
  // ...
  methods: {
    /** 新增腳位
     * @param {PinInfo} pin
     */
    addPin(pin) {
      if (!pin) {
        return;
      }

      this.$store.commit('window/addOccupiedPin', {
        id: this.id,
        pin,
      });

      this.existPins.push(pin);
    },
    /** 移除腳位
     * @param {PinInfo} pin
     */
    deletePin(pin) {
      if (!pin) {
        return;
      }

      this.$store.commit('window/deleteOccupiedPin', {
        id: this.id,
        pin,
      });

      const index = this.existPins.findIndex(
        (existPin) => existPin.number === pin.number
      );
      this.existPins.splice(index, 1);
    },

    // ...
  },
};
嘗試看看有沒有成功提交占用腳位。

接著在 base-select-pin.vue 取得 occupiedPins,並限制 options 內容。
disable。src\components\base-select-pin.vue <script>
/**
 * @typedef {import('@/types/type').PinInfo} PinInfo
 * @typedef {import('@/types/type').OccupiedPin} OccupiedPin
 */

import { mapGetters } from 'vuex';

import firmataUtils from '@/script/utils/firmata.utils';

export default {
  name: 'BaseSelectPin',
  // ...
  computed: {
    ...mapGetters({
      occupiedPins: 'window/occupiedPins',
    }),

    options() {
      /** @type {PinInfo[]} */
      const pins = this.pins;

      /** @type {OccupiedPin[]} */
      const occupiedPins = this.occupiedPins;

      const options = pins.map((pin) => {
        const chips = pin.capabilities.map((capability) =>
          firmataUtils.getDefineByCode(capability.mode)
        );

        // 若此 pin 出現在 occupiedPins 中,則 disable 為 true
        const disable = occupiedPins.some(
          (occupiedPin) => occupiedPin.info.number === pin.number
        );

        return {
          label: pin.number,
          chips,
          value: pin,
          disable,
        };
      });

      return options;
    },

    // ...
  },
  // ...
  methods: {
    handleClick(option) {
      /** @type {PinInfo} */
      const pin = option.value;
      if (!pin) {
        return;
      }

      if (option.disable) {
        this.$emit('err', `「${pin.number} 號腳位」已被占用`);
        return;
      }

      this.$emit('selected', pin);

      // 更新 v-model 綁定數值
      this.$emit('input', pin);
    },

    // ...
  },
};
src\components\base-select-pin.vue <template lang="pug">
q-select.text-shadow.base-select-pin(
  // ...
)
  // ...

  template(v-slot:option='{ opt }')
    // 自定 option 內容
    q-item.py-10px.border-b-1(
      // ...
      :class='{ "cursor-not-allowed opacity-40": opt.disable }'
    )
      // ...
試試看效果。

成功阻止重複新增腳位,世界恢復和平!ᕕ( ゚ ∀。)ᕗ
下一步我們要來實際建立 I/O 控制組件,顯示、控制真實的數位訊號。
base-select-pin 組件,用於選擇腳位。base-select-pin 顯示。以上程式碼已同步至 GitLab,大家可以前往下載:
