databinding是google推出的support library,可以將UI上的布局元件綁定DATA,可以減低UI的元件程式碼(如:findViewById)
以下演示textview顯示名稱跟訊息:
//一般findViewById的寫法
Textview userName =findViewById(R.id.userName);
Textview msg =findViewById(R.id.age);
userName.setText("eles");
msg.setText("hello! everyone")
gradle添加
android{
    dataBinding{
        enabled = true
    }
}
xml配置,可以使用alt跟enter轉換成databinding格式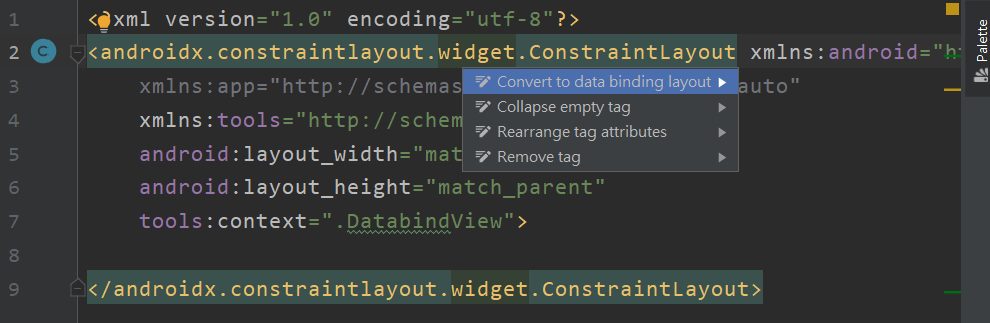
<?xml version="1.0" encoding="utf-8"?>
<layout xmlns:android="http://schemas.android.com/apk/res/android"
    xmlns:app="http://schemas.android.com/apk/res-auto"
    xmlns:tools="http://schemas.android.com/tools">

    <data>

    </data>

    <LinearLayout
        android:layout_width="match_parent"
        android:layout_height="match_parent"
        android:orientation="vertical"

        ...>

    </LinearLayout>
</layout>
public class DataItem {
    private String name;
    private String msg ;

    public String getMsg() {
        return msg;
    }

    public void setMsg(String msg) {
        this.msg = msg;
    }

    public DataItem(String name, String msg){
        this.name=name;
        this.msg=msg;
    }
    public String getName() {
        return name;
    }

    public void setName(String name) {
        this.name = name;
    }
}
data標籤標示會使用到的變數名稱跟路徑
<data>
        <variable
            name="dataitem"//取名在xml使用的名稱
            type="com.example.newtest.databindView.DataItem" />

    </data>
設置UI元件
        <TextView
            android:layout_width="wrap_content"
            android:layout_height="wrap_content"
            android:text="@{dataitem.name}"
            android:textSize="40sp"/>
        <TextView
            android:layout_width="wrap_content"
            android:layout_height="wrap_content"
            android:text="@{dataitem.msg}"
            android:textSize="40sp"/>
透過@{}賦值,TextView就可以取得dataitem裡的name跟msg
按下Build -> make project(快速鍵 ctrl+f9),會根據xml的名稱生成一個ActivityMain2Binding
public class MainActivity2 extends AppCompatActivity  {
    @Override
    protected void onCreate(Bundle savedInstanceState) {
        super.onCreate(savedInstanceState);

        ActivityMain2Binding main2Binding=DataBindingUtil.setContentView(this,R.layout.activity_main2);
        DataItem item=new DataItem("eles","hello! everyone");//將name跟msg的值帶入
        main2Binding.setDataitem(item);
    }
恭喜你完成一個簡單的databinding實作,雖說今天這樣下來感覺findViewById的寫法看起來比較簡潔,但當專案越來越大時,使用databinding可以大量減少Activity的代碼喔,那今天就介紹到這。


 iThome鐵人賽