Motion Editor是自 Android Studio 4.0 版本開始為MotionLayout佈局型別所構建的視覺化編輯氣,用於建立動畫效果。
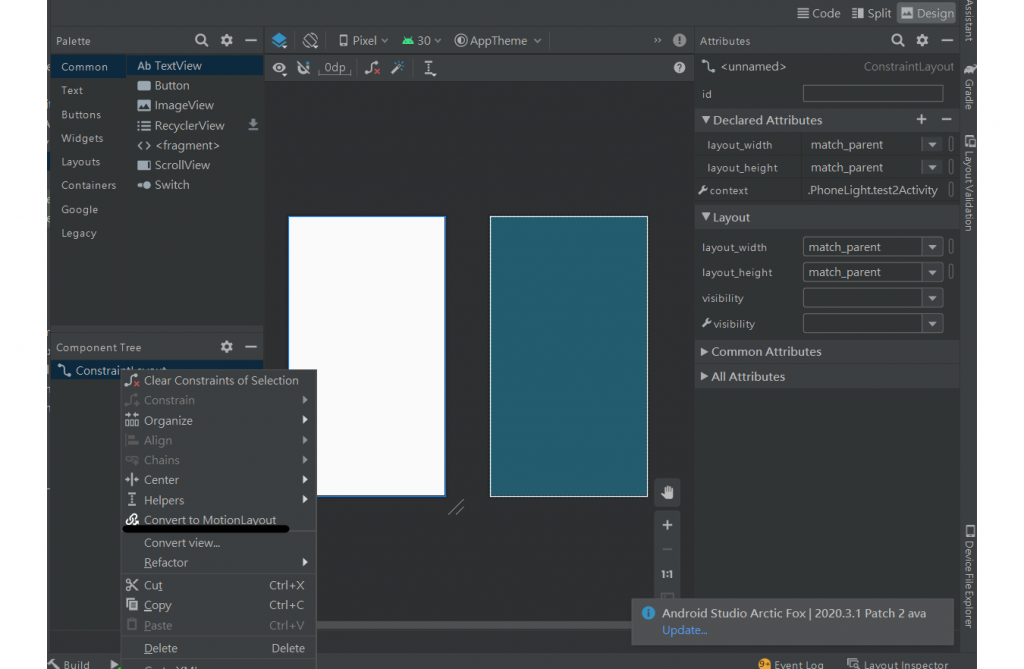
MotionLayout是ConstraintLayout 的子類別,可以將任何的ConstraintLayout轉換成MotionLayout。
轉換結束會發現在res目錄之下有xml資料夾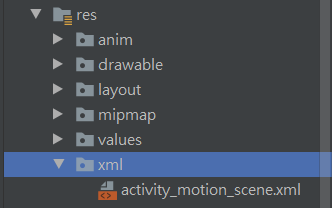
設定使用者與ui互動會顯示的動畫,
button(id為button)被我滑動的時候,會從開始的ConstraintSet至結束的ConstraintSet所進行的動畫。
<MotionScene
    xmlns:android="http://schemas.android.com/apk/res/android"
    xmlns:motion="http://schemas.android.com/apk/res-auto">
    <!-- 動畫開始與結束 -->
    <Transition
        motion:constraintSetEnd="@+id/end"
        motion:constraintSetStart="@id/start"
        motion:duration="1000">

        <!-- 動畫實現的樣式 -->
       <OnSwipe motion:dragDirection="dragUp"
        motion:touchAnchorId="@id/button"
        motion:touchAnchorSide="top"/>
    </Transition>
    <!-- 動畫開始 -->
    <ConstraintSet android:id="@+id/start">
        <Constraint
            motion:layout_constraintVertical_bias="0.877"
            android:layout_height="wrap_content"
            motion:layout_constraintStart_toStartOf="parent"
            motion:layout_constraintTop_toTopOf="parent"
            motion:layout_constraintBottom_toBottomOf="parent"
            motion:layout_constraintEnd_toEndOf="parent"
            android:layout_width="wrap_content"
            android:id="@+id/button" />
    </ConstraintSet>
    <!-- 動畫結束 -->
    <ConstraintSet android:id="@+id/end">
        <Constraint
            motion:layout_constraintVertical_bias="0.109"
            android:layout_height="wrap_content"
            motion:layout_constraintStart_toStartOf="parent"
            motion:layout_constraintTop_toTopOf="parent"
            motion:layout_constraintBottom_toBottomOf="parent"
            motion:layout_constraintEnd_toEndOf="parent"
            android:layout_width="wrap_content"
            android:id="@+id/button" />
    </ConstraintSet>
</MotionScene>
在Transition裡的:
motion:constraintSetEnd="@+id/end" :表示動畫結束的布局id
motion:constraintSetStart="@id/start":表示動畫開始的布局id
motion:duration="1000" //動畫執行的時間
OnSwipe:使用者與ui互動的方法
成果
這樣就可以完成簡單的動畫了~


 iThome鐵人賽