今天來優化 Day24 做的色碼挑戰器,主要增加的功能如下:
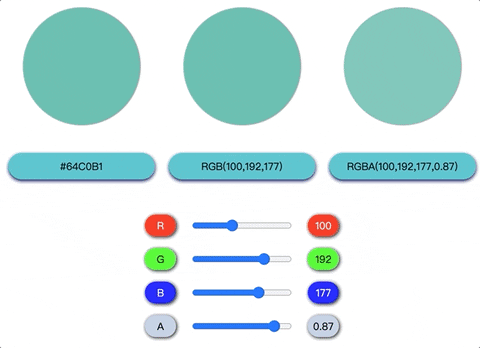
因為要多顯示一個色碼表示法,將排版做了些微調整,改成下圖的樣子

這次學習的主要一個重點是複製功能,在瀏覽器中主要有三個方法可以實作複製功能,之後的實作會先採用第一種方法
Document.execCommanddocument.execCommand('copy') 執行複製p元素的方式const get = (text) => document.querySelector(text);
const p = get('p');
p.addEventListener('click', function() {
// 產生 range 物件
const range = document.createRange();
// 選取p節點作為range物件的內容
range.selectNode(p);
// 產生 selection 物件
const selection = window.getSelection();
// 清除選取範圍
selection.removeAllRanges();
// 將選取到內容放入selection物件中
selection.addRange(range);
// 執行複製
document.execCommand('copy');
// 清除
selection.removeAllRanges();
})
Clipboard APInavigator.clipboard
Clipboard Event認識有哪些方法可以對瀏覽器中的元素進行複製後,就開始來練習吧~
<!-- 顯示顏色的區域 -->
<section class="display">
  <!--總共有三個與下面同樣結構的div -->
  <div class="hex">
    <div class="colorpad"></div>
    <p class="colorCode">#808080</p>
  </div>
  <!--略 -->
</section>

<!-- 可以滑動slider的區域 -->
<section class="slider">
  <!--總共有四個與下面同樣結構的div:代表R/G/B/A的slider-->
  <div class="alpha-group">
    <span>A</span>
    <input type="range" min="0" max="1" step="0.01" value="0.5" class="alpha">
    <span class="range">0.5</span>
  </div>
  <!--略 -->
</section>
由於要增加 RGBA 的顯示,我將原本的displayValue函式拆解成兩個函式:
displayDigit : 負責 slider 中 R/G/B/A 個別數值顯示displayColorCode: 負責不同色碼的顯示這裡會拆出來也是在更改的過程中,發現當我在添加 RGBA 的顯示時,即便不是拖曳透明度的 slider,數值也會跟著做變化,見識到不必要的耦合現象!!!
其他的邏輯部分和 Day24 的實作沒有太大的區別,所以以下直接看程式碼
// 轉換數值
function rgbToHex(R,G,B) {
  const hexDigit = [R, G, B].map( item => {
    return Number(item).toString(16).padStart(2, '0')
  }).join('');

  return '#'+ hexDigit;
}

// 顯示 slider 個別數值
function displayDigits(e) {
  const currentValue = e.target.value;
  const alphaValue = currentValue;
  e.target.nextElementSibling.innerHTML = currentValue;
}


// 顯示顏色的不同表示法
function displayColorCode() {
  const hexValue = (rgbToHex(red.value, green.value, blue.value)).toUpperCase();

  const hexIndicator = get('.hex').children[1];
  const rgbIndicator = get('.rgb').children[1];
  const rgbaIndicator = get('.rgba').children[1];

  hexIndicator.innerHTML = hexValue;
  rgbIndicator.innerHTML = `RGB(${red.value},${green.value},${blue.value})`;
  rgbaIndicator.innerHTML = `RGBA(${red.value},${green.value},${blue.value},${alpha.value})`;
}


//改變圓形圖的顏色
function changeColor() {
  const hexColorPad = get('.hex').children[0];
  const rgbColorPad = get('.rgb').children[0];
  const rgbaColorPad = get('.rgba').children[0];

  hexColorPad.style.backgroundColor = `rgb(${red.value},${green.value},${blue.value})`;
  rgbColorPad.style.backgroundColor = `rgb(${red.value},${green.value},${blue.value})`;
  rgbaColorPad.style.backgroundColor = `rgba(${red.value},${green.value},${blue.value}, ${alpha.value})`;
}

//對 slider綁定事件監聽器
rangeSliders.forEach(rangeSlider => {
  //監聽並改變RGB個別代碼
  rangeSlider.addEventListener('mousemove', displayDigits);
  //監聽並改變所有色碼表示法
  rangeSlider.addEventListener('mousemove', displayColorCode);
  //監聽並改變背景顏色
  rangeSlider.addEventListener('mousemove', changeColor);
})
copy函式
changeDisplay函式
//做複製的功能
const buttons = getAll('.colorCode');

function copy() {
  const range = document.createRange();
  range.selectNode(this);
  const selection = window.getSelection();
  selection.removeAllRanges();
  selection.addRange(range);
  document.execCommand('copy');
  selection.removeAllRanges();
}

// 改變顏色和文字內容
function changeDisplay(e){
  e.target.style.backgroundColor = `rgb(247,157,128)`;
  e.target.innerHTML = `複製好色碼囉~`;

  reset(e);
}

// 兩秒後會回復到先前的狀態
function reset(e){
  setTimeout(()=> {
    e.target.style.backgroundColor = `rgb(78,199,207)`;
    displayColorCode();
  }, 2000)
}

//對按鈕綁定事件監聽
buttons.forEach(button => {
  button.addEventListener('click', copy);
  button.addEventListener('click', changeDisplay);
});
完成~~~codepen連結
一開始只是為了回應饅頭大大的一句話,想不到因而學習到瀏覽器的複製功該如何實作,也在增加功能的過程中再次體會到拆函式的重要性,不好好將函式拆好的下場就是改了 A 動了B,不斷有出其不意的驚喜(令人崩潰的那種XD)
透過觀察線上的色碼轉換器所包含的功能,想想這些功能是怎麼實作出來的,再逐步找相應語法嘗試的過程真的很有趣~
謝謝神隊友的修改建議和提問~~
參考資料:
RGBA and Hex Color Converter
剪貼簿複製操作
那些被忽略但很好用的 Web API / Clipboard