iT邦幫忙

1

Vue3 ( 進階 API ) -3

  • 分享至 

  • xImage
  •  

1.Refs 似 Document.getElementById()

(1)直操作DOM

            <input type="text" ref="inputDom" />

跟元素內製作生命週期抓ref,並使用方法

              //生命週期 畫面載入完成(created會抓不到)
              mounted() {
                // 1-2 取得ref的全部資訊(Target)
                console.log(this.$refs);
                // 1-2 取得input 的 inputDom
                console.log(this.$refs.inputDom);

                // 1-3 直接focus
                this.$refs.inputDom.focus();
              },

(2)元件內資料調整

     <card ref="myCard"></card>
     <button type="button" @click="getComponentInfo">取得元件資訊</button>
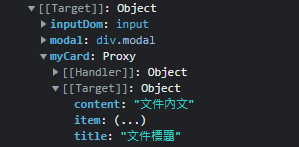
https://ithelp.ithome.com.tw/upload/images/20211101/20137684p5qL0WMX01.png

          app.component("card", {
               data() {
                 return {
                   // 2-2 Target內會顯示該資料,接下來製作按按鈕使其變更
                   title: "文件標題",
                   content: "文件內文",
                 };

跟元素內製作methods,並使用方法

              methods: {
                getComponentInfo() {

                  // 寫方法變更title
                  this.$refs.myCard.title = "被更新後的元件標題YO";
                  this.$refs.myCard.content = "被更新後的內容YO";
                },

(3)操作BS元件
製作 ref 在 BS的語法裡面

              <div class="modal" tabindex="-1" ref="modal">

新增click事件,讓該ref="modal"變更資料

              <button @click="openModal">開啟 Bootstrap Modal</button>

看官方API如何用JS使用BS套件

              var myModal = new bootstrap.Modal(document.getElementById('myModal'), options)

在跟元素內製作BS倉庫及方法
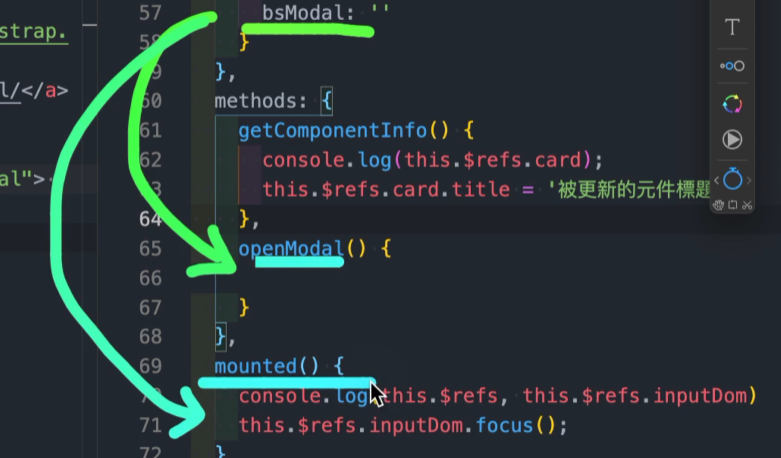
https://ithelp.ithome.com.tw/upload/images/20211101/20137684n7R4EmS3S6.png

              data() {
                return {
                  // 做一個BS套件倉庫
                  bsModal: "",
                };
              },

              mounted() {

                // 在BS套件倉庫 放入 被bootstrap.Modal抓取的$refs.modal
                this.bsModal = new bootstrap.Modal(this.$refs.modal);
              },

觀看官方文件,內文提到用.show()就可以展示BS,把方法加到按鈕方法裡面

                openModal() {
                  // 3-5 觀看官方文件,內文提到用.show()就可以展示BS
                  this.bsModal.show();
                },
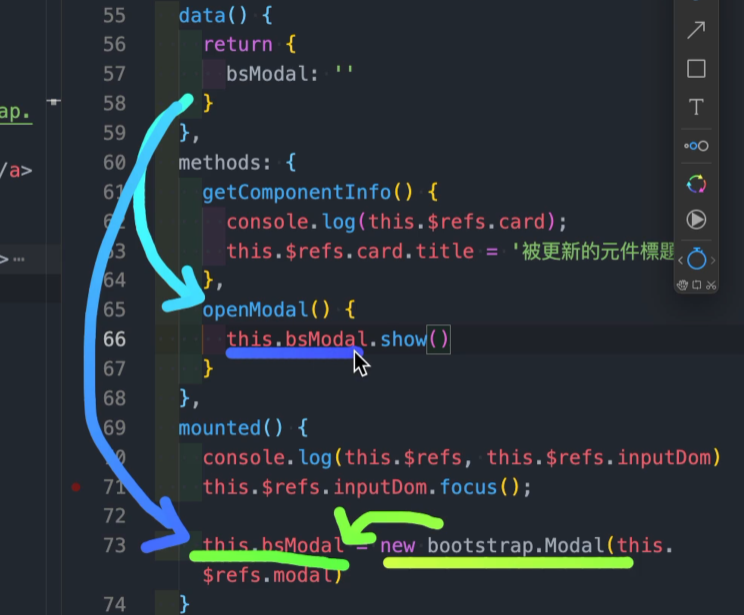
https://ithelp.ithome.com.tw/upload/images/20211101/20137684mJTnJyK6l7.png


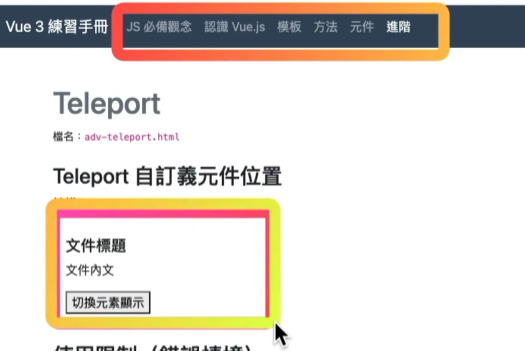
2.teleport 自訂元件生成位置

可以兩處都使用同一個元件
https://ithelp.ithome.com.tw/upload/images/20211101/2013768455QbZdBYoZ.png
(1)用法:

想顯示的地方

             <div id="target"></div>

別的元素內製作,並用teleport + to="where"包起來

            app.component("card", {
              data() {
                return {
                  title: "文件標題",
                  content: "文件內文",
                  toggle: false,
                };
              },
              template: `
             
      1.先把要移動的資料包在teleport標籤內 並指定位置to="#target"
      <teleport to="#target">
        <div v-if="toggle" class="alert alert-danger">*我是目標*被招喚的元素</div>
      </teleport>
    `,

(2)放太前面還沒抓到 會錯誤
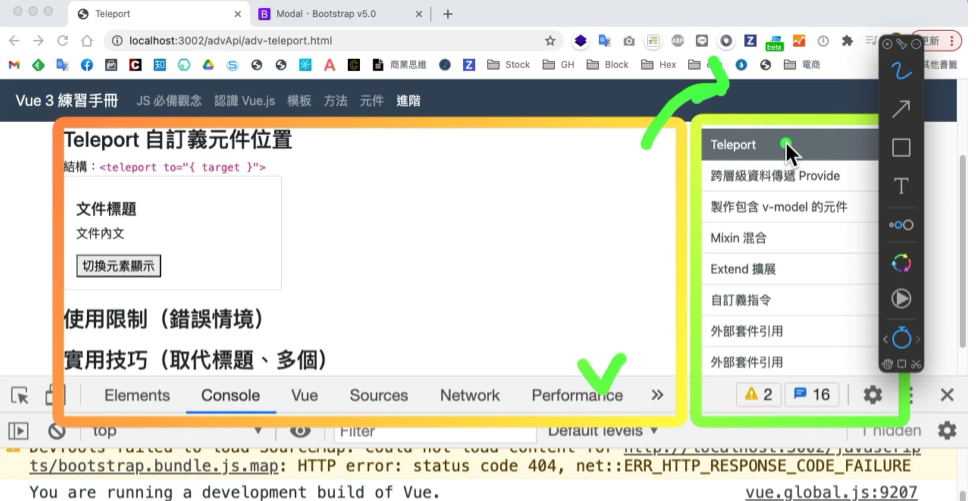
https://ithelp.ithome.com.tw/upload/images/20211101/20137684uEwpvCsmHF.png
https://ithelp.ithome.com.tw/upload/images/20211101/20137684sUjcWQQIyL.png

(3)實用技巧(取代標題、多個)

            <h1 class="mt-0 text-muted">Teleport</h1>
            <new-title></new-title>

            app.component("new-title", {
              template: `
              <teleport to="title"> - 新增的標題片段</teleport> //取代標題
              <teleport to="h1"> - 新增的文字片段</teleport>`,
            });
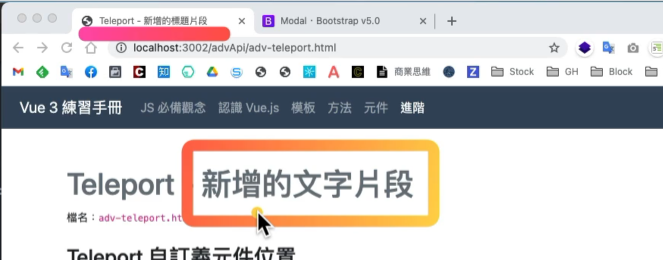
https://ithelp.ithome.com.tw/upload/images/20211101/20137684yHQgQ9LHmn.png


3.provide 跨層級資料傳遞

如果外層傳入只有一層可以用props
但很多層時,使用provide(使用時機:登入驗證)
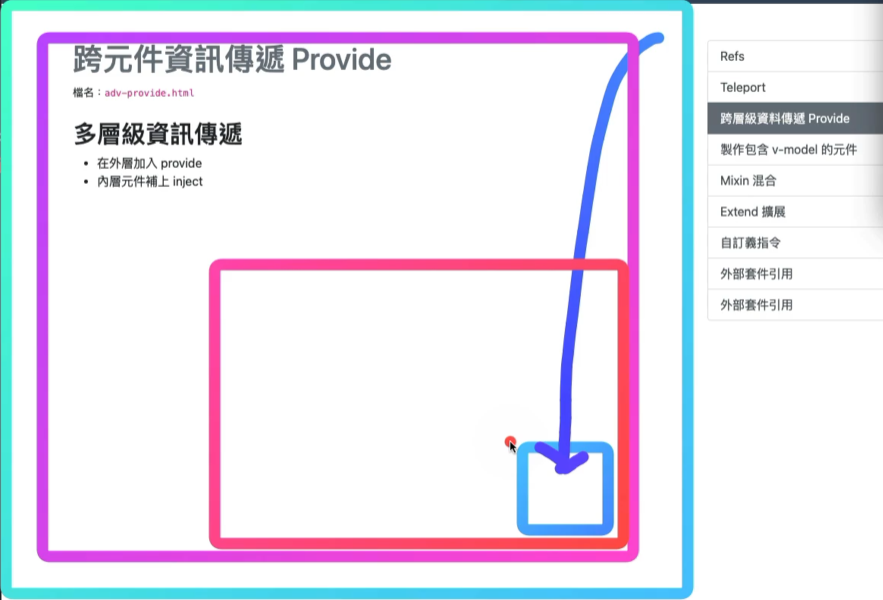
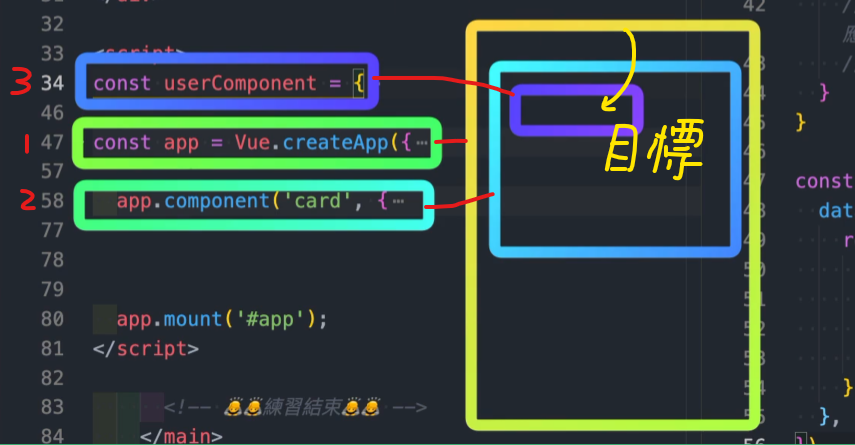
https://ithelp.ithome.com.tw/upload/images/20211101/20137684G3umqx9jAw.png

https://ithelp.ithome.com.tw/upload/images/20211101/20137684EvK9Xo7thP.png
跟元件
子元件
子元件內的區域註冊

目標:把最外層的Vue.createApp data資料給最內層的區域註冊userComponent
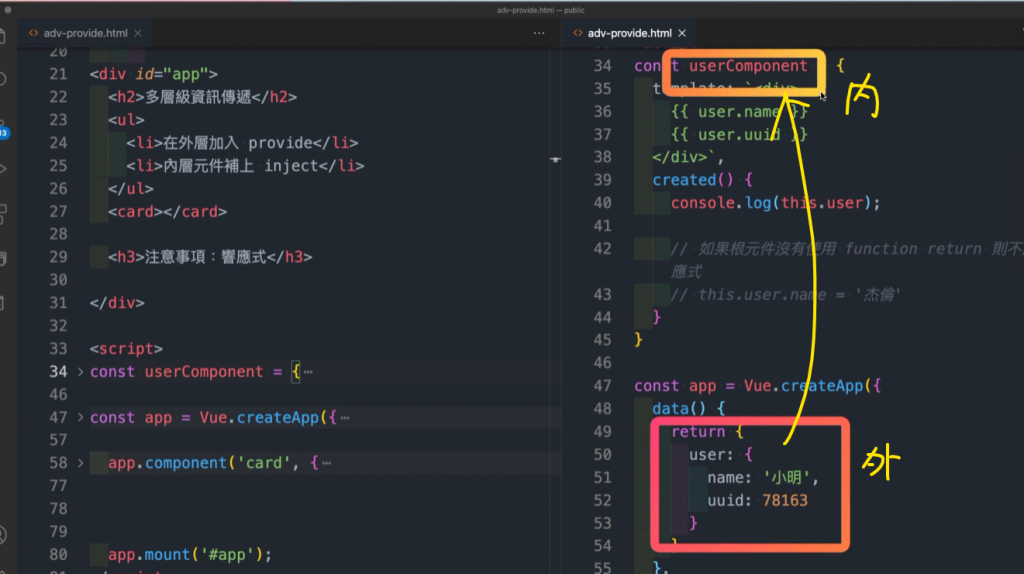
https://ithelp.ithome.com.tw/upload/images/20211101/20137684qgZR1OPwKf.png

(1)在外層加入 provide 函式 or 物件

             const app = Vue.createApp({
              data() {
                return {
                  user: {
                    name: "小明",
                    uuid: 78163,
                  },
                };
              },
              // 在外層加入 provide 函式 or 物件
              // 放入要傳遞的資料
              provide: {
                user: {
                  name: "小明",
                  uuid: 78163,
                },

(2)內層元件補上 inject
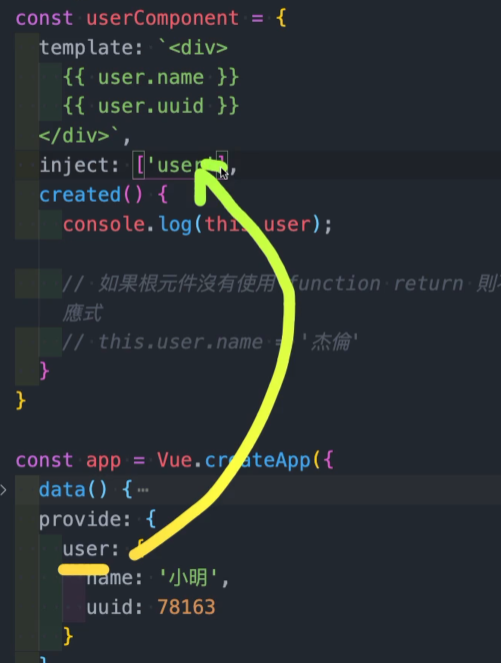
https://ithelp.ithome.com.tw/upload/images/20211101/20137684Q0iDZm7wuY.png

            const userComponent = {
              template: `<div>
              {{ user.name }}
              {{ user.uuid }}
            </div>`,
              // 2. 內層元件補上 inject
              // 對應 provide: { user: {
              inject: ["user"],

(3)注意,收值處變更值,若跟目錄傳遞時使用provide:{}無法傳遞
實務上經常直接使用provide(){return}

           const userComponent = {

                // 3.如果根元件沒有使用 function return 則不能使用響應式
                // 響應式:這裡更改值,外層不會改變
                this.user.name = "杰倫";
              },
            };

需將根元素

           const app = Vue.createApp({

              // 1.在外層加入 provide 函式() or 物件{}
              // 放入要傳遞的資料
              provide: {
                user: {
                  name: "小明",
                  uuid: 78163,
                },
              },
            });

改為

            const app = Vue.createApp({
           
              provide() {
                return {
                  user: this.user,
                };
              },
            });

此時外層也會收到


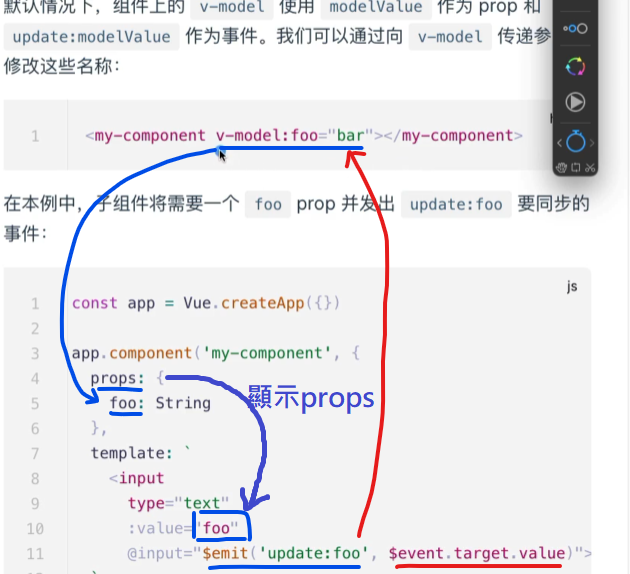
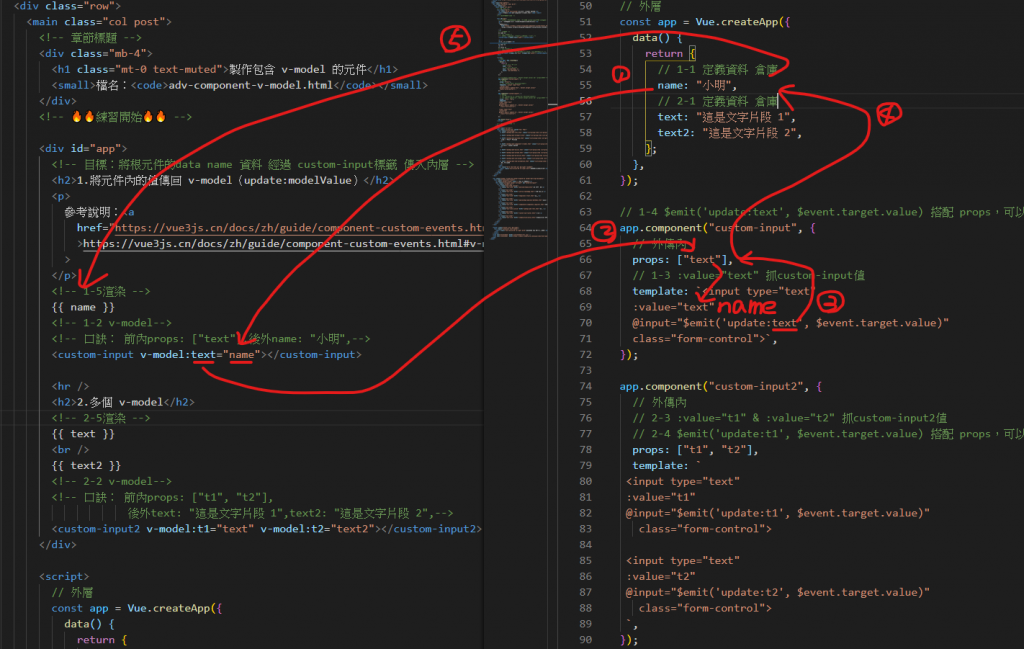
4. 製作包含v-model的元件

https://ithelp.ithome.com.tw/upload/images/20211101/20137684x4PMgtk1oS.png
https://ithelp.ithome.com.tw/upload/images/20211101/20137684JArnR8VrD2.png
目標:將根元件的data name 資料 經過 custom-input標籤 傳入內層
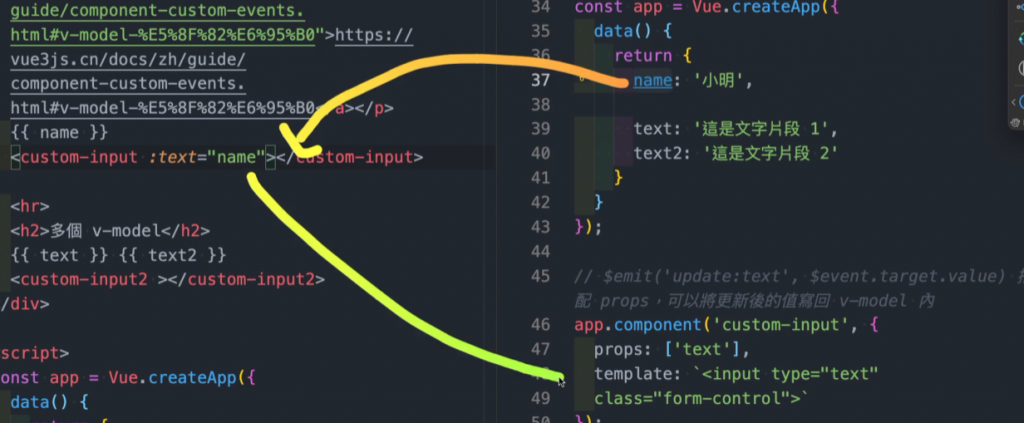
https://ithelp.ithome.com.tw/upload/images/20211101/20137684LY6tfMUf8W.png
https://ithelp.ithome.com.tw/upload/images/20211101/20137684TzfKwfrlbH.png


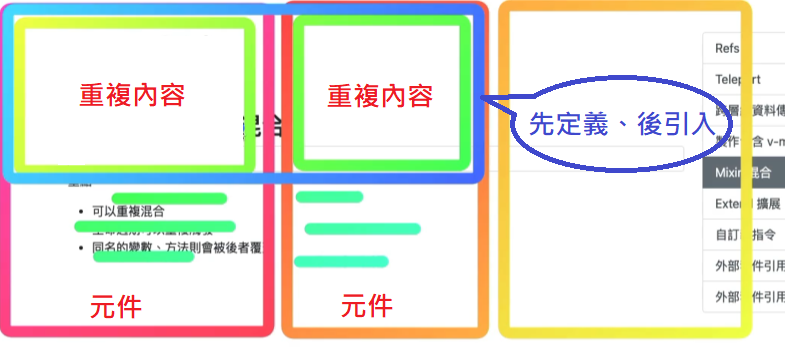
5. mixins 混合元件方法

https://ithelp.ithome.com.tw/upload/images/20211101/20137684sWUwGY62mw.png


6. extend 擴展元件方法(似mixins)

無法一次extend多個元件

與差異mixins
extend 單一拓展
mixins 多個混合
權重:元件屬性 > mixins > extend
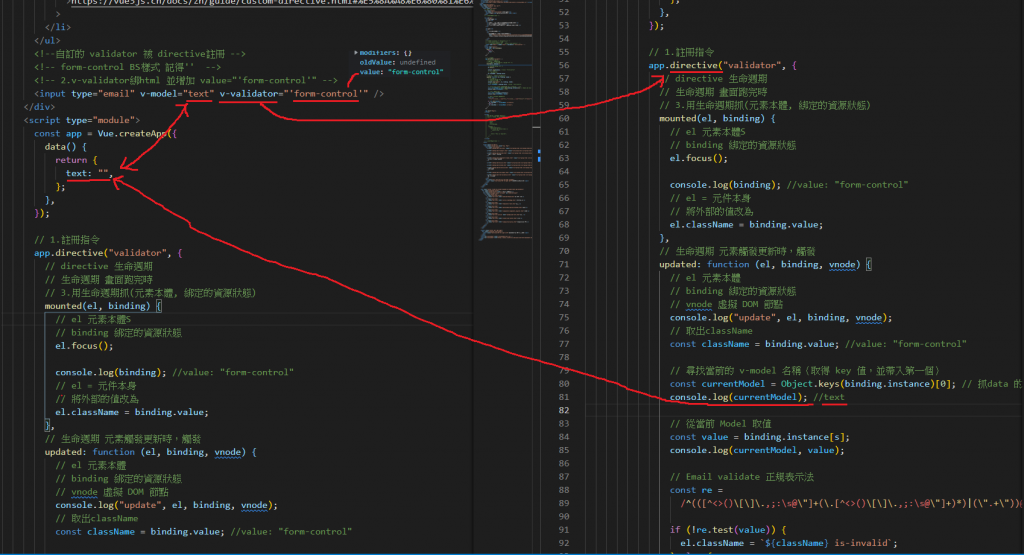

7. directive 自訂義指令

https://ithelp.ithome.com.tw/upload/images/20211101/20137684gp65k3bF6H.png

註冊
components vs directive

components註冊元件

             const app = Vue.createApp({
              data() {
                return {
                  text: "外部元件文字",
                };
              },
              // 3.顯示-方法1 區域註冊
              components: {
                alert3,
                // 4.到跟元素註冊
                alert4,
              },

directive註冊指令

              app.directive("validator", {

8. plugins 擴充插件

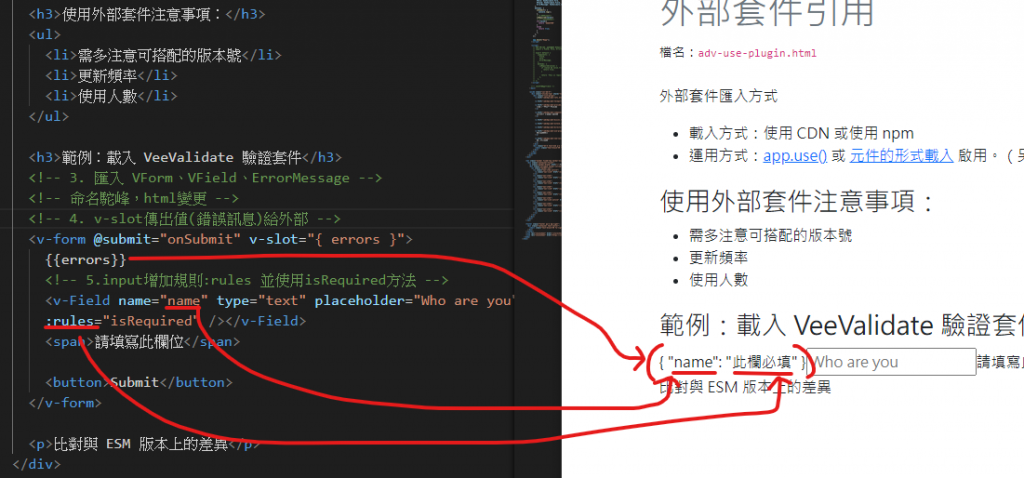
表單驗證常使用
要注意版本(vue與套件),不同版本可能會無法使用
並注意使用人次(多)及更新頻率(高)

(1)兩種方式
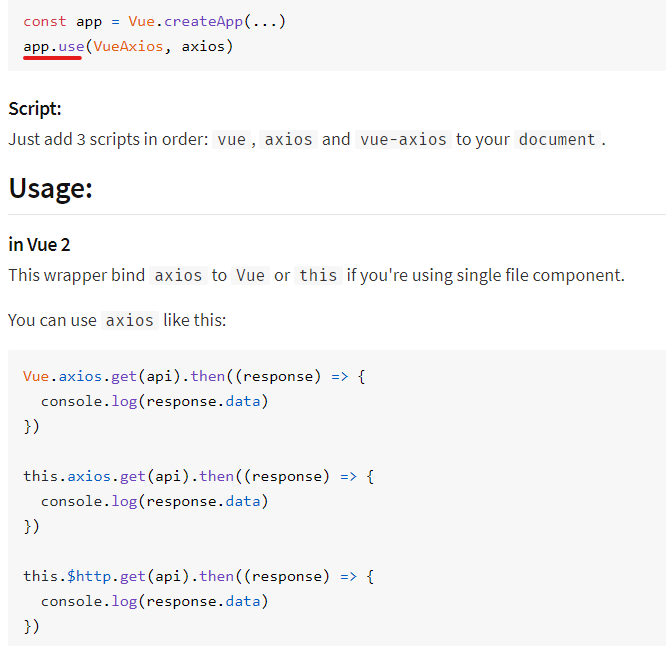
(a)app.use() 或 元件的形式載入

app.use()
https://ithelp.ithome.com.tw/upload/images/20211101/20137684DpegVCa65A.png

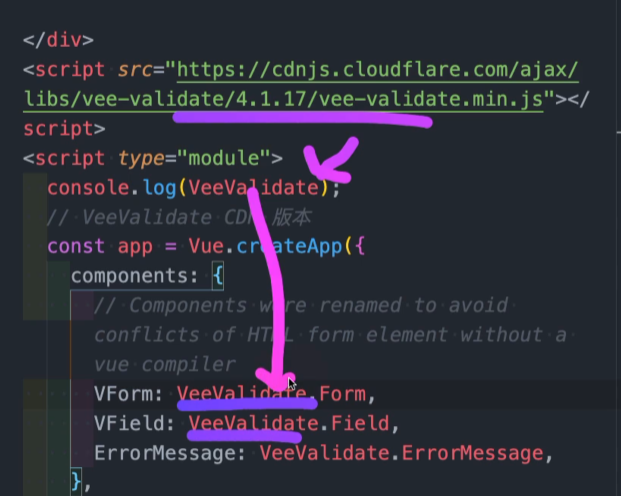
(b)元件的形式載入

<template>
  <Form>
    <Field name="field" :rules="isRequired" />  //元件的形式載入 
    <ErrorMessage name="field" />
  </Form>
</template>
<script>

import { Field, Form, ErrorMessage } from 'vee-validate'; //元件的形式載入
export default {
  components: {
    Field,
    Form,
    ErrorMessage,
  },
https://ithelp.ithome.com.tw/upload/images/20211101/20137684v75ZOcUGTK.png
https://ithelp.ithome.com.tw/upload/images/20211101/201376849BX4LQB6Ab.png
https://ithelp.ithome.com.tw/upload/images/20211101/20137684Z3a08pilQH.png


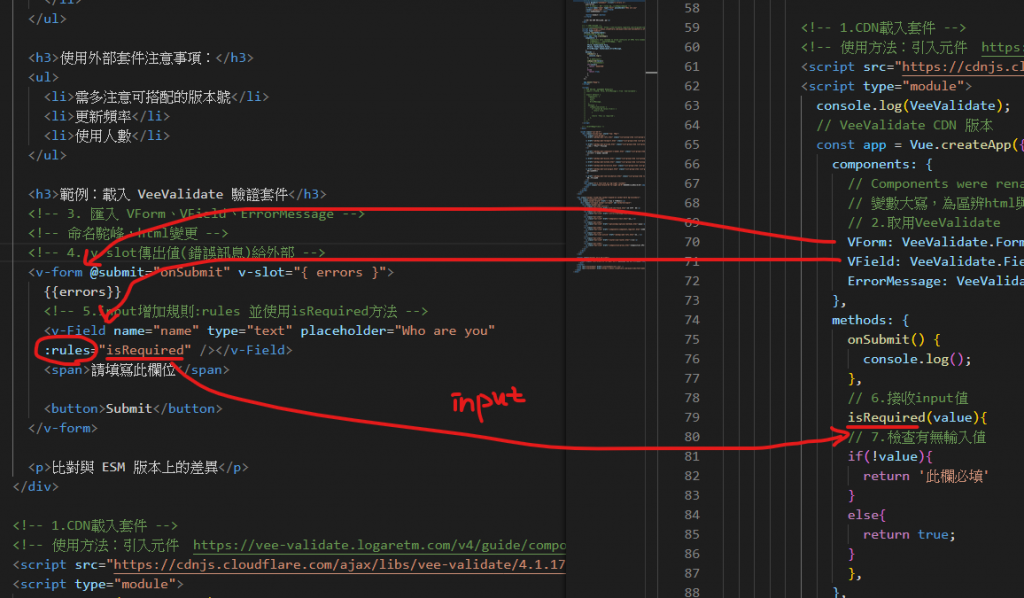
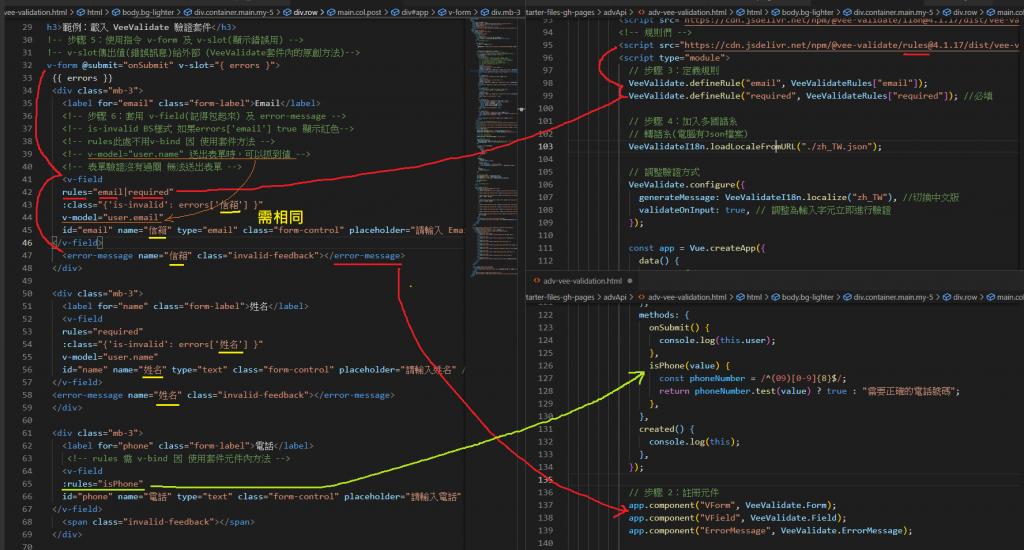
9. vee-validation 表單驗證套件

https://ithelp.ithome.com.tw/upload/images/20211101/20137684SBDTdMtxiG.png


圖片
  直播研討會
圖片
{{ item.channelVendor }} {{ item.webinarstarted }} |
{{ formatDate(item.duration) }}
直播中

尚未有邦友留言

立即登入留言